
Last Logon KB ID 0001340
Problem
I can’t really take the credit for this, I was at a client’s site a few weeks ago, and they were doing this. I thought ‘That’s cool, I’ll have a play with that when I get the chance”.
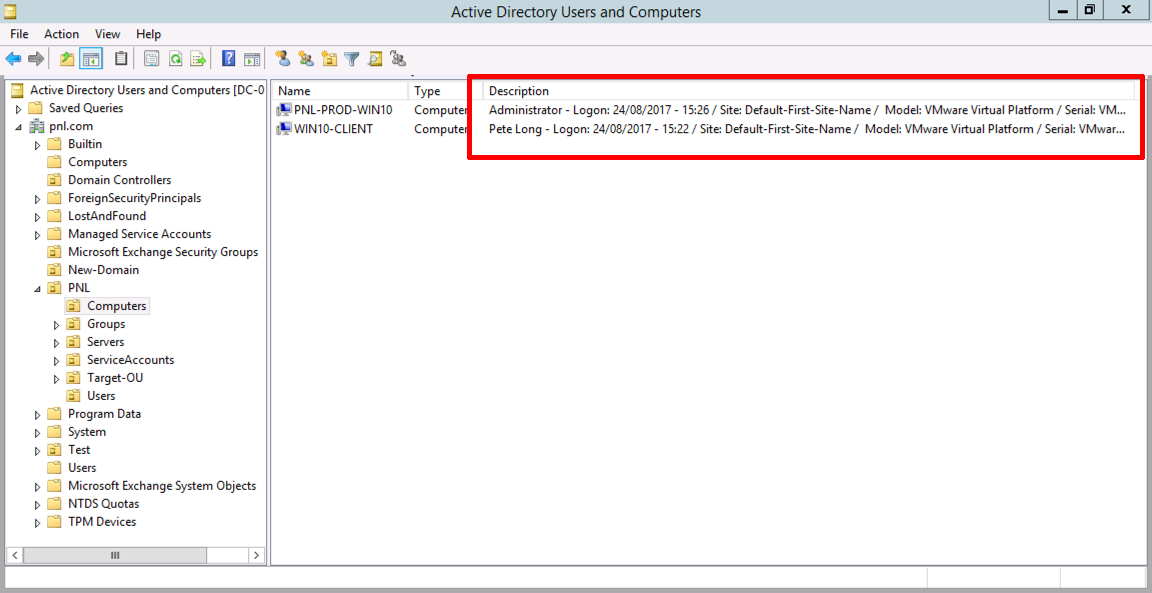
Essentially, you update the description of the Computer object(s) in AD so that they list;
- The last user who logged on.
- What time they logged on.
- What AD ‘Site’ the machine is in.
- Model of the PC/Laptop.
- Serial Number of the machine.
- Operating System.
- 32 or 64 bit.
I tested it in VMware so my machine type and serial number are a little misleading but this is what it looks like.
Now I can think of loads of situations when that information would be very helpful?
Solution : Last Logon
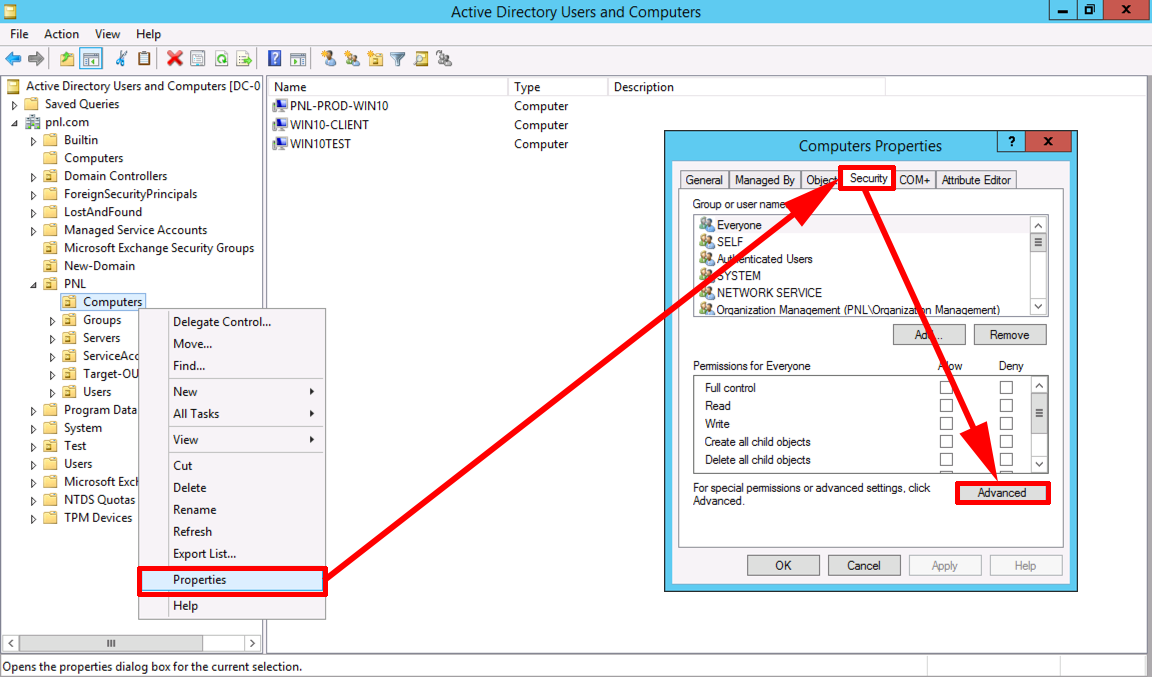
So how do you do it? Well to make a change to a computer’s ‘Description’ filed in AD, requires some rights, locate the OU (or OUs) that contain your computers/servers and open the advanced properties on their security tab.
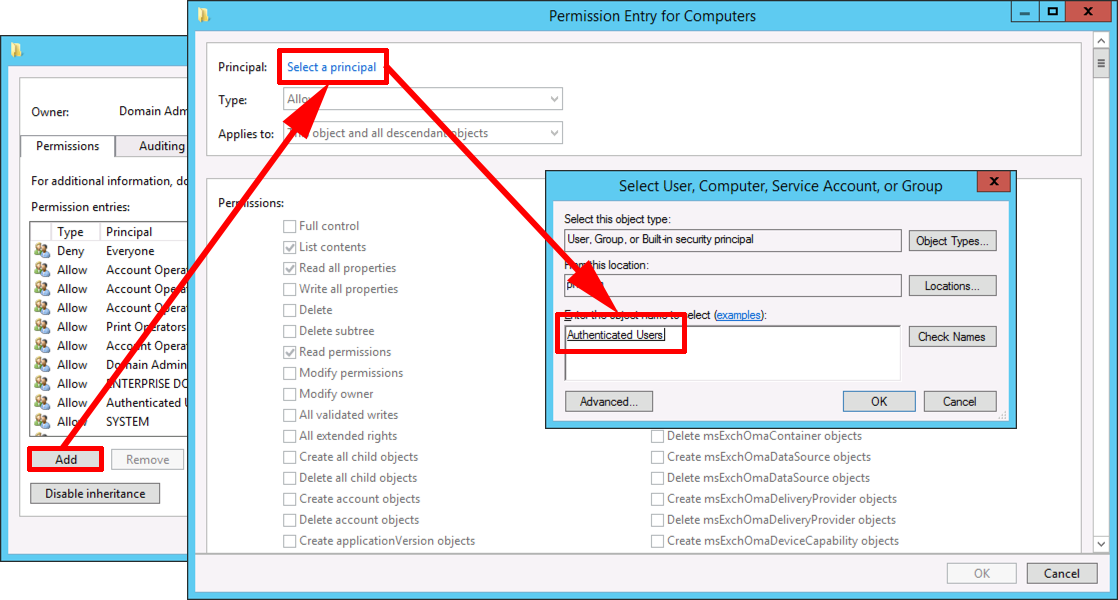
You can either ‘Add’ (as shown), or select the existing ‘Authenticated Users’ object from the list.
Change the ‘Applies to’ section to ‘Descendant Computer Objects’.
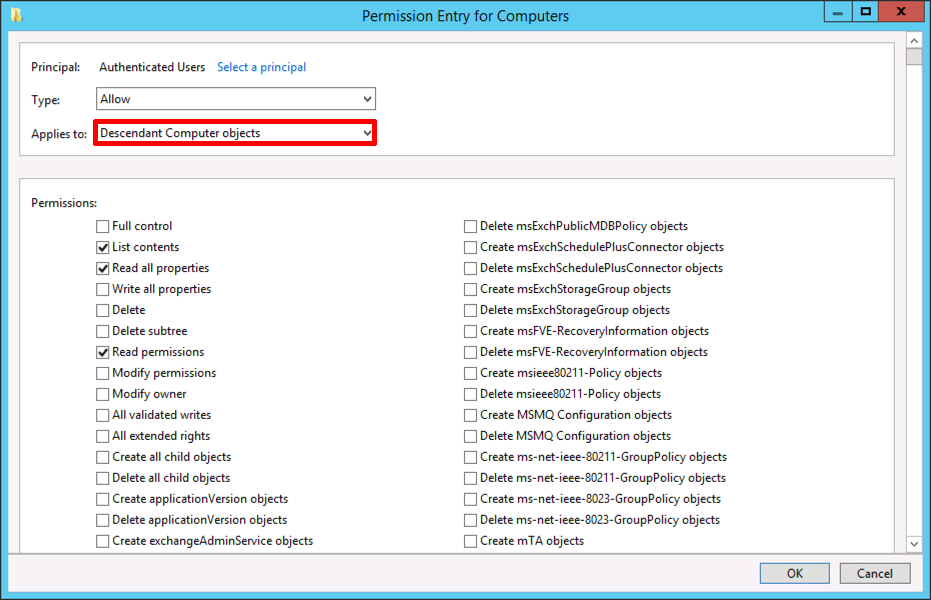
Scroll down and tick, ‘Write Description’
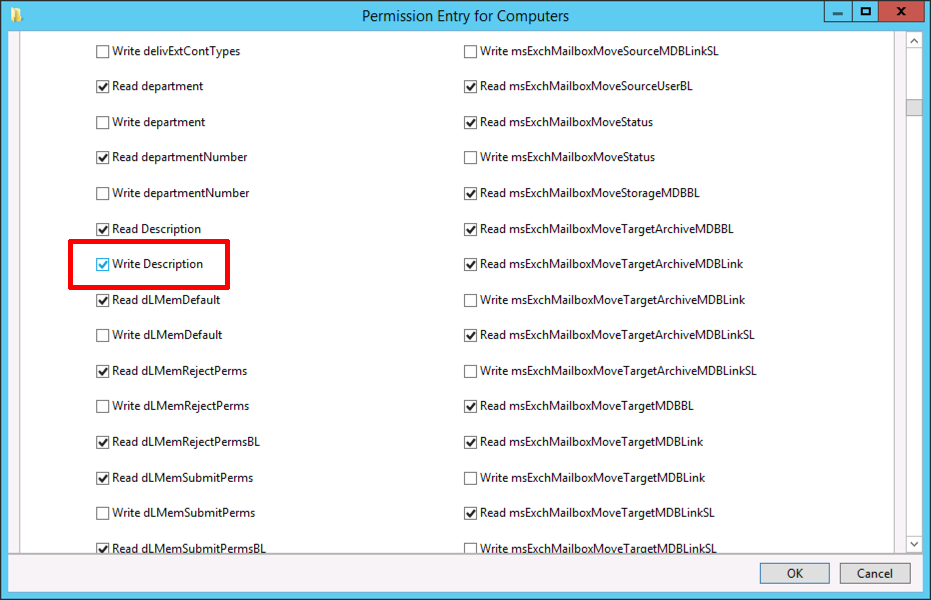
Isn’t that dangerous? Well not really, it gives users the right to change a computer objects description field, they would need to have the technical ability to do so. And if they did it would get overwritten the next time a user logged onto that machine anyway.
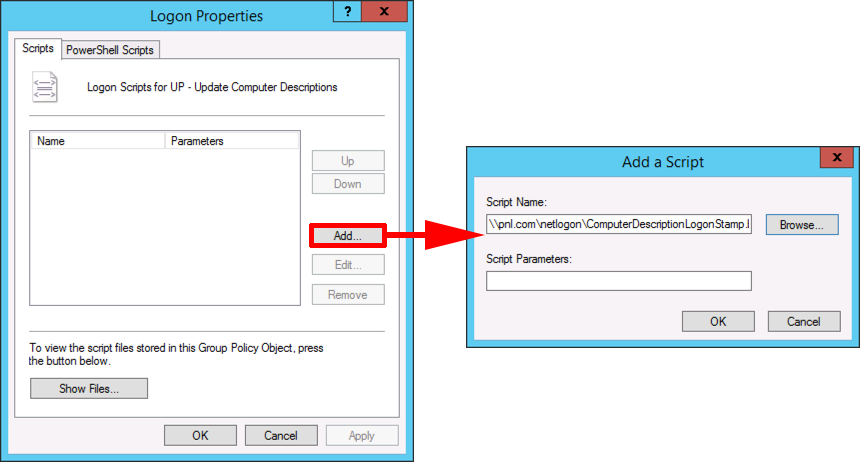
Download the ComputerDescriptionLogonStamp.zip file, and extract the two files you find inside it, into your domain netlogon share (\\{your-domain-name}\netlogon). Edit the domain name in the ComputerDescriptionLogonStamp.bat file so it matches YOUR domain name not mine!

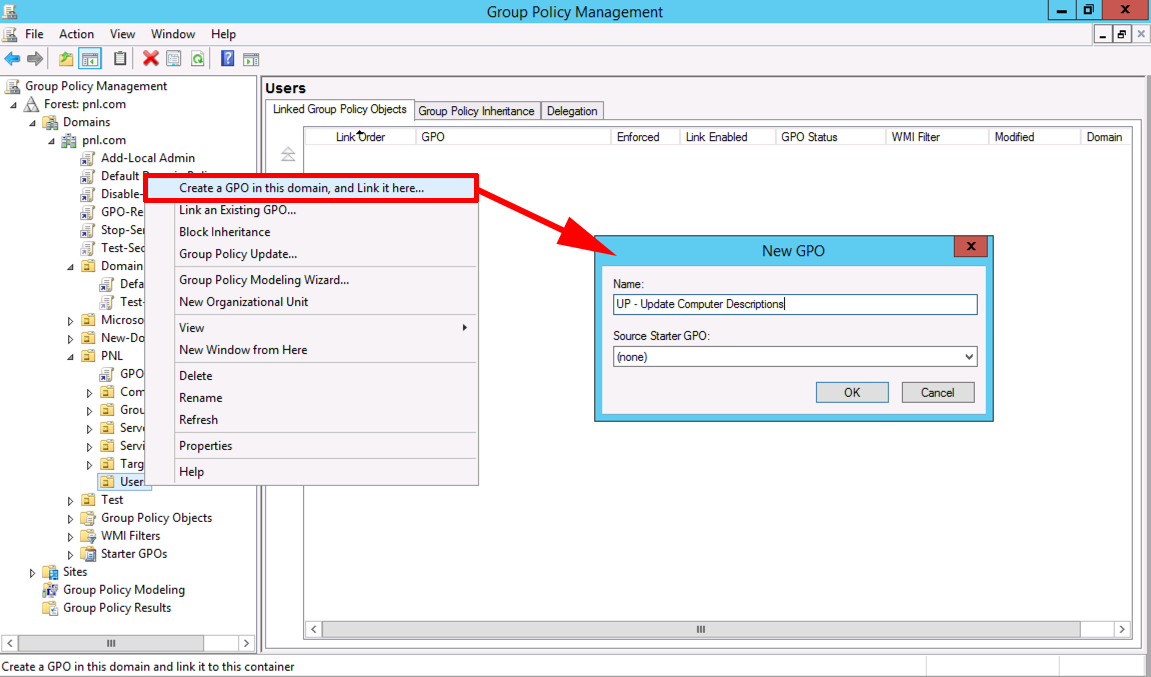
Now create a new Group Policy Object, linked to your USERS.
Edit the policy, and navigate to;
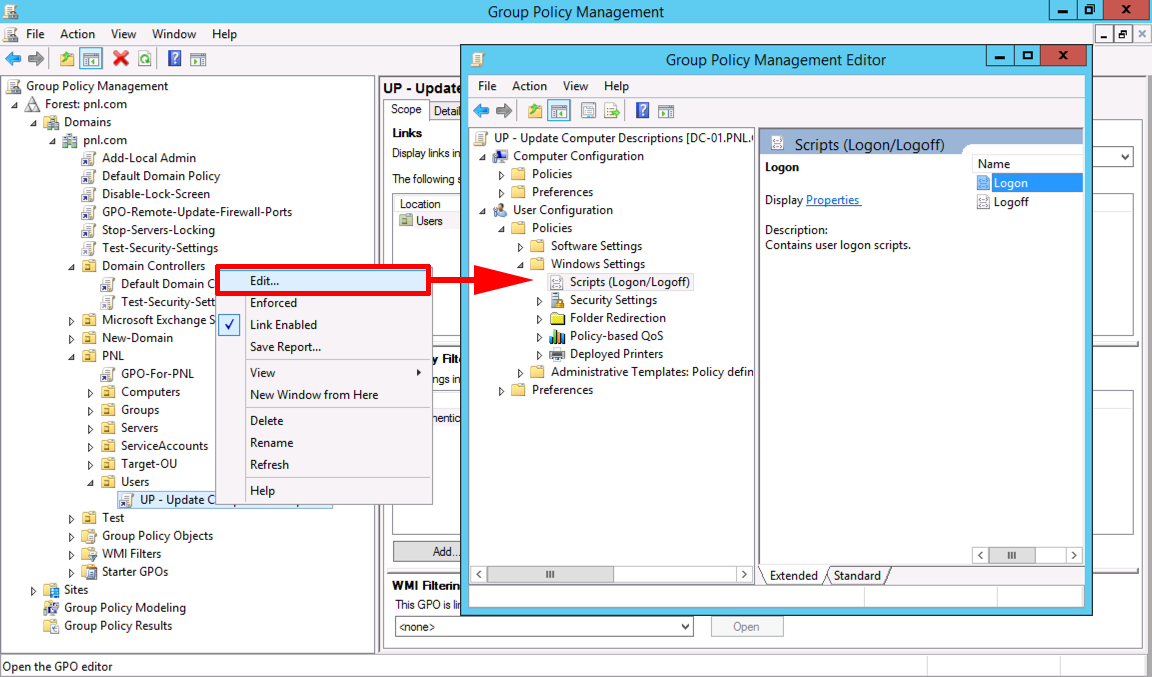
Add in the UNC path to the ComputerDescriptionLogonStamp.bat file (Note: Make sure you use a UNC path, to your Netlogon folder, and you do NOT browse locally to the file, if the path looks like; C:\windows\sysvol\pnl.con\sysvol\ComputerDescriptionLogonStamp.bat IT WON’T WORK.)
Close the Group policy editor, then either wait, or force a group policy update. Usernames, last logon, and machine into will appear in AD users and computers.
Windows – Forcing Domain Group Policy
Related Articles, References, Credits, or External Links
NA
01/09/2017
That’s brilliant! I always wanted to get those information from the machines and never found anything as well explained as that.
Thank you so much!
02/09/2017
No problem.
14/06/2018
Thanks you! This is great manual! It very good help for me.
16/01/2019
This is exactly what I was looking for. Thank you!
05/05/2021
Very useful, thanks. I found that when we used it as noted above, it would generate a security warning about running scripts from outside your organisation, but if we changed it to run from \\SERVERNAME\NETLOGON\… it ran just fine.
06/01/2022
My comments
On the principle, this could be useful, but
– Why using a .bat file launching a .vbs file, moreover a not really friendly readable and not really understandable in 2017/2022 ? Using a .ps1 file could be better and more simple (ie. : using CIM cmdlets)
– Why using the Authenticated group ? This group is populated by Domain Computers and Domain Users groups. GPOs are running with the computer account (since 2016), then using the Domain Computers group is enough.
06/01/2022
I did write this 5 years ago Oliver! (probably longer than that TBH as it was migrated from the old web layout!)
If you want to write a PS script and post it here, I’m sure it would help somebody.
14/04/2025
I also do something similar, but in addition, have it write to the user’s description what PC they last logged onto.