
KB ID 0001194
Problem
In vSphere 5 and earlier versions this was not a ‘fun’ job at all, many times I sat down to do it, and lost the will to live. Now there’s a nice new tool built into vCenter that does ‘most’ of the hard work for you. Here I’m using the vCenter appliance but the tool is also available on the Windows version.
For my certificates I’m using Microsoft Certificate Services. I’m going to issue a ‘Subordinate CA’ certificate to my vCenter Appliance, then it can issue signed certificates to each of its services.
Solution
Make sure you have published a ‘Subordinate Certification Authority’ certificate template.

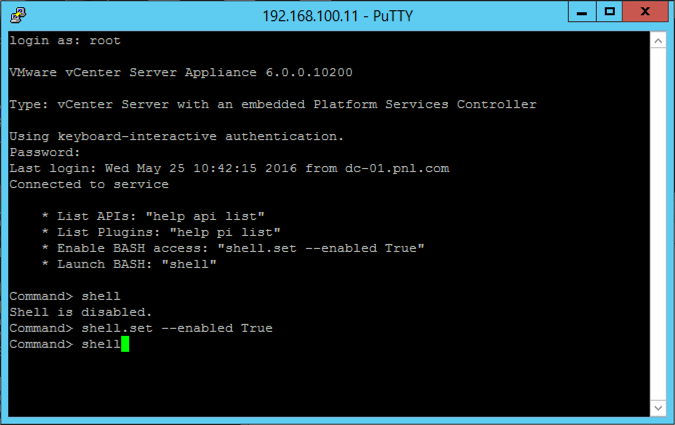
Connect the the vCenter appliance using SSH and enable ‘shell’
shell.set --enabled True
shell
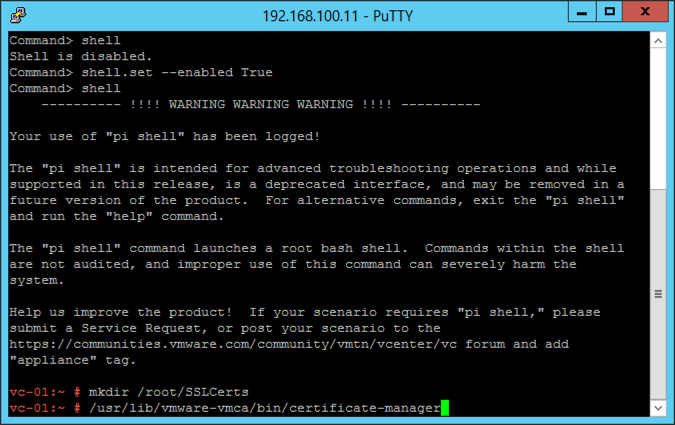
Create a directory to store our certificates and requests in, then launch the certification-manager tool.
mkdir /root/SSLCerts
/usr/lib/vmware-vmca/bin/certificate-manager
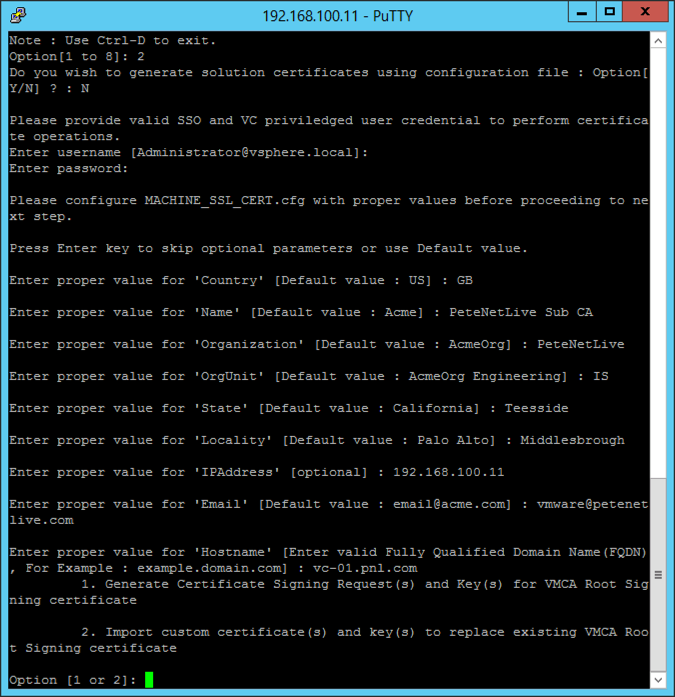
The app will launch, and present you with a bunch of options.

Select option 2 > No we don’t want to use the configuration file > enter your logon information, (administrator@vsphere.local and password) > Enter all the items required for the certificate request.
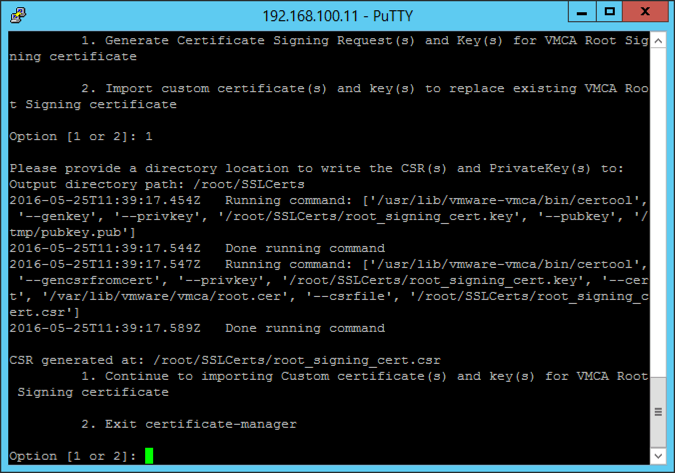
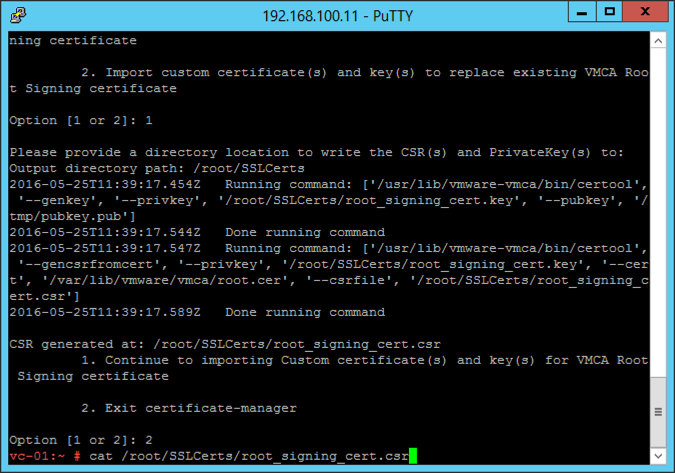
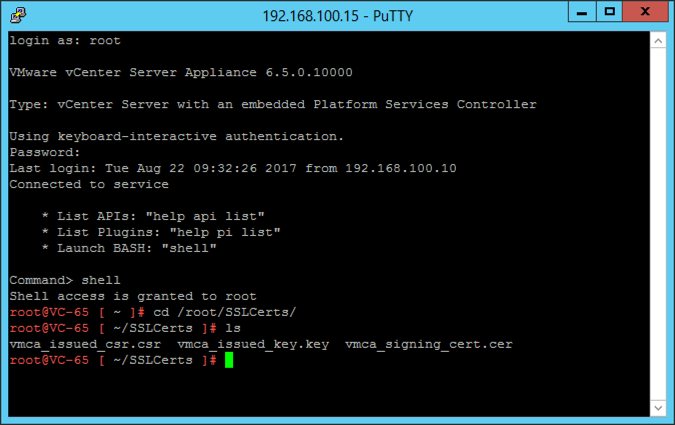
Choose option 1 (Generate Certificate signing request) > Specify the folder you created above, (/root/SSLCerts) > Two files will be generated > Enter ‘2’ to exit.
The files;
vCenter 6.5
- vmca_issued_key.key (the private key)
- vmca_issued_csr.csr (the request)
vCenter 6.0.0
- root_signing_cert.key (the private key)
- root_signing_cert.csr (the request)
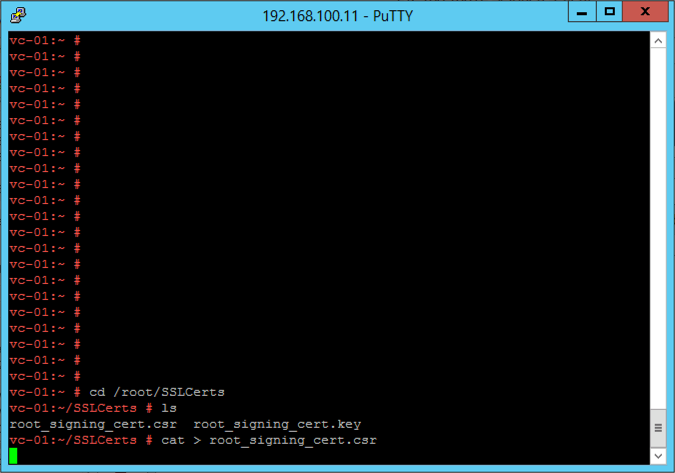
Now we need to get the CSR (signing request).
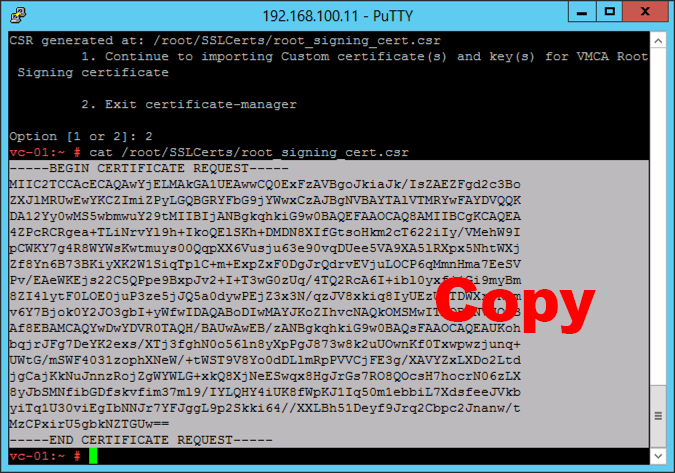
cat /root/SSLCerts/vmca_issued_csr.csr
OR
cat /root/SSLCerts/root_signing_cert.csr
Copy the certificate PEM file.
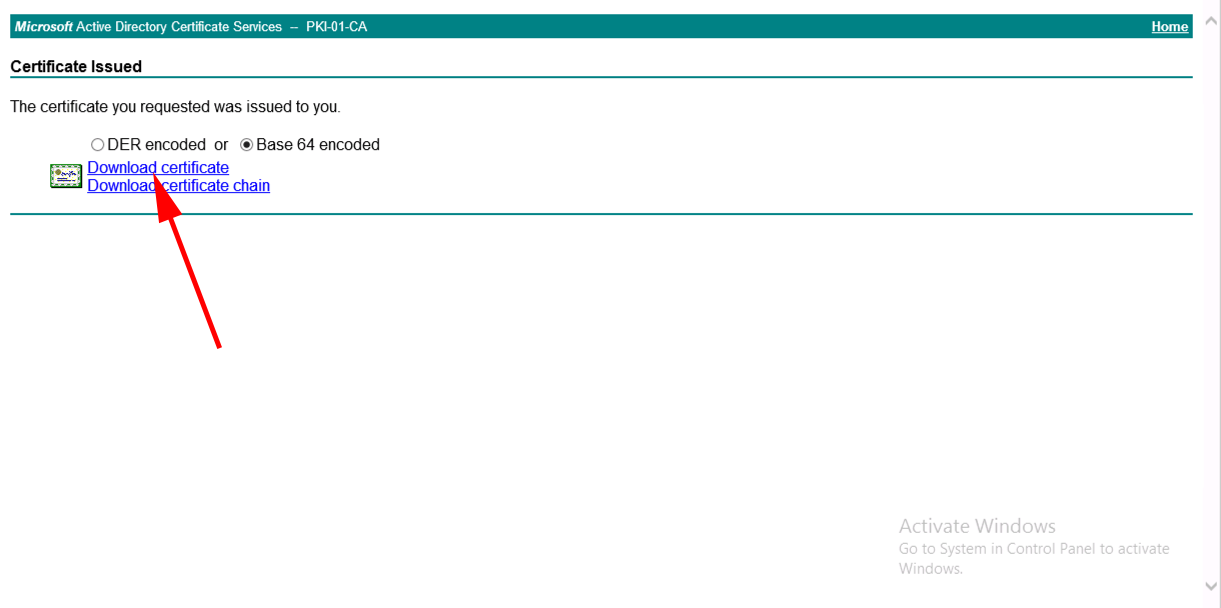
Open the web enrolment portal of your certificate services server, (https://server.domain.com/certsrv) > Request a certificate > Advanced Certificate Request > Submit a certificate request by using a base-64-encoded CMC or PKCS #10 file, or submit a renewal request by using a base-64-encoded PKCS #7 file > Paste in the PEM text > Remember to use the Subordinate Certificate Authority template > Submit.

Base 64 Encoded > Download Certificate > Save it somewhere you can find it, and give it a sensible name!
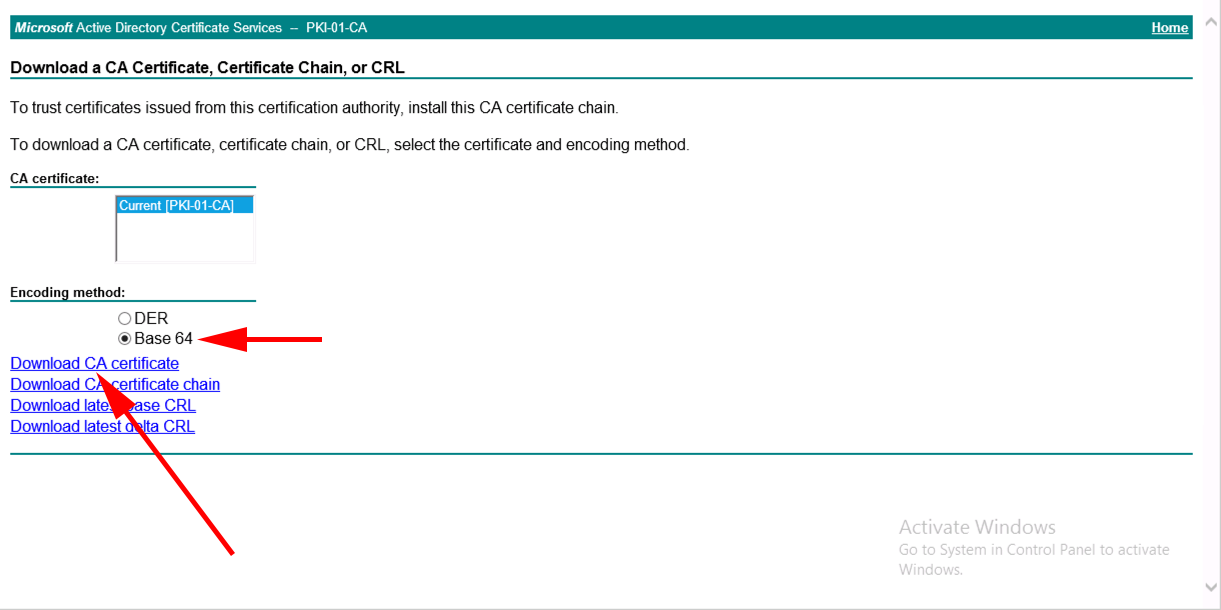
Now download the Base 64 version of your CA certificate from the main page of your certificate services website, (press ‘back’ a few times).
Now back in your SSH session, change to your SSLCerts directory, and create an ’empty’ file to paste our certificate information into.
cd /root/SSLCerts/
touch vmca_signing_cert.cer
vi vmca_signing_cert.cer
Open the certificate for the vCenter Appliance in a text editor, and PASTE IN BELOW it, the text from the Root-CA certificate. Then copy ALL the text to the clipboard, and go back to the SSH session.

Paste the text you have coped into the open ‘vi editor’ page (Press I, then P) > Save and Exit (Press Esc > :wq {enter})
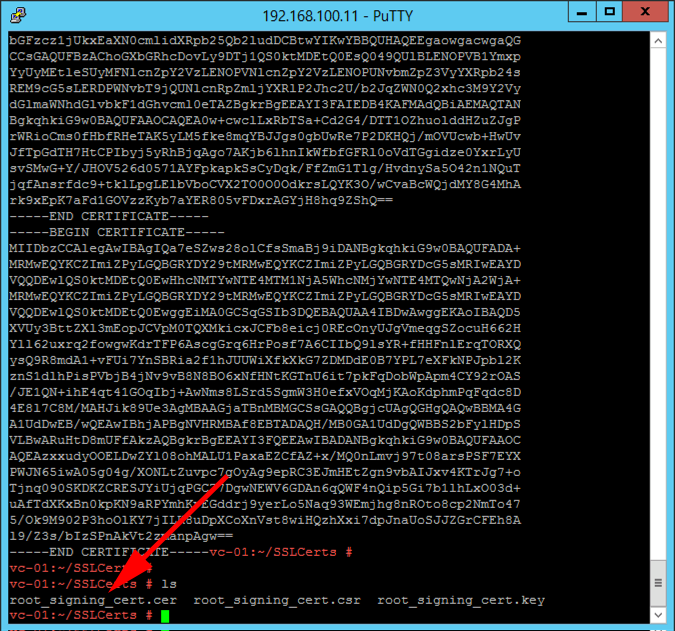
If you ‘ls’ (thats list short, or dir if you are a Windows type), you will see you now have a .CSR, a .KEY and a .CER file. (the names of which vary between version 6 and 6.5).
Version 6.5
Version 6.0
Launch the certificate-manager application again > Option 2 again > No (again) > Login (again) > ‘N’ > Option 2 (Import custom certificate(s)) > Give it the path to the certificate file > Then the path to the key file.
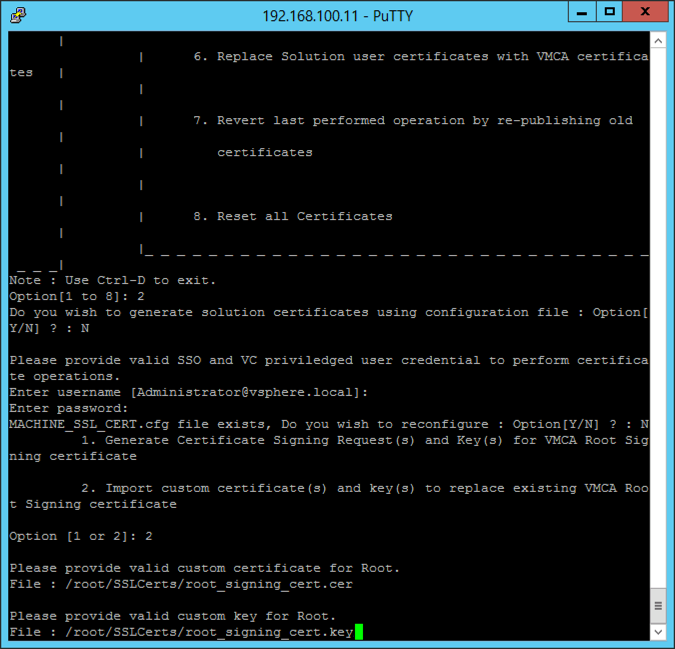
Yes we want to replace the certificates.

Go get a coffee, this will take a while.

Thats vCenter done.

Next we will concentrate on the ESX hosts
VMware ESXi6 – Replacing the Default Certificates
Related Articles, References, Credits, or External Links
Original Article Written 25/05/16
28/02/2019
Wonderful post. Thanks for that. I followed your procedure but… Although my CA Authority template is set to 6 years, VCenter certificate expiration shows only 2 years. Is there any way to change this? It would be annoying to do the same every 2 years.
Thanks in advance.
02/03/2019
Sounds like a Microsoft CA? you need to change it there, it’s on there, its on the properties of the SubCA certificate template.
20/05/2019
The MS CA template needs updating and then re-publishing. I set mine to 5 years, then published it, then created the certificate. All good.
20/05/2019
One thing to clarify is with a 2 tier MS PKI,, at the copy steps, you have your vCenter Subordinate CA, then you need to paste in your Issuing CA details, then underneath that, the Root CA. It needs the complete certificate chain. When I followed these steps as is, it rolled back because I was missing part of the chain.
Its not a big deal if you know PKI, but can be confusing to new users.