KB ID 0001084
Problem
I seem to have done a lot of PKI the last 18 months. This week I needed an OCSP server deploying for the CA server on my test bench so I took the time to document it for future use. One of the most overlooked parts of a PKI deployment, is how to cope with ‘revoking’ certificates.
Traditionally this has been done with a CRL, but there is a downside to CRL’s. Network devices tend to cache them, and they don’t get updated as often as they should. Which is why OCSP is a lot better, it runs as a service and answers revocation requests immediately.
Solution
This is a walk though on configuring OCSP, I’m assuming you already have your PKI and your CRL is already setup, if not take a look at the following article;
Windows Certificate Services – Setting up a CRL
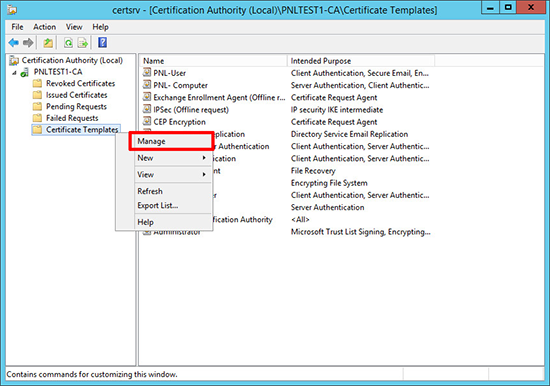
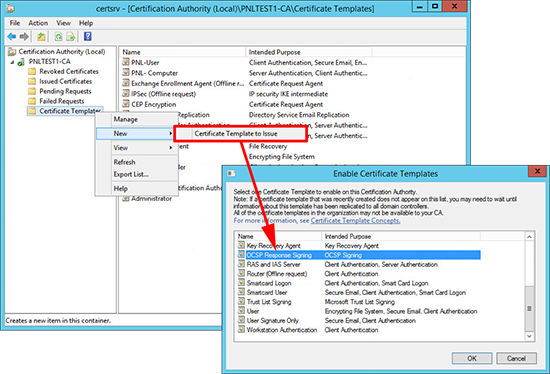
1. Launch the certificate services management console > Certificate Templates > Manage.
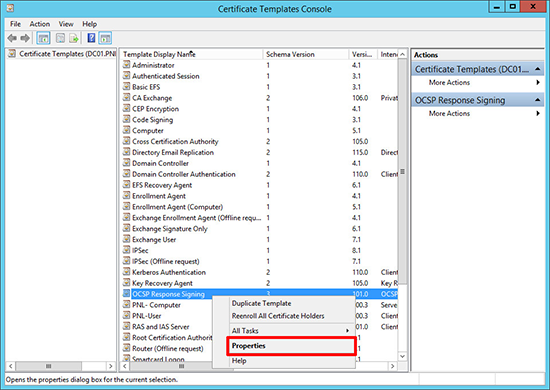
2. Locate the OCSP Response Signing Certificate > Properties.
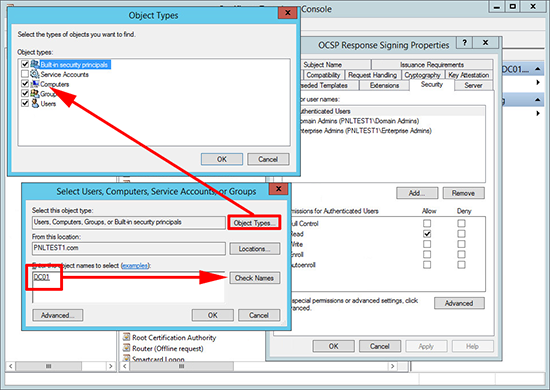
3. Security Tab > Add in the server that will be hosting the OCSP service, (I always use the same server that’s serving my CRL).
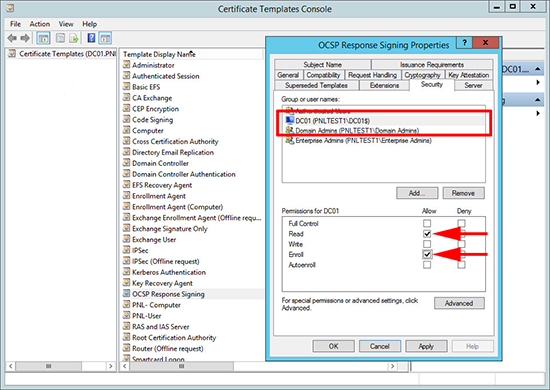
4. Grant the server read and enroll rights > Apply > OK.
5. Then issue the OCSP Responder Template.
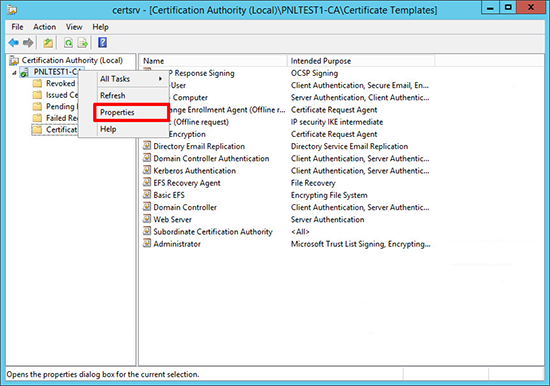
6. Open the properties of the Certificate Services Server.
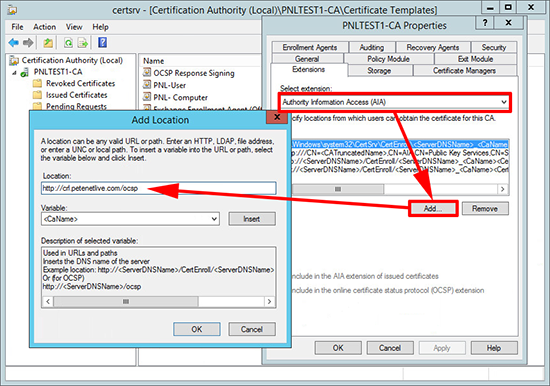
7. Extensions Tab > Change the drop-down to Authority Information Access (AIA) > Add >Enter the URL of the server that will serve OCSP, this will need to be resolvable internally and of the service is presented to the outside works the URL will need registering in public DNS > OK.
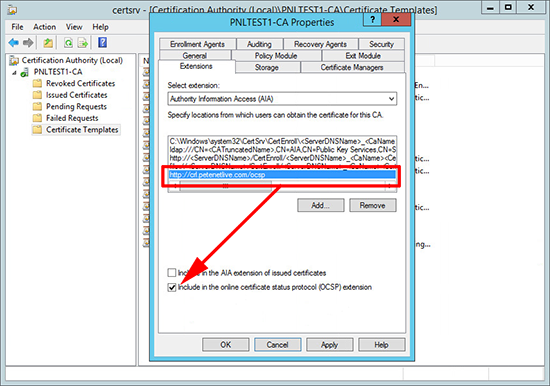
8. Select the URL you have just entered > Tick ‘Include in the online certificate status protocol (OCSP) extension’ > Apply > OK.
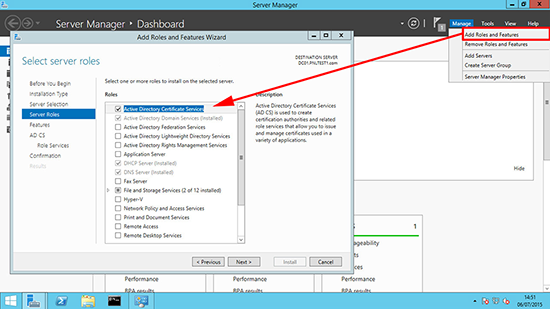
9. On the server that you want to install the OCSP service > Launch Server Manager > Manage > Add Roles and Services > Add in the Active Directory Certificate Services Role.
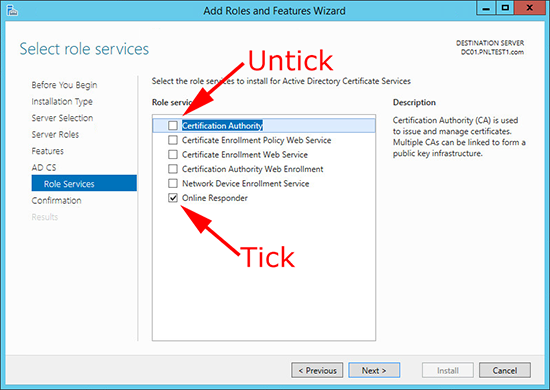
10. On the Role Services page, remove ‘Certificate Authority’ and then add ‘Online Responder’ > Complete the wizard.
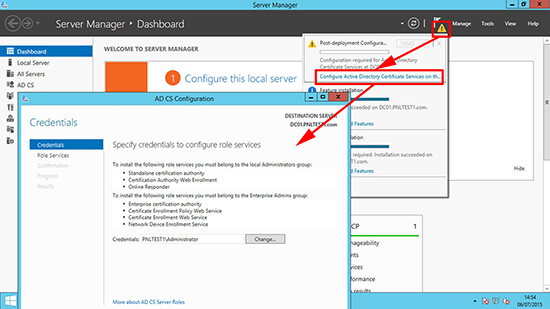
11. Run through the post install wizard, and accept all the defaults.
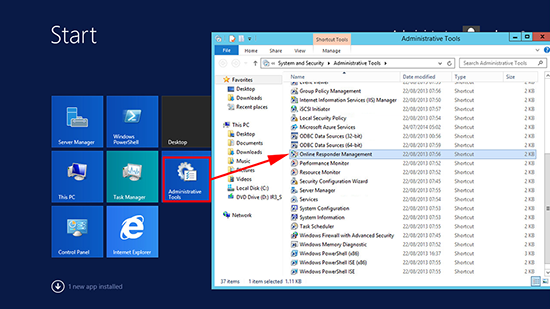
12. Launch the Online Responder Management console.
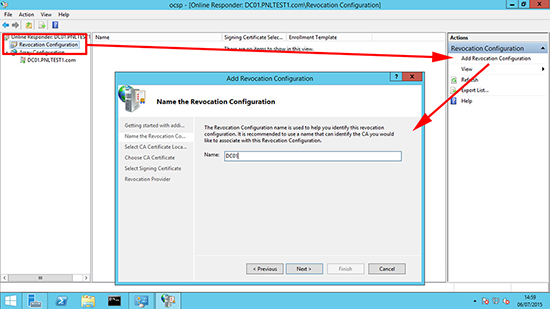
13. Revocation Configuration > Add Revocation Configuration > Enter a name > Next.
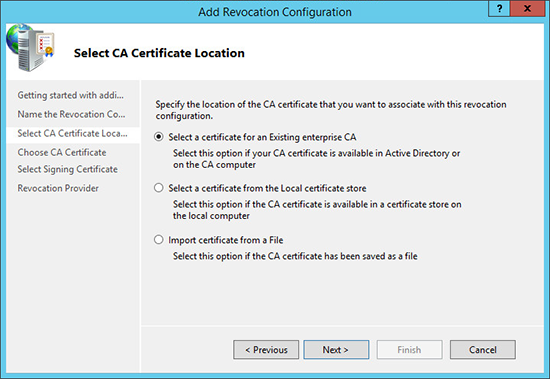
14. Select your method of locating a CA certificate > Next.
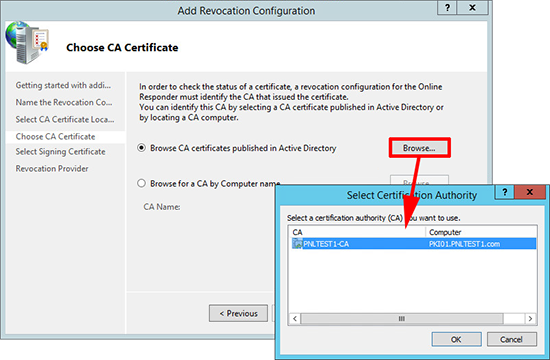
15. Locate your CA Certificate.
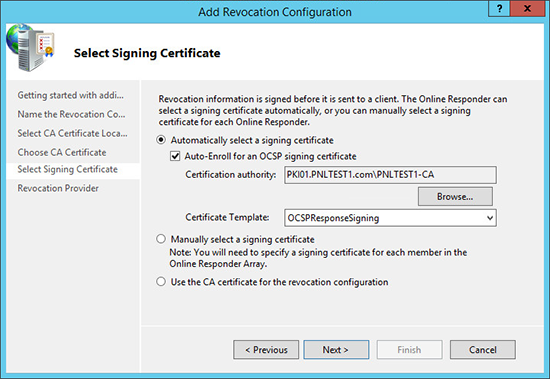
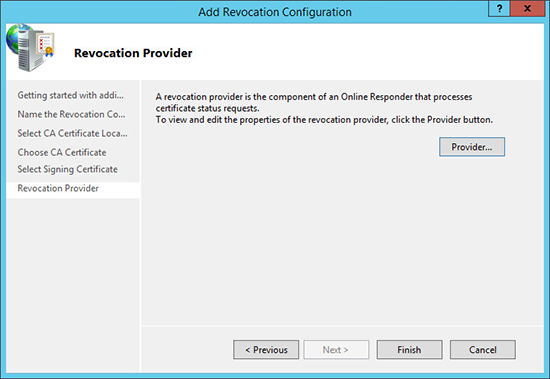
16. Select your OCSP Template > Next.
17. Finish.
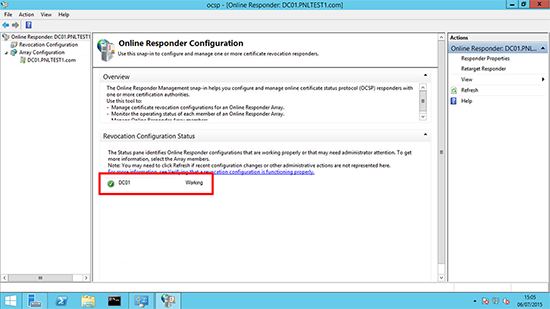
18. The configuration should go green and say ‘Working’.
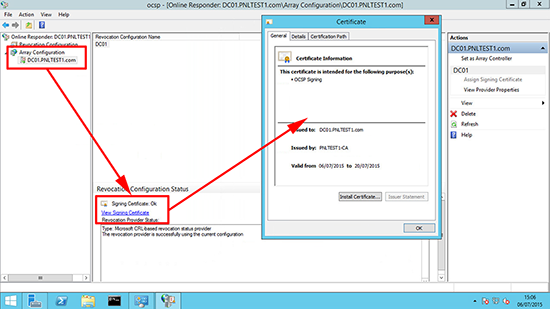
19. To make sure the certificate is issued > Array Configuration > {server-name} > View Signing Certificate.
Related Articles, References, Credits, or External Links
Windows Certificate Services – Setting up a CRL

