KB ID 0001083
Problem
Back in Part Three we setup the switches ready to plug in our clients. I’m going to configure the Windows clients by Group Policy. But I suggest you carry out tests using single Windows clients and LOCAL policy until you know you have everything setup correctly.
WARNING: Rolling this out without adequate testing, can resolve in all your Windows clients falling off the network
Solution
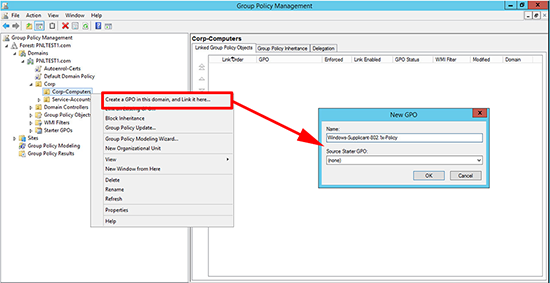
1. On a DC or a machine with the AD management tools installed, open the group management console. Either edit an existing policy or create and link a policy to the OU that contains your client computers.
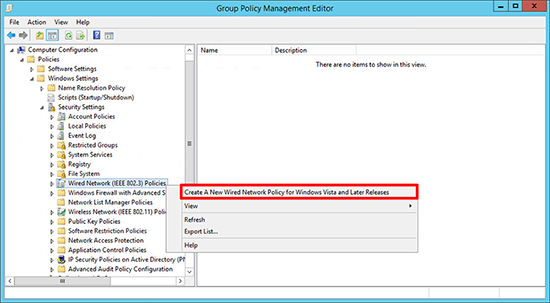
2. Navigate to;
Create A New Wired Network Policy for Windows Vista and Later Releases.
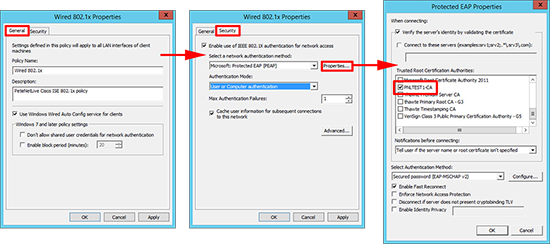
3. Configure the following;
General Tab
- Policy Name: Give the policy a name
- Description: Optional
- Use Windows Wired Auto Config service for clients. (Ticked)
Security Tab
- Enable use of IEEE 802.1X authentication for network access. (Ticked)
- Select a network authentication method: Microsoft Protected EAP (PEAP)
- Authentication Mode: User or computer authentication
- Properties (optional in case you ever use TLS) Add in your Root CA Cert
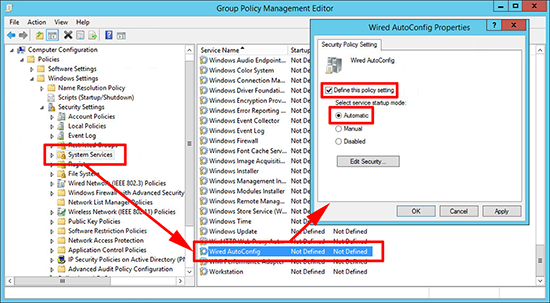
4. Navigate to;
Define the policy and set the startup type to ‘Automatic’.
5. Now when you connect a client to a properley configured switch port it will authenticate before if is allowed to join the network. If the machine is not a domain PC, or 802.1x fails then it will get an authentication failed remark on its network card.
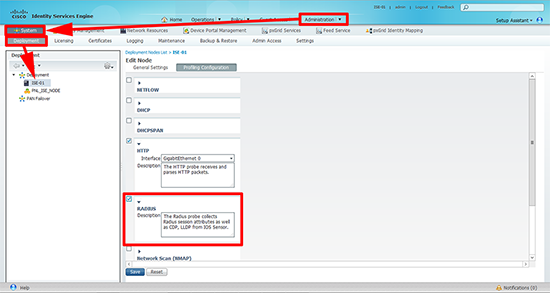
6. OPTIONAL: We have setup 802.1x now, but it is also worth adding RADIUS to the ISE profiling configuration.
Related Articles, References, Credits, or External Links
NA

