
KB ID 0001040
Problem
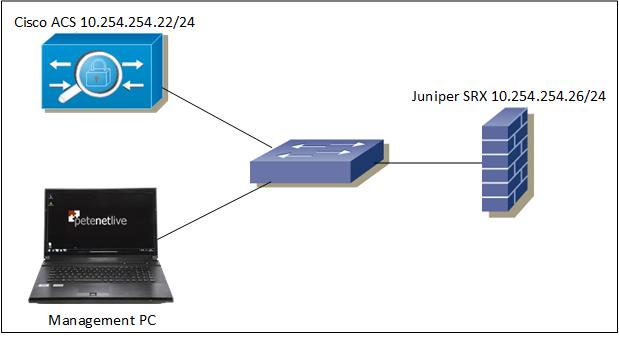
I’ve been configuring a client’s Juniper SRX chassis cluster, for a while now. Their ACS was deployed last week so my task was to configure it to use the TACACS+ from the Cisco ACS server.
The client’s setup required them to use their fxp0 management interfaces to perform the authentication. After it was configured and working, (due in no small part, to the ACS skills of Mr SteveH). I decided that because of the lack of decent info, I would run it up at home on the test bench.
This procedure uses a Juniper Firefly Perimeter vSRX, and a Cisco ACS virtual appliance (v5.5). I’m going to create a read only group (JUNOS-RO), and a read write group (JUNOS-RW) for different levels of authentication.
Solution
Step 1 – Configure Cisco ACS For Juniper JunOS
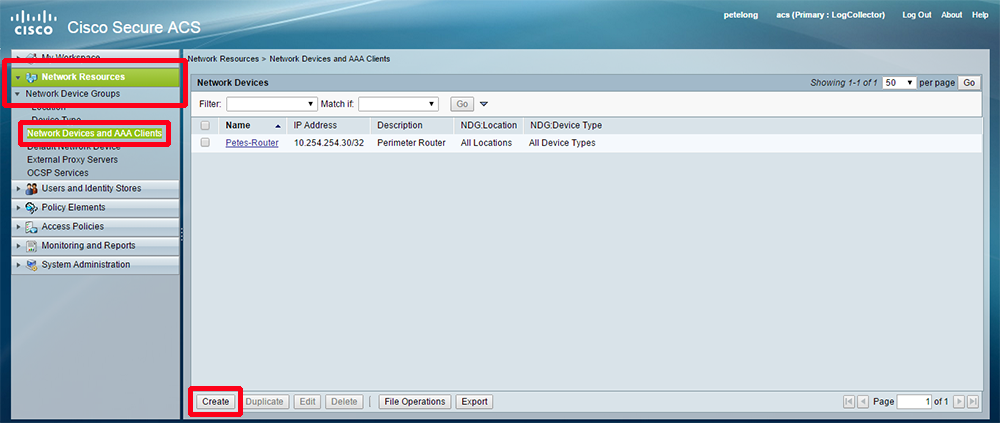
1. Log into ACS > Network Resources > Network Devices and AAA Clients > Create.
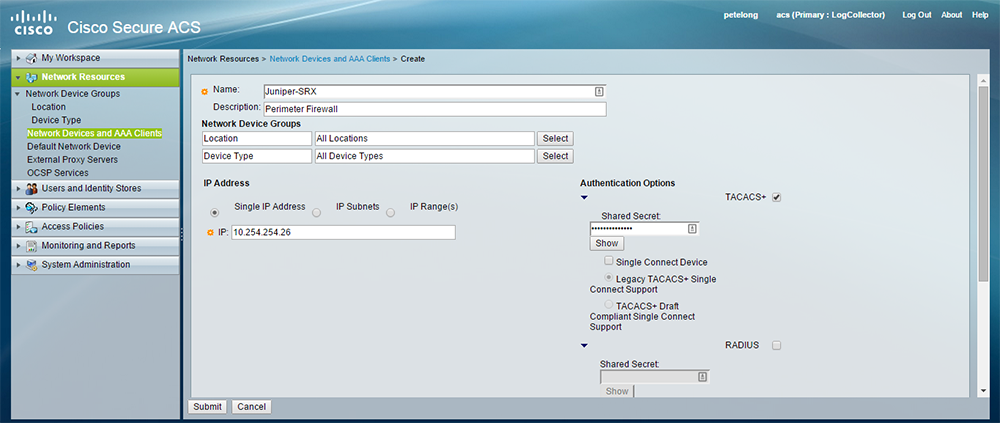
2. Add the SRX as a device > Submit.
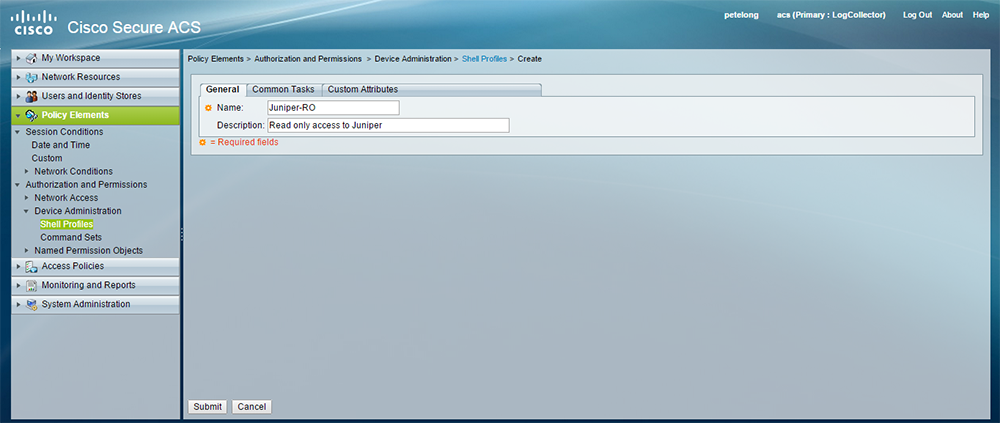
3. Policy Elements > Device Administration > Shell Profiles > Create.
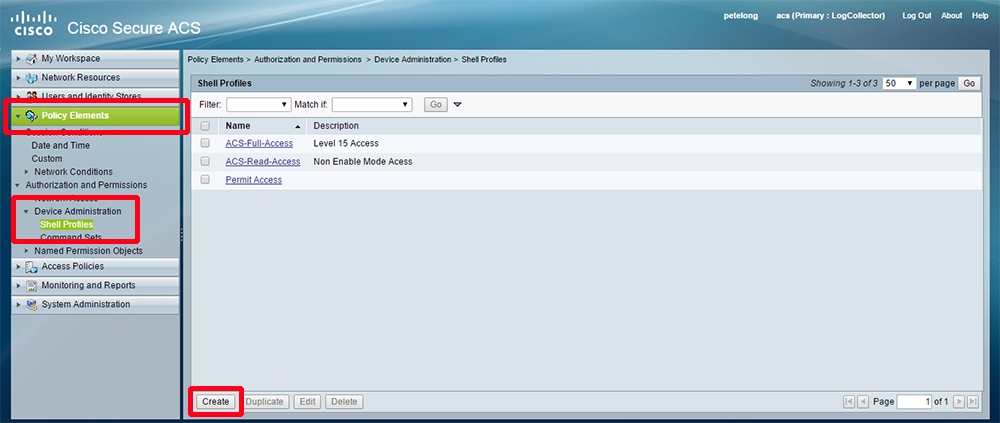
4. Create a new shell profile for our read only profile.
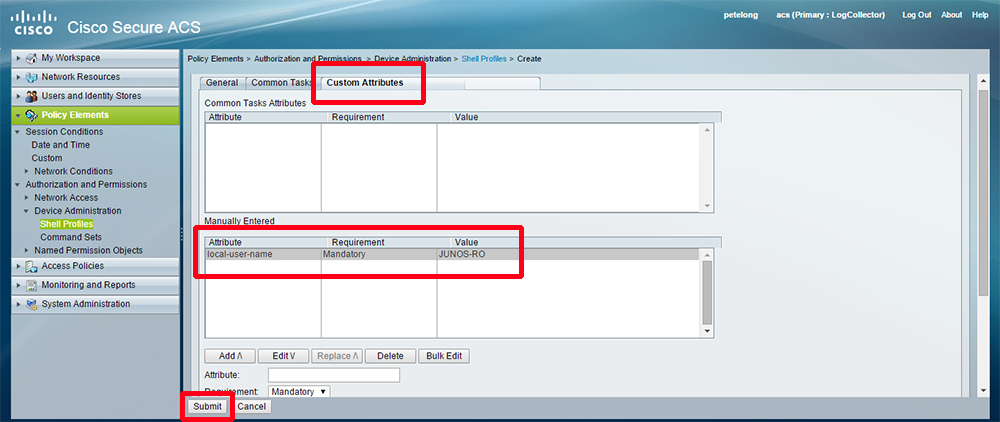
5. Custom Attributes tab > Add in an attribute called local-user-name and set its value to JUNOS-RO > Submit.
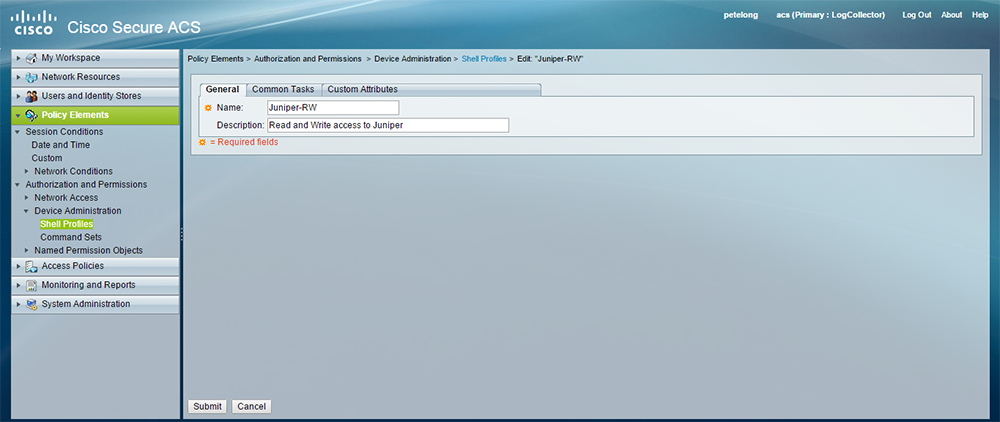
6. Repeat the process and create a new shell profile for the read/write profile.
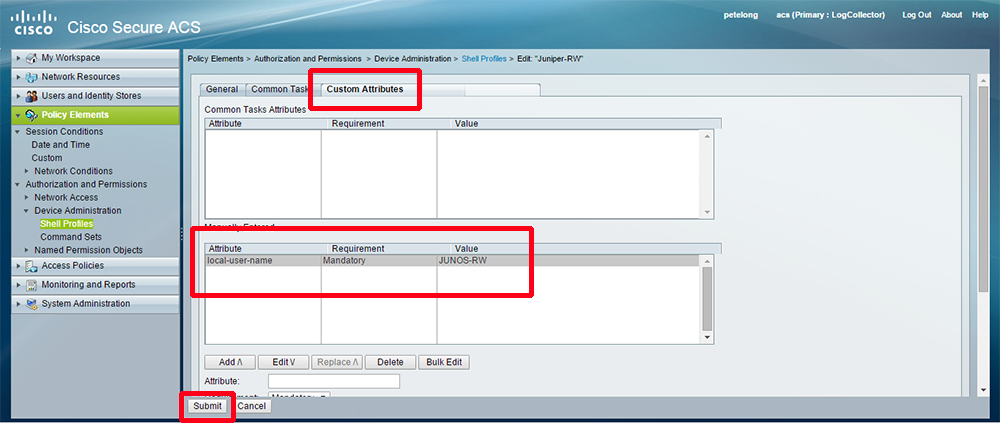
7. This time on the custom attributes tab add local-user-name but this time set its value to JUNOS-RW > Submit.
8. Access Policies > Access Services > Create.
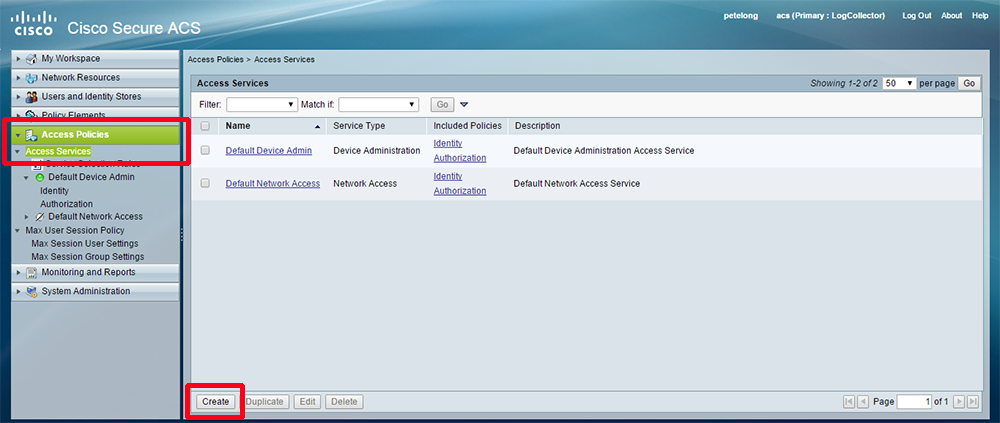
9. Create a new access service profile for your JunOS device(s) > Next.
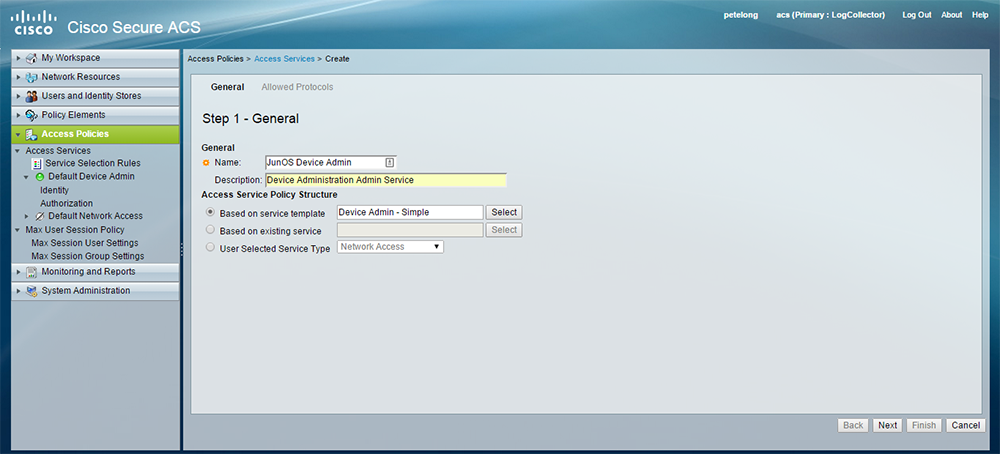
10. Select Process host lookup > Select PAP/ASCII > Finish.

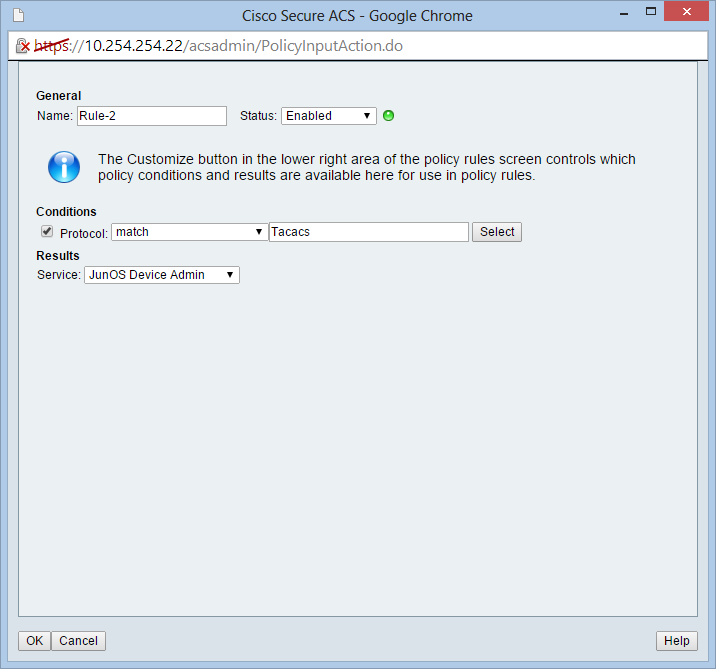
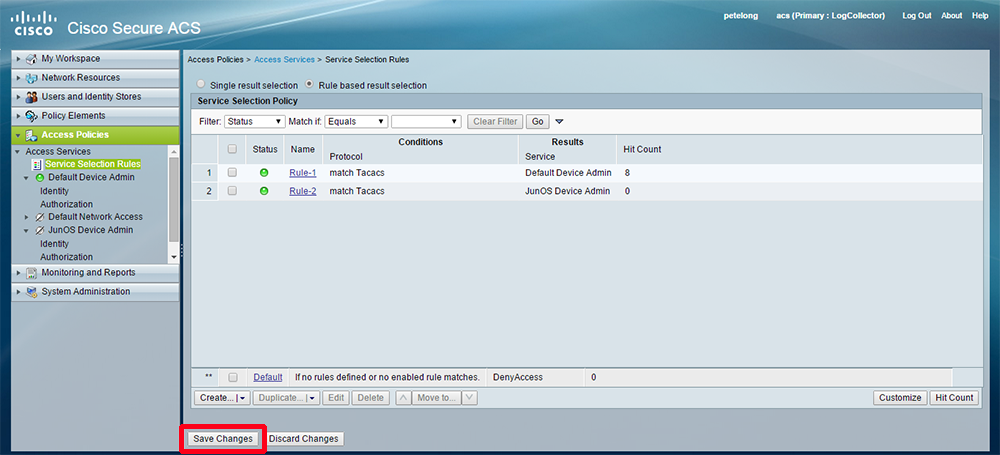
11. You will be prompted to create a service selection rule > Create.
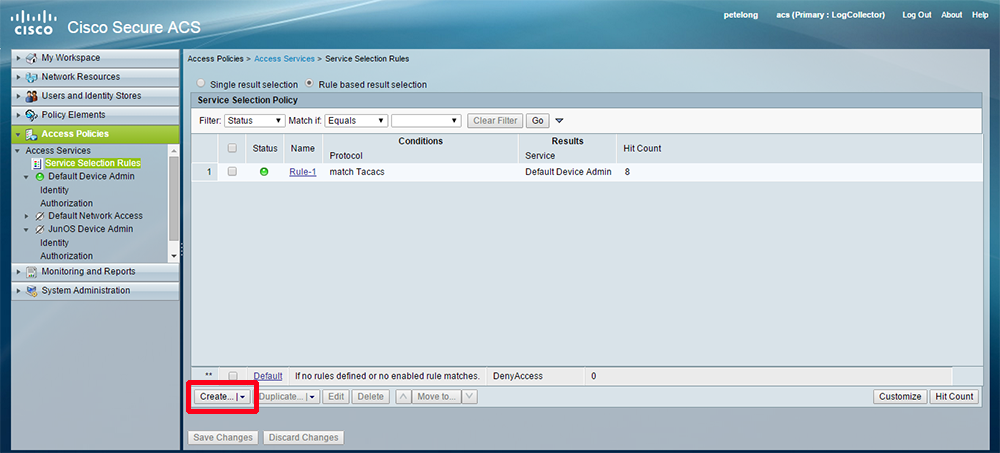
12. Ensure you select TACACS and the service is set to the one that you have just created > OK.
13. Save Changes, (at this point your JunOS access service should ‘go green’).
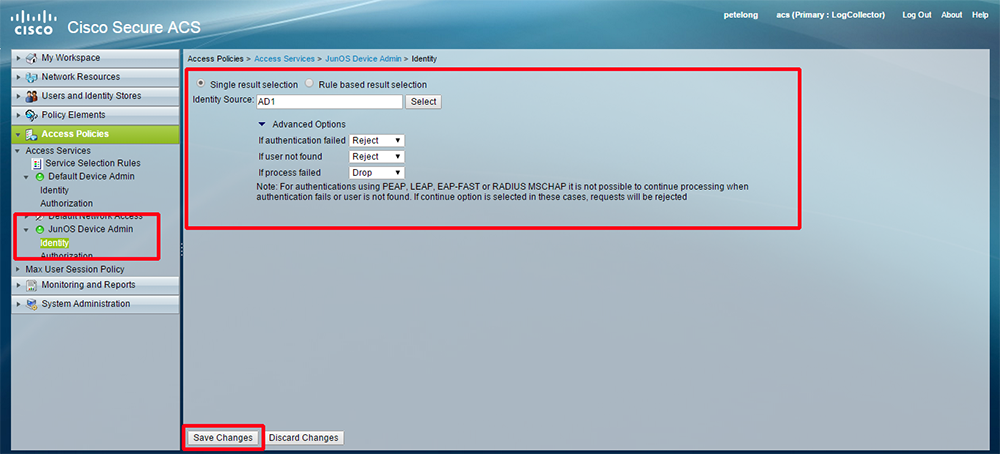
14. Select your ‘JunOS Device Admin’ access service > Identity > Select your AD > Save Changes.
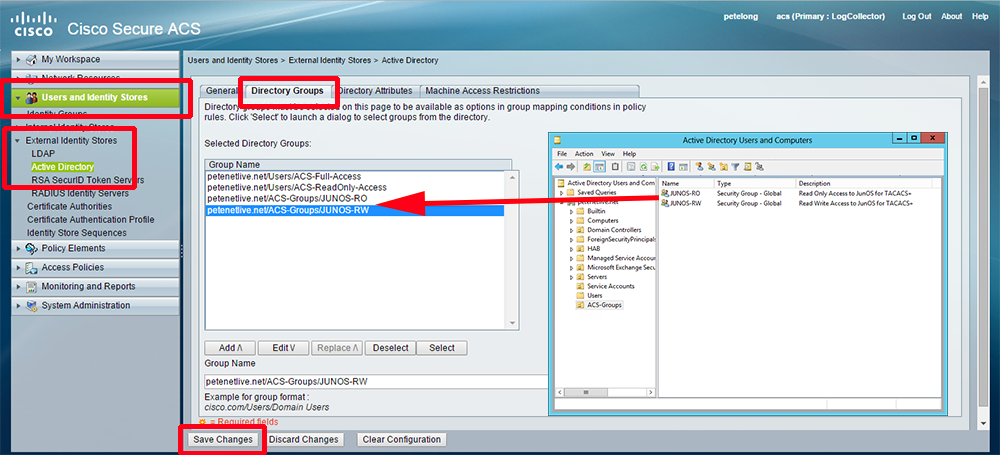
15. Ive created some AD groups for my two roles > to Add them into ACS > Users and Identity Stores > External Identity Stores > Active Directory > Directory Groups > Add in the groups as applicable.
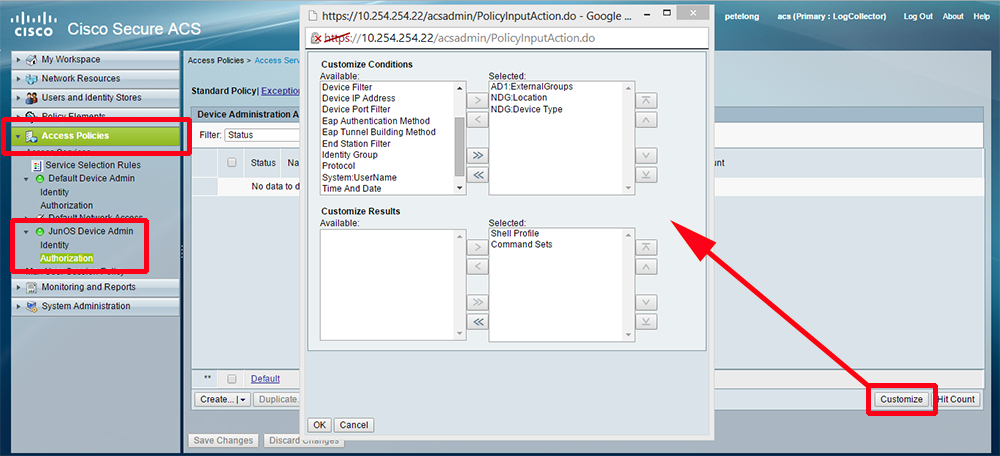
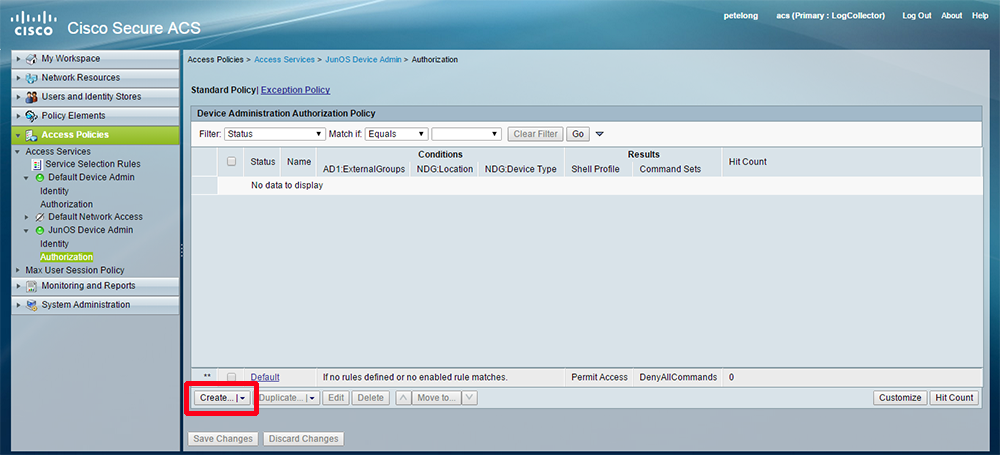
16. Access Policies > ‘JunOS Device Admin’ access service > Authorization > Customize > Set as shown below > OK.
17. Create.
18. Create a new element for the read only role > OK.
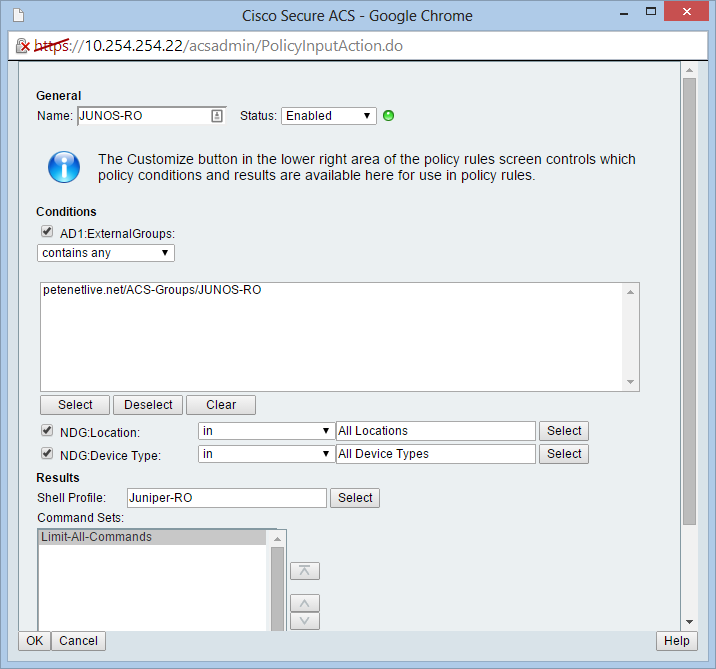
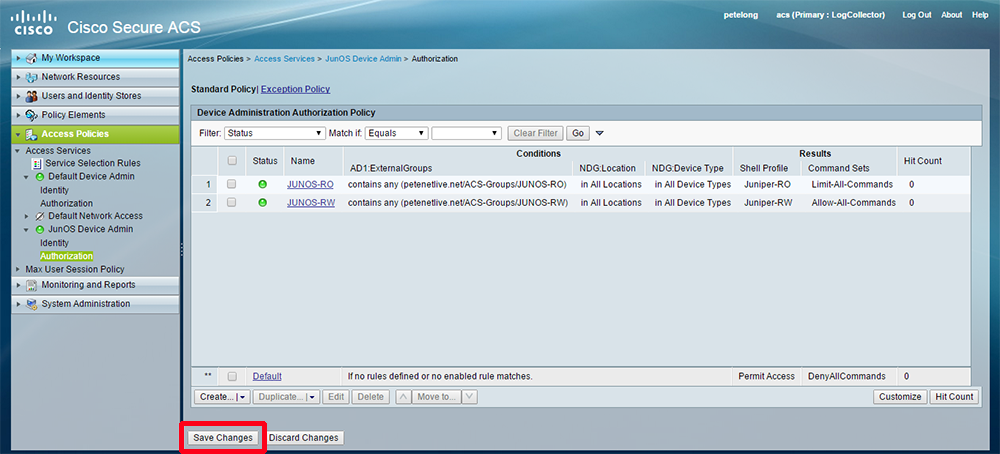
19. Then repeat for the read/write role > OK.

20. Save Changes.
Step 2 – Configure SRX for Cisco ACS Access
1. Connect to the SRX and go to configuration mode.
login: petelong Password: ********** No home directory. Logging in with home = “/”.
— JUNOS 12.1X47-D10.4 built 2014-08-14 22:59:01 UTC
petelong@Petes-SRX> configure Entering configuration mode
[edit] petelong@Petes-SRX#
2. I’m going to setup the TACACS server with the following properties;
- IP of TACACS Server: 10.254.254.22/24
- IP that the SRX will present to the ACS Server: 10.254.254.26/24
- Shared secret: s3cr3tp@ssword
- TACACS Port: 49 (TCP)
[edit] petelong@Petes-SRX# set system tacplus-server 10.254.254.22 secret s3cr3tp@ssword
[edit] petelong@Petes-SRX# set system tacplus-server 10.254.254.22 source-address 10.254.254.26
[edit] petelong@Petes-SRX# set system tacplus-server 10.254.254.22 port 49
[edit] petelong@Petes-SRX# set system tacplus-server 10.254.254.22 single-connection
Note: If you are deploying a chassis cluster and you want to use the Fxp0 interface for TACACS that does not failover, so you need to pin each node to a particular ACS server like so;
set groups node0 system tacplus-server 10.254.254.26 secret <secret-password> set groups node0 system tacplus-server 10.254.254.26 source-address 10.254.254.10 set groups node0 system tacplus-server 10.254.254.26 port 49 set groups node0 system tacplus-server 10.254.254.26 single-connection set groups node1 system tacplus-server 10.254.254.27 secret <secret-password> set groups node1 system tacplus-server 10.254.254.27 source-address 10.254.254.11 set groups node1 system tacplus-server 10.254.254.27 port 49 set groups node1 system tacplus-server 10.254.254.27 single-connection
3. In the event that TACACS fails, (or cannot be contacted), I want the SRX to ‘fail back’ to its local user database so we can still log in.
4. Create a ‘user class’ for our read only group.
[edit] petelong@Petes-SRX# set system login class RO-CLASS permissions view-configuration
5. Create a ‘user class’ for our read write group.
6. Now create two users, and assign each user to the appropriate class.
[edit] petelong@Petes-SRX# set system login user JUNOS-RO uid 2100 class RO-CLASS
[edit] petelong@Petes-SRX# set system login user JUNOS-RW uid 2101 class RW-CLASS
7. Finally Save all your hard work.
[edit] petelong@Petes-SRX# commit commit complete
[edit] petelong@Petes-SRX#
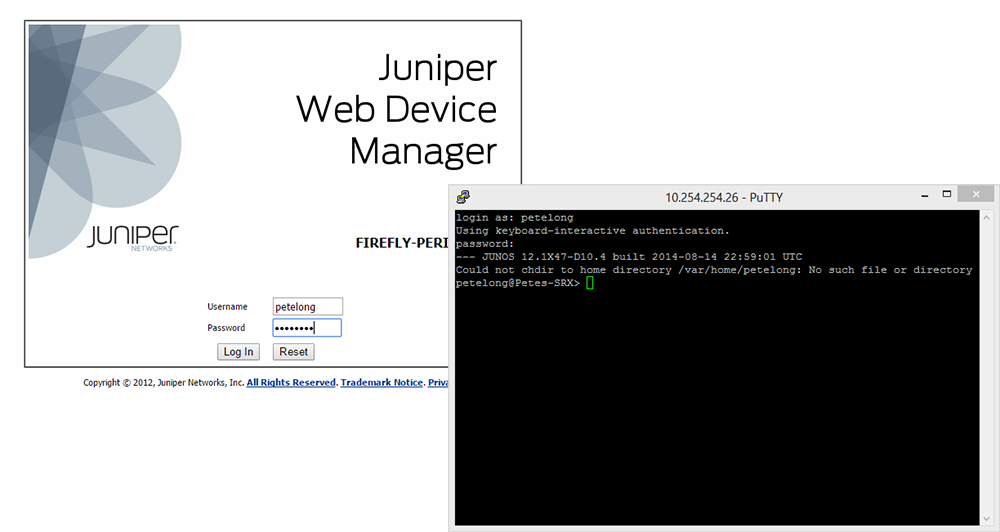
8. And test.
Full JunOS (SRX) Config for TACACS+
set system tacplus-server 10.254.254.22 secret s3cr3tp@ssword set system tacplus-server 10.254.254.22 source-address 10.254.254.26 set system tacplus-server 10.254.254.22 port 49 set system tacplus-server 10.254.254.22 single-connection set system authentication-order tacplus authentication-order password set system login class RO-CLASS permissions view set system login class RO-CLASS permissions view-configuration set system login class RW-CLASS permissions all set system login user JUNOS-RO uid 2100 class RO-CLASS set system login user JUNOS-RW uid 2101 class RW-CLASS
Related Articles, References, Credits, or External Links
NA