
KB ID 000096
Problem
Later on in the year I’ve got a big RSA and SharePoint deployment, as I know ‘Zippity Squat’ about SharePoint, I thought the best way to get some hands on experience, was to work out how to integrate SecureID with Exchange 2013, (which I know a few things about!)
Solution
I’m assuming you already have RSA Authentication Manager setup and users/tokens deployed. This run though is simply to get your RSA solution working with Exchange/OWA
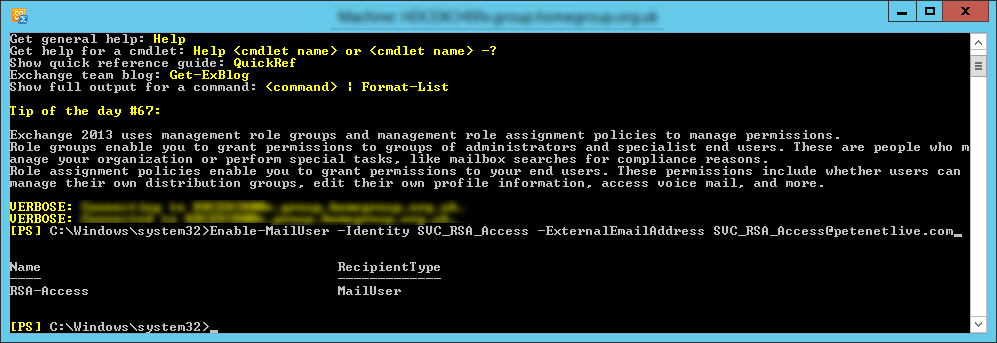
1. Create a user in Active Directory, (here I’m using SVC_RSA_Access), and ensure that user has a mailbox, you can do this in the Exchange Admin Center, but I prefer to use the shell.

2. Hopefully it will complete without error.
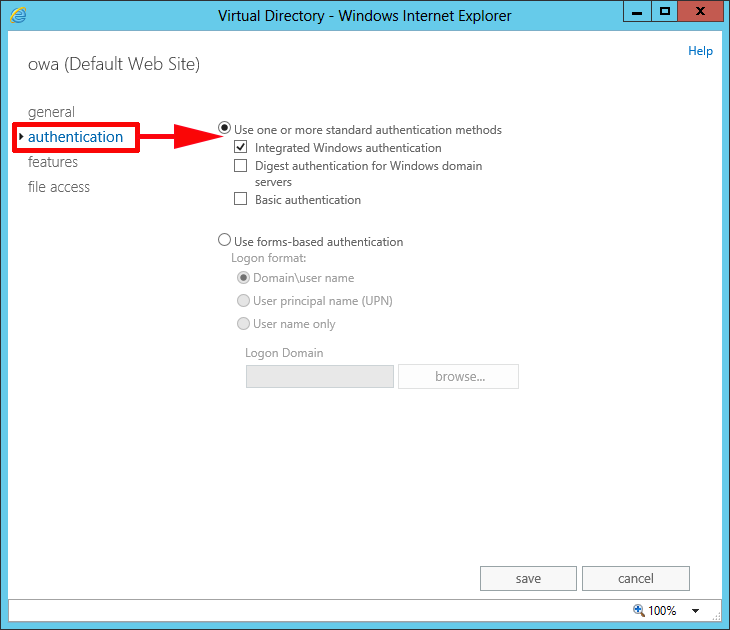
3. Over in the Exchange Admin Center > Servers > Virtual Directories > OWA > Edit.

4. Authentication > Select Integrated Windows Authentication.
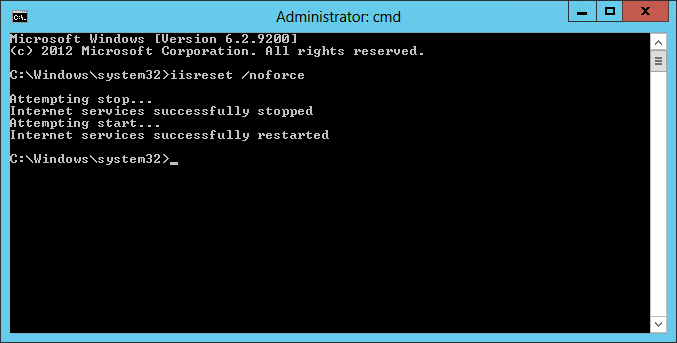
5. Then restart IIS with the following command;

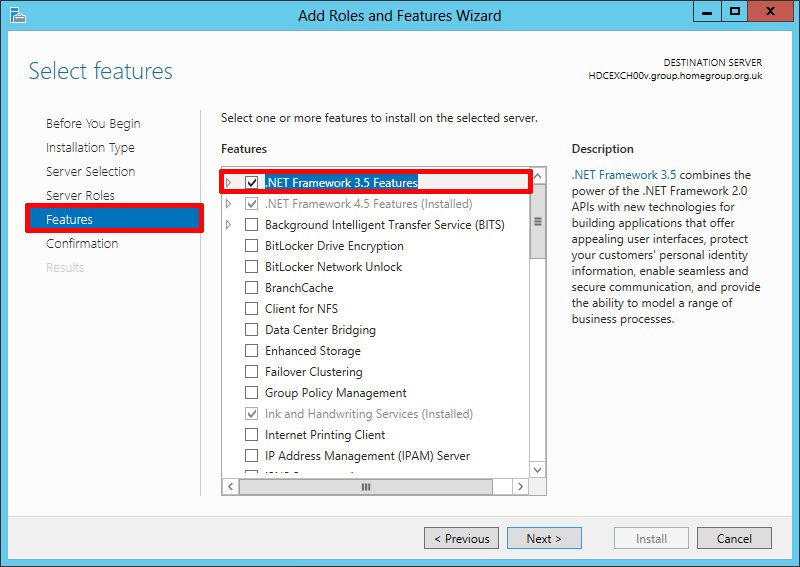
6. We need to have the .Net 3.5 Feature added. (Server Manager > Add Roles and Features).
7. Log onto the Security Console of your RSA Authentication Manager appliance > Access > Authentication Agents > Generate Configuration File > Follow the wizard > Download the file.

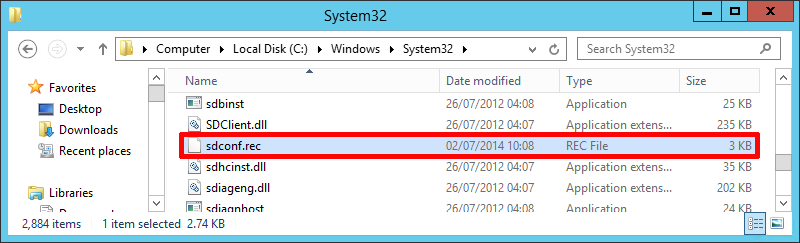
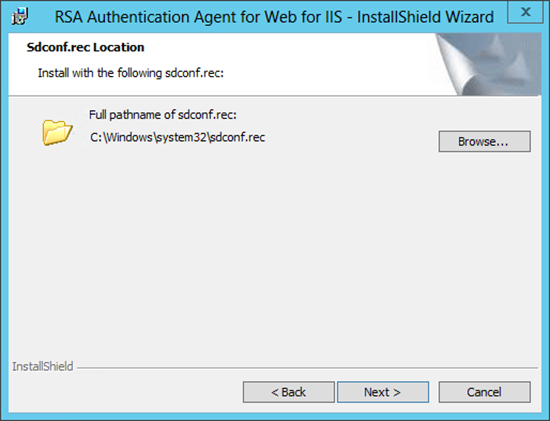
8. Place the file you downloaded (sdconf.inf) on the Exchange server in the C:Windowssystem32 folder.
9. Download and install the RSA Authentication Agent for Web for IIS, Install and accept all the defaults, it should locate the config file you have just downloaded.
10. On the Exchange server launch ‘RSA Web Agent’, and don’t be surprised when IIS Manager opens.

11. Select Default Web Site > RSA SecureID.
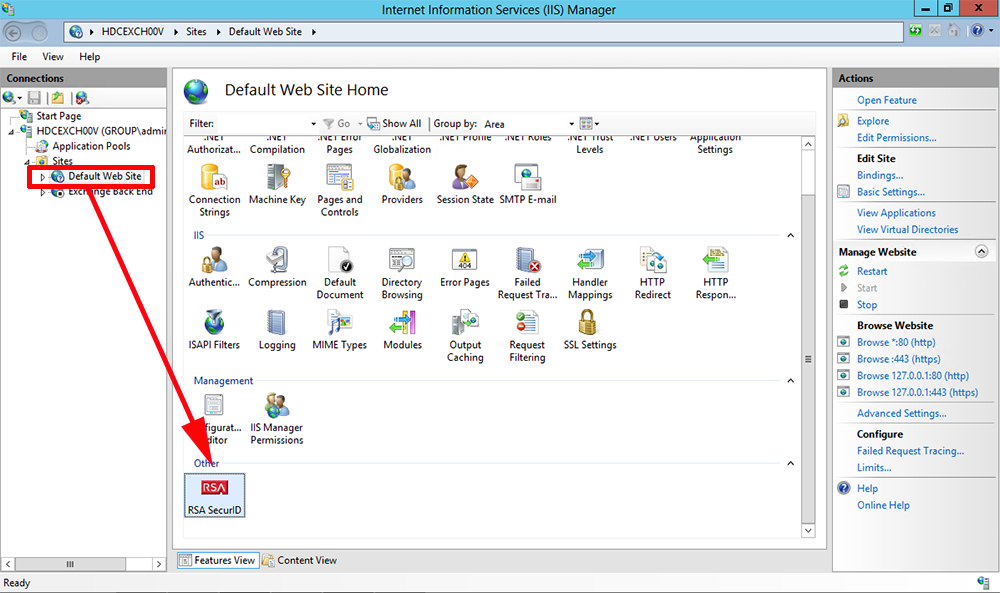
12. Select ‘Enable RSA SecureID Web Access Authentication’ > Apply.

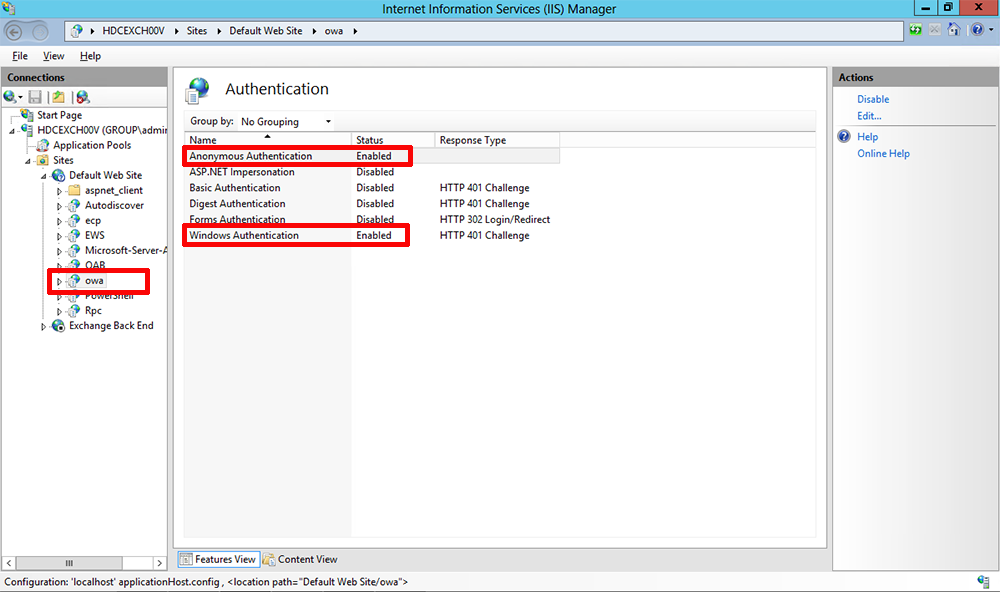
13. Select the OWA Virtual Directory > Authentication > Ensure Anonymous Authentication and Windows Authentication are both enabled.
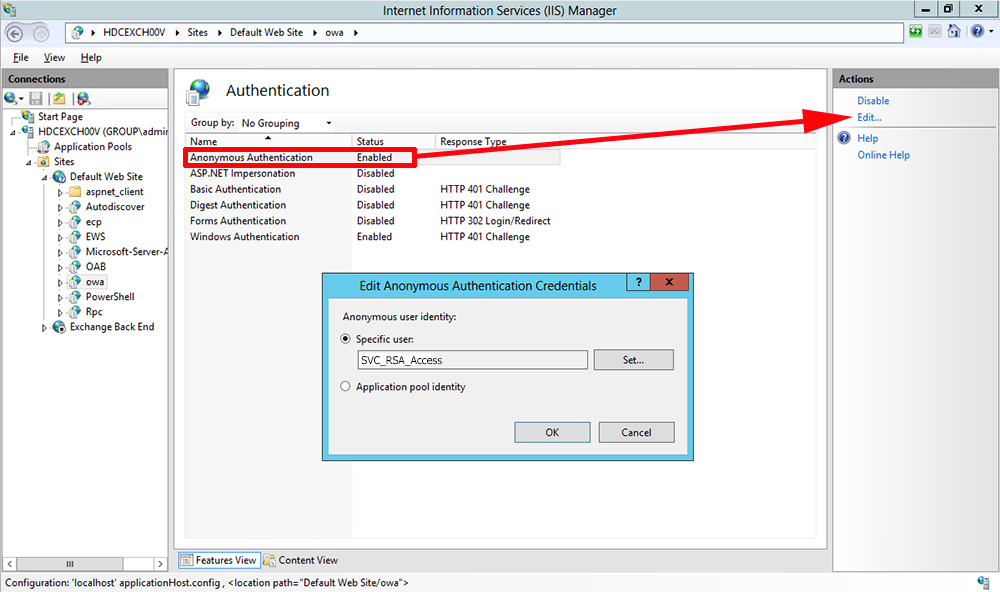
14. With Anonymous Authentication selected > Edit > Set the user account to the user we created back in step 1.
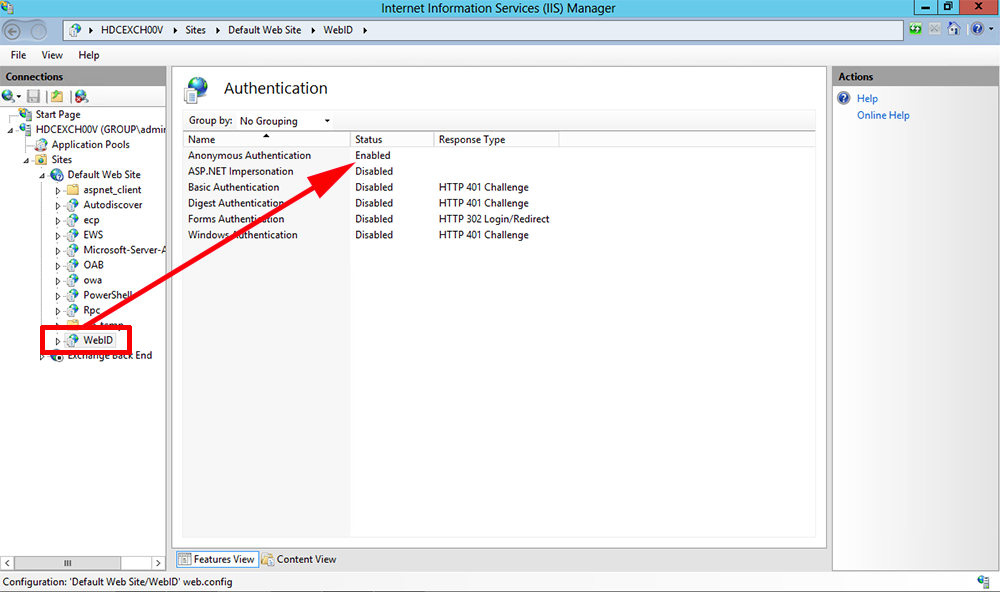
15. Select the WebID Virtual Directory > Authentication > Ensure Anonymous Authentication is enabled.
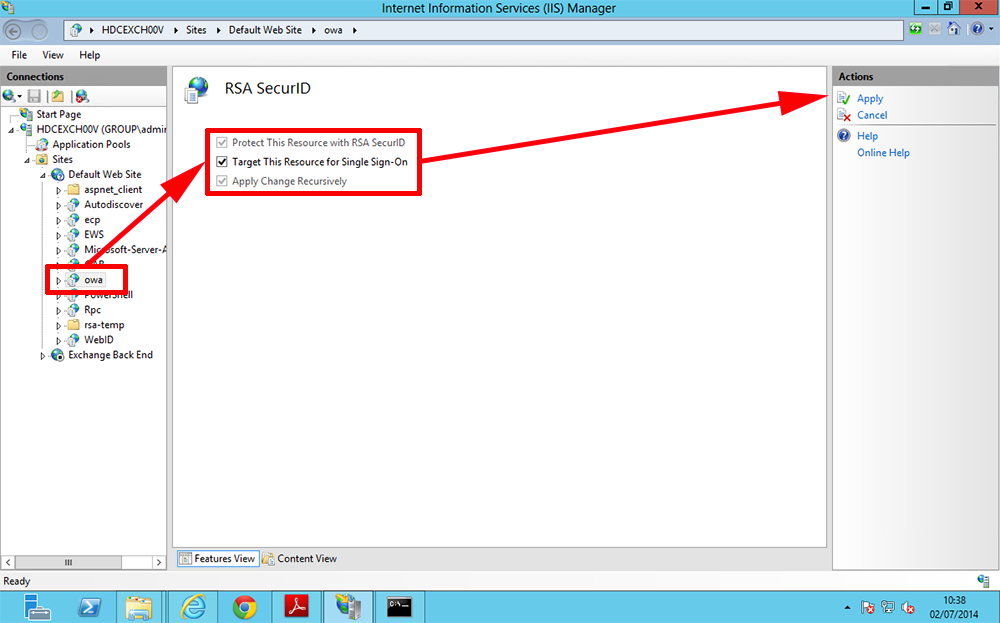
16. Select the OWA virtual directory > Select ‘Protect This Resource with RSA SecureID’ > Select ‘Target This Resource for Single Sign-On’ > Apply.
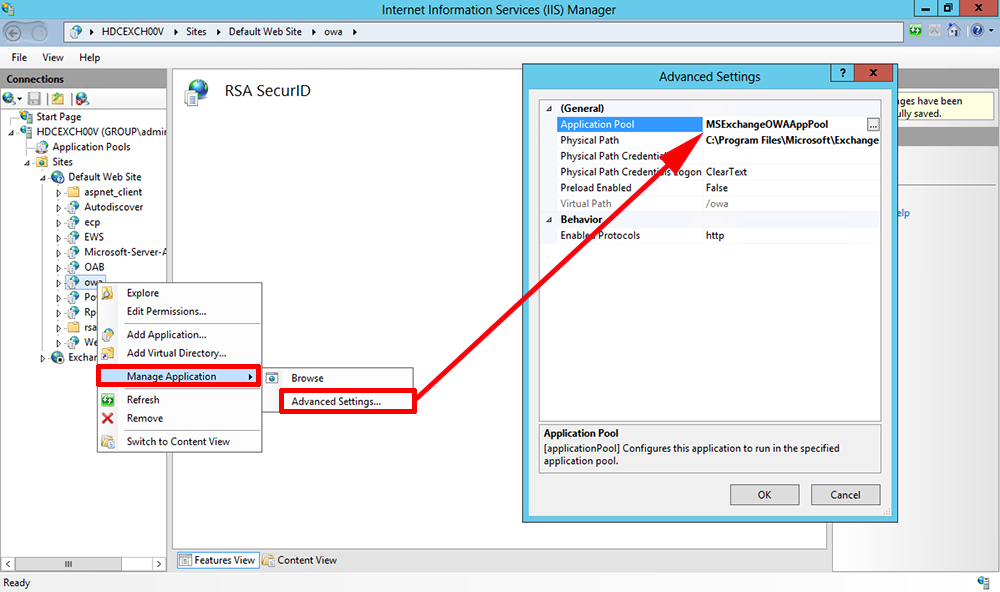
17. Right Click OWA > Manage Application >
Advance Settings > Ensure the Application Pool is set to MSExchangeOWAAppPool.
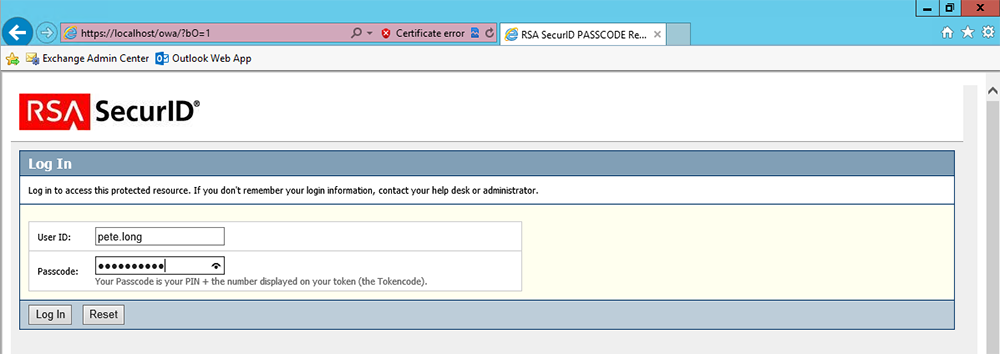
18. Right Click WebID > Manage Application > Advance Settings > Ensure the Application Pool is set to RSA SecureID Pool.

19. Once again restart the IIS service.
20. Back in the Security Console of the RSA appliance > Access > Authentication Agents > Add New.
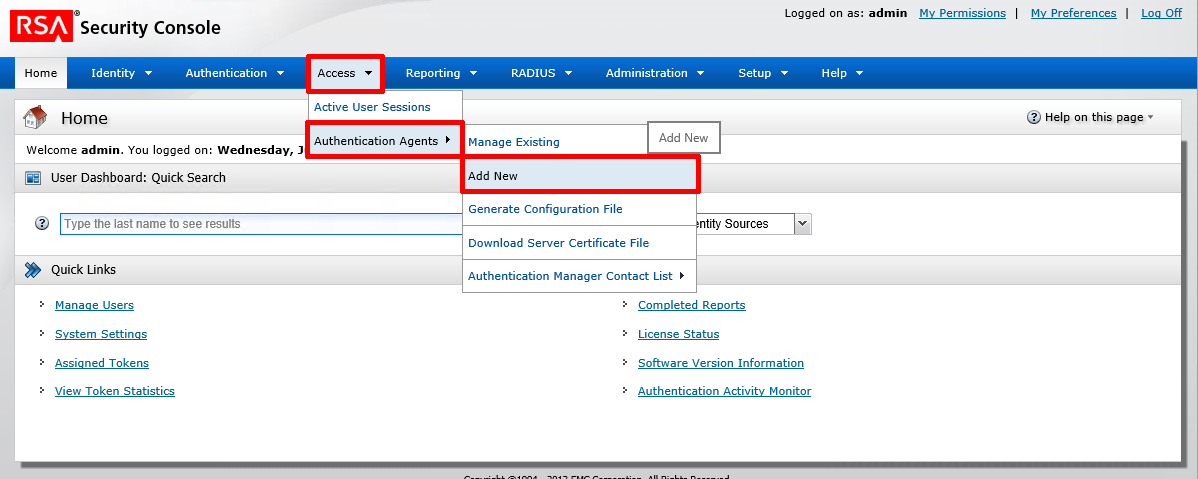
21. Enter the Exchange server details > Set the Agent Type to Web Agent > Save.

22. Hopefully it should go green and look like this.

23. Now when you connect to OWA instead of the usual log on screen you should see this, enter your domain username and your SecureID pass-code.
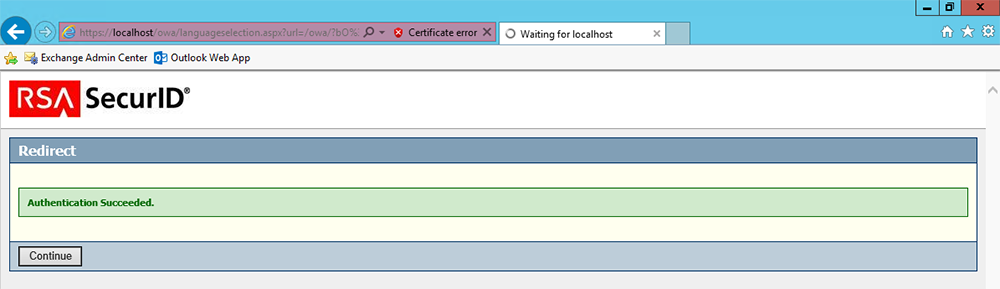
24. Once authentication has succeeded > Continue > and you will be logged into OWA.
Related Articles, References, Credits, or External Links
NA