
KB ID 0000942
Problem
For network identification I have tended to use RADIUS (in a Windows NPS or IAS flavour), in the past. I turned my back on Cisco TACACS+ back in my ‘Studying for CCNA’ days, because back then it was clunky and awful. I have a client that will be installing ACS in the near future, so I thought I would take a look at it again, and was surprised at how much more polished it is. As Cisco plans to roll ACS into Cisco ISE in the future, I’m not sure if it will remain as a separate product. So we may find people using version 5 for a long time yet.
Solution
I’m deploying ACS version 5.5 as a virtual appliance, remember to give it at least 60GB of hard drive or the install will fail. If you are installing on VMware workstation, choose the ‘I will install the operating system later’ option and manually present the CD image or it will also fail.
When you have run through the initial setup on the appliance it will set;
- Hostname.
- IP Address.
- Subnet Mask.
- Default Gateway.
- DNS Domain Name.
- DNS IP Address.
- Secondary DNS (if required).
- NTP Server IP address. (Ensure UDP port 123 is open or this will fail).
- Secondary NTP (if required).
- Timezone.
- Username.
- Password.
Then connect via a web browser (https);
- Username: ACSAdmin
- Password: default
1. Join the ACS appliance to your domain. Users and Identity Stores > External Identity Stores > Active Directory > Join/Test Connection > Enter Domain Credentials > Join.
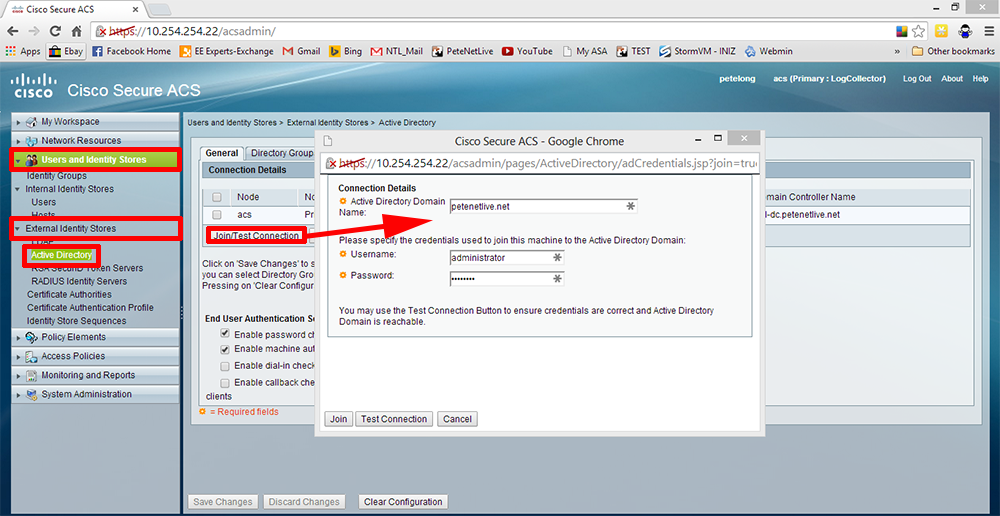
2. Be patient it can take a couple of minutes, wait till it says ‘Joined and Connected’.

3. Make sure you already have some groups in active directory that you want to grant access to, here I’ve got a full-access group and a read-only access group.
Note: I’m going to grant privilege level 15 to full-access, and privilege level 1 to read-only, (yes I know they can still escalate to configure terminal mode, but you can always restrict level 1 so it can only use the show command if you like).

4. Back in ACS > Directory Groups > Add > Add in your Groups > OK.

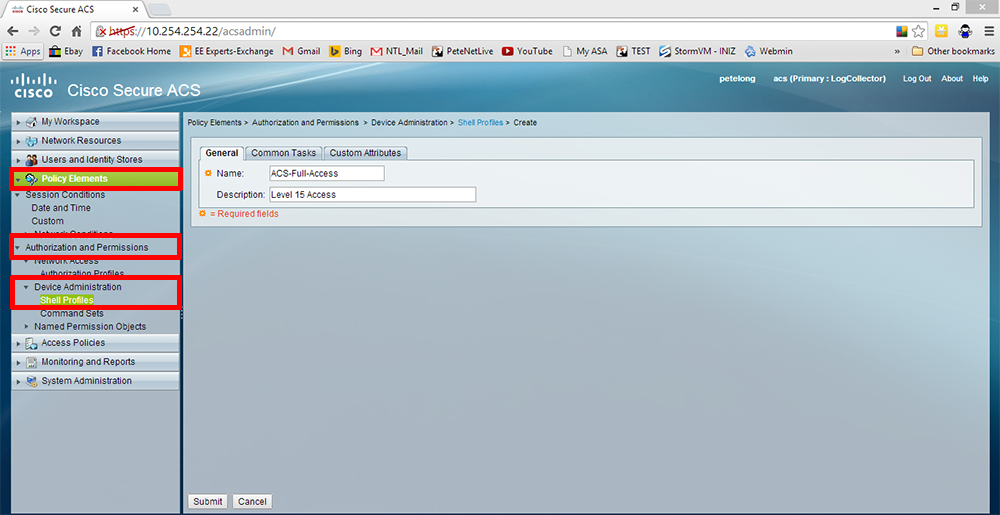
5. Create a Shell Policy: Policy Elements > Authorization and Permissions > Shell Profiles > Create > First create one for level 15 (full-access).
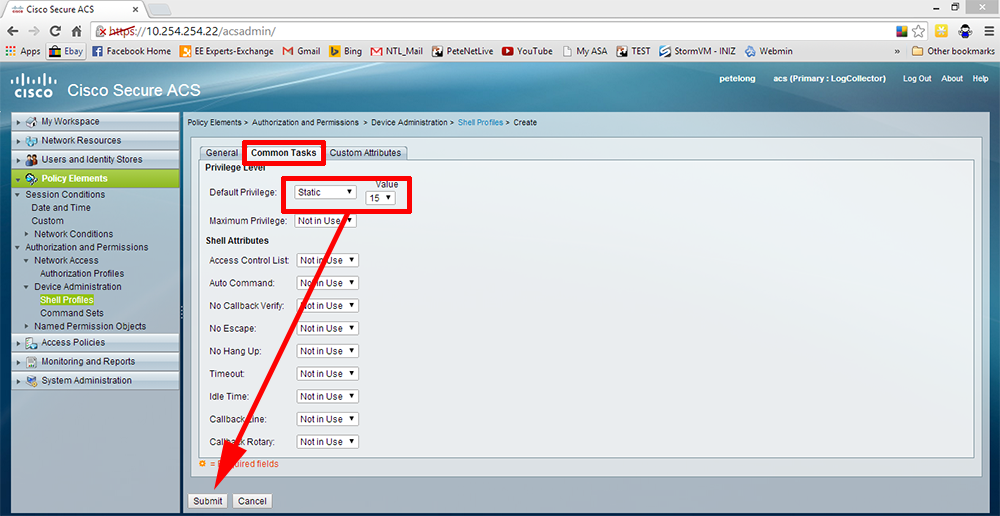
6. Common Tasks tab > Default Privilege > Static > 15 > Submit.
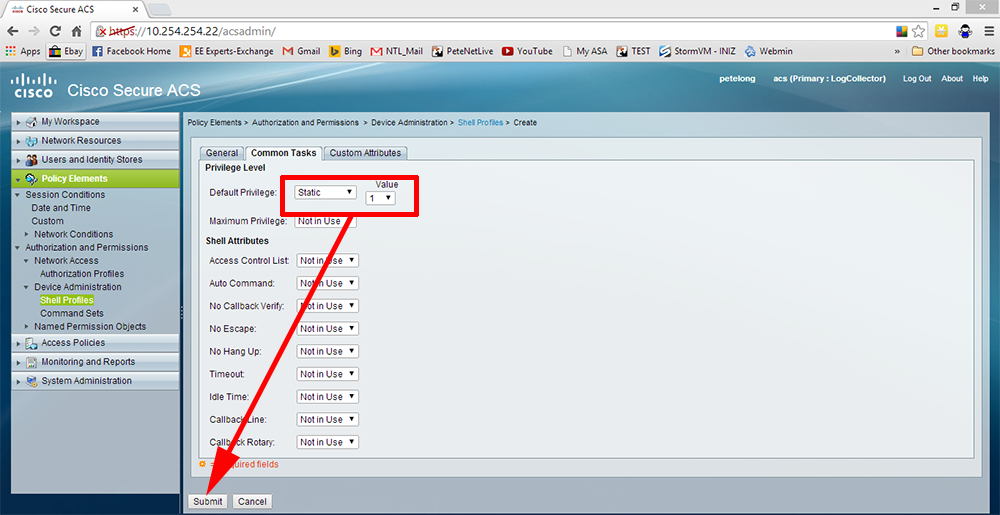
7. Then repeat to create a profile for read-only (level 1) access.
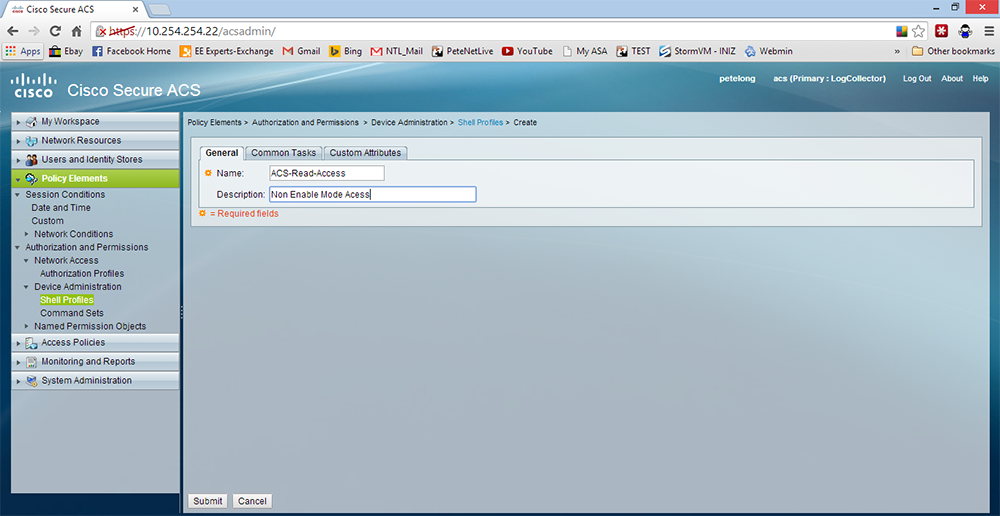
8. Common Tasks tab > Default Privilege > Static > 1 > Submit.
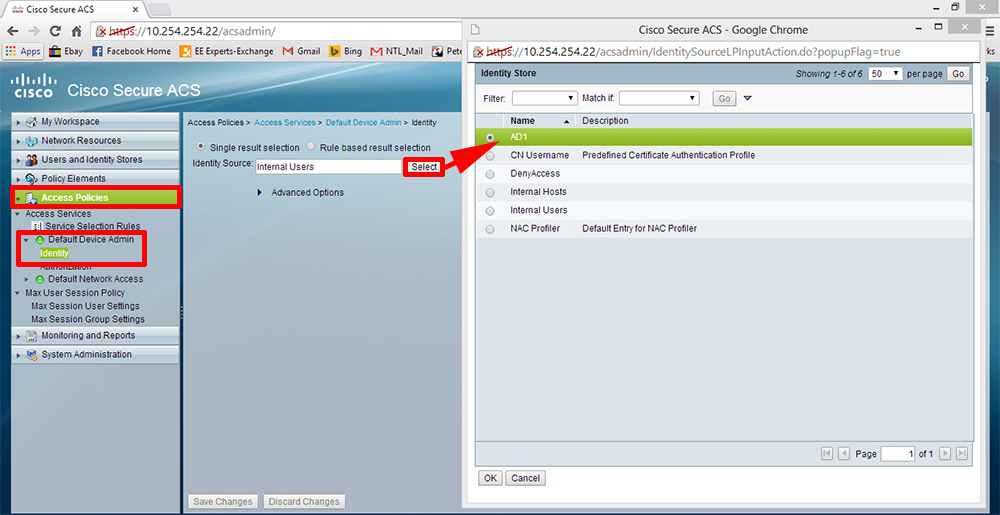
9. Access Policies > Access Services > Default Device Admin > Identity >Select > AD1 (this got created when you joined the domain earlier) > OK.
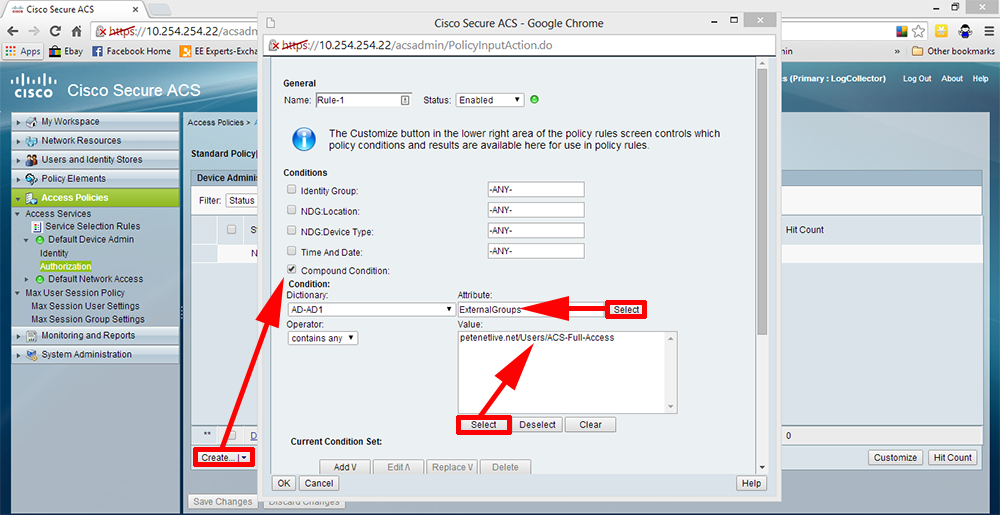
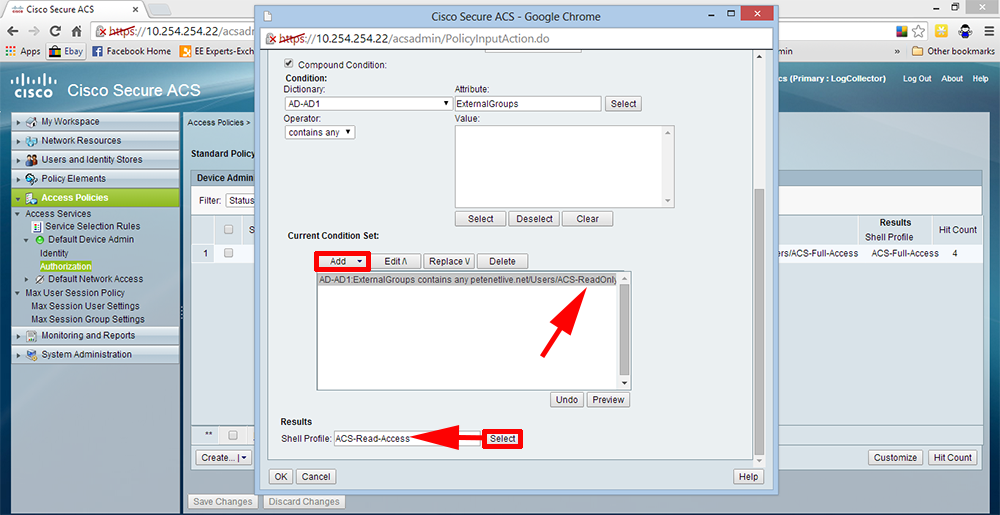
10. Access Policies > Access Services > Default Device Admin > Authorisation > Customise > Add ‘Compound Condition’ > OK.

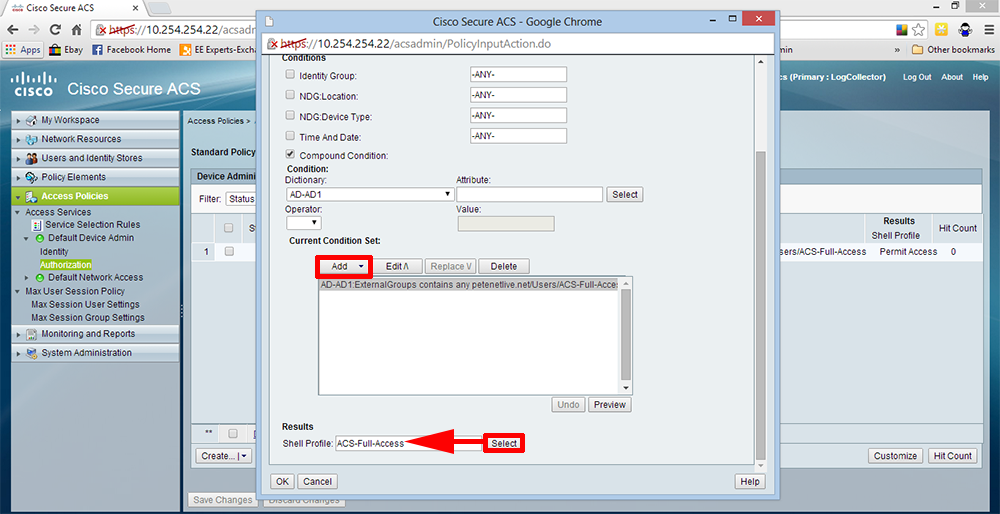
11. Create > Tick ‘Compound Condition’ > Select > ExternalGroups > Select your full-access group.
12. Add > Shell Profile > Select > Select the full-access profile > OK.
13. Repeat for the read-only group.

14. Set the shell profile to read-only access > OK.
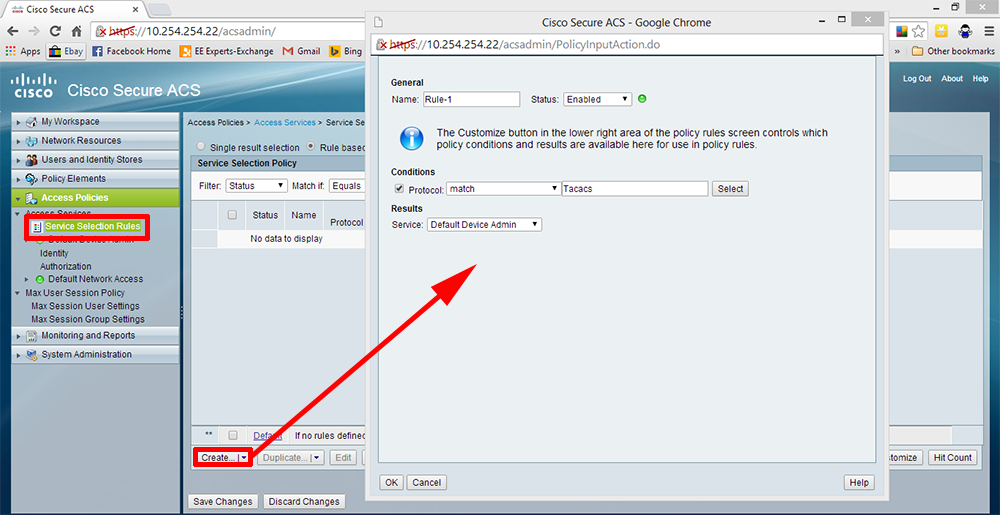
15. Access Policies > Service Selection Rules > Create > Set to Match Protocol TACACS > Set the service to Default Device Admin > OK.
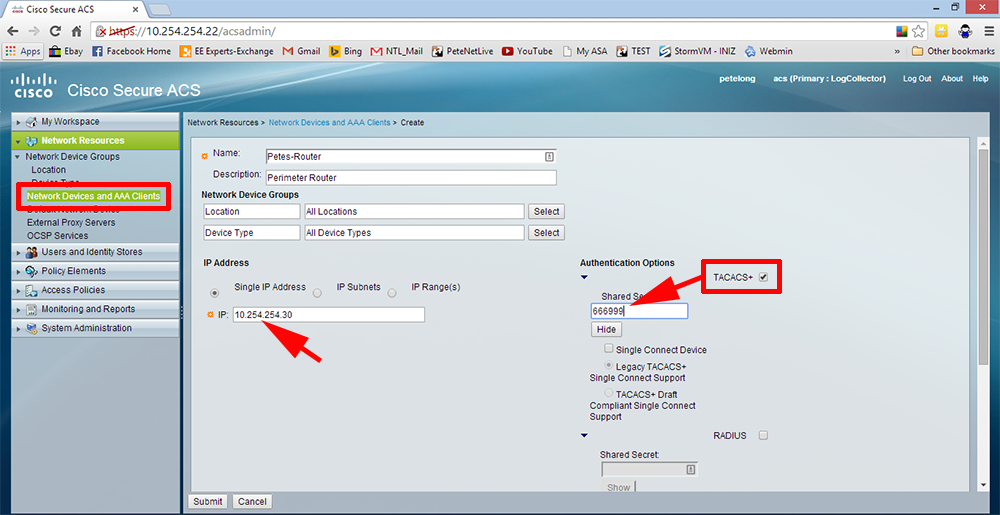
16. Network Resources > Network Devices and AAA Clients > Enter the details of your Cisco device and set a shared key, (here I’m using 666999) > Submit.
17. Make the necessary changes on your Cisco devices, like so;
Cisco IOS TACACS+ Config
Petes-Router#configure terminal
Enter configuration commands, one per line. End with CNTL/Z.
Petes-Router(config)#aaa new-model
Petes-Router(config)#aaa authentication login default group tacacs+ local
Petes-Router(config)#aaa authorization exec default group tacacs+ local
Petes-Router(config)#aaa authorization console
Petes-Router(config)#tacacs-server host 10.254.254.22
Petes-Router(config)#tacacs-server key 666999
Petes-Router(config)#end
Petes-Router#
*Mar 1 00:10:24.691: %SYS-5-CONFIG_I: Configured from console by console
Petes-Router#write mem
Building configuration...
[OK]
Petes-Router#
Cisco ASA 5500 (and Next Generation) TACACS+ Config
Petes-ASA# configure terminal
Petes-ASA(config)# aaa-server PNL-AAA-TACACS protocol tacacs+
Petes-ASA(config-aaa-server-group)# aaa-server PNL-AAA-TACACS (inside) host 10.254.254.22
Petes-ASA(config-aaa-server-host)# key 666999
Petes-ASA(config-aaa-server-host)# exit
Petes-ASA(config)#

-=-=-=-=-Authentication-=-=-=-=-
ASDM Authentication

Petes-ASA(config)# aaa authentication http console PNL-AAA-TACACS LOCAL
Console Authentication

Petes-ASA(config)# aaa authentication serial console PNL-AAA-TACACS LOCAL
SSH Authentication

Petes-ASA(config)# aaa authentication ssh console PNL-AAA-TACACS LOCAL
Telnet Authentication

Petes-ASA(config)# aaa authentication telnet console PNL-AAA-TACACS LOCAL

Enable Mode Command Protection Authentication

Petes-ASA(config)# aaa authentication enable console PNL-AAA-TACACS LOCAL
-=-=-=-=-Authorisation-=-=-=-=-

Petes-ASA(config)# aaa authorization command PNL-AAA-TACACS LOCAL
Petes-ASA(config)# privilege show level 5 mode configure configure command aaa

<repeat as necessary - Note: Turn it on with the ASDM with command preview enables and you can copy paste all the commands out and edit them accordingly>
-=-=-=-=-Accounting-=-=-=-=-

Petes-ASA(config)# aaa accounting command PNL-AAA-TACACS
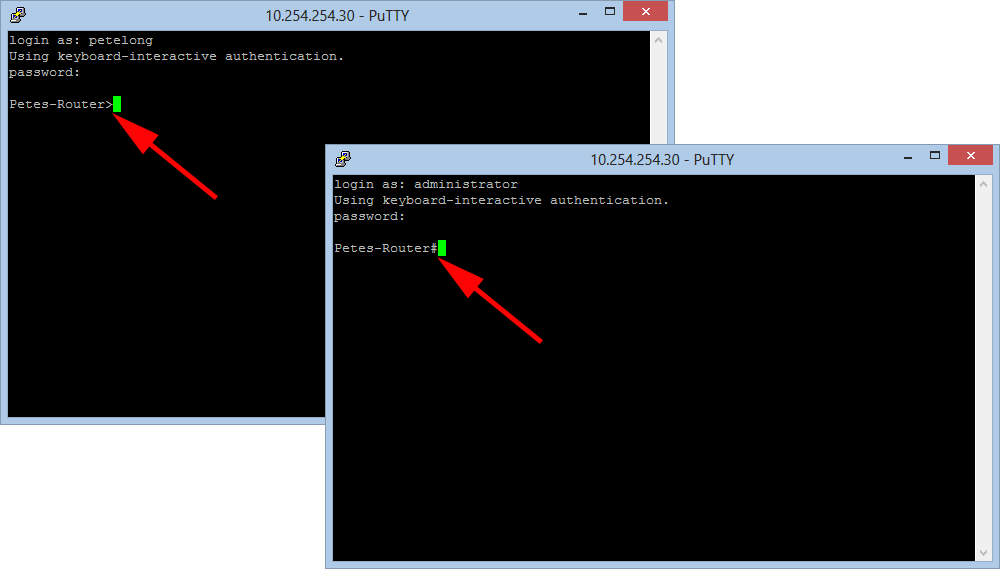
18. Now you can test, here I connect as a user with read-only access (Note: I have a greater than prompt, I’m in user EXEC mode). Then when I connect as a full-access user (Note: I have a hash prompt. I’m in privileged EXEC mode).

19. The results are the same if I connect via SSH.
Enabling TACACS+ Though a Firewall
Sometimes, e.g. you have a switch in a DMZ or a router outside your firewall that you want to secure with TACACS. To enable this you simply need to open TCP port 49, from the device you are securing with TACACS to the ACS server.
Related Articles, References, Credits, or External Links
JunOS – Using TACACS+ With Cisco ACS