
KB ID 0000899
Problem
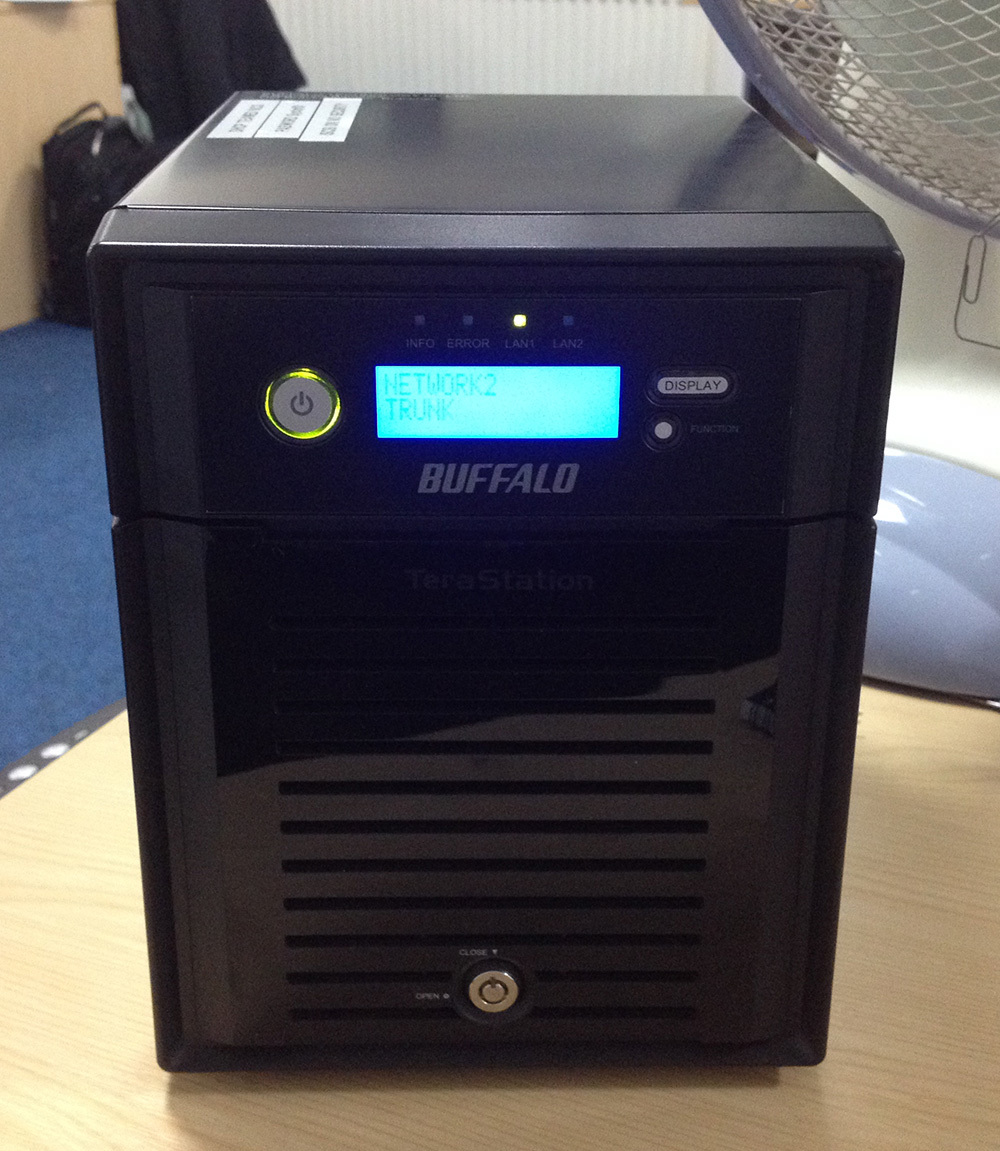
This little NAS box is a cheap way of adding a large amount of storage. Below I’m going to configure it as an iSCSI target, then connect my ESX5 host to it.
I’m not setting up any CHAP authentication, but I’ll show you where it’s configured, if you want to deploy yours a little more securely.
Also it’s considered good practice to separate your storage network traffic, from your actual network traffic (either physically or via VLANs). Here I’m also NOT doing that.
Solution
Initial Configuration of the TS5000
If you connect either of the NAS box’s NICs to your network they will pick up an IP address via DHCP (You will see it in your DHCP leases).
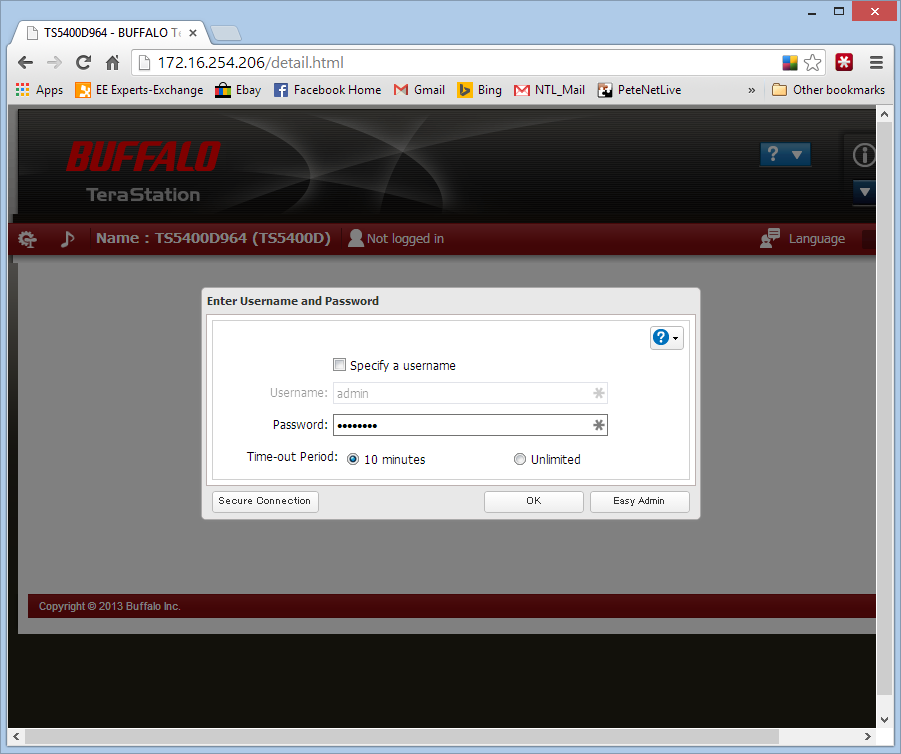
1. Connect to the NAS with a web browser, the default password is ‘password’.
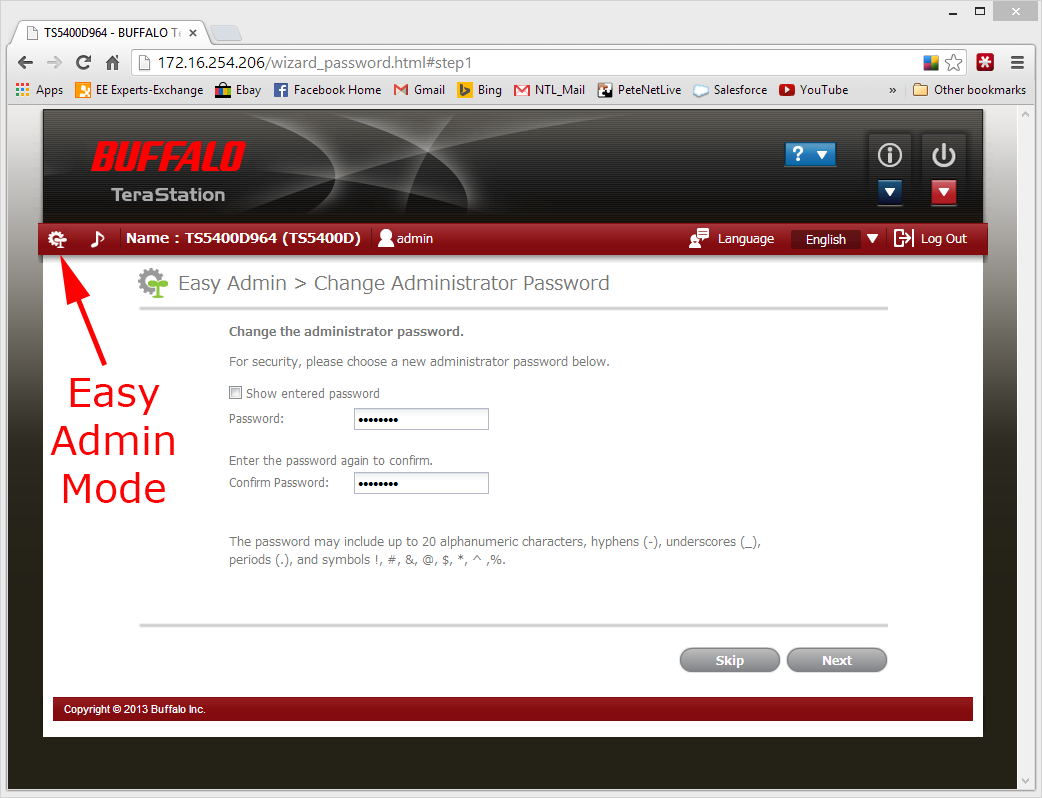
2. To change the default password: Enter Easy Admin mode > Reset Password > Follow the instructions.
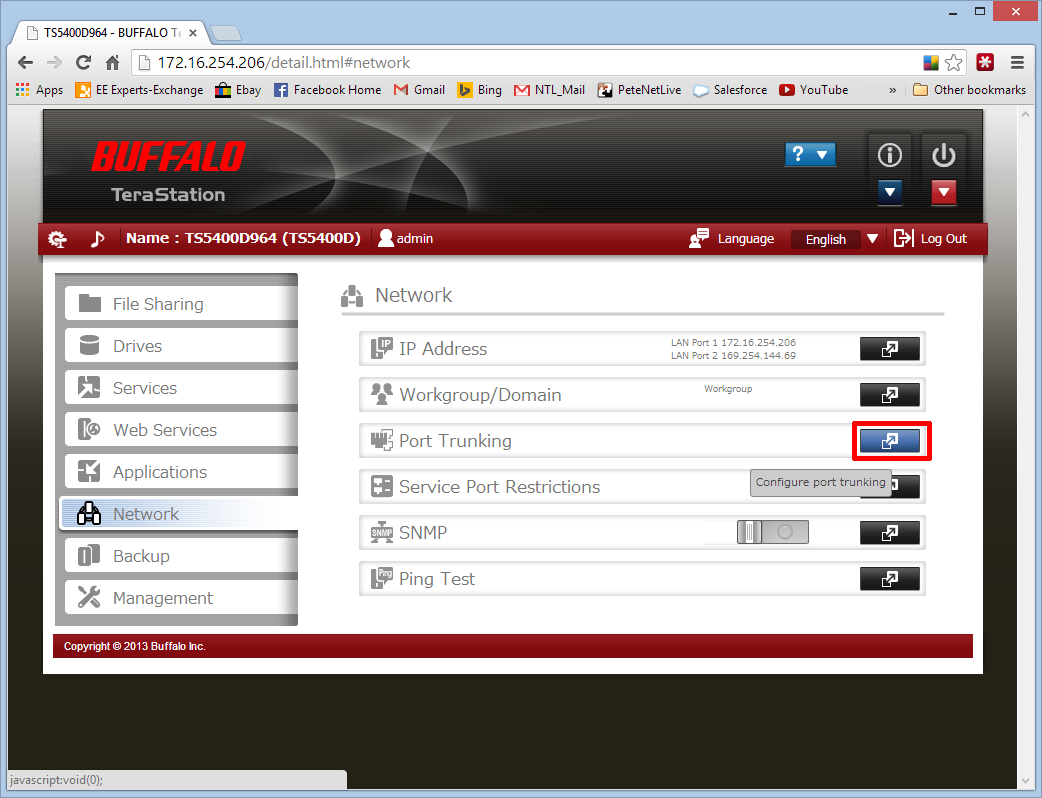
3. Team / Trunk The NICs: You can have each NIC with its own IP address, but I prefer to aggregate them > Network > Port Trunking > Configure port trunking.
4. Select ‘Link 1’.

5. Select All > Assign.
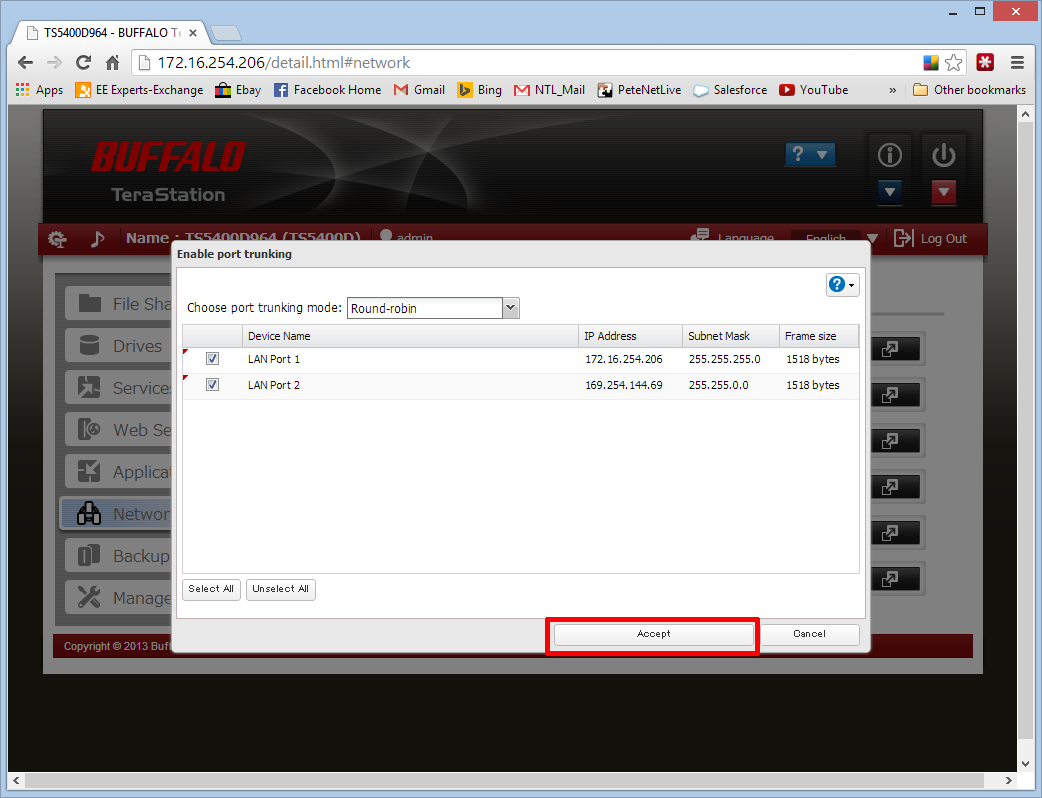
6. It may take a few seconds.

Configure iSCSI
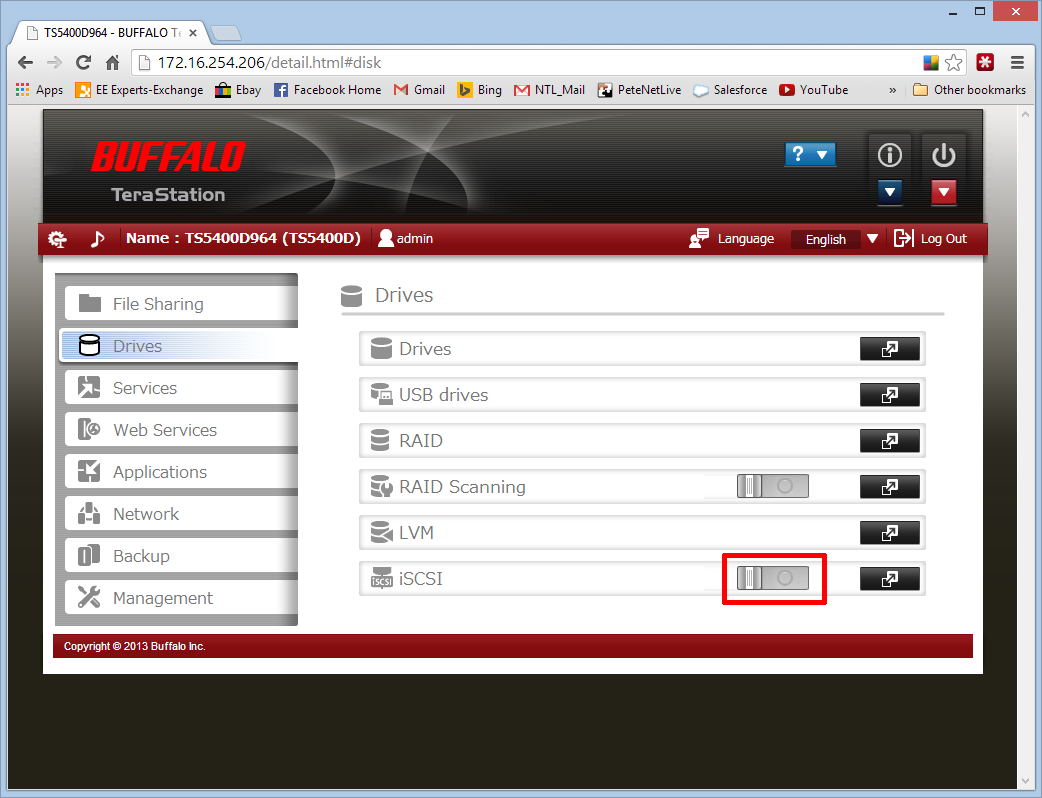
7. First enable iSCSI > Drives > iSCSI > Click the switch to enable.
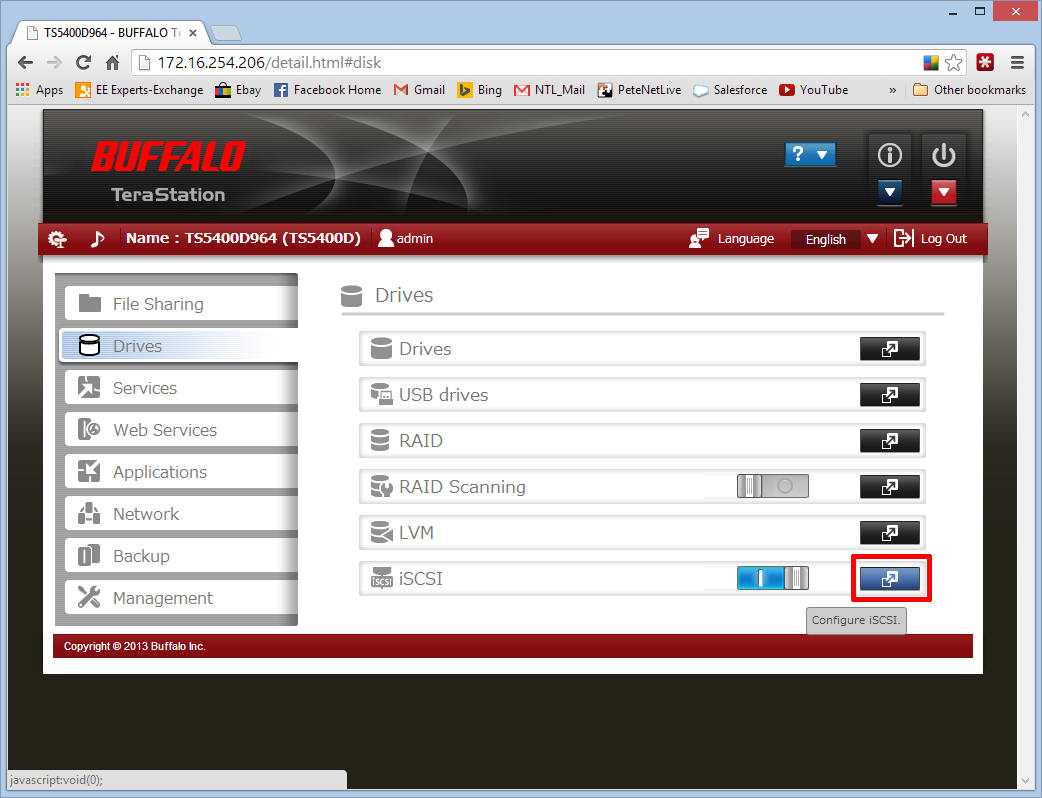
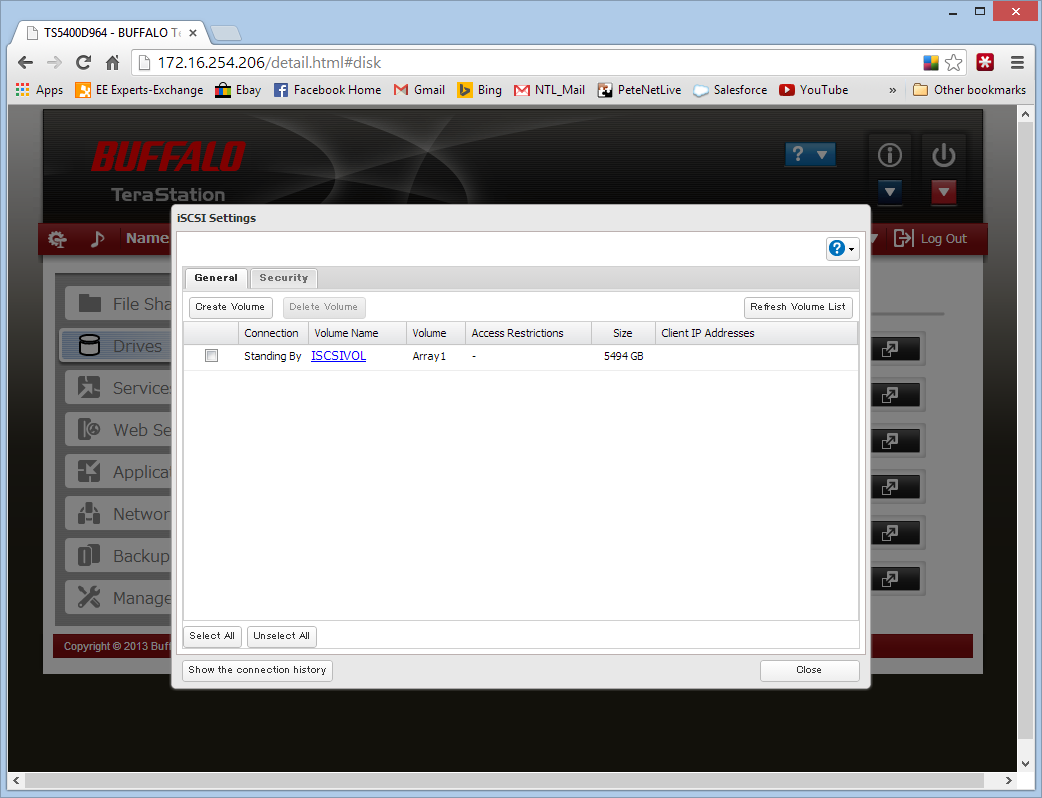
8. Configure iSCSI
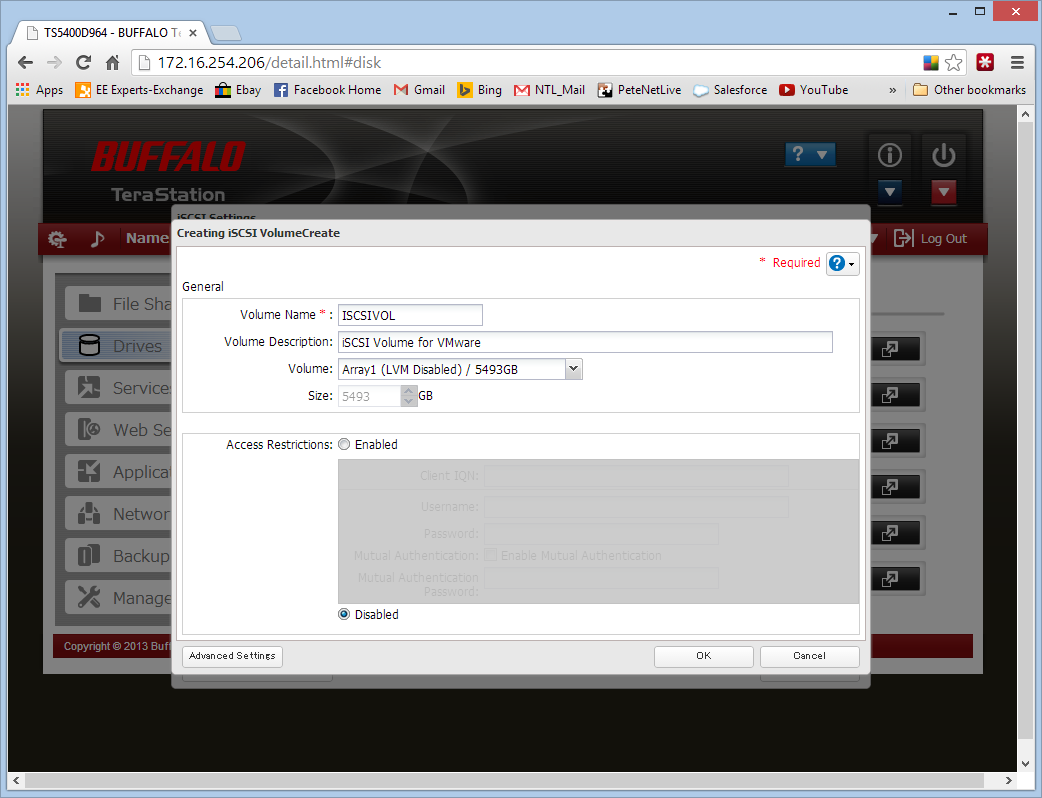
9. Create Volume.
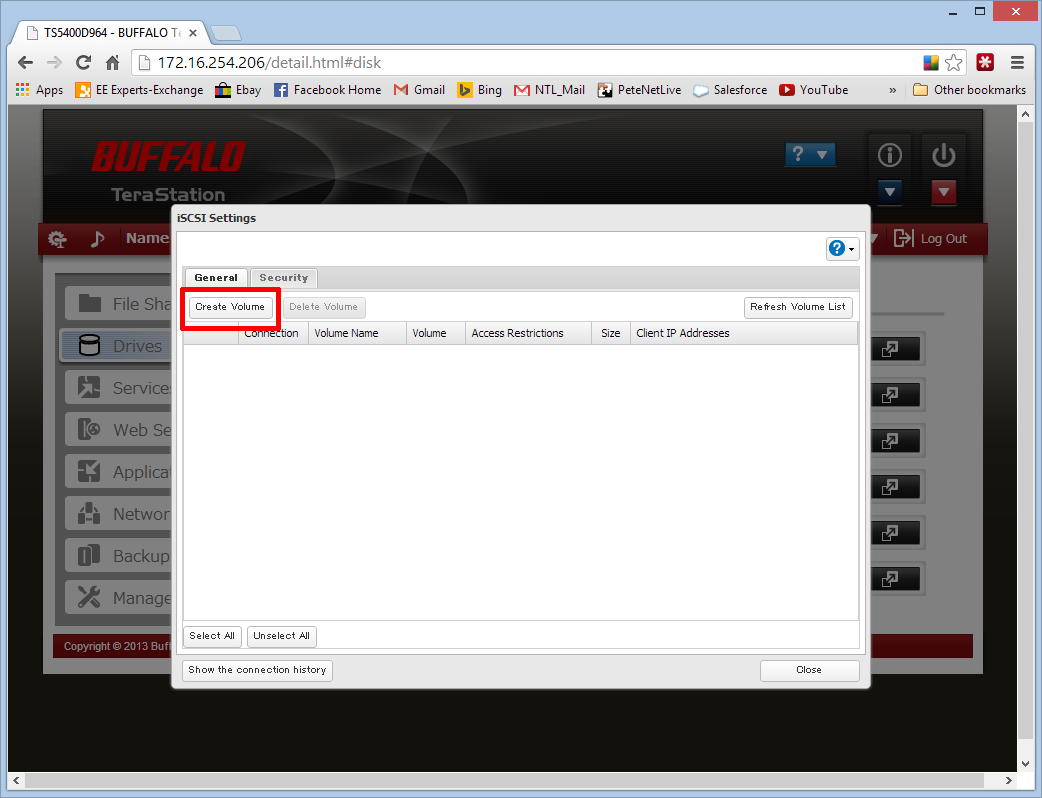
10. Give the volume a name, description, and specify the volume size > OK.
Note: If you wanted to configure authentication select enabled, and set accordingly.
11. Enter the numbers as requested > OK.
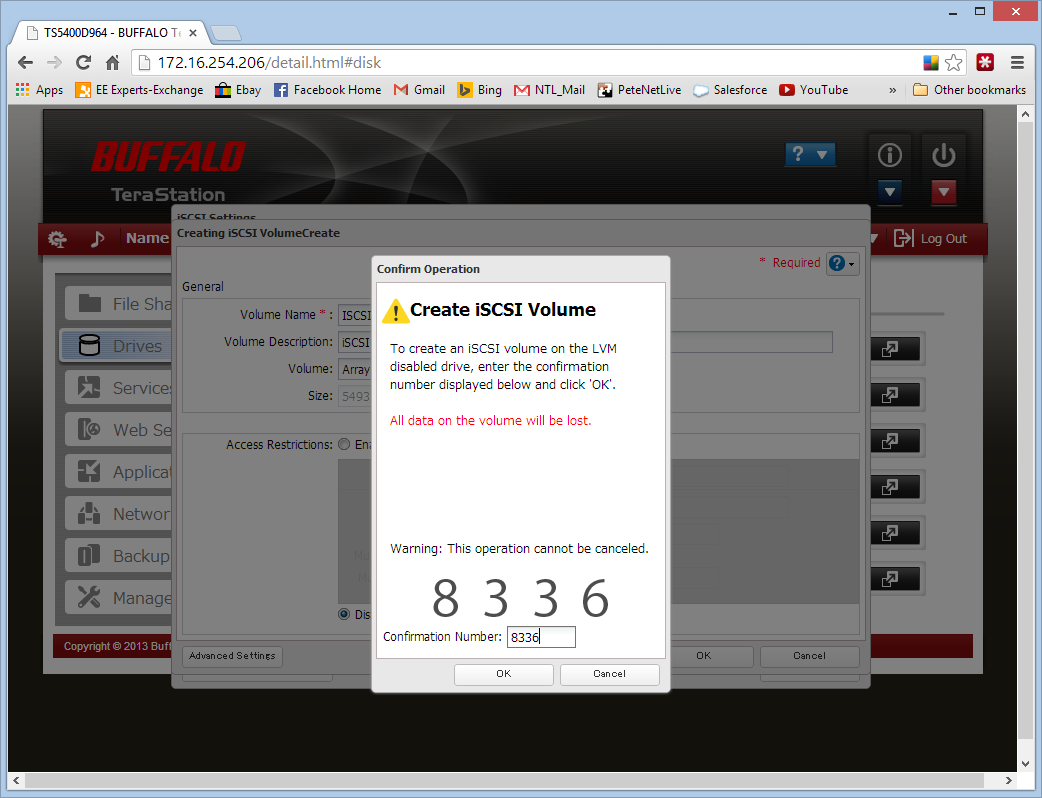
12. This can take a couple of minutes also.
Configure ESX For iSCSI
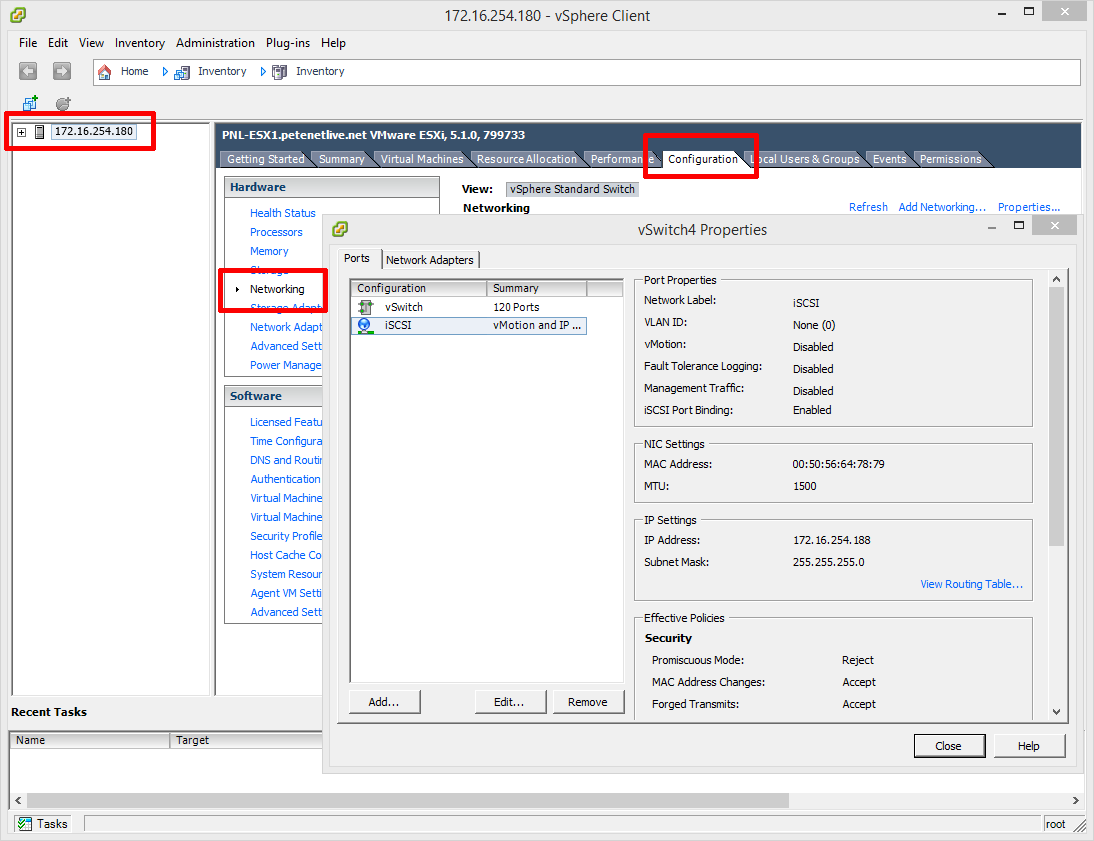
13. Connect to either your ESX host or vCenter > Select a host > Configuration > Networking > Add Networking > Create a new vSwitch > Add a VMkernel port group (called iSCSI or something sensible) > Assign a free NIC, and give it an IP address on the same range as the NAS box.
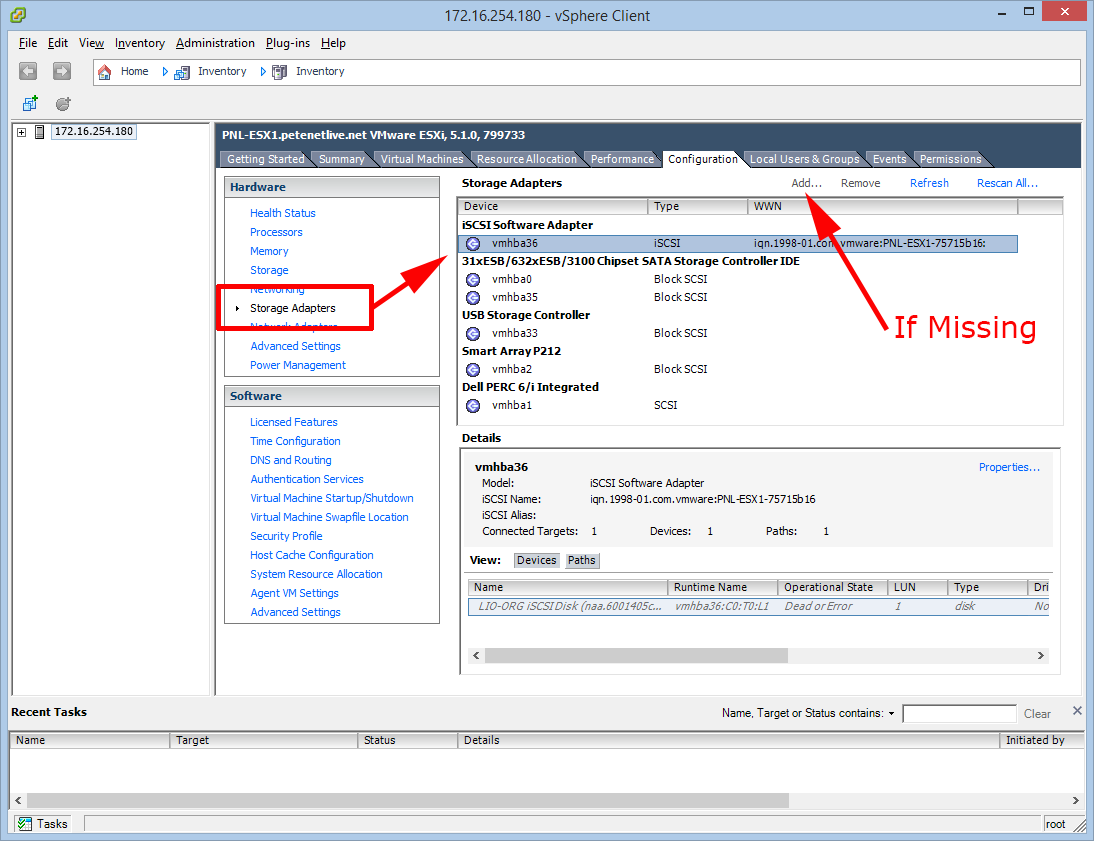
14. Storage Adaptors > If you do not see any, select ‘Add’ and add in a software iSCSI Adapter.
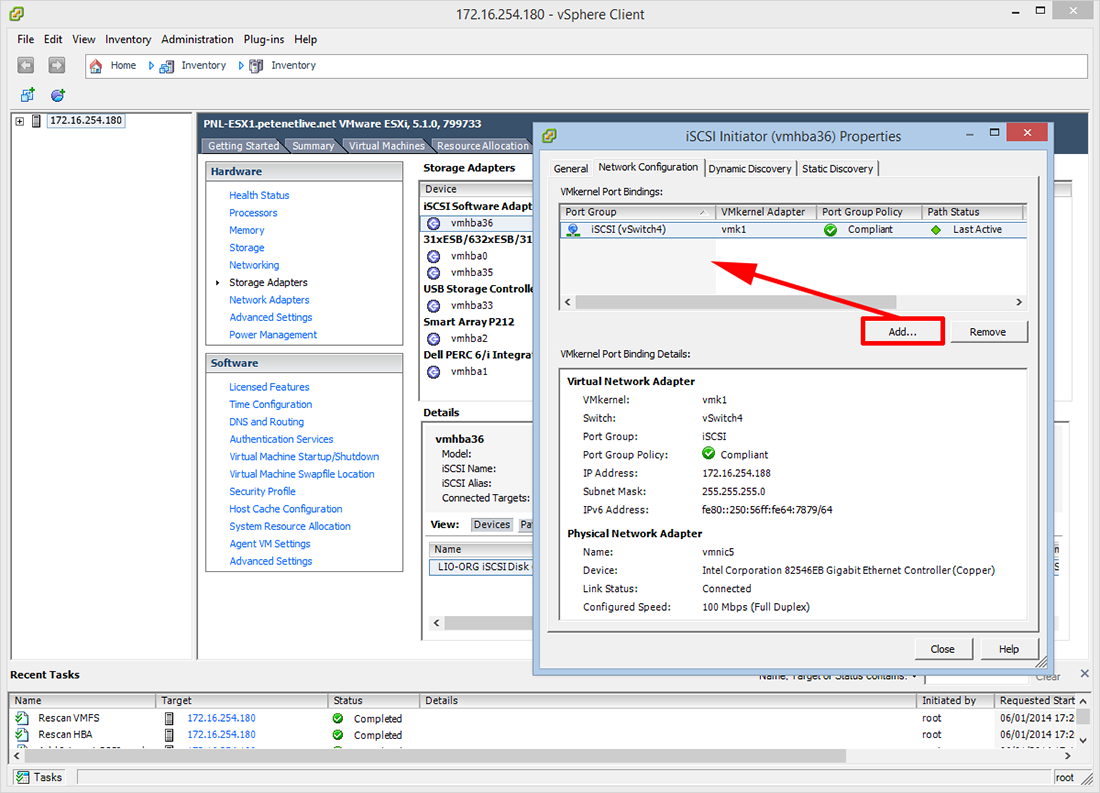
15. Right click your iSCSI Adapter > Network configuration > Bind it to the port group you created in step 13.
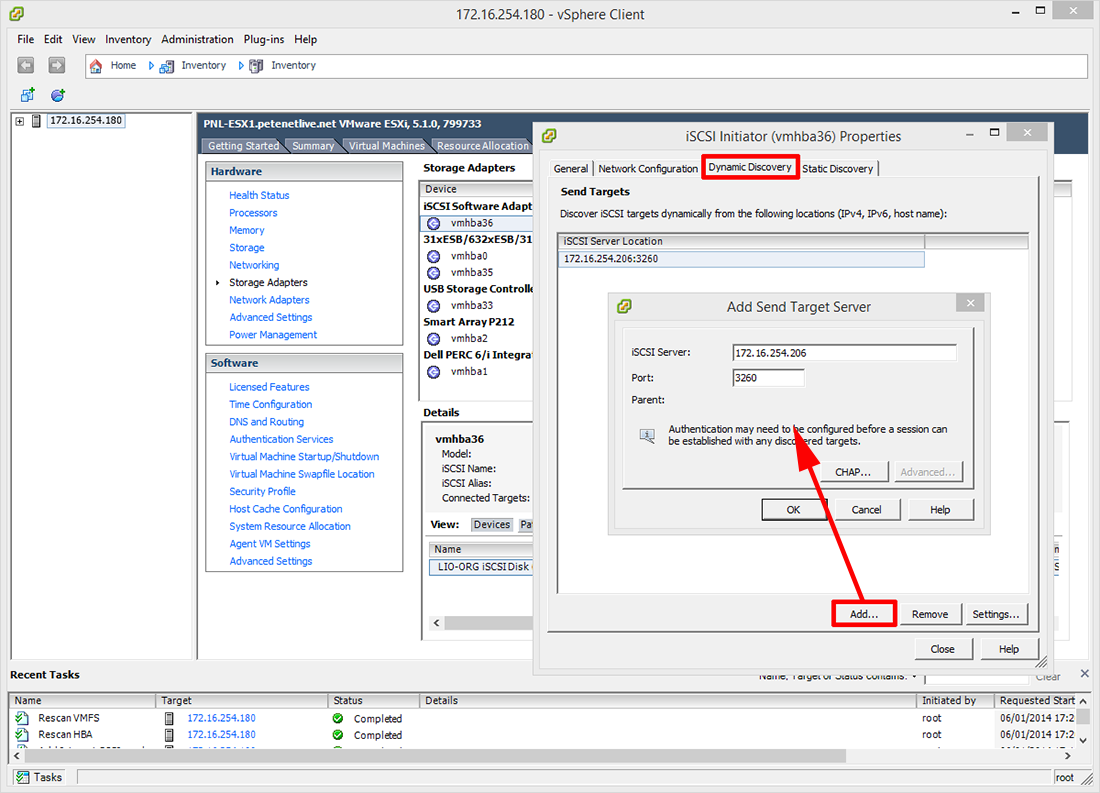
16. Then on either the Dynamic or the Static discovery tab, enter the IP address of the NAS box.
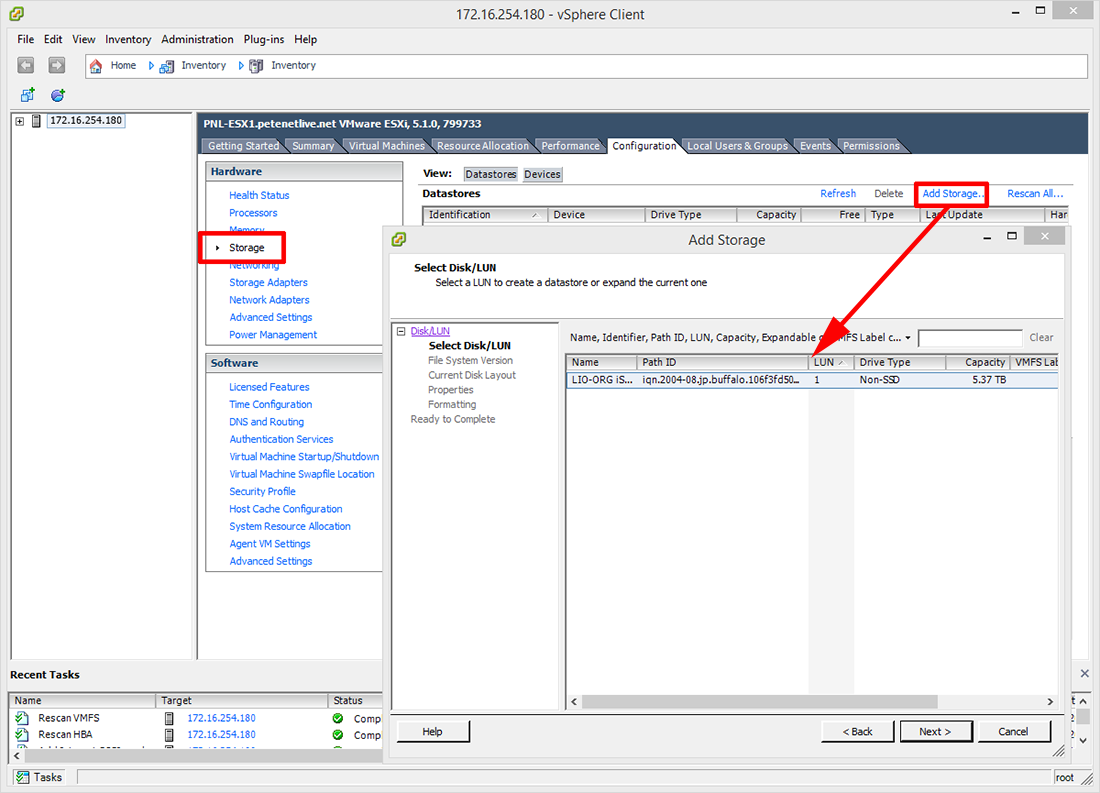
17. Storage > Add Storage > Disk/LUN > Select the iSCSI storage > Follow the instructions.
18. Repeat the process on your remaining ESX hosts. (Note: You will only need to create the VMFS volume(s) for the first one).
Related Articles, References, Credits, or External Links
Cisco Small Business (SG500) Link Aggregation (LAG) With LACP