
KB ID 0000830
Problem
Setting up split DNS is something I usually do if I’m setting up a new Microsoft Exchange Server. Primarily this is because of certificates that are used on the Exchange Server like so;
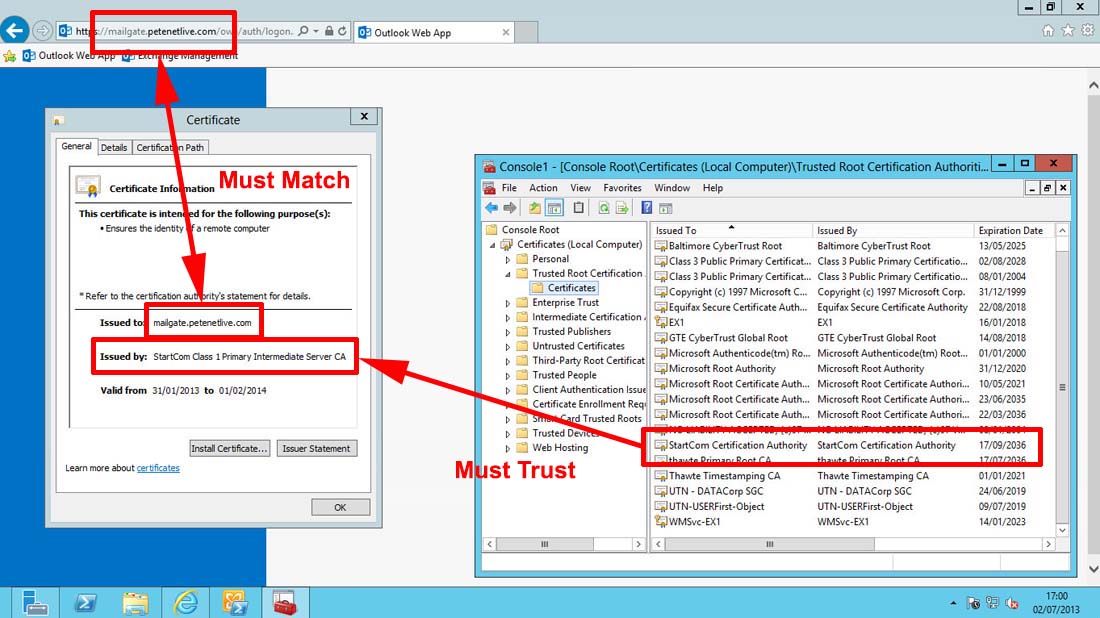
Now, as anyone who has purchased a Universal Comms/SAN (Subject Alternative Name) certificate will know that you can put the internal name of the server on the certificate as well e.g. ex1.abc.local.
Well that’s fine, but after 1st November 2015 you can no longer put a domain name on a certificate that you are not the registered owner of. As a lot of them are things like domainname.local or even worse, a domain name that is registered externally to someone else! then you CAN’T PURCHASE THEM.
Here’s the official line;
“As of the Effective Date of these Requirements, prior to the issuance of a Certificate with a Subject Alternative Name (SAN) extension or Subject Common Name field containing a Reserved IP Address or Internal Server Name, the CA shall notify the Applicant that the use of such Certificates has been deprecated by the CA / Browser Forum and that the practice will be eliminated by October 2016. Also as of the Effective Date, the CA shall not issue a certificate with an Expiry Date later than 1 November 2015 with a SAN or Subject Common Name field containing a Reserved IP Address or Internal Server Name. As from 1 October 2016, CAs shall revoke all unexpired Certificates.”
Solution
So you can either setup split DNS, or setup your own domain CA and start issuing different certificates for different roles, i.e. have a self signed certificate with the local server name on it for the Exchange Mailbox role.
Split DNS – Option 1 (Handy for a single (or few) URLS
Note: Thanks to Scott Bauer
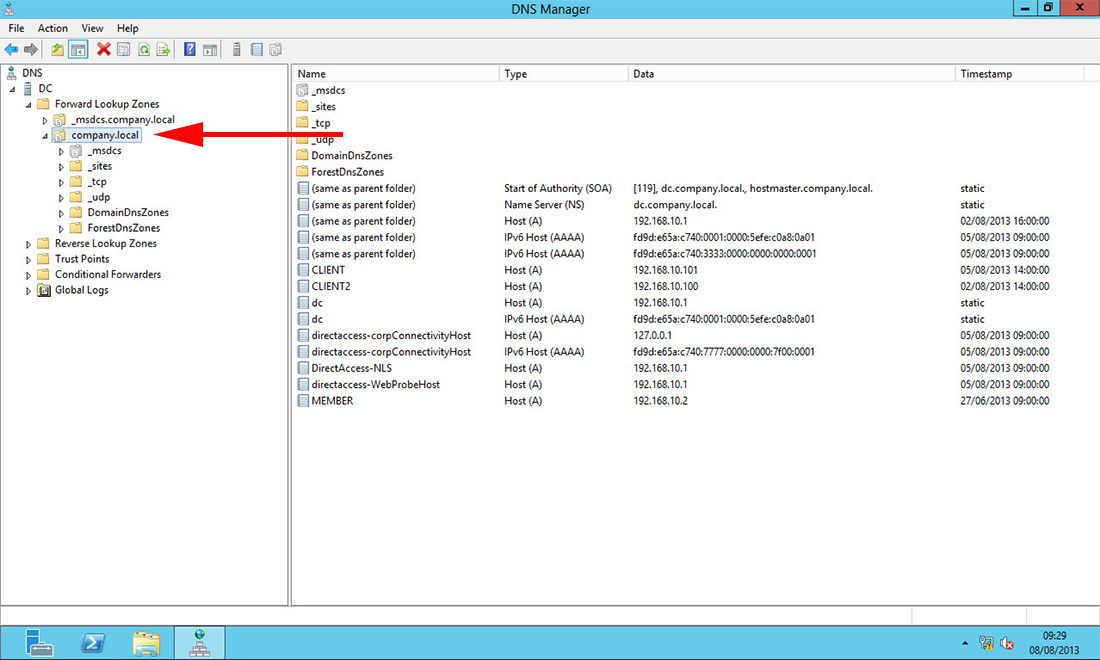
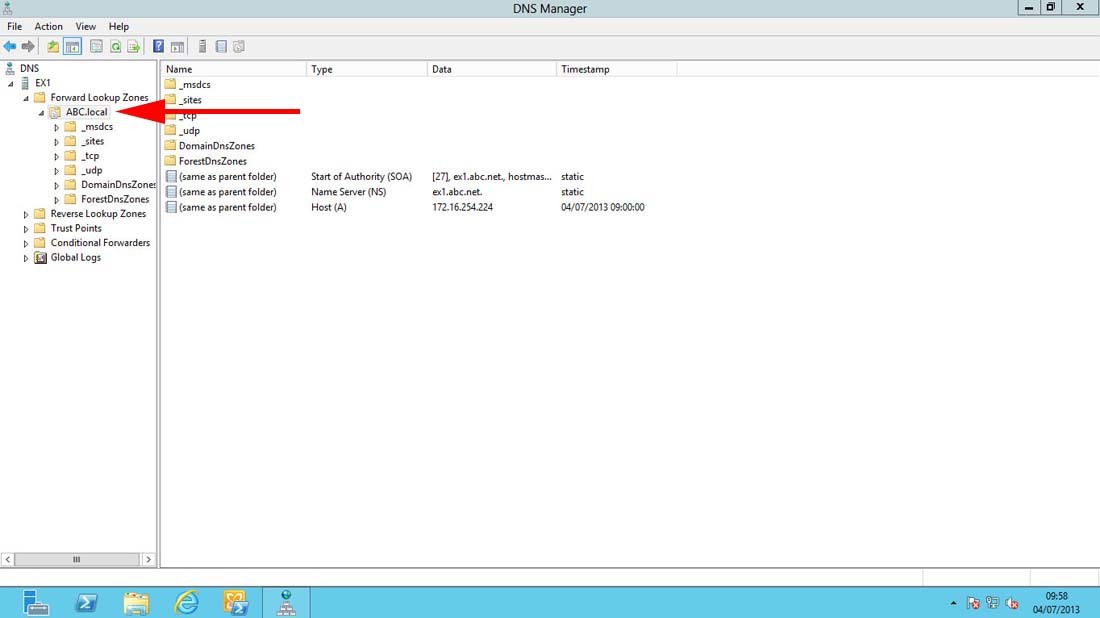
1. On the DNS Server > Windows Key +R > dnsmgmt.msc. Here you can see I’ve got an unregistered domain name that I’m using internally (company.local).
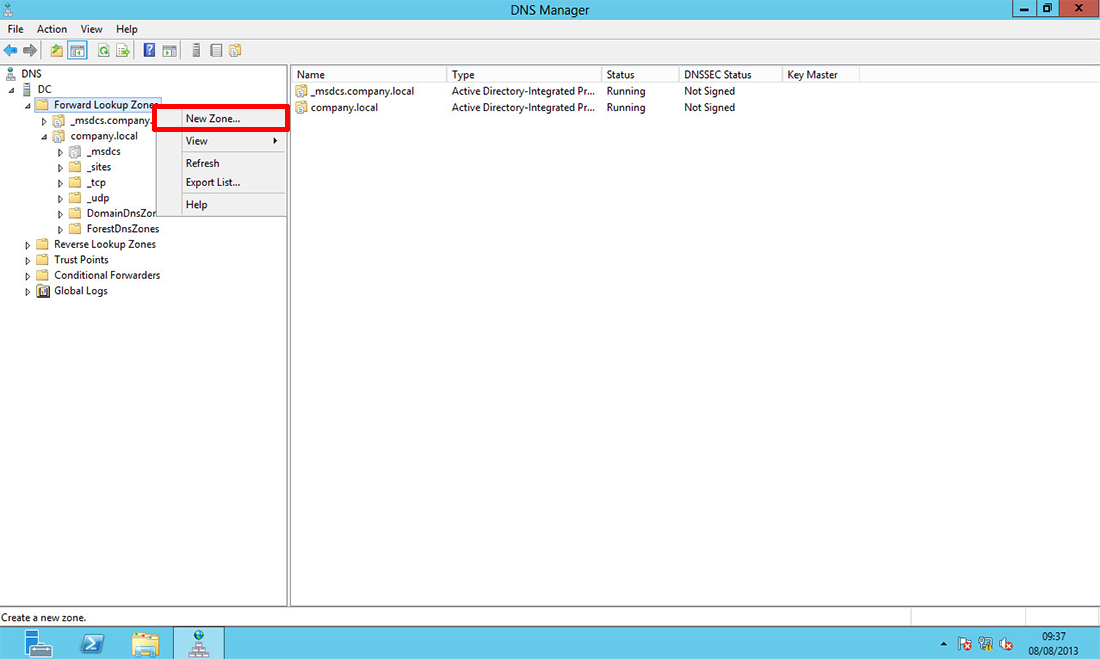
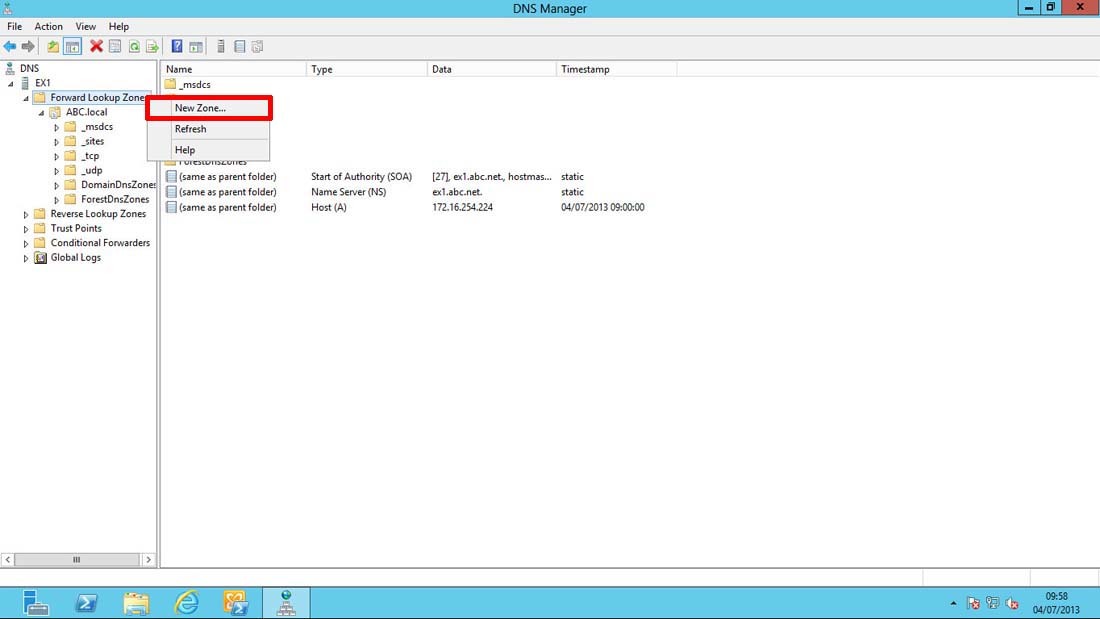
2. Right click ‘Forward Lookup Zone’ > New Zone.
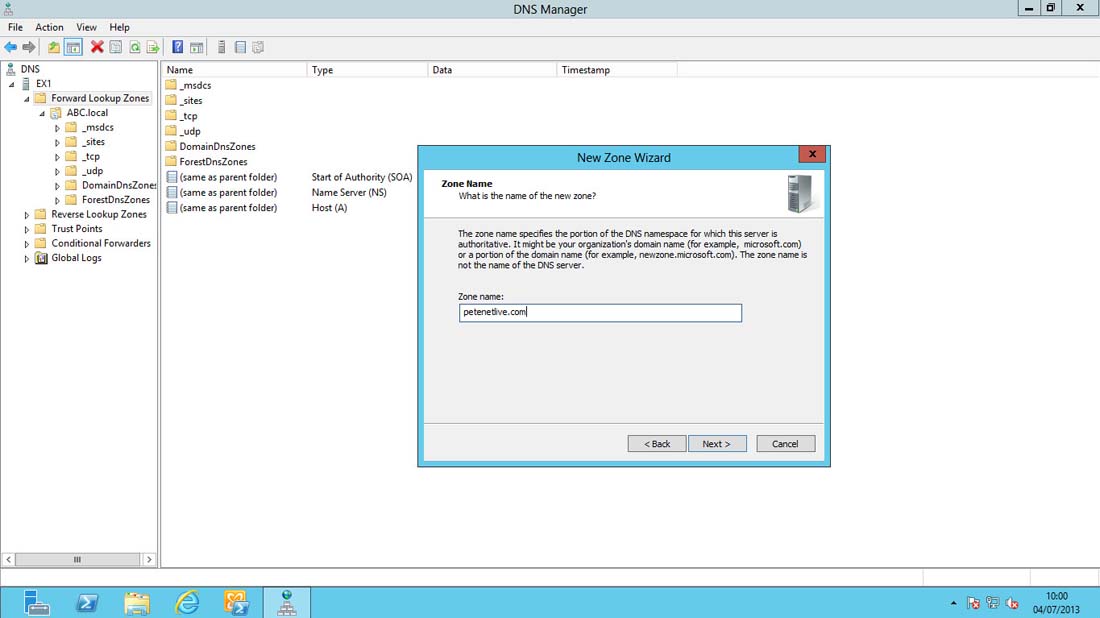
3. Next > Primary Zone > Next > To all DNS servers on domain controllers in this domain > Next > Type in the Zone name > Next > Allow only secure… > Next > Finish.
Note: The Zone name should be the FULL NAME that is the common name on your certificate, i.e: On the certificate in the first diagram above the name is mailgate.petenetlive.com, so in that case the zone name would be mailgate.petenetlive.com.
Note: If its a website, it would be www.petenetlive.com, or an ftp site ftp.ptenetlive.com.

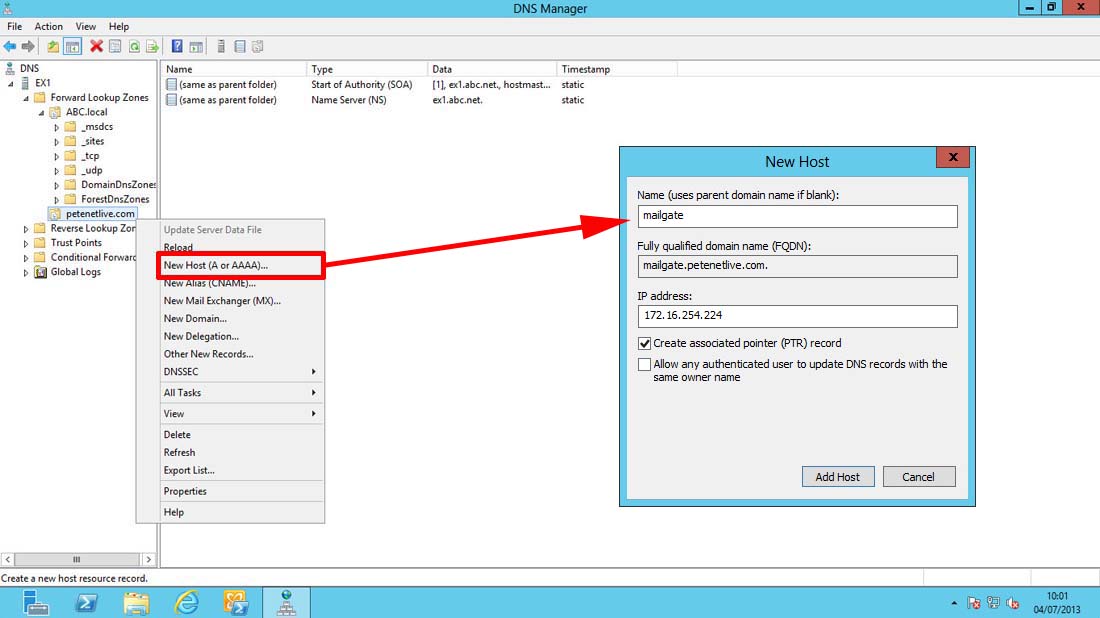
In your new domain zone create a ‘New Host (A or AAAA)’ record > LEAVE THE HOSTNAME BLANK > Enter its private/internal IP address > Add Host.
Note: Here I’ve got ‘Create associated pointer (PTR) record ticked, if you do the same, and do not have a reverse lookup zone configured, you will get an error, don’t panic.
Split DNS – Option 2 (Handy if you have many URL’s)
1. On the DNS Server > Windows Key +R > dnsmgmt.msc. Here you can see I’ve got an unregistered domain name that I’m using internally (abc.local).
2. Right click ‘Forward Lookup Zone’ > New Zone.
3. Next > Primary Zone > Next > To all DNS servers on domain controllers in this domain > Next > Type in the Zone name > Next > Allow only secure… > Next > Finish.
Note: The Zone name is the public registered domain name that is on your certificate, i.e: On the certificate in the first diagram above the name is mailgate.petenetlive.com, so in that case the zone name would be petenetlive.com.
4. In your new domain zone create a ‘New Host (A or AAAA)’ record > Give it the host name on the certificate (in our example that would be mailgate) > Enter its private/internal IP address > Add Host.
Note: Here I’ve got ‘Create associated pointer (PTR) record ticked, if you do the same, and do not have a reverse lookup zone configured, you will get an error, don’t panic.
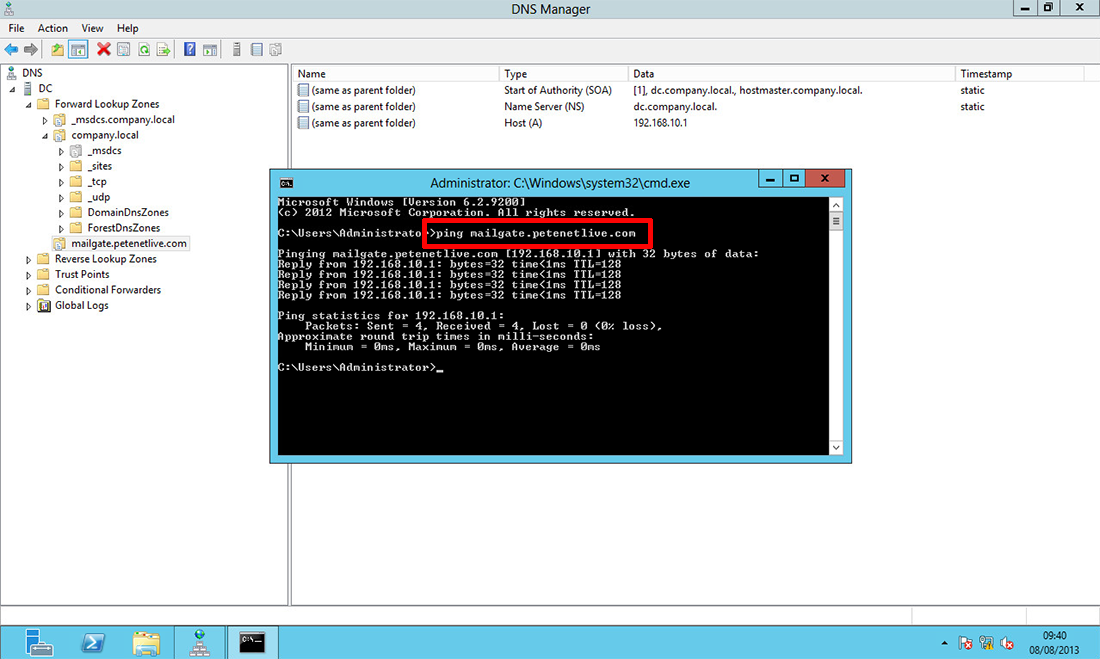
5. Now make sure when you ping the name on the certificate the correct private/internal IP address responds.

Gotchas – There is a Possible Problem With Doing This
Using the example above I’m now running an authoritative DNS server for the domain petenetlive.com, if my internal clients now want to got to www.petenetlive.com it will fail. Note: this is not a problem if you choose option 1.
So if your public website used the same domain name as your Exchange server you need to do a little more work.
Note: This is not just for www, if you have ftp or any other public registered host records you will need to do this for them as well.
1. First on a machine that can still access www.domain-name.com find out the correct public IP address for it using the nslookup command like so;

So mines returned a public IP address of 123.123.123.123
2. In your new DNS zone, create another A/Host record called www and enter the public IP Address of the website.
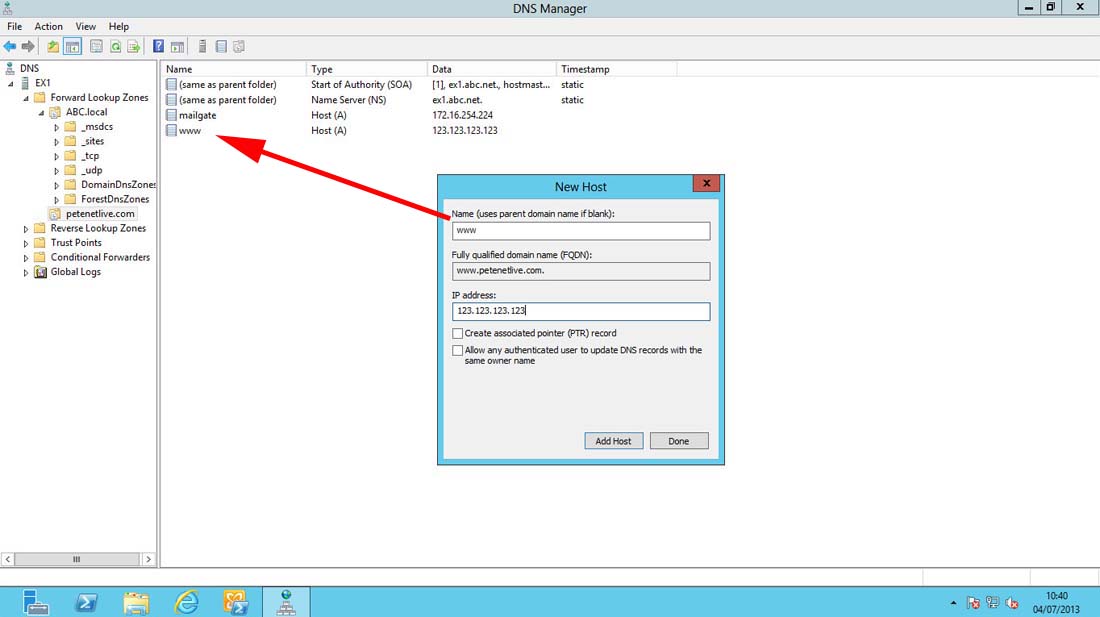
Now www.petenetlive.com will be resolved, because there’s a host called www in the zone called petenetlive.com that resolves to the correct IP address, (which is how web pages work anyway!)
Related Articles, References, Credits, or External Links
Setting up the Correct DNS Records for your Web or Mail Server
Special thanks to Scott Bauer for the Split DNS feedback
Original article written 05/07/13