
KB ID 0000772
Problem
If you have an FTP server, simply allowing the FTP traffic to it wont work. FTP (in both active and passive mode) uses some random high ports that would normally be blocked on the firewall. So by actively inspecting FTP the firewall will know what ports to open and close.
Solution
How you ‘allow’ access to the FTP server will depend on weather you have a public IP address spare or not, if you only have one public IP you will need to ‘port forward’ the FTP traffic to the server. But if you have a spare public IP address you can create a static mapping to that IP address instead.
Cisco ASA FTP Procedure
1. Connect to the firewall > Go to enable mode > Go to Configure terminal mode > Create an object for the FTP server > redirect all FTP Traffic to that object.
Note: In this example 192.168.1.1 is the IP of the FTP server.
USING PORT FORWARDING

User Access Verification

Password:
Type help or '?' for a list of available commands.
Petes-ASA> enable
Password: ********
Petes-ASA# configure terminal
Petes-ASA(config)# object network Internal_FTP_Server
Petes-ASA(config-network-object)# host 192.168.1.1
Petes-ASA(config-network-object)# nat (inside,outside) static interface service tcp ftp ftp
Petes-ASA(config-network-object)#exit
Petes-ASA(config)#
USING A SPARE PUBIC IP (STATIC MAPPING to 123.123.123.124)

User Access Verification

Password:
Type help or '?' for a list of available commands.
Petes-ASA> enable
Password: ********
Petes-ASA# configure terminal
Petes-ASA(config)# object network Internal_FTP_Server
Petes-ASA(config-network-object)# host 192.168.1.1
Petes-ASA(config-network-object)# nat (inside,outside) static 123.123.123.124
Petes-ASA(config-network-object)# exit
Petes-ASA(config)#
2. Then allow the FTP traffic in from outside.
Now you need to allow the ftp traffic in. Before you can add an ACL you need to see if you already have one. We are applying an ACL to the outside interface for traffic going in (I call this inbound for obvious reasons). To see if you already have an ACL applied, issue the following command;
Petes-ASA(config)# show run access-group
access-group inbound in interface outside
access-group outbound in interface inside
Note: In the example above we have an ACL called inbound that we MUST use. (If you added a new one, all the access list entries for the old one get ‘Un-applied’). If yours has a different name (e.g. outside_access_in then use that instead of the ACL name I’m using here). If you DONT have an access-group entry for inbound traffic then we will do that at the end!
Petes-ASA(config)# access-list inbound permit tcp any object Internal_FTP_Server eq ftp
3. Then: Only carry out the following command if you DO NOT HAVE an ACL applied for incoming traffic.
Petes-ASA(config)# access-group inbound in interface outside
4. Then to allow the ASA to insect the FTP traffic, do the following;
Petes-ASA(config)# policy-map global_policy
Petes-ASA(config-pmap)# class inspection_default
Petes-ASA(config-pmap-c)# inspect ftp
Petes-ASA(config-pmap-c)# exit
Petes-ASA(config-pmap)# exit
Petes-ASA(config)#
5. Save the changes.
Petes-ASA(config)# write memory
Building configuration...
Cryptochecksum: aab5e5a2 c707770d f7350728 d9ac34de
[OK]
Petes-ASA(config)#
Allow Access to FTP Server via ASDM
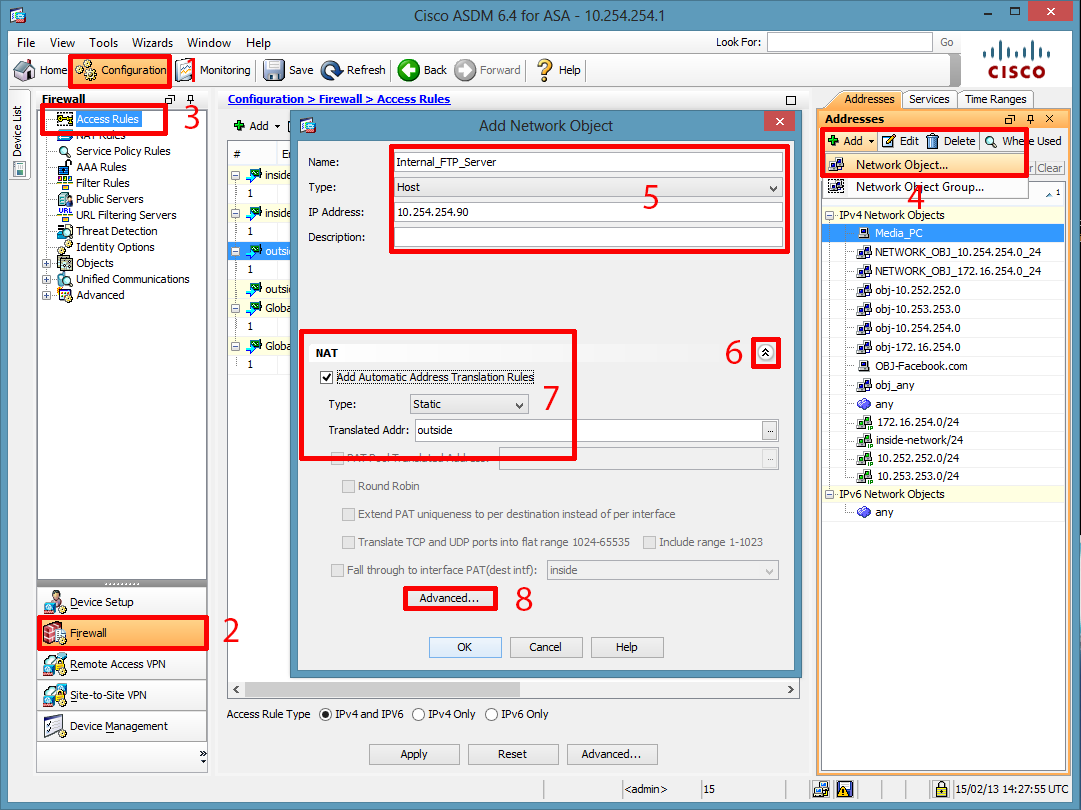
1. Connect to the ASDM > Configuration > Firewall > Addresses Section > Add > Network Object > Give the FTP server a name > Set it to ‘Host’ > Enter The IP Address > Select the drop down arrow > Tick the ‘Add Automatic Address Translation Rule’ > Advanced.
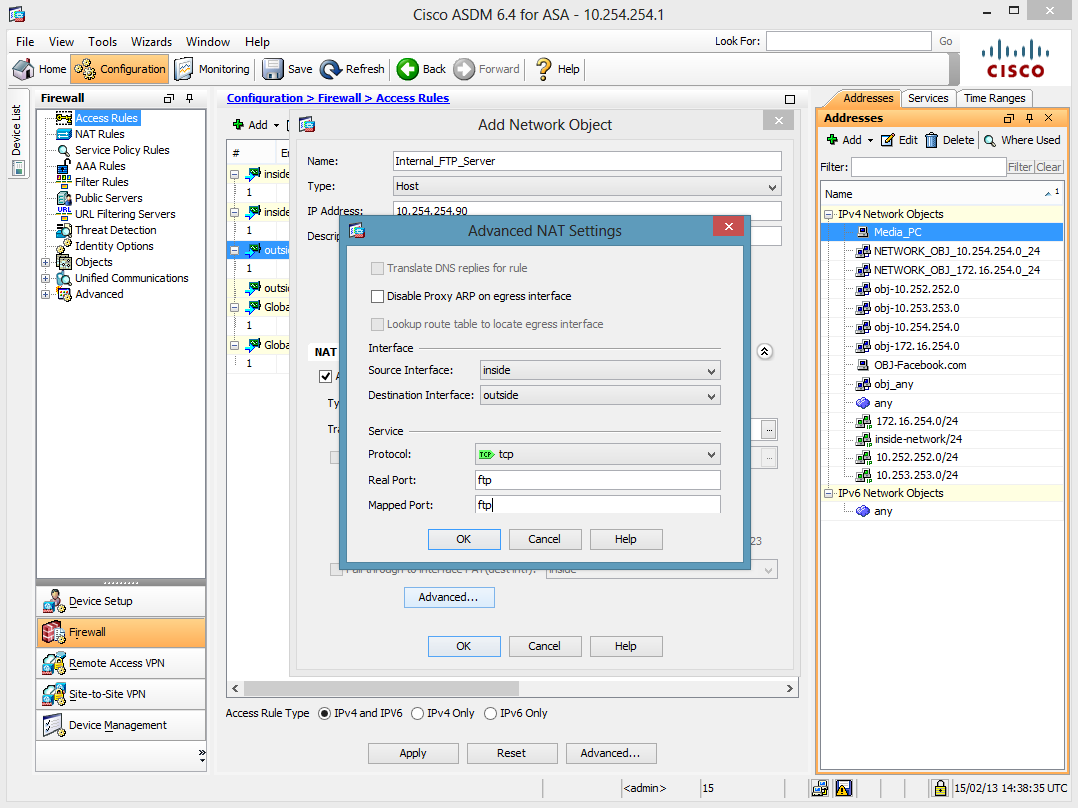
2. Set Source interface = inside > Destination Interface = outside > Protocol = tcp > Real and Mapped ports = ftp > OK > OK > Apply.
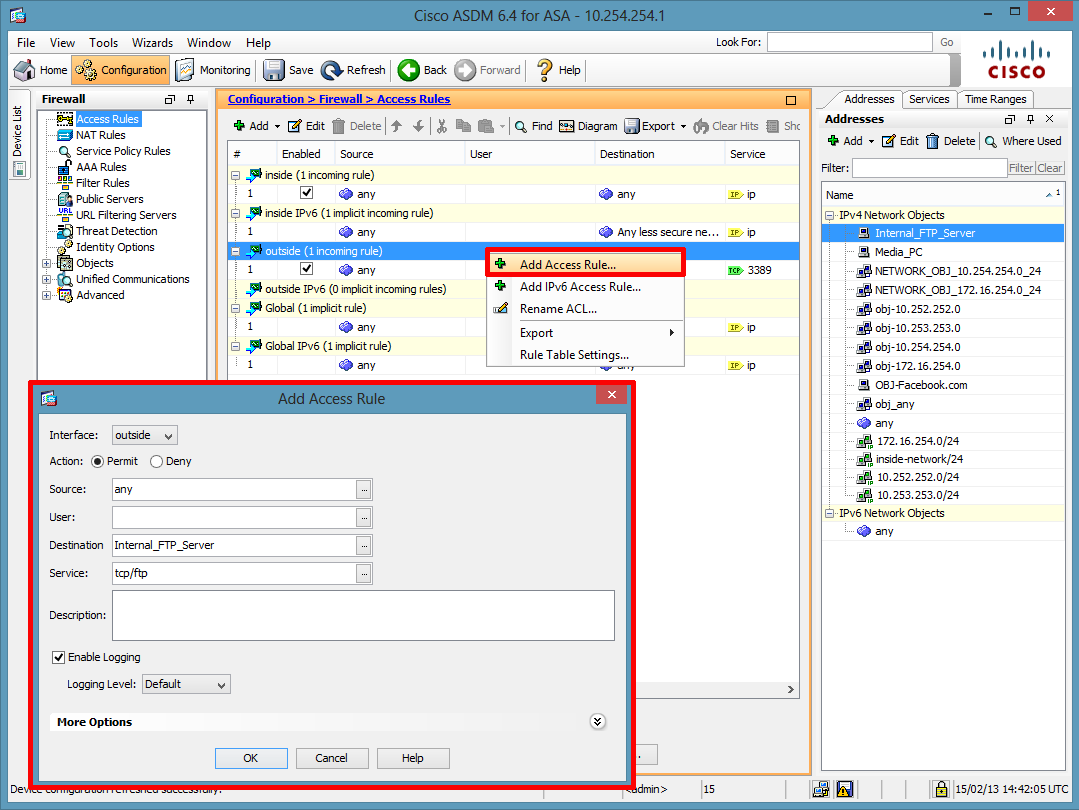
3. To allow the traffic in right click the outside interface > Add Access Rule.. > Set the destination to the server you created earlier > and the service to tcp/ftp > OK > Apply.
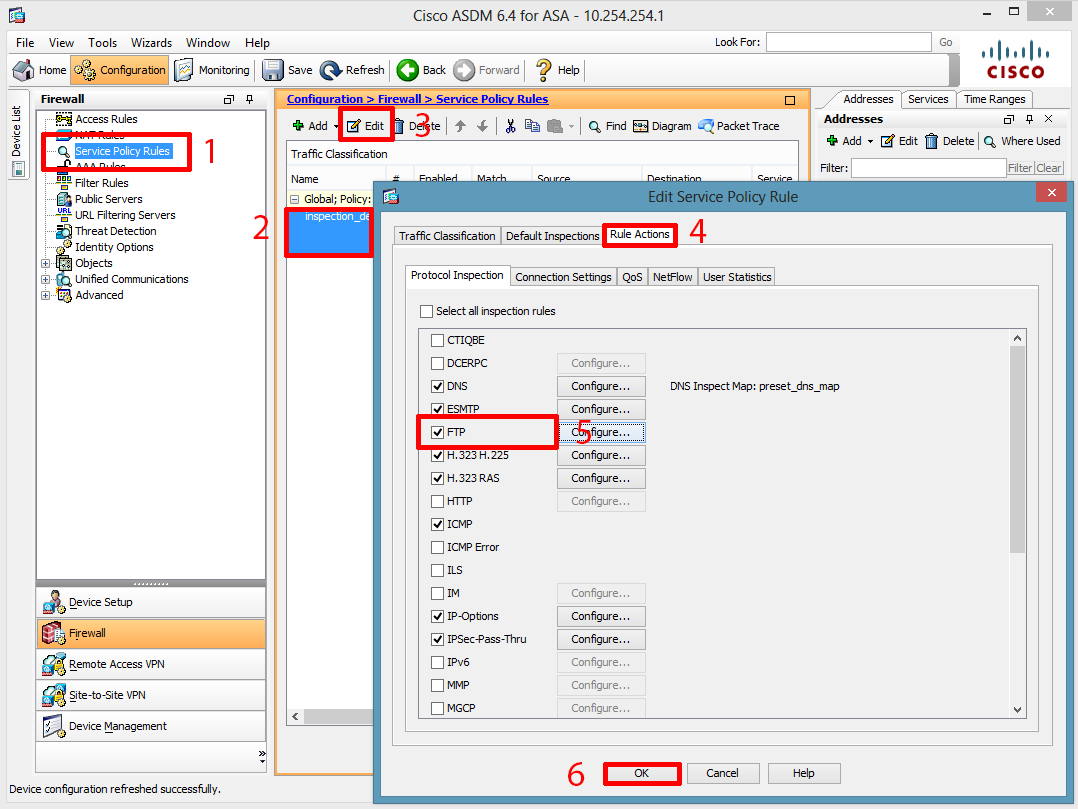
4. Service Policy Rules > Inspection_default > Edit > Rule Actions > Tick FTP > OK > Apply.
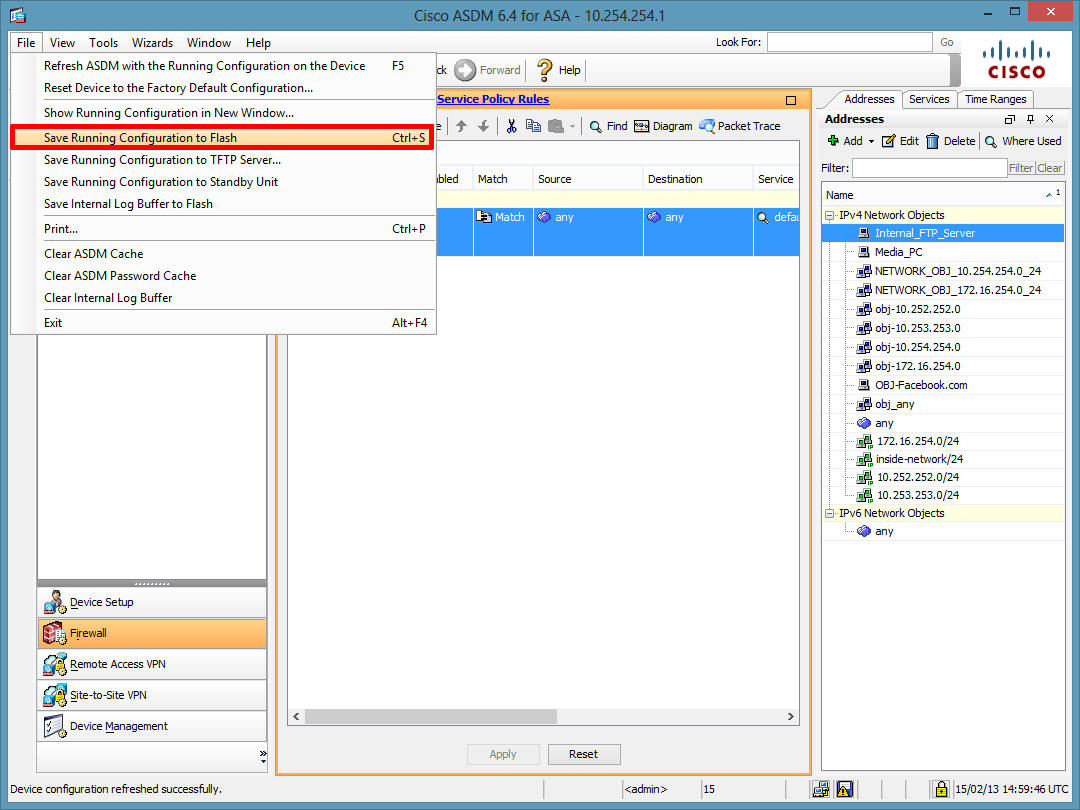
5. Save the changes > File > Save running Configuration to Flash.
Cisco PIX FTP Procedure
1. Connect to the firewall > Go to enable mode > Go to Configure terminal mode > Access List for the inbound FTP traffic (Its wide open we will narrow it down in a moment).
User Access Verification

Password:
Type help or '?' for a list of available commands.
PetesPIX> enable
Password: ********
PetesPIX# configure terminal
PetesPIX(config)# access-list inbound permit tcp any any eq ftp
PetesPIX(config)# access-group inbound in interface outside
2. Create a static mapping that locks all incoming FTP traffic to the internal servers IP address (In this case 192.168.1.1).
PetesPIX(config)# static (inside,outside) tcp interface ftp 192.168.1.1 ftp netmask 255.255.255.2553. Now because FTP uses dynamic port allocation you need to add a ‘fixup’ to the FTP port (TCP port 21).
PetesPIX(config)# fixup protocol ftp 214. Finally save the changes.
PetesPIX(config)# write mem
Building configuration...
Cryptochecksum: 01832c5d a90d008d ebf30483 dc48a0d0
[OK]
Related Articles, References, Credits, or External Links
Cisco PIX / ASA Port Forwarding
Add a Static (One to One) NAT Translation to a Cisco ASA 5500 Firewall
Original article written 15/02/13