
KB ID 0000739
Problem
A while back I got an email,
Message: Hallo Pete,
Can you make a tutorial for me for sharing a Home Folder or Profile Path folder for every user?
It’s hard to get one.
Thanks in advance.
Sincerely,
Matthew Wittenberg </br
Well it’s taken me a while (sorry!) But here you go,
Solution
Creating and Allocating Home Folders to Users
1. Create a folder that is on a drive or volume with plenty of room.
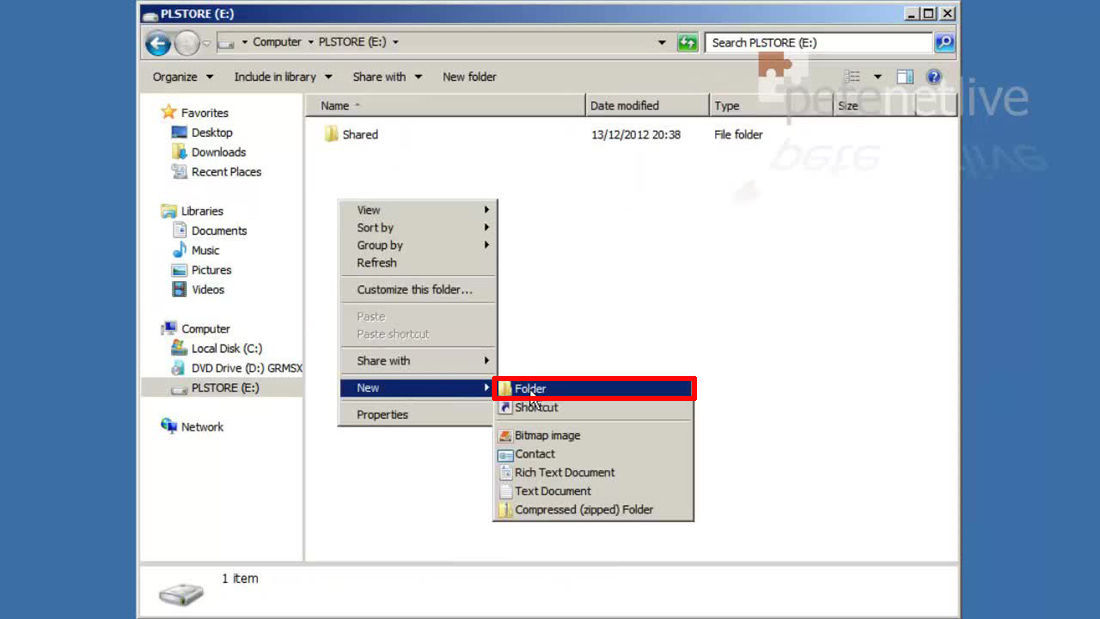
2. I’ve simply used ‘Home’ as the folder name, open the folder’s properties.

3. Sharing Tab > Advanced Sharing.

4. Tick to share > put a dollar ‘$’ symbol onto the end of the share name (this just stops the folder being visible to someone browsing the network) > Permissions.
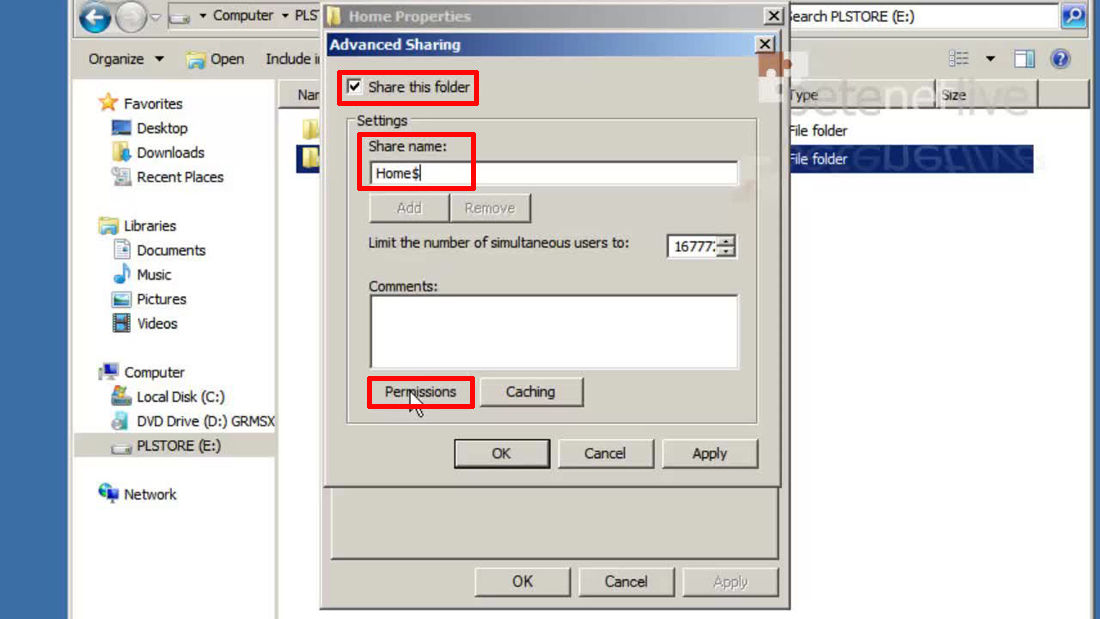
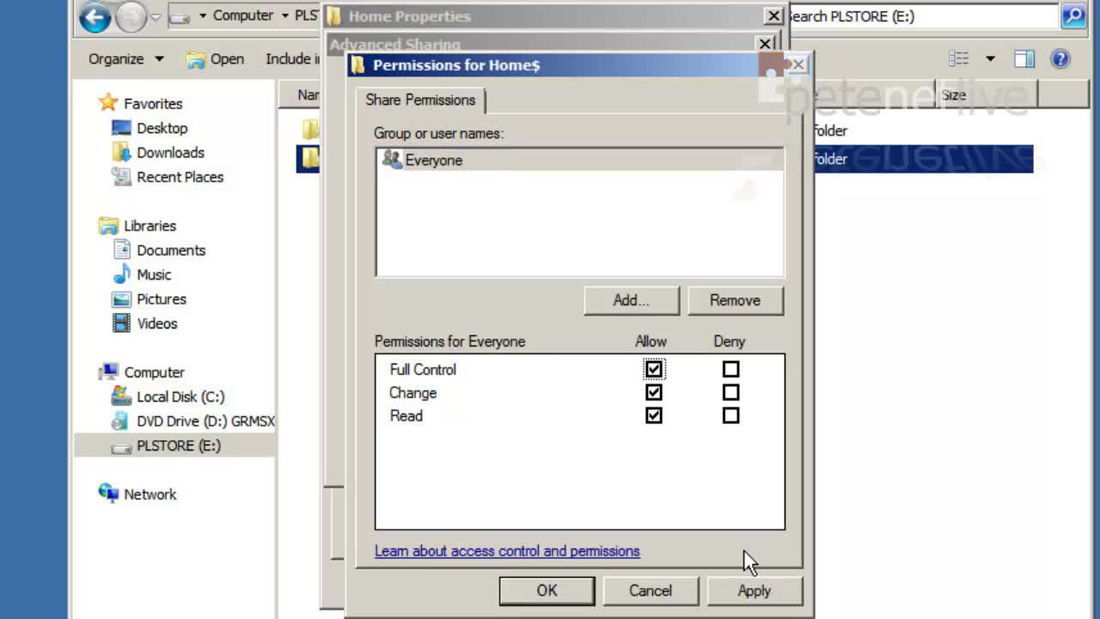
5. Grant Everyone ‘Full Control’, Don’t worry we will lock it down with NTFS permissions (Remember permissions are cumulative, and most restrictive apply) > Apply > OK.
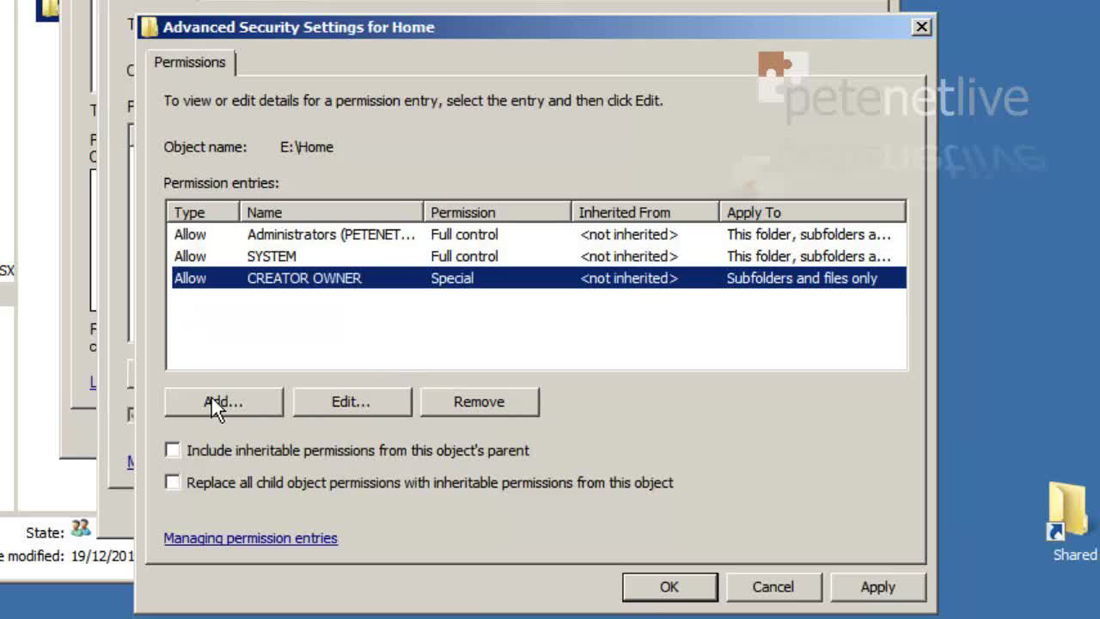
6. Security tab > Advanced.
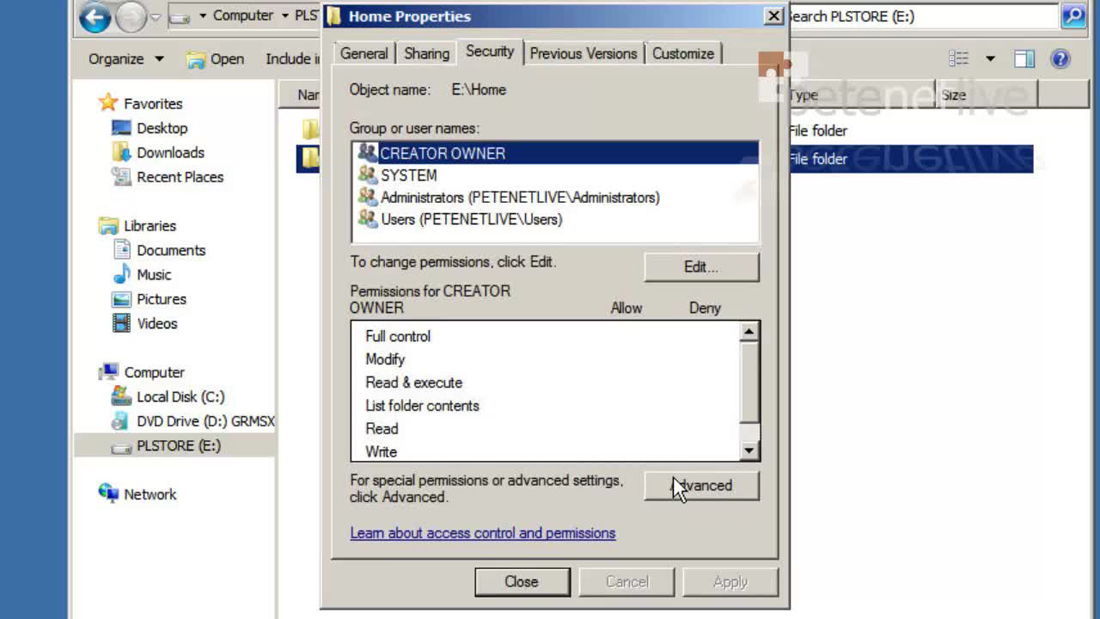
7. Change Permissions.
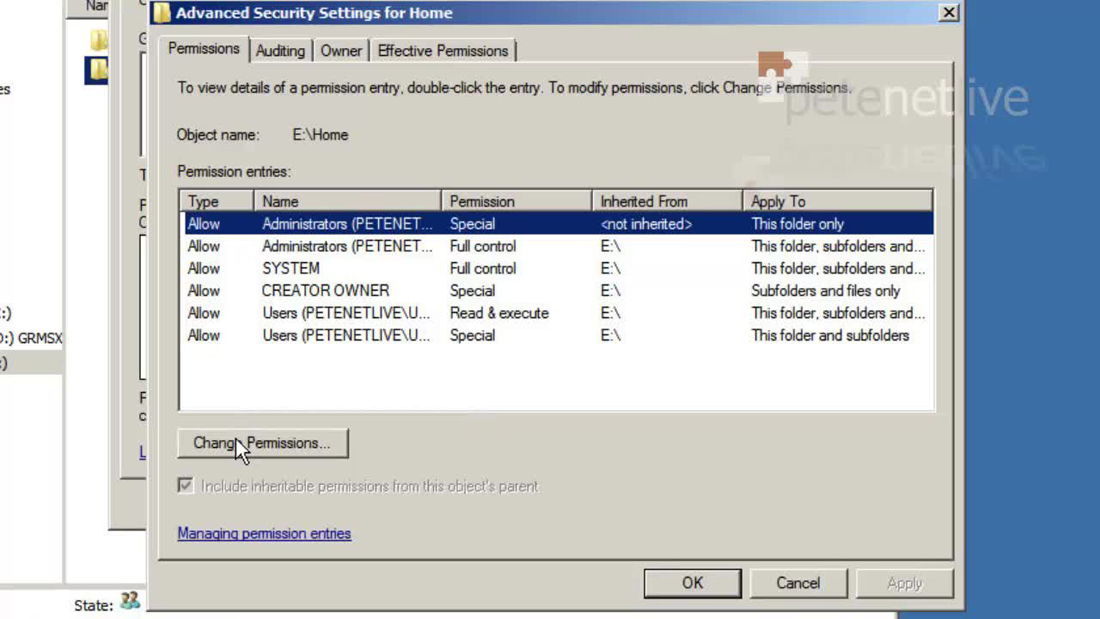
8. Untick ‘Include inheritable permissions……’ > Add.

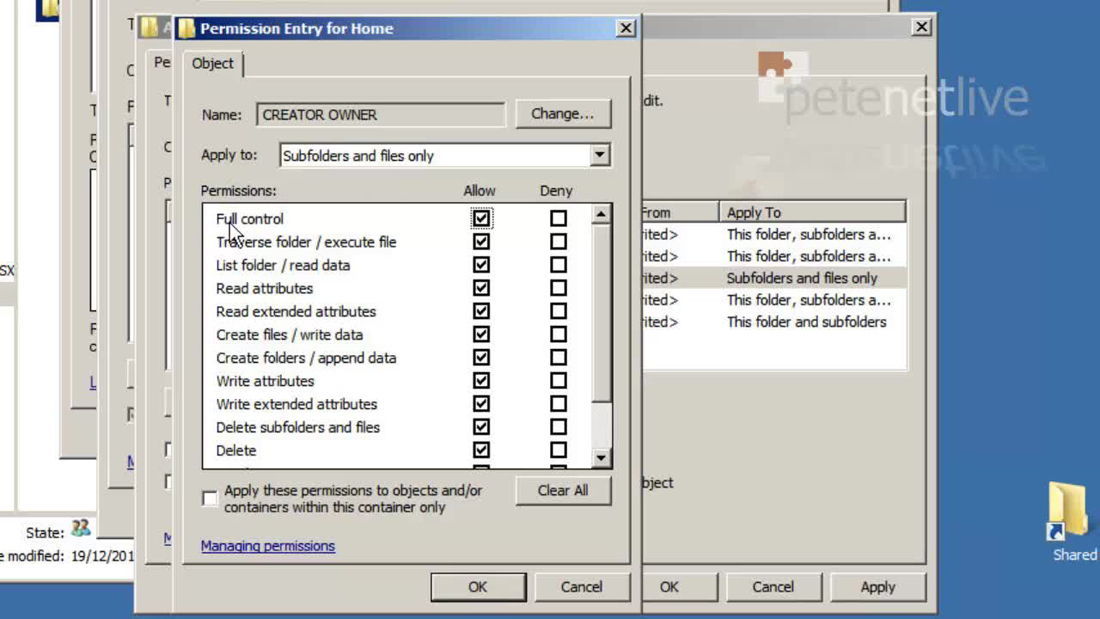
9. Select CREATOR OWNER > Edit > Permissions should apply to ‘Subfolders and files only’ > Full control.
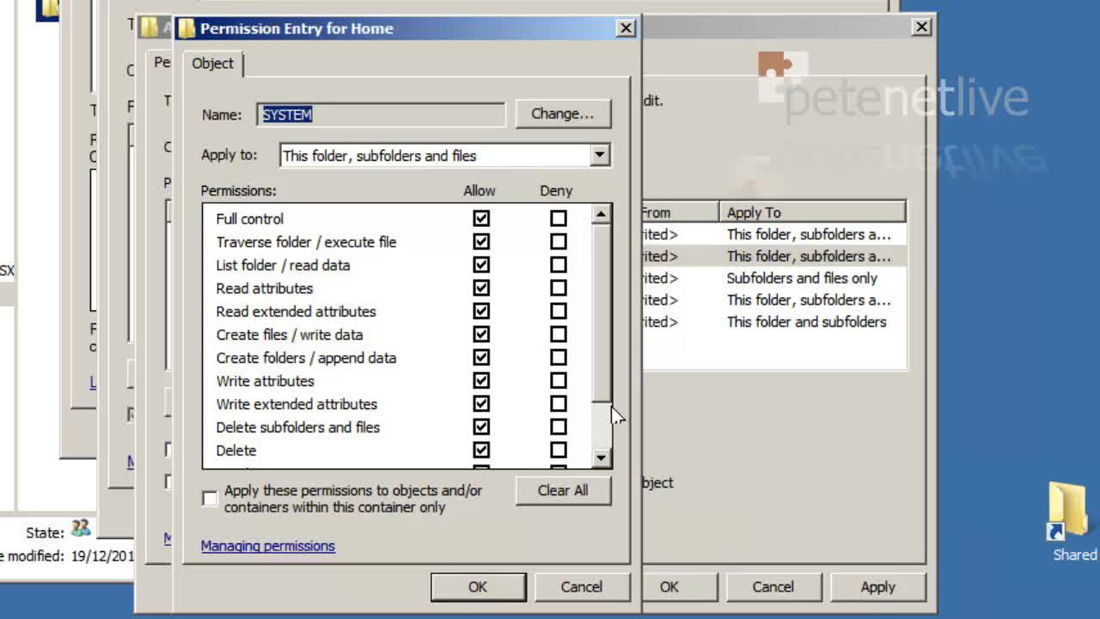
10. Select SYSTEM > Edit > Permissions should apply to ‘This Folder, subfolders and files only’ > Full control.
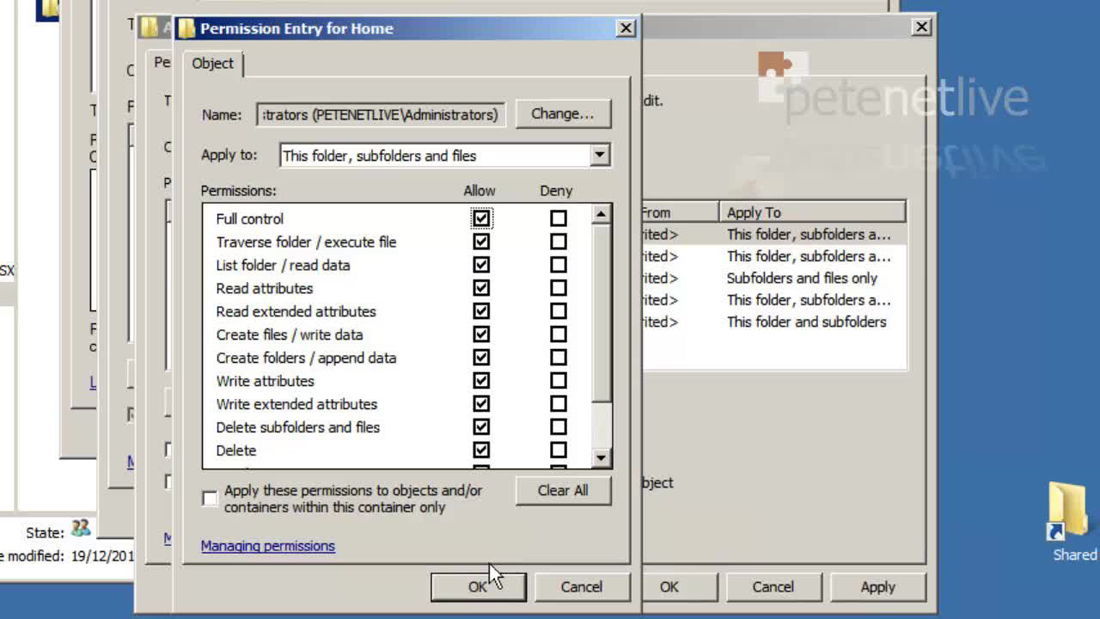
11. Select DOMAINNAMEAdministrators > Edit > Permissions should apply to ‘This Folder, subfolders and files only’ > Full control.
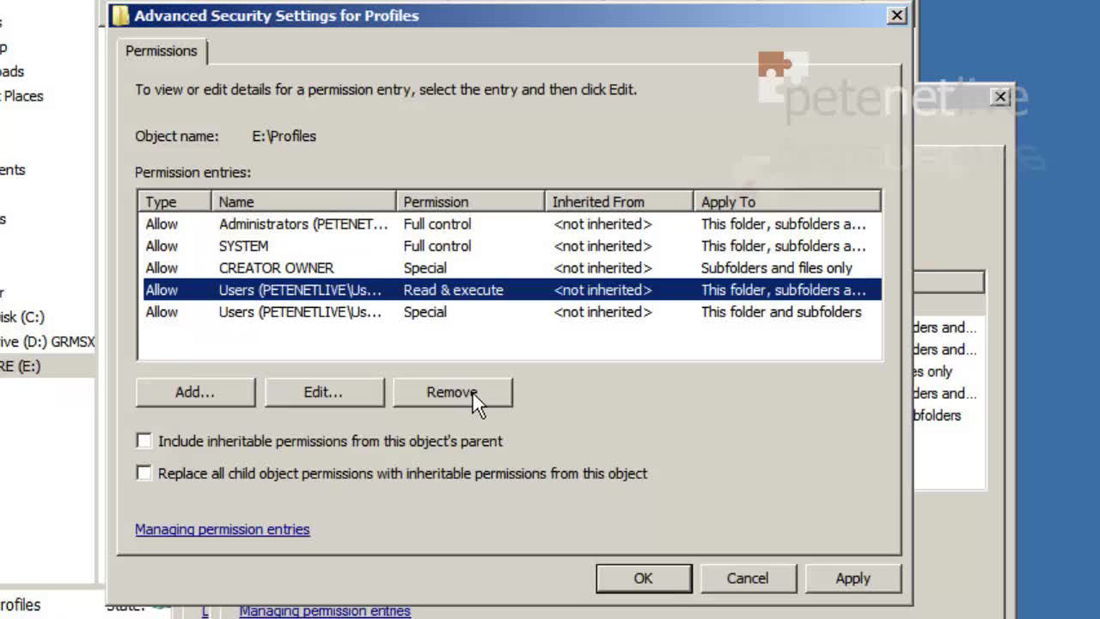
12. Remove the Users (the one with Read & Execute).

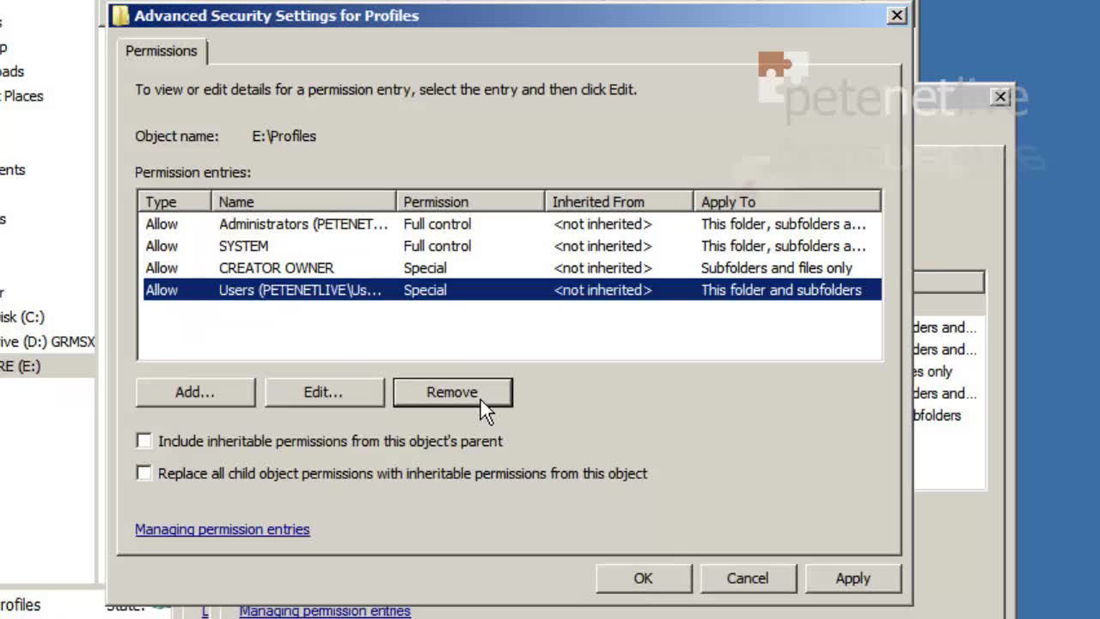
13. Remove the Users (the one with Special).

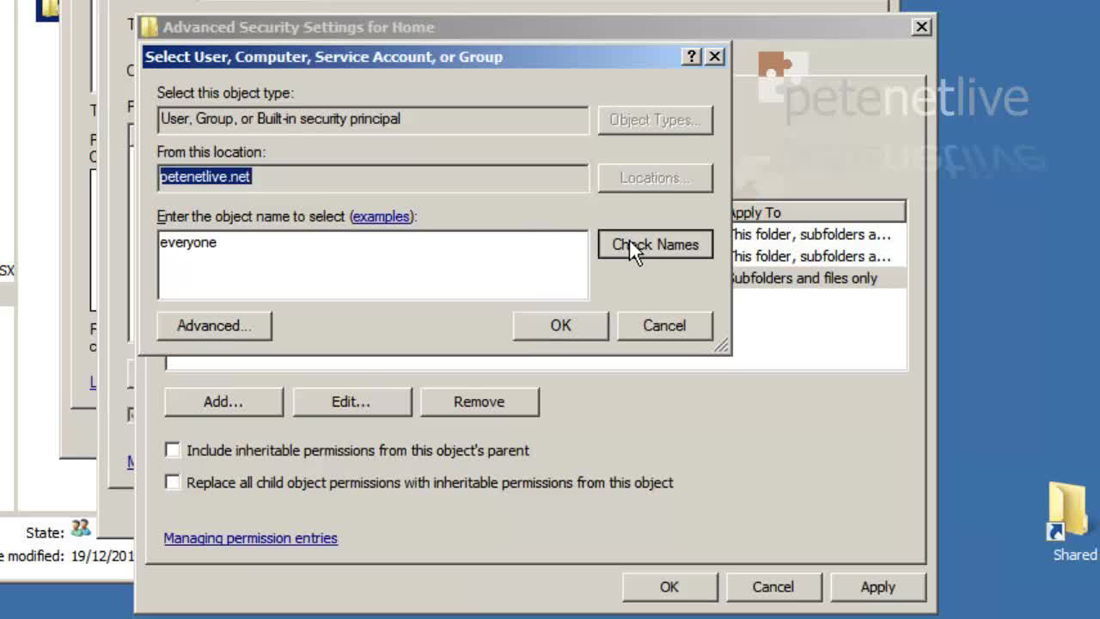
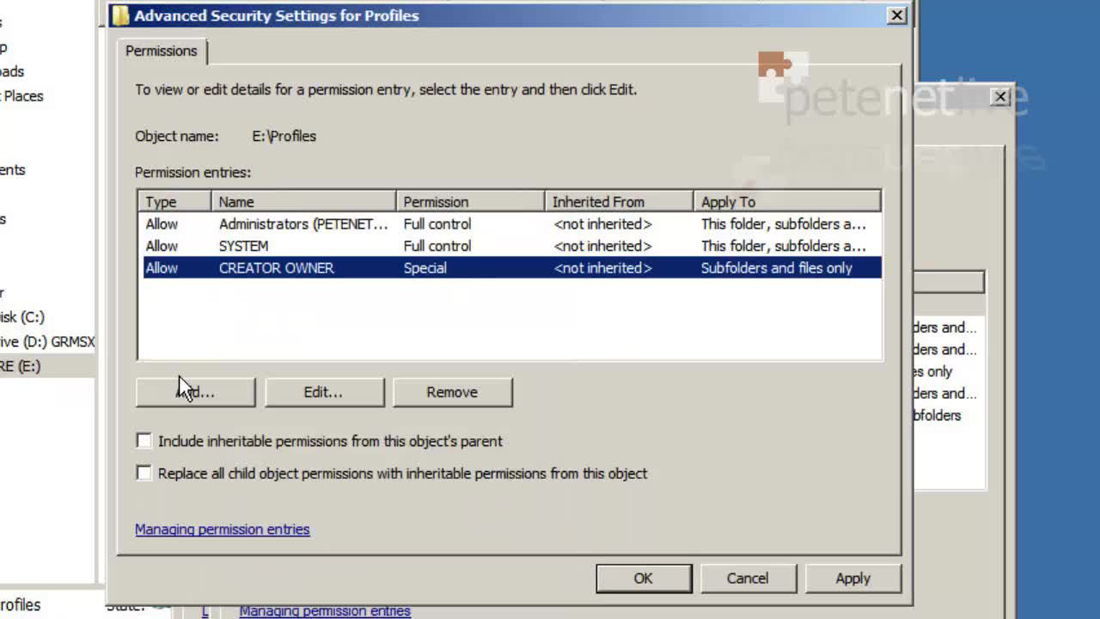
14. Add.
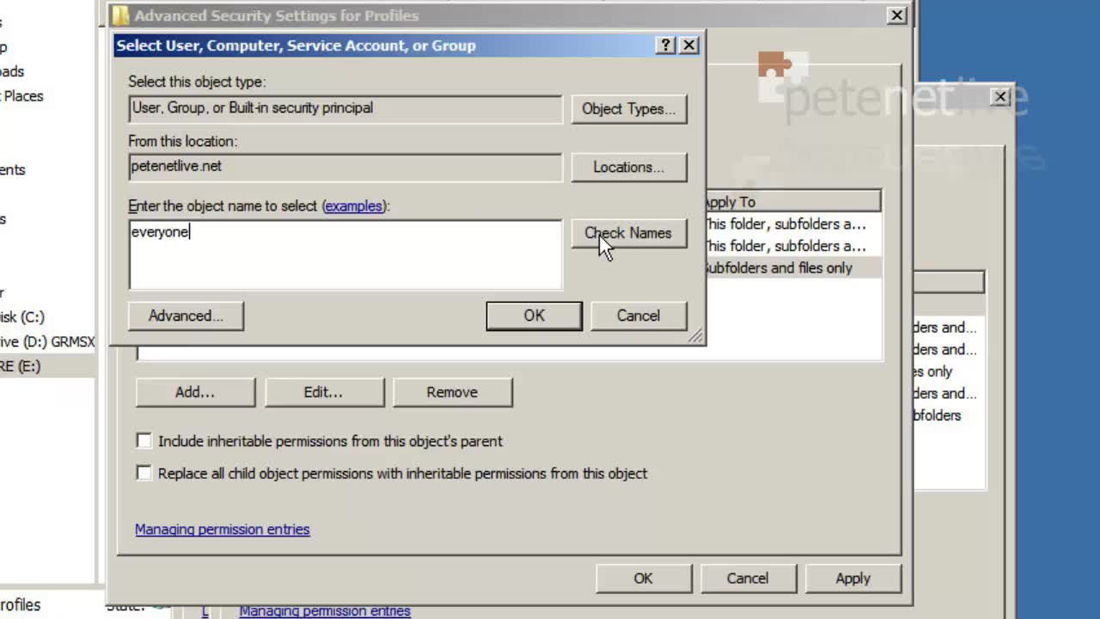
15. Everyone > check Name (make sure it underlines Everyone) > OK
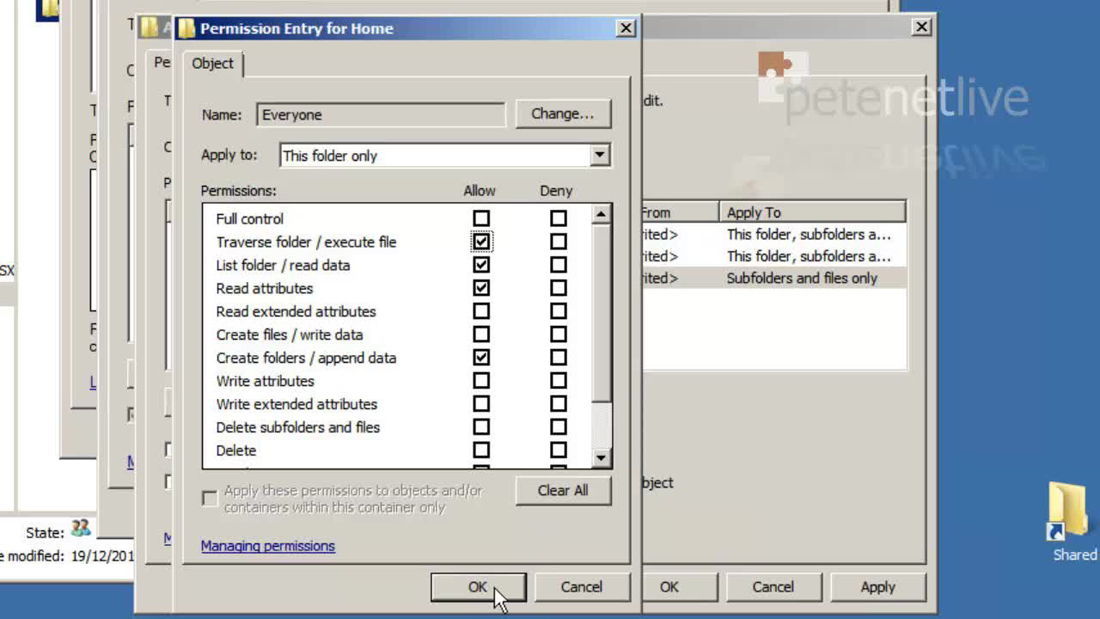
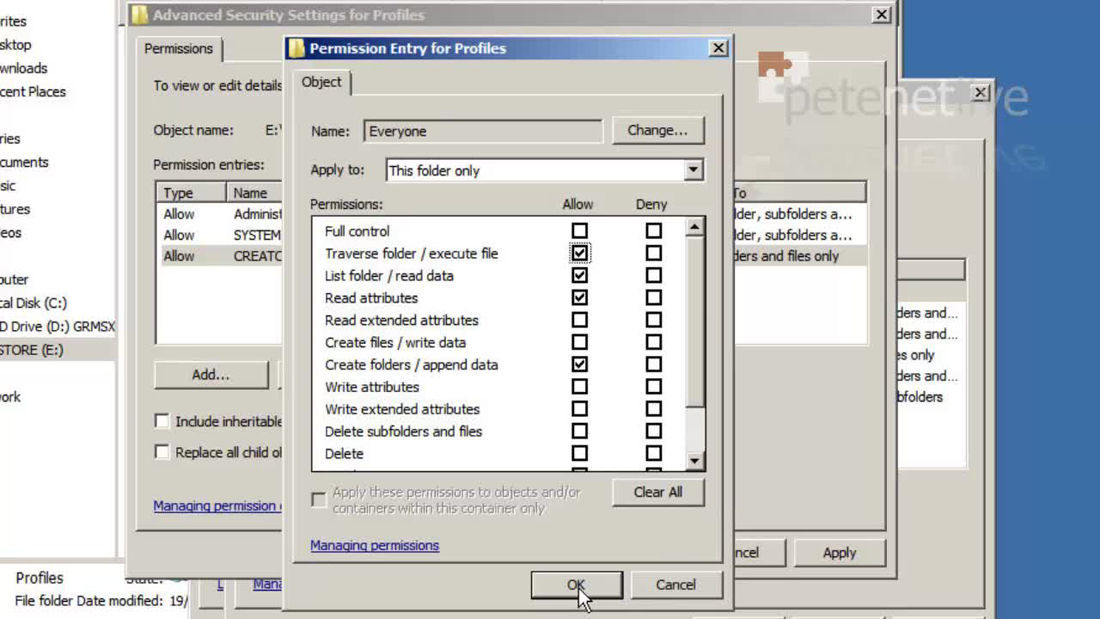
16. Sett Apply to = This folder only > Allow the following.
Traverse Folder / execute file
List Folder / read data
Read attributes
Create Folders / append data
Allocate the Home Folder to the Domain Users
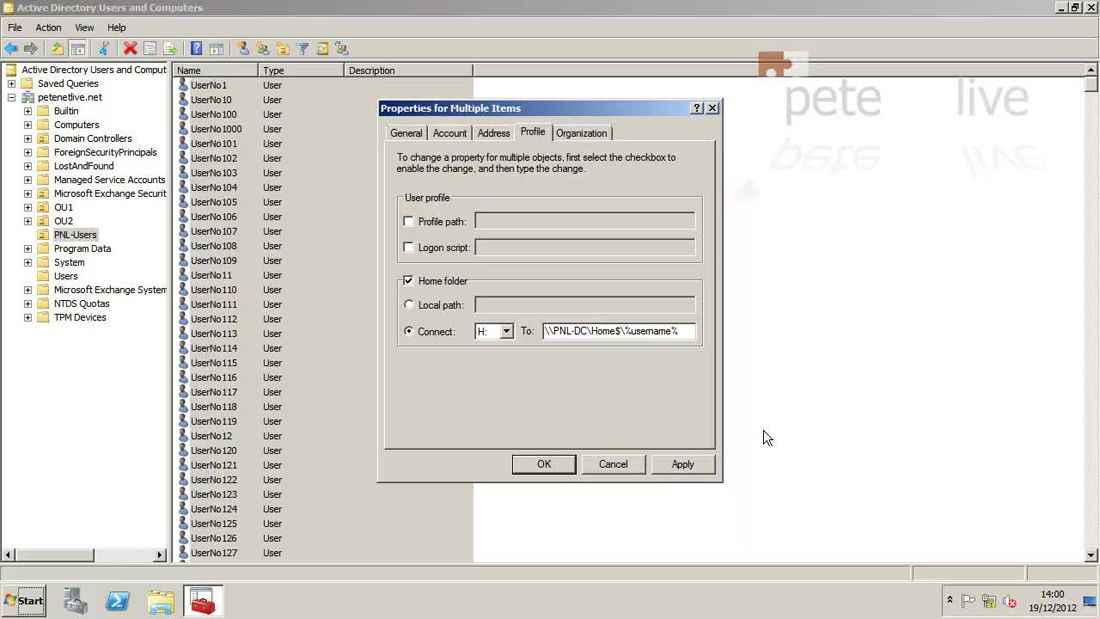
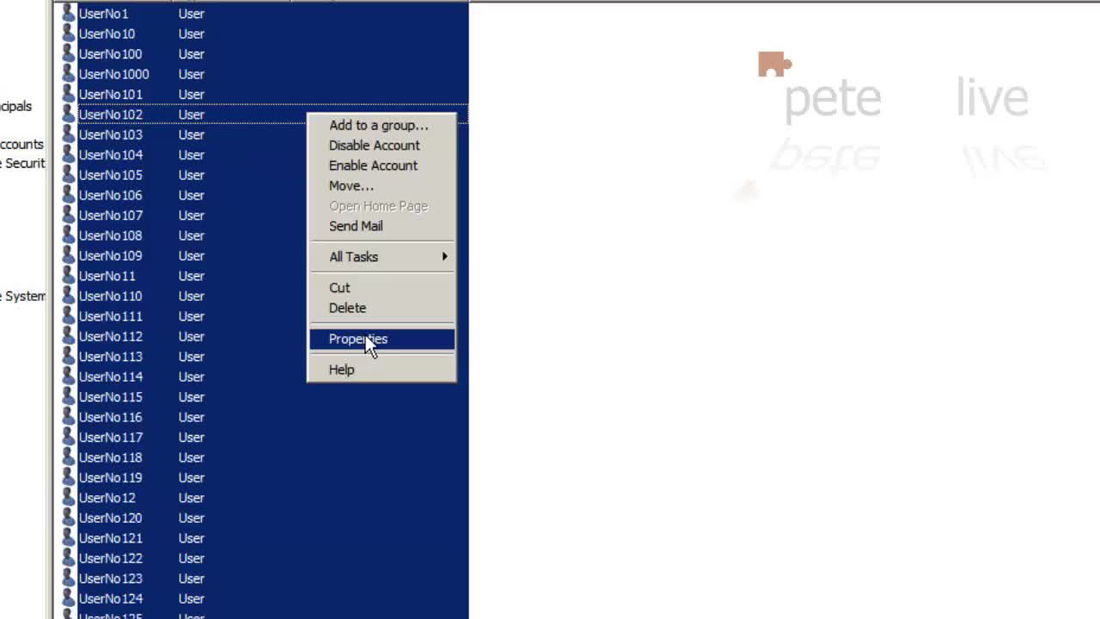
1. From within Active Directory Users and Computers locate your users, (you can press Windows Key+A to select them all).
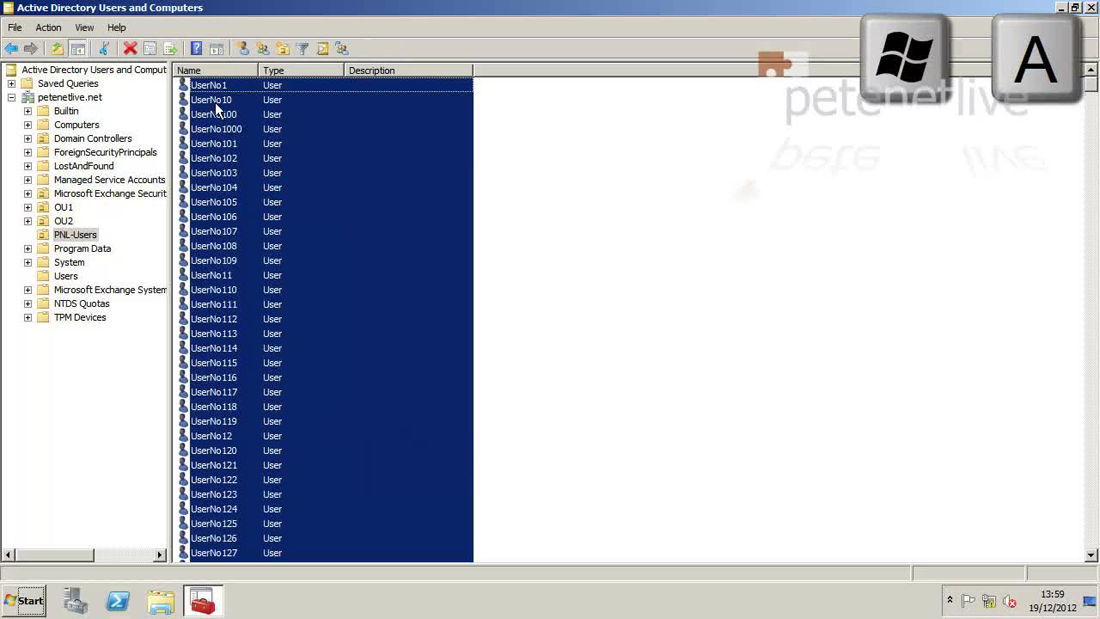
2. Open their properties.

3. Profile tab > You can connect a drive letter (I usually use H:) and connect that to the users home drive. Set the path like so;
\\Server-name\Folder-name\%username%
e.g.
\\PNL-DC\Home$\%username%
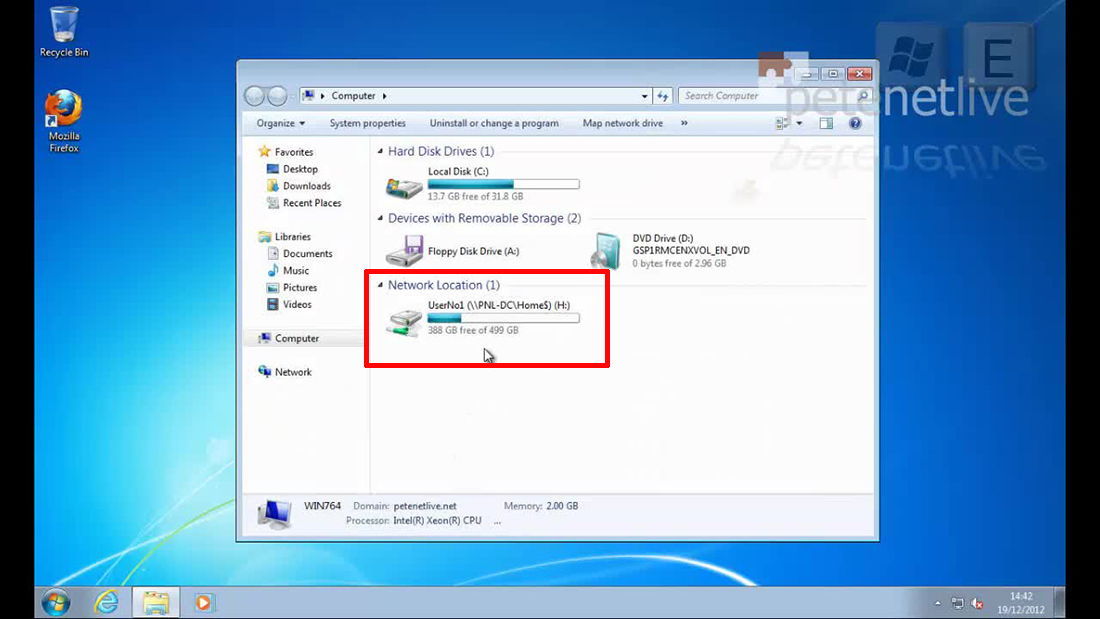
4. This is what the users will see.
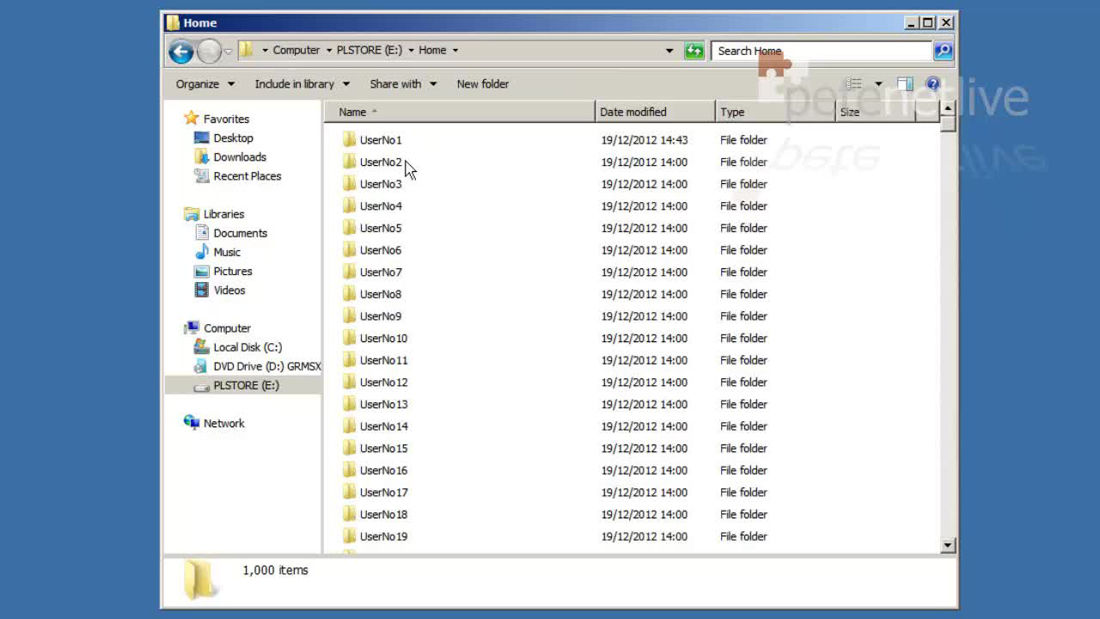
5. On the server the folders are all created straight away.
Creating and Allocating Roaming Profile Folders to Users
The process for setting up the folder is identical to the one above for the home folders.
1. Create a folder that is on a drive or volume with plenty of room.

2. I’ve simply used ‘Profile’ as the folder name, open the folder’s properties > Sharing Tab > Advanced Sharing > Tick to share > put a dollar ‘$’ symbol onto the end of the share name (this just stops the folder being visible to someone browsing the network) > Permissions.

3. Grant Everyone ‘Full Control’, Don’t worry we will lock it down with NTFS permissions (Remember permissions are cumulative, and most restrictive apply) > Apply > OK.

4. Security tab > Advanced.
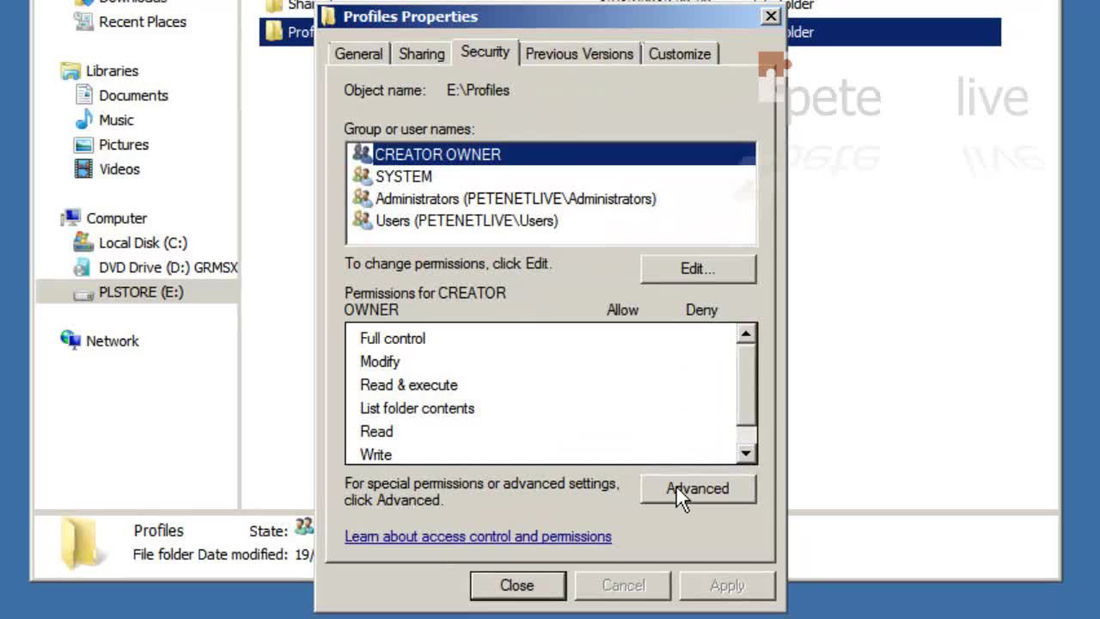
5. Change Permissions > Untick ‘Include inheritable permissions..’ > Add.

6. Remove the Users (the one with Read & Execute).
7. Remove the Users (the one with Special).
8. Add.
9. Everyone > check Name (make sure it underlines Everyone) > OK.
10. Set Apply to = This folder only > Allow the following.
Traverse Folder / execute file
List Folder / read data
Read attributes
Create Folders / append data
Allocate the Roaming Profile Folder to the Domain Users
1. From within Active Directory Users and Computers locate your users, (you can press Windows Key+A to select them all).
2. Open their properties > Profile Tab > Tick ‘Profile path’ > Set the path as follows;
\\Server-name\Folder-name\%username%
e.g.
\\PNL-DC\Profiles$\%username%

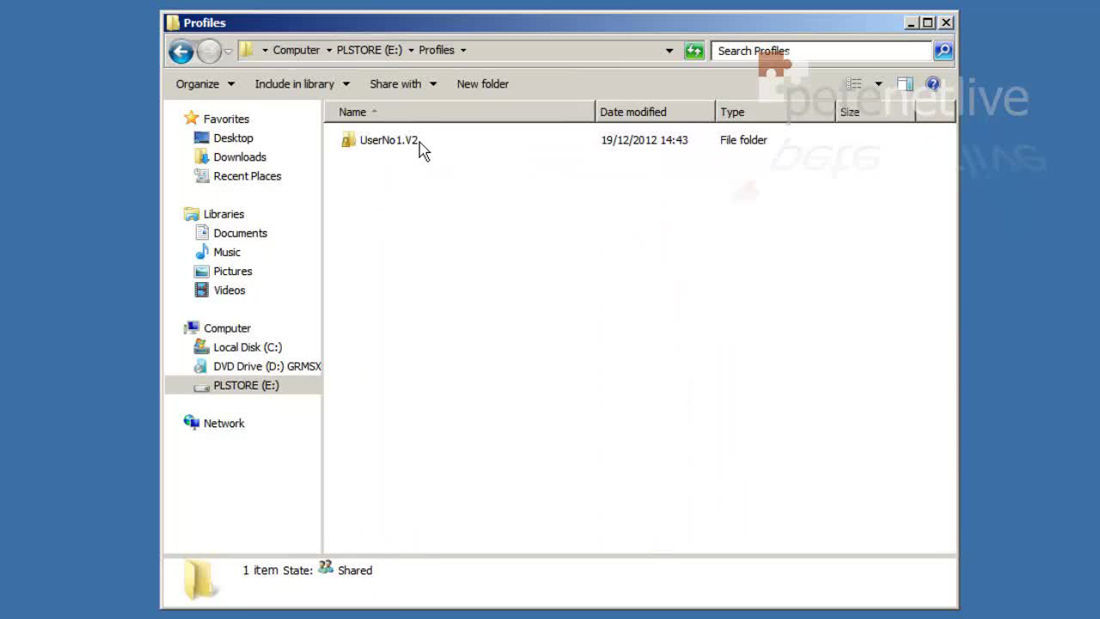
3. Unlike home folders, profile folders are only created when the users log onto the network, here you can see this profile has a V2 on the end of it (a version 2 profile means it has come from a Windows Vista or newer machine). For this reason if your users use Windows XP (or older) clients, AND Windows Vista (or newer) clients they will get TWO DIFFERENT profiles.
Related Articles, References, Credits, or External Links
NA