
KB ID 0000691
Problem
Note: This is for Cisco ASA 5500, 5500-x, and Cisco Firepower devices running ASA Code.
If you have a spare/available public IP address you can statically map that IP address to one of your network hosts, (i.e. for a mail server, or a web server, that needs public access).
This is commonly referred to as a ‘Static NAT’, or a ‘One to One translation’. Where all traffic destined for public address A, is sent to private address X.
Note: This solution is for firewalls running versions above version 8.3. If you are unsure what version you are running use the following article.
Find out your Cisco ASA version (Operating system and ASDM)
If you only have one public IP address you would need to carry out port forwarding instead.
Cisco ASA 5500 (and PIX) Port Forwarding
Solution
In the following example I will statically NAT a public IP address of 81.81.81.82 to a private IP address behind the ASA of 172.16.254.1. Finally I will allow traffic to it, (in this example I will allow TCP Port 80 HTTP/WWW traffic as if this is a web server).
Create a Static NAT and allow web traffic via ASDM
Note for the command line alternative see below.
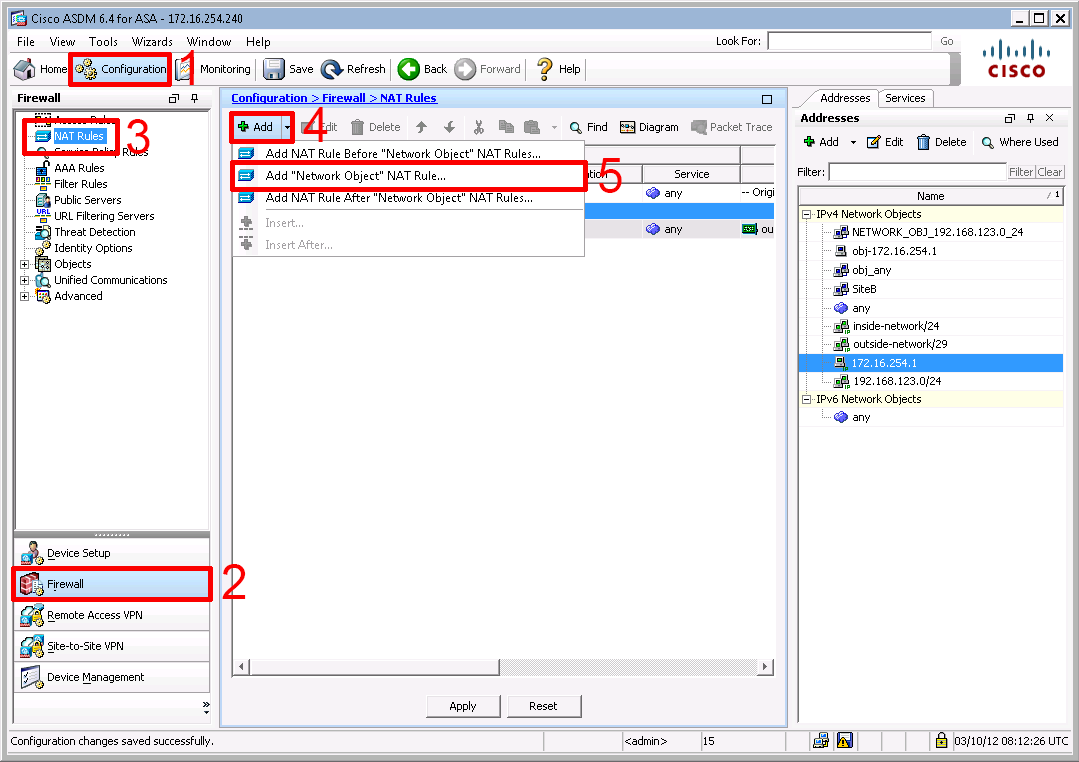
2. Configuration > Firewall > NAT Rules > Add > Add “Network Object” NAT Rule.
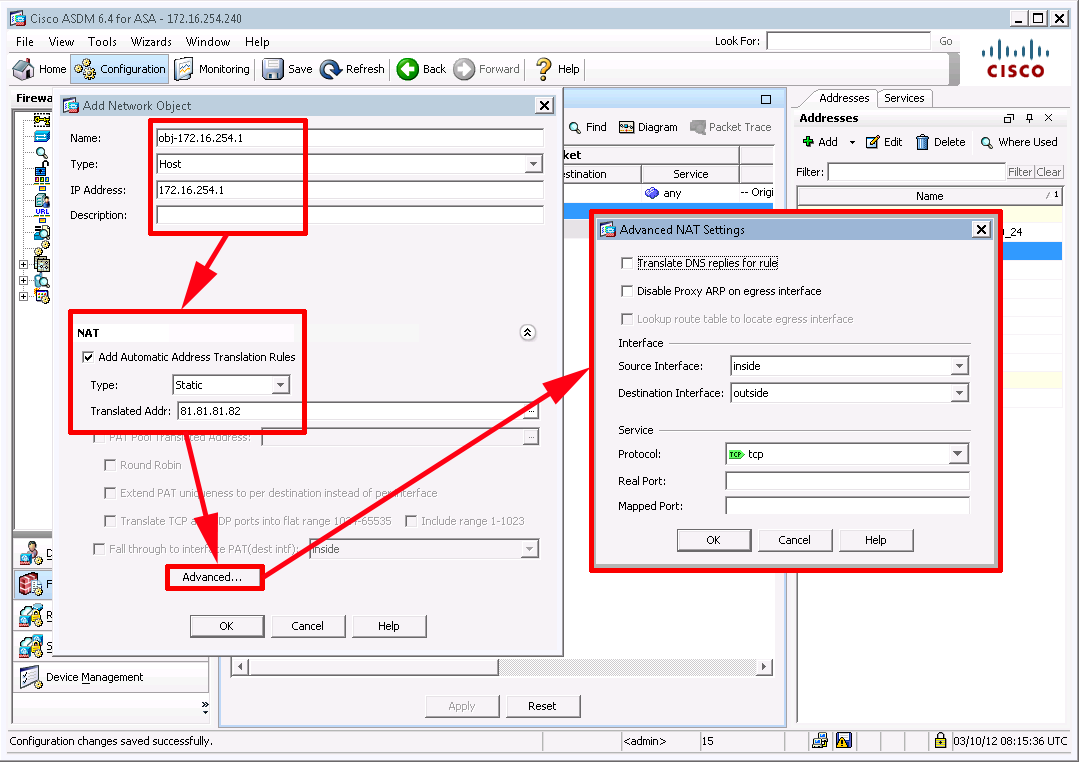
3. Give the ‘object’ a name (I usually prefix them with obj-{name}) > It’s a Host > Type in it’s PRIVATE IP address > Tick the NAT section (press the drop-down if its hidden) > Static > Enter it’s PUBLIC IP address > Advanced > Source = Inside > Destination > Outside > Protocol TCP. Note: You could set this to IP, but I’m going to allow HTTP with an ACL in a minute, so leave it on TCP > OK > OK > Apply.
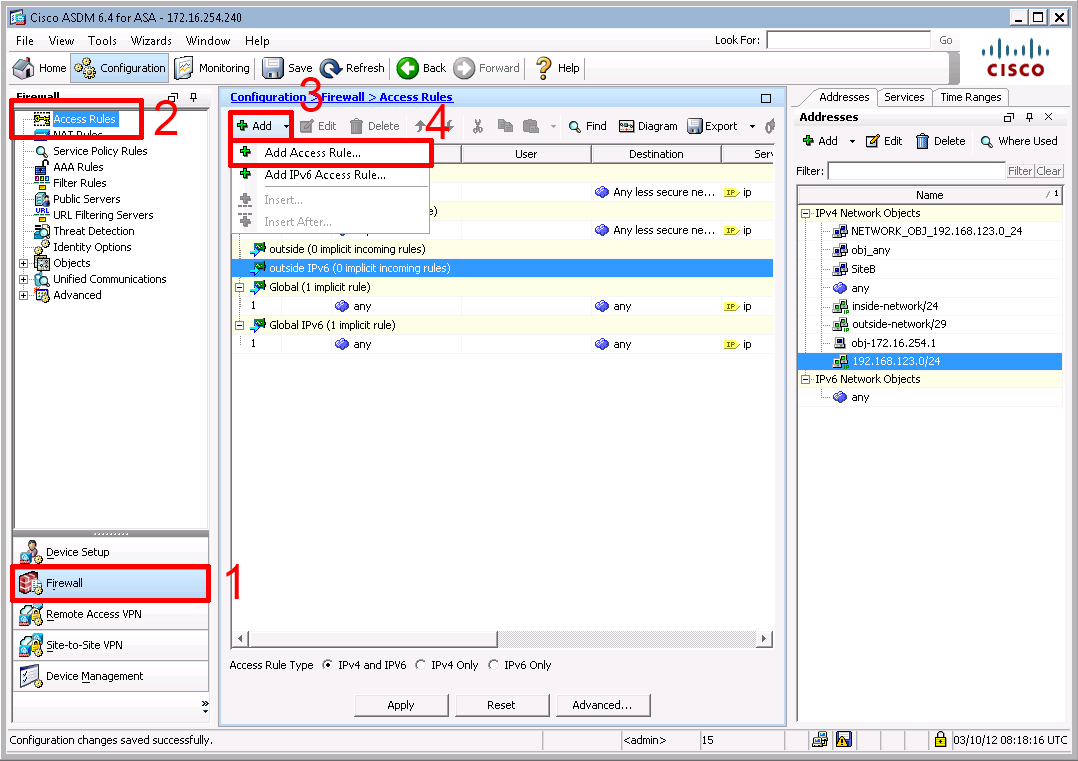
4. Now navigate to Firewall > Access Rule > Add > Add Access Rule.
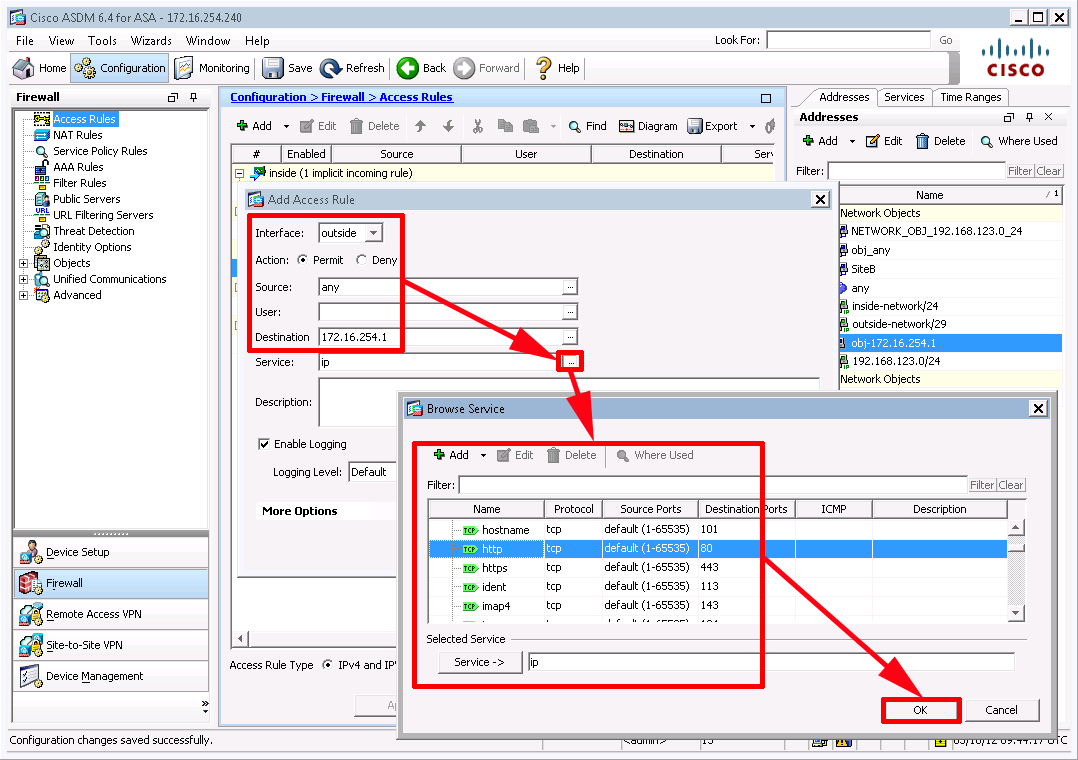
5. Interface = outside > Permit > Source = any > Destination = PRIVATE IP of the host > Service > Press the ‘more’ button > Locate TCP/HTTP > OK > OK > Apply.
6. Then save your work with a File > Save Running Configuration to Flash.

Create a Static NAT and allow web traffic via Command Line
1. Connect to the ASA via Command Line.
2. Log In > Go to enable mode > Go to configure terminal mode.
User Access Verification

Password:*******

Type help or '?' for a list of available commands.
 PetesASA> enable
 Password: *******
 PetesASA# conf t
 PetesASA(config)
3. First I’m going to allow the traffic to the host (Note: after version 8.3 we allow traffic to the private (per-translated IP address). This assumes you don’t have an inbound access list if you are unsure execute a “show run access-group” and if you have one applied substitute that name for the word ‘inbound’.
Warning before carrying out applying the ‘access-group’ command, see the following article;
Cisco ASA – ‘access-group’ Warning
PetesASA(config)# access-list inbound permit tcp any host 172.16.254.1
PetesASA(config)# access-group inbound in interface outside
4. Then to create the static translation.
PetesASA(config)# object network obj-172.16.254.1
PetesASA(config-network-object)# host 172.16.254.1
PetesASA(config-network-object)# nat (inside,outside) static 81.81.81.82
PetesASA(config-network-object)# exit
PetesASA(config)#
PetesASA(config)# wr mem

Building configuration...
Cryptochecksum: 89faae4b 7480baa4 bf634e87 470d2d30
6224 bytes copied in 1.10 secs (6224 bytes/sec)
[OK]
Static NAT Commands to Copy & Paste
access-list inbound permit tcp any host 172.16.254.1
access-group inbound in interface outside
object network obj-172.16.254.1
 host 172.16.254.1
 nat (inside,outside) static 81.81.81.82
Note: Check and change the values in bold as appropriate
Related Articles, References, Credits, or External Links
NA