
KB ID 0000593
Problem
I got a warning from a colleague that these switches, were no longer ‘Open’. i.e. You can no longer just plug them in, connect all your SAN devices and it will work. That’s how they used to work, so someone has decided to have then ‘Not Work’ out of the box (Nice one, well done).
Solution
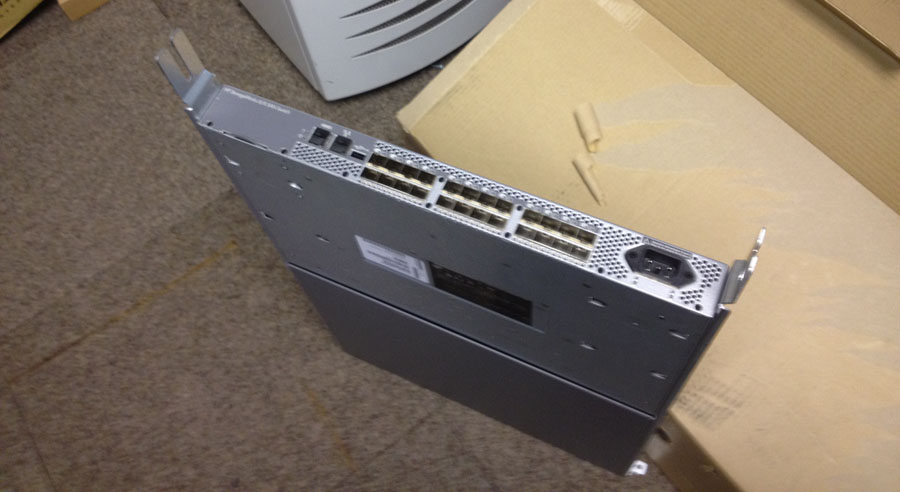
Rack fitting the Brocade 300 SAN Switch
1. Each mounting rail is in three pieces (2 long pieces and a small bracket that will be in the bag with the screws). The two outer brackets (without all the screw holes in them) are labelled left and right, and are fixed to the front of the rack, using the square washers that fit into the square holes in the rack, (see below).
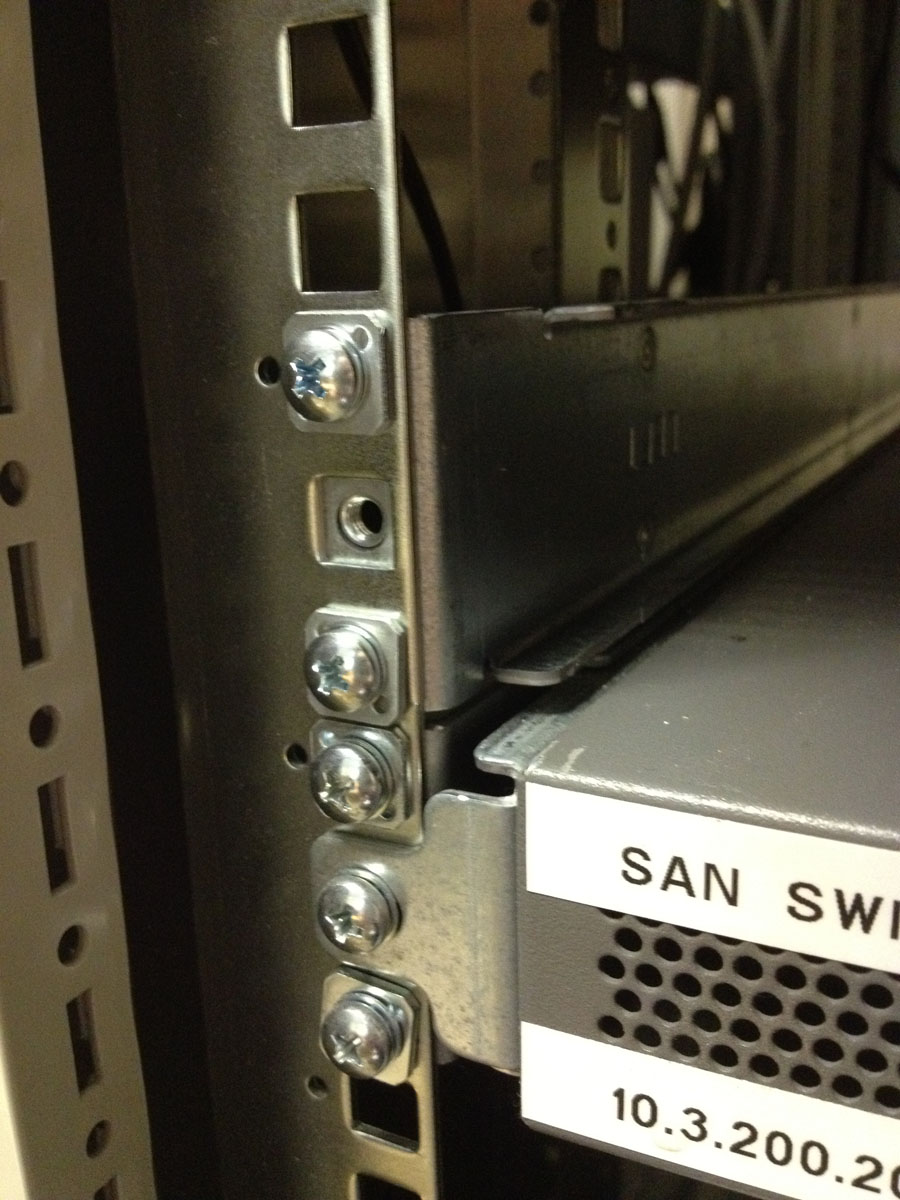
2. At the rear, use the small bracket and screw it to the rack in the same manner as the front.
3. The ‘inner’ rails screw onto the side of the switch and the air guide/baffle, as shown. If you line the front up the correct screw holes should be visible. Secure them with the round headed screws that have washers on them. (Note: the air baffle has a row of rivets on it – these face downwards).

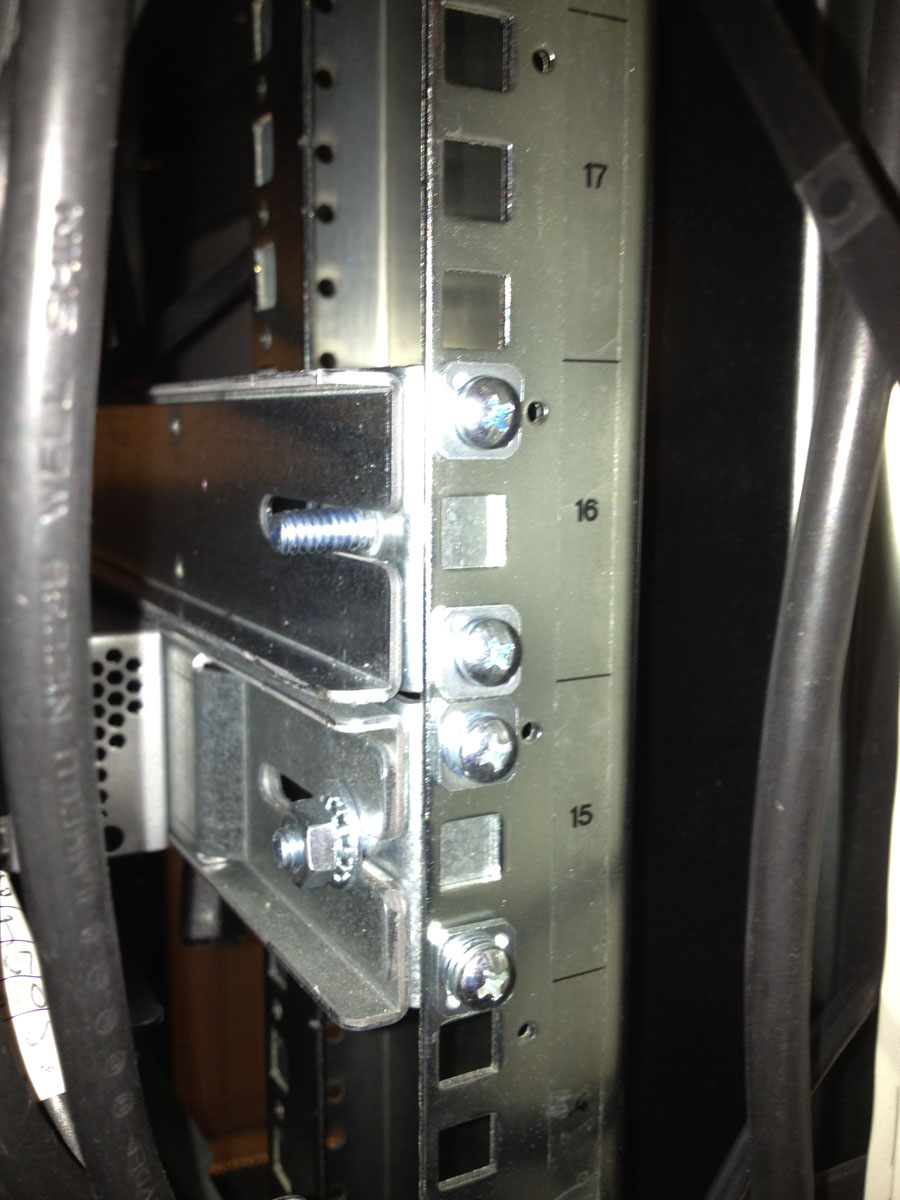
4. With both inner rails fitted, the switch will slide into the outer rails that are screwed to the rack. (From the front you want the power socket on the left, or the switch will go in upside down!)
5. Once inserted secure in place with a single screw in the middle.
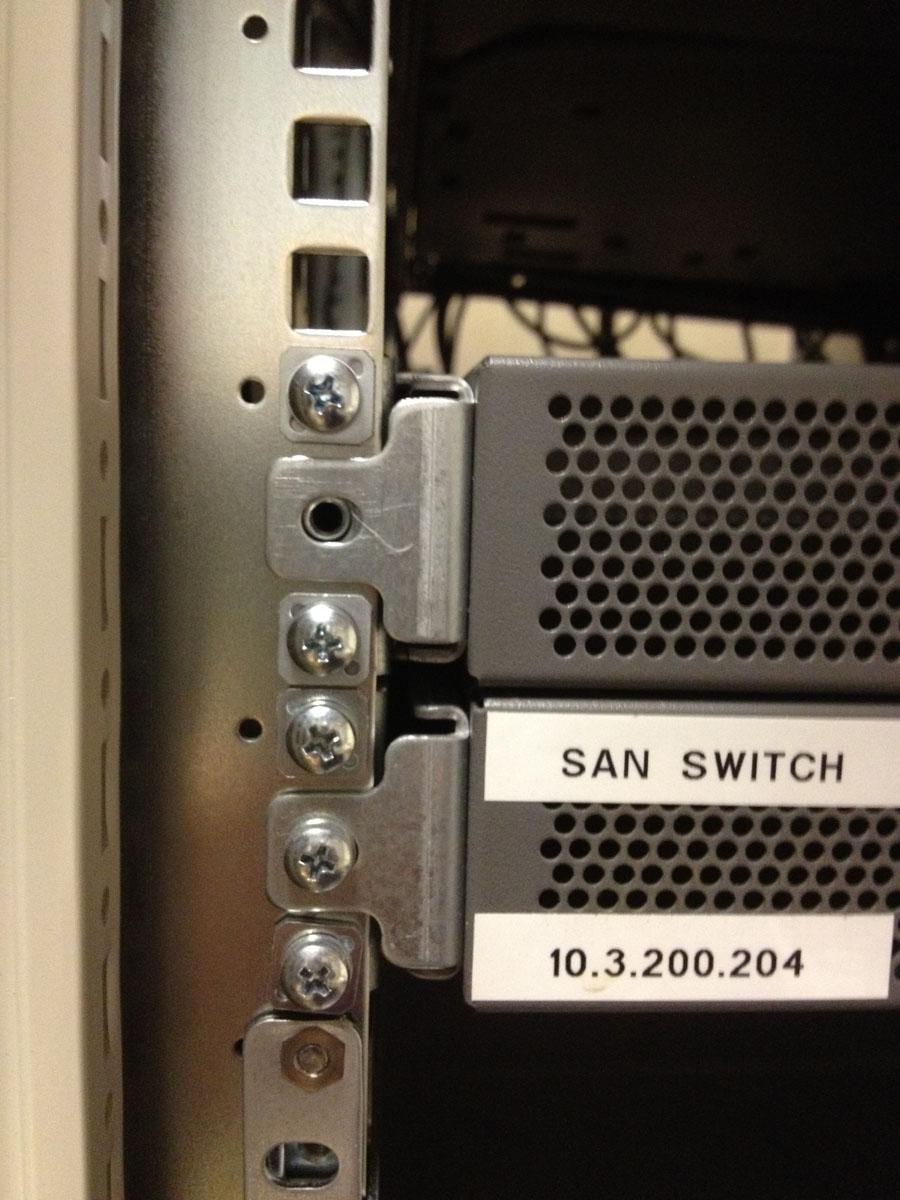
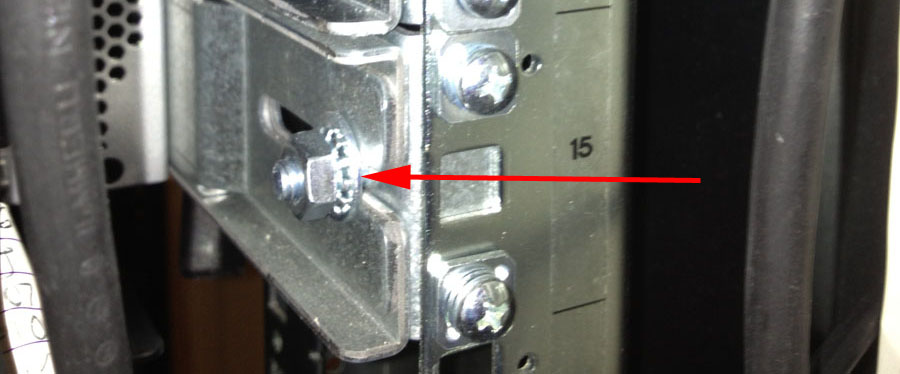
5. Finally, use the large nut to secure all the rails to the bracket at the rear.
Configuring the Brocade 300 SAN Switch
If you are feeling especially lazy, you can connect the switch to the network and connect to it via http://10.77.77.77 (Give yourself an IP address of 10.77.77.1/24). Use the username root and the password fibranne
1. If you don’t want to do that, connect the console cable (provided) to your PC and launch the EZ Setup Software supplied with the switch. Select English > OK.
2. At the Welcome Screen > Next > Next > accept the EULA > Install > Done > Select Serial Cable > Next > Next (make sure HyperTerminal is NOT on or it will fail). It should find the switch > Set its IP details)
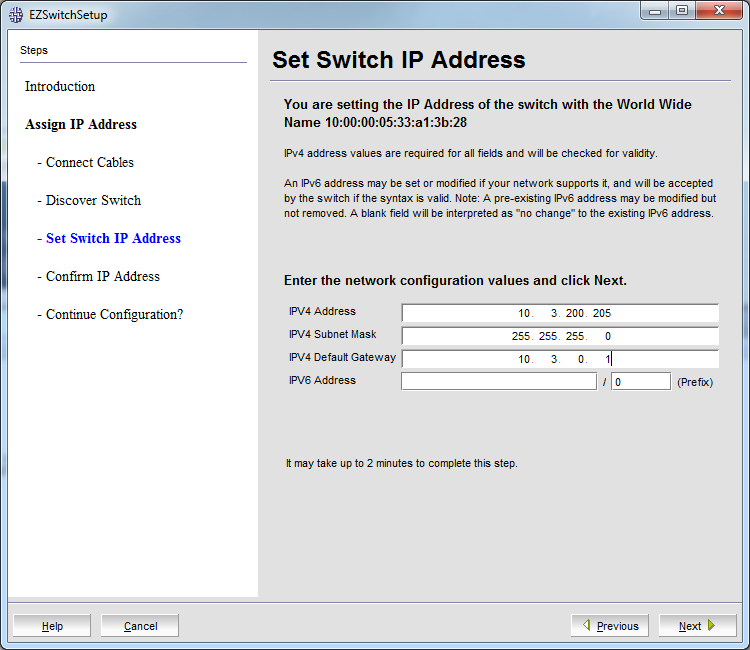
2. Next > Follow Instructions.
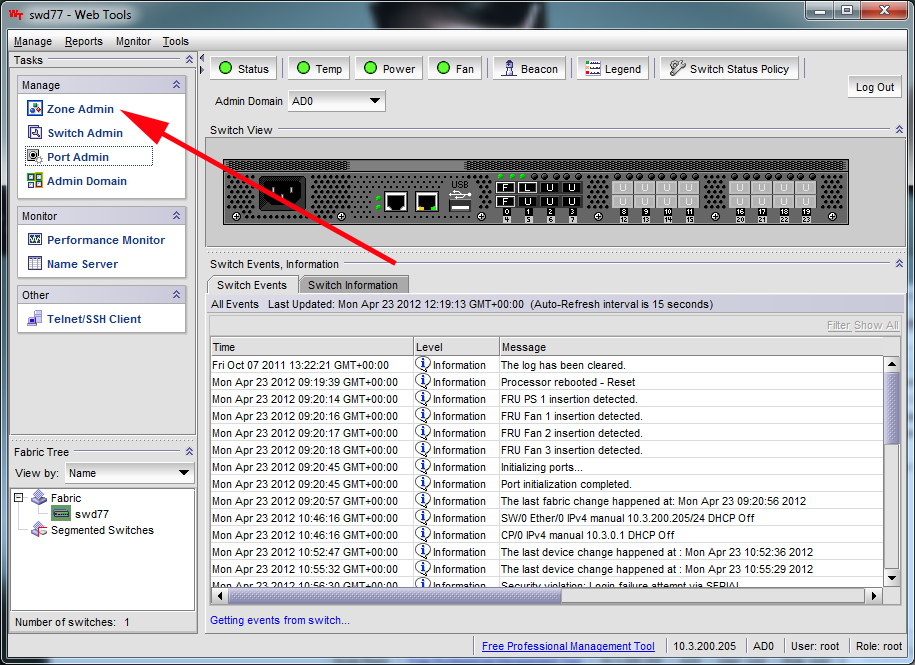
3. With the IP address set, you can connect to the switch via its web console (You must have Java installed). Once logged in (the default root password id fibranne unless you have changed it). Select ‘Zone Admin’.
4. Select Zone > New Zone > Create one > Now select all the WWW/Node names that are connected, and then you can add then to the new zone.
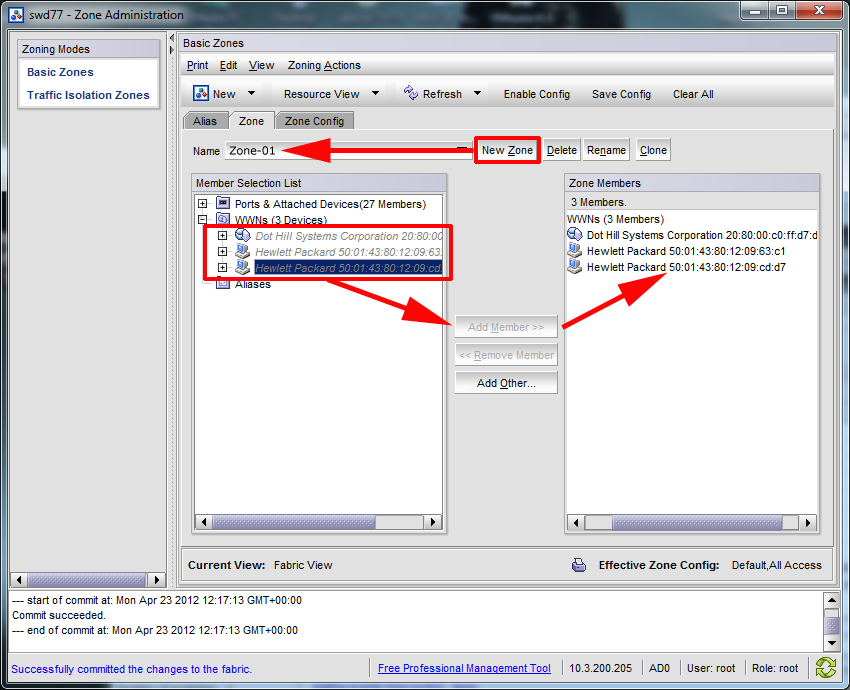
5. Before closing the window, Zoning Actions > Save Config.

Brocade 300 Additional Notes
Whilst connected via terminal (9600/8/1/N) you can use the following commands;
To show IP “ipaddshow”
To change IP “ipaddrset”
Default Passwords
username root password fibranne
username admin password password
Related Articles, References, Credits, or External Links
NA