
KB ID 0000551
Problem
The ability to administer vCenter via a web browser is nothing new, vCenter has had a web console in previous versions.
vCenter vSphere 4 Web Client (Web Access)

The version with vSphere 5 is much more feature rich. Like the VMware vSphere client it talks directly to the vCenter vSphere API, but unlike previous web access, the component needs to be installed and configured before you can use it.
What the Web Client Can Do
1. Connect to a vSphere vCenter server.
2. Can be used on non Windows machines (VI Client is Windows only).
3. Deploy Virtual Machines (Including deployment from Templates).
4. Configure Virtual Machines.
5. Provide basic monitoring.
What the Web Client Can’t Do
1. Manage Hosts
2. Manage Clusters
3. Manage Networks.
4. Manage Datastores or Datastore Clusters.
5. Connect to ESX or ESXi hosts.
Solution
Step 1 Install and Configure Web Access
Prerequisite: The vCenter server needs to have Adobe Flash installing on it to access the management console.
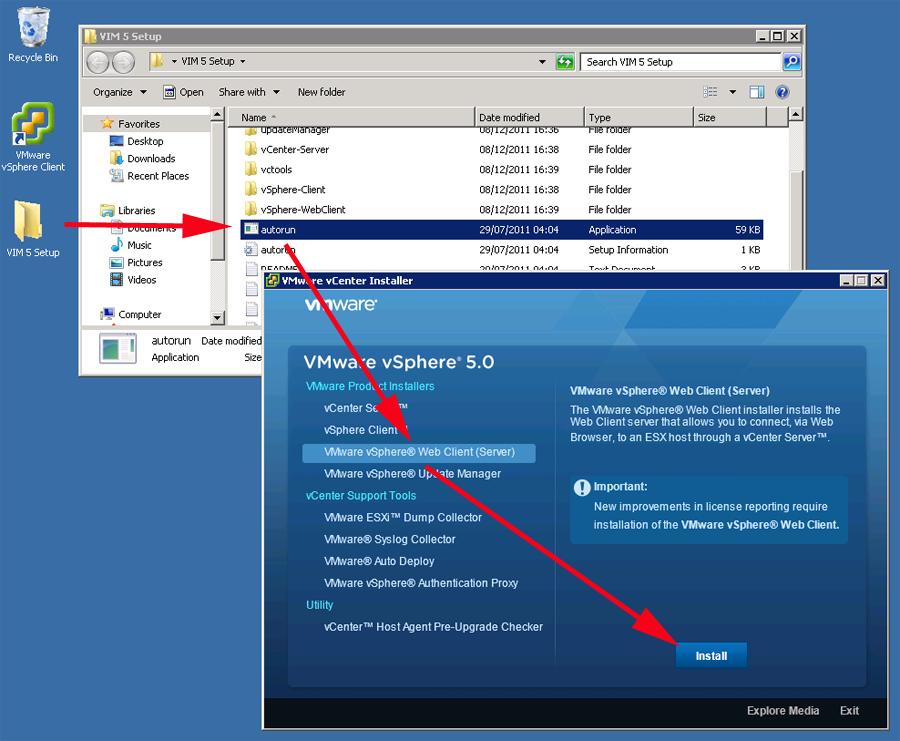
1. From the vCenter Installer media select “VMware vSphere Web Client (Server) > Install > Follow the on screen prompts.
2. Accept all the defaults, note the secure port number we will be using that later (TCP Port 9443).

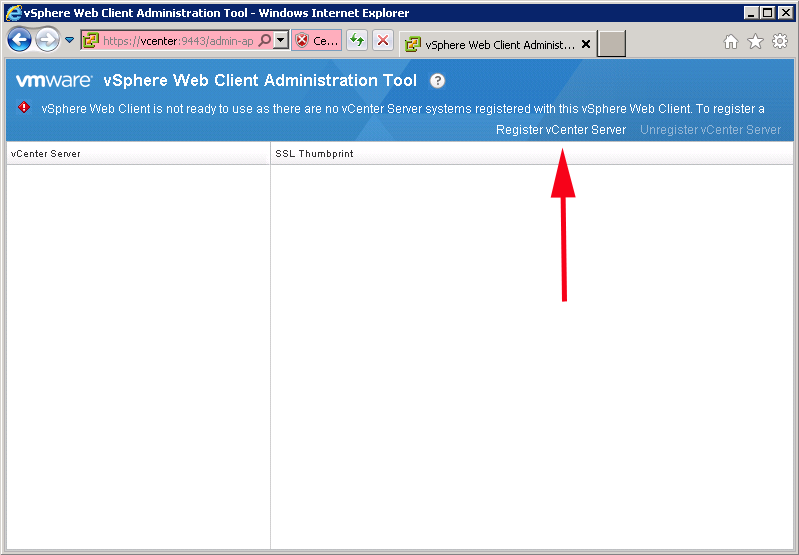
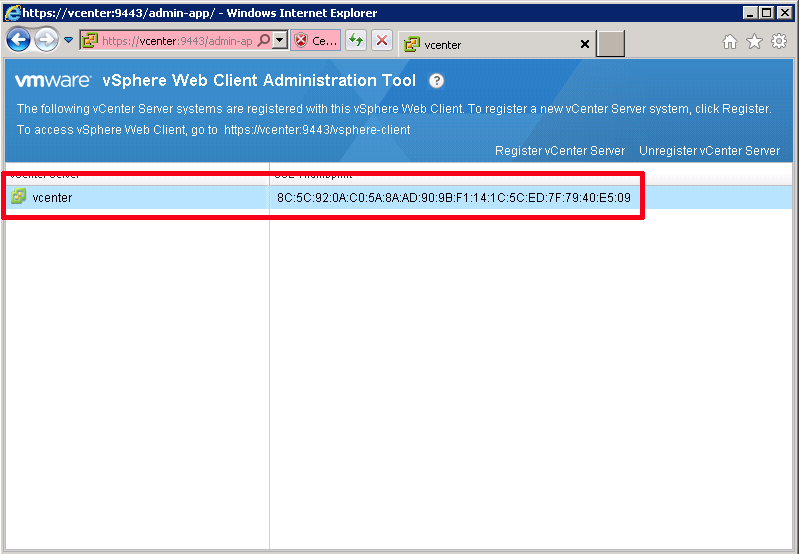
3. Once installed > On the vCenter server itself open a browser window > navigate to > https://{servername}:9443/admin-app > Select “Register vCenter Server”.
vSphere Web Client Supported Browsers: Internet Explorer (7 or newer) and Firefox (3.5 or newer), I’ve tried Chrome, it works, but some functionality is lost. (anything that requires the plug in i.e. console connections).
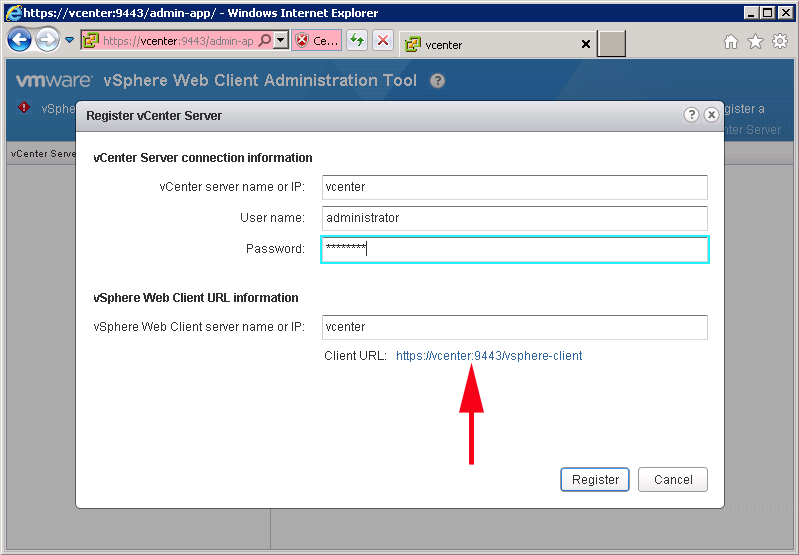
4. Enter the details for the vCenter server > Take note of the URL for your client to access (https://{servername}:9443/vsphere-client) > Register.
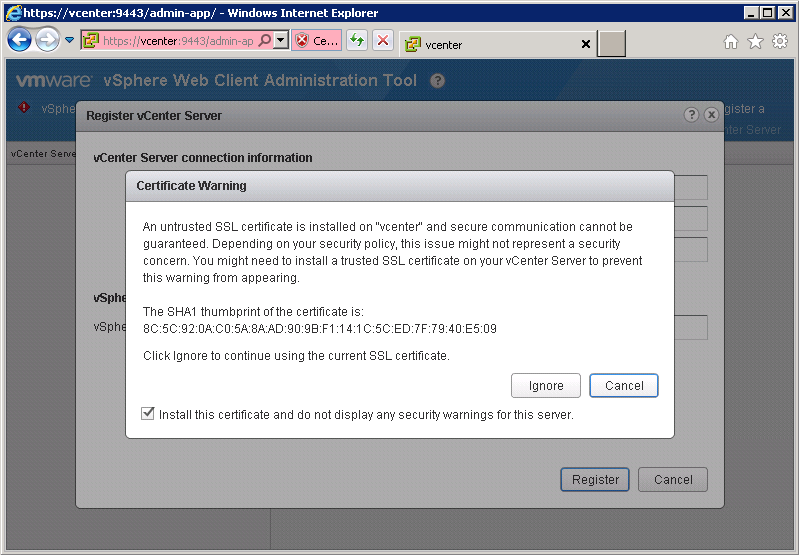
5. You will probably be using self signed certificates to tick the box and select “Ignore”.
6. That’s the server configured and ready to go.
Step 2 – Access the vCenter from web client
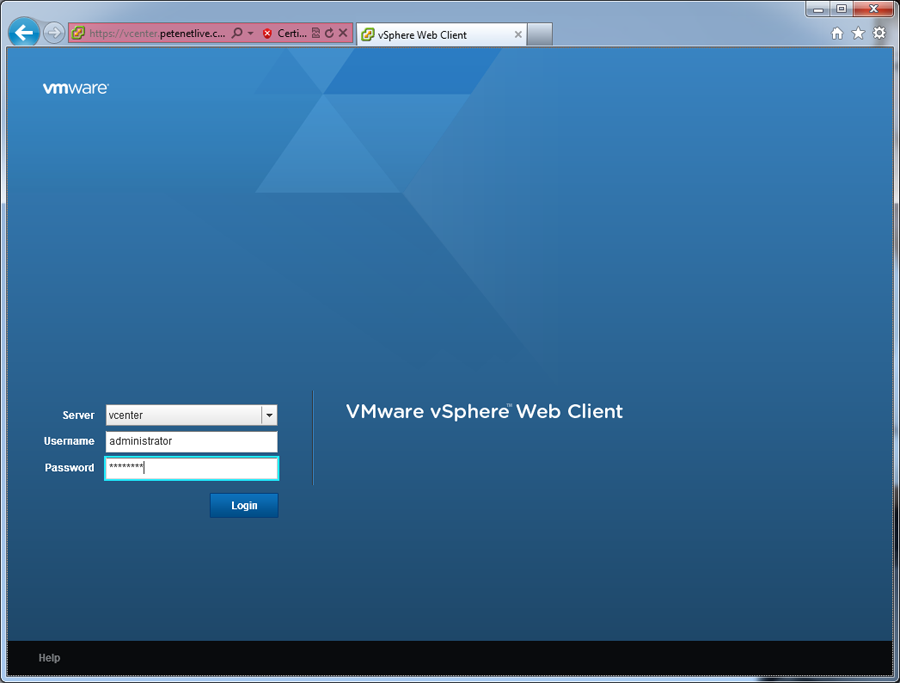
1. Open a browser window and navigate to https://{servername}:9443/vsphere-client> You may receive a warning about the certificate (because it’s self signed) click to continue > Enter your credentials > Login.
2. The first time you connect it launches the welcome splash screen > tick “Do not show..” and close the window. (Note you can launch it again from the help menu).

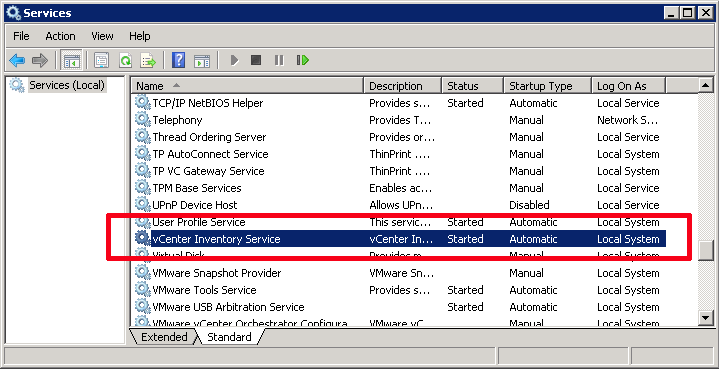
Note: If you see this error:
Connection Error
Unable to connect to vCenter Inventory Service –
https://{servername}:10443

Check on the vCenter server to make sure this service is running.
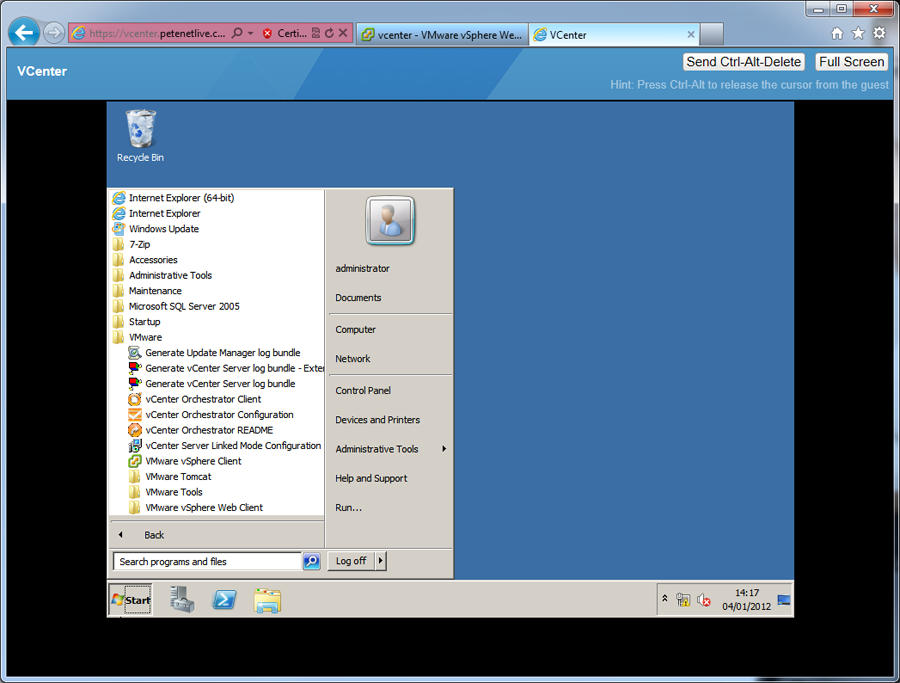
3. You should then be connected, and be able to browse your virtual infrastructure.

4. You can “console” onto your VM’s (Note: will need a plug in installing your browser will prompt you to accept/install).
Related Articles, References, Credits, or External Links
NA