
KB ID 0000436
Problem
You would like to put in a site to site VPN from a site that has a SmoothWall firewall to another site that has a Cisco ASA.
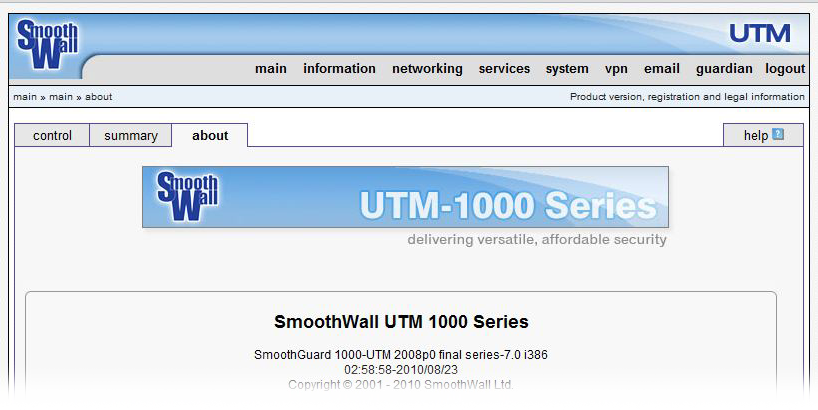
Note: This procedure was carried out on a SmoothWall UTM 1000 Series appliance, and uses a pre-shared key to authenticate the VPN.
Solution
1. For The Cisco end of the configuration, you can configure it from command line see here, or from the ASDM see here..
2. Connect to the SonicWall’s web management console. Navigate to VPN > IPSEC subnets.

2. Set as follows,
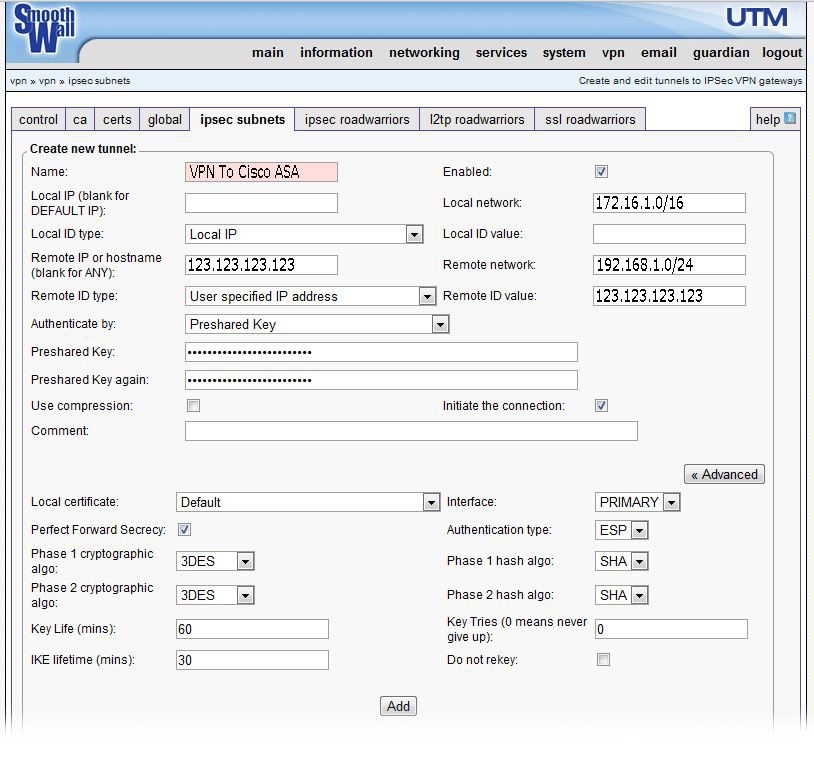
Name: Can be anything give it a recognisable name.
Enabled: Tick.
Local IP : Leave blank.
Local Network: The network behind the SmoothWall.
Local ID Type: Local IP
Local ID Value: Leave blank.
Remote IP or Hostname: The outside IP of the Cisco ASA.
Remote Network: The subnet address behind the Cisco ASA.
Remote ID Type: User Specified IP Address.
Remote ID value: The outside IP of the Cisco ASA.
Authenticate by: Preshared Key.
Preshared Key: The same key you entered on the Cisco ASA e.g. This1sak3y
Preshared Key again: Repeat above.
Use Compression: Leave un-ticked.
Initiate the connection: Tick.
Advanced Options
Local Certificate: Default.
Interface: PRIMARY.
Perfect Forward Secrecy: Tick.
Authentication type: ESP
Phase 1 cryptographic algo: 3DES
Phase 1 hash algo: SHA
Phase 2 cryptographic algo: 3DES
Phase 2 hash algo: SHA
Key Life: 60.
IKE Lifetime: 30
3. Finally press “Add”.
Note: To edit an existing tunnel, in the summary at the bottom place a tick in the “Mark” box then click “Edit”.
4. Normally that should be all you need to do, however you may also need to allow zone bridging, select networking > zone bridging.

5. Set as follows,
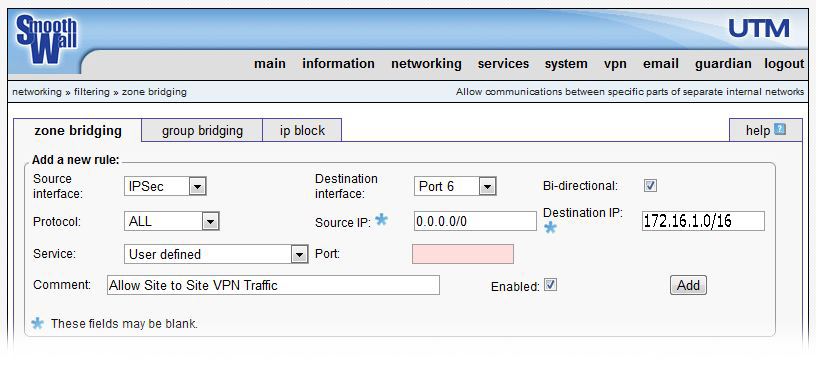
Source Interface: IPSec
Destination interface: Port that the hosts inside the SmoothWall are plugged into.
Bi-directional: Tick.
Protocol: ALL
Source IP: 0.0.0.0/0
Destination IP: The subnet behind the SmoothWall.
Service: User Defined
Port: Leave Blank
Comment: Put in a sensible text comment.
Enabled: Tick
6. Finally press “Add”.
Note: To edit an existing zone bridge, in the summary at the bottom place a tick in the “Mark” box then click “Edit”.
Related Articles, References, Credits, or External Links
NA