
(Installing on Server 2008 R2)
KB ID 0000416
Problem
Microsoft have not only slipstreamed the service pack into the install media, they have (Finally!) got the install routine to put in all the usual pre-requisites, roles, and features, that you had to do yourself before. (With the exception of the Microsoft 2010 filter pack, but even then you can do that after the install).
The procedure below was done on a single server in a test environment, to demonstrate the simplified procedure, it IS NOT good practice to install Exchange (any version) on a domain controller.
Solution
Before Site Visit
1. Have your install media downloaded and ready to go (Make sure you also have the unlock codes for Exchange – or you will have 119 days to licence it, post install).
2. Does your current anti virus solution support Exchange 2010? Do you need an upgrade?
3. Does your current backup software support Exchange 2010? Do you need to purchase extra remote agents or updates?
Before Deploying Exchange 2010
1. Depending on what documentation you read, some say that the global catalog server(s) in the current site need to be at least Server 2003 SP2. Other documentation says the schema master needs to be at least Server 2003 SP2. Let’s hedge our bets, and make sure that ALL the domain controllers are at least Server 2003 SP2 🙂
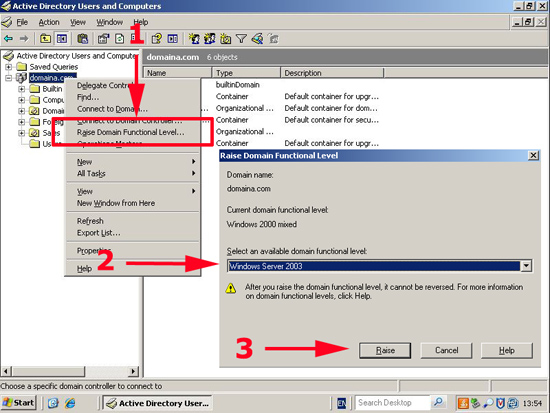
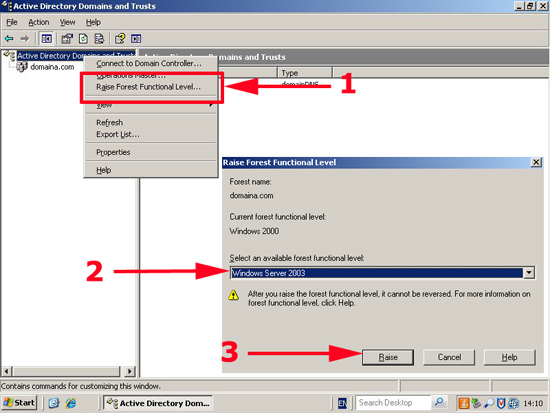
2. Your domain and forest functional levels need to be at Windows Server 2003.
3. Don’t forget – your server needs to be x64 bit (the video below was shot on a Server 2008 R2 server).
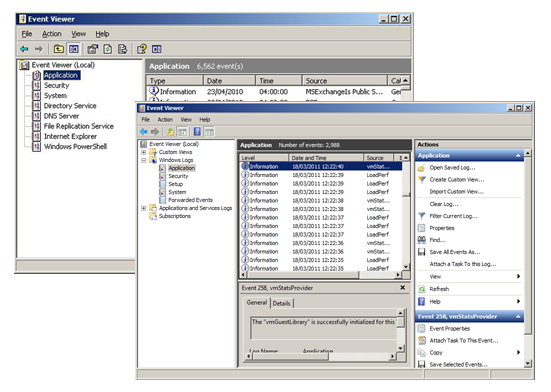
4. Make sure both the server you are installing on, and the Windows domain, are happy (get into the event viewers of your servers and have a good spring clean before deploying Exchange 2010).
5. Install the Office 2010 Filter Pack, and the Office 2010 Filter Pack Service Pack 1.
6. Install the roles required with the following PowerShell Commands;
Import-Module ServerManager

For Client Access, Hub Transport, and the Mailbox roles issue the following command;

Add-WindowsFeature NET-Framework,RSAT-ADDS,Web-Server,Web-Basic-Auth,Web-Windows-Auth,Web-Metabase,Web-Net-Ext,Web-Lgcy-Mgmt-Console,WAS-Process-Model,RSAT-Web-Server,Web-ISAPI-Ext,Web-Digest-Auth,Web-Dyn-Compression,NET-HTTP-Activation,RPC-Over-HTTP-Proxy,Web-WMI -Restart

For Client Access and Hub Transport server roles issue the following command;

Add-WindowsFeature NET-Framework,RSAT-ADDS,Web-Server,Web-Basic-Auth,Web-Windows-Auth,Web-Metabase,Web-Net-Ext,Web-Lgcy-Mgmt-Console,WAS-Process-Model,RSAT-Web-Server,Web-ISAPI-Ext,Web-Digest-Auth,Web-Dyn-Compression,NET-HTTP-Activation,RPC-Over-HTTP-Proxy,Web-WMI -Restart

For only the Mailbox role issue the following command;

Add-WindowsFeature NET-Framework,RSAT-ADDS,Web-Server,Web-Basic-Auth,Web-Windows-Auth,Web-Metabase,Web-Net-Ext,Web-Lgcy-Mgmt-Console,WAS-Process-Model,RSAT-Web-Server -Restart

For only the Unified Messaging role issue the following command;

Add-WindowsFeature NET-Framework,RSAT-ADDS,Web-Server,Web-Basic-Auth,Web-Windows-Auth,Web-Metabase,Web-Net-Ext,Web-Lgcy-Mgmt-Console,WAS-Process-Model,RSAT-Web-Server,Desktop-Experience -Restart

For only the Edge Transport role issue the following command;

Add-WindowsFeature NET-Framework,RSAT-ADDS,ADLDS -Restart
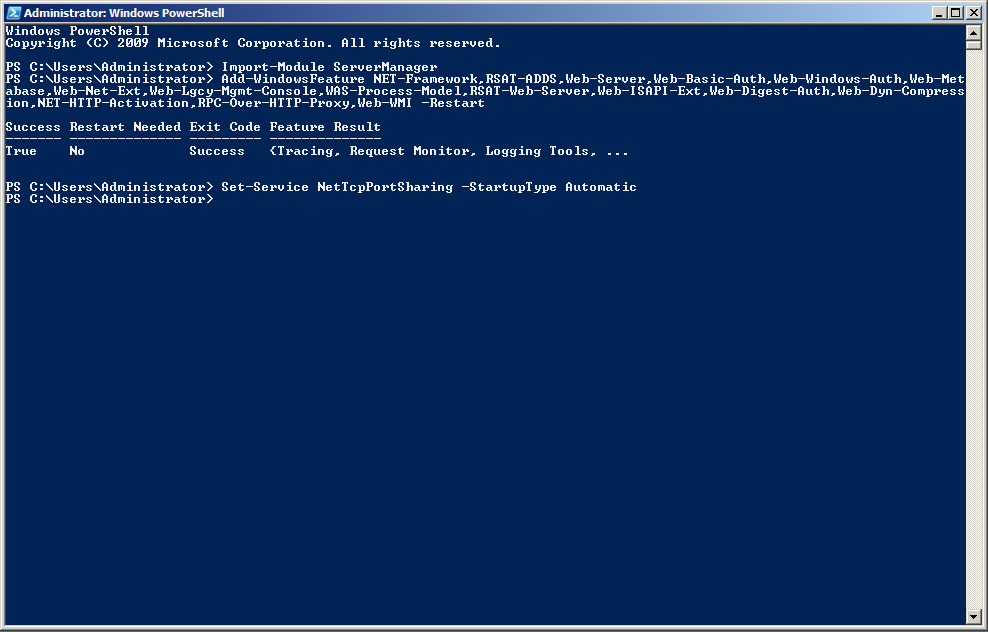
7. Set the Net.Tcp Port Sharing Service for Automatic startup by running the following command;
Exchange 2010 (c/w SP1) Install – Greenfield Site
The single best thing Microsoft has done with the SP1 install media, is to include this tick box.

Related Articles, References, Credits, or External Links
How To Install Exchange 2016 (Greenfield Site)