
KB ID 0000274
Problem
You have a diskless HP Proliant server – or simply a Proliant with an internal SD card (this procedure will work on internal/external USB drives as well). And you want to install VMware ESXi 4.
Solution
Pre Requisites
Set the Server to Boot From USB Card First
1. When the server boots press F9 to Enter the RBSU.
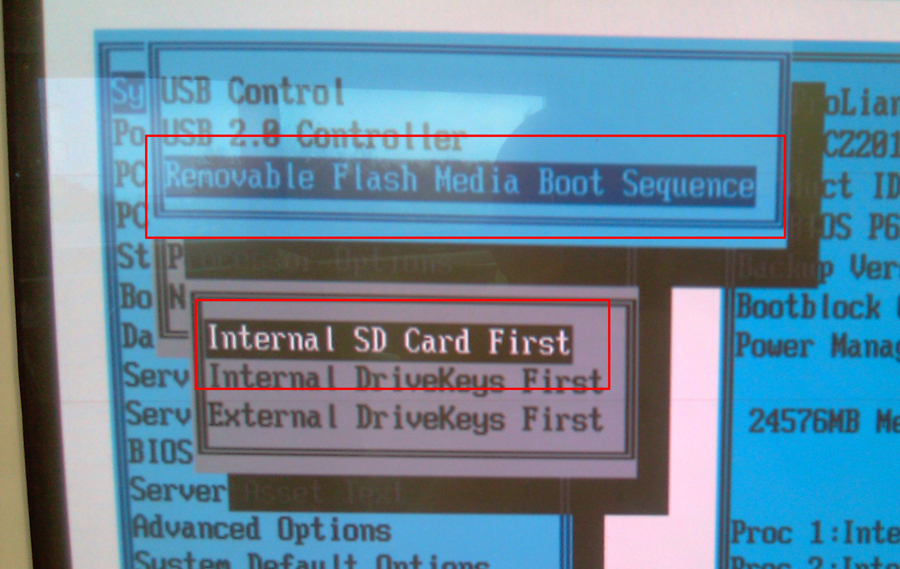
2. System Options > USB Options > Removable Flash Media Boot Sequence.
3. Select the appropriate boot device i.e. “Internal SD Card First” > Esc > Esc.
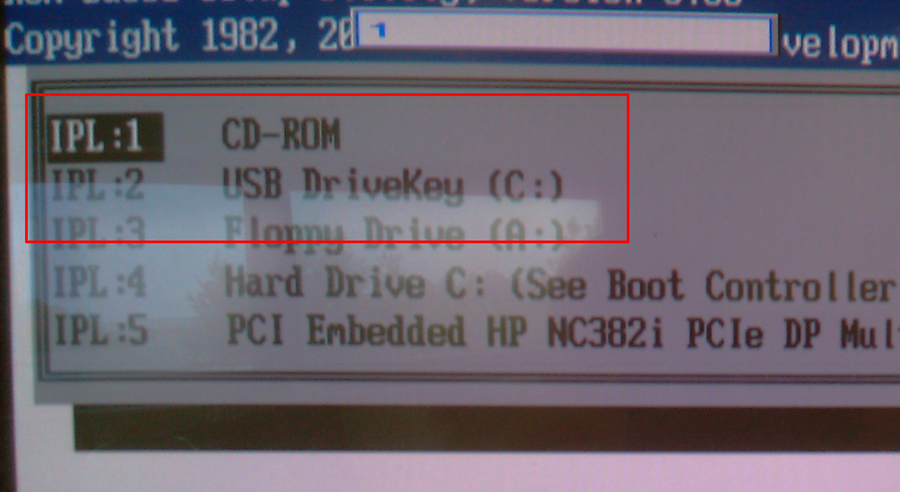
4. Select Standard Boot order (IPL) > Set CDROM first then USB DriveKey second.
Set the Servers Internal BIOS Clock
1. From within the RBSU.
2. Date and Time > Set accordingly > Esc.
Disable F1 Prompt (Not necessary but it annoys me)
1. From within RBSU > Server Availability > Post F1 Prompt > Disabled > Enter > Esc > Esc > F10 to save.
Install ESXi 4
1. Remember to remove all presented LUNS first!
2. Download the HP ESXi flash card installer CD.
Note: I used ESXi_HD_USB_SD_Image_Installer_CD_583772_003.iso
1. Boot the server with your ESXi flash installer CD/DVD.
2. Accept the default of ESXi Installer > lots of Linux image loading (2 minutes).
3. Then the Vmware ESXi splash screen will load. (2 minutes).
5. At the “Welcome to the VMware ESXi 4.0.0 Installation Window > Press Enter to install.
6. Press F11 to Accept the EULA.
7. Select your USB Flash Media (Disk0 by default) > Enter.
8. Press Enter to continue.
WARNING this will wipe anything on the SD card!
9. Press F11 again to confirm.
10. The image will transfer over (3 Minutes).
11. When done it will say successfully installed.
12. Remove the CD/DVD and press Enter to reboot.
Configure ESXi 4
When the server has booted Press F2 to configure.
1. Configure root password > old password will be blank > Type in the new one twice > Press Enter.
2. To set an IP Select Configure Management Network > Connect the NIC you want to use as the service console.
3. Select IP Configuration > Enter > Select “Set Static” > Type in the IP, Mask and default gateway > Enter.
4. Select DNS Configuration > enter primary and secondary DNS Servers and the ESXi servers FQDN > Enter > Esc.
5. Custom DNS Suffixes > Enter your domain name > Enter > Esc.
6. Press Esc then Press “Y” to save the changes and restart the management network.
You can now connect to the the ESX server via its web page, and download the viclient software to manage it.
For Licensing ESX4i click here.
Related Articles, References, Credits, or External Links
NA