
KB ID 0000255
Problem
It’s been so long since I did this, I thought I’d document it this time round, as it’s probably going to be the last time I ever do it.
Solution
Pre – Requisites
1. A server running Windows Server 2000 (Standard or Advanced). It must be a domain member server (it can be a domain controller but that’s not recommended). It must also be able to see a properly configured DNS server.
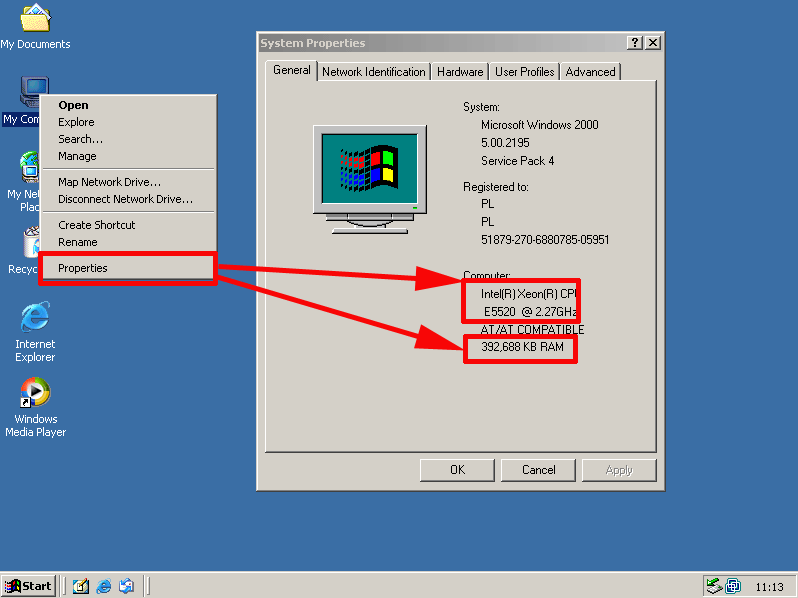
2. The Server needs to have at least a 166 Mhz processor, have 128MB of RAM and 4GB free disk space.
3. Before you start make sure you have good backups of this server and your active directory.
4. Inspect your server event logs to make sure everything is running cleanly before you start. Consider running netdiag from the Windows 2000 support tools.
5. You will also need a copy of the Server 2000 CD handy.
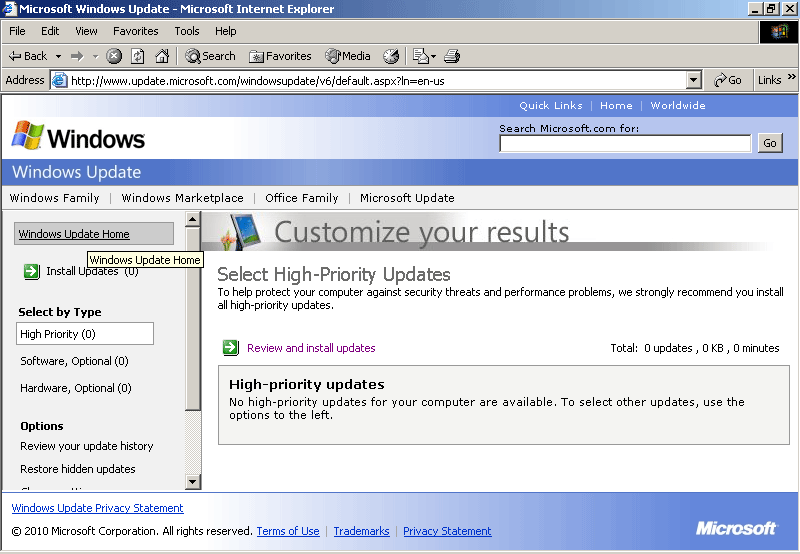
6. Make sure your server is fully up to date with windows updates.
Step 1 Prepare The Server.
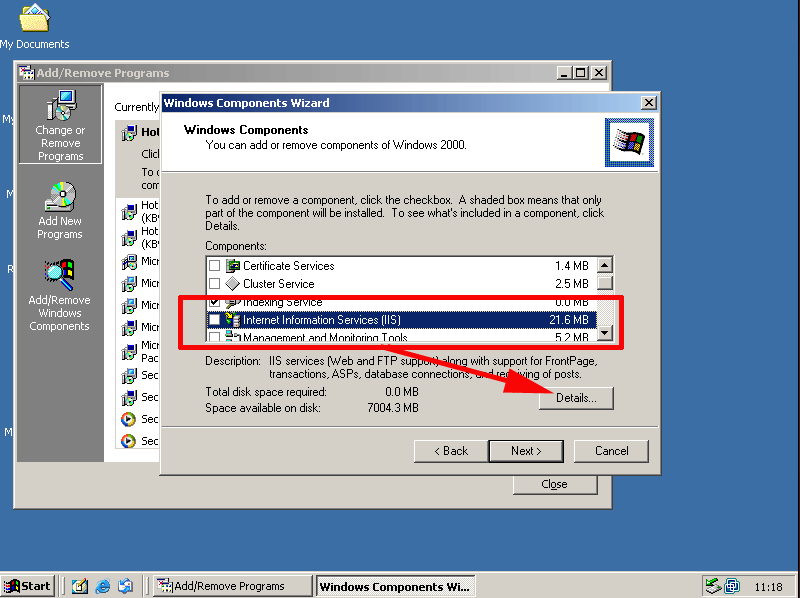
1. IIS is installed with 2000 server by default, you need to add NNTP and SMTP. Start > Run > appwiz.cpl > Add Remove Windows Components > Internet Information Services > Details.
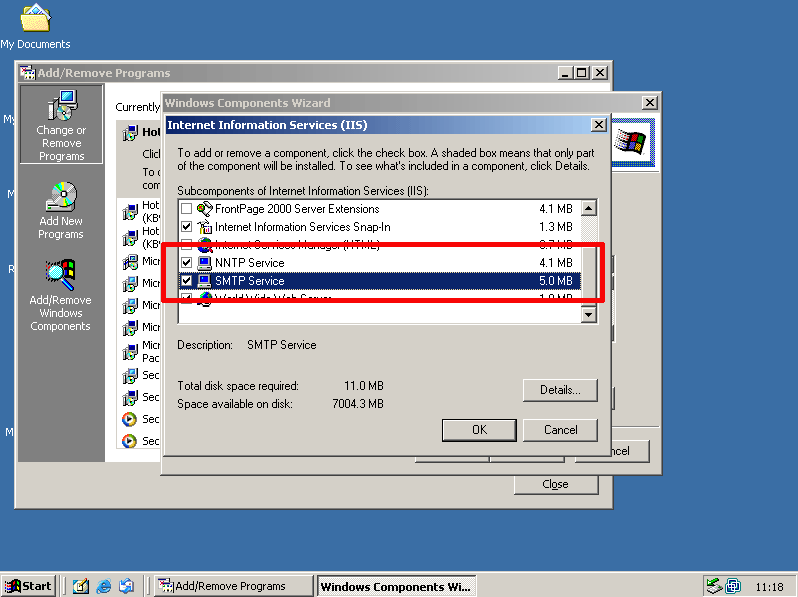
2. Tick NNTP service and SMTP Service > OK > Next > Point at the Windows Server install CD or a local copy of the i386 directory > OK.
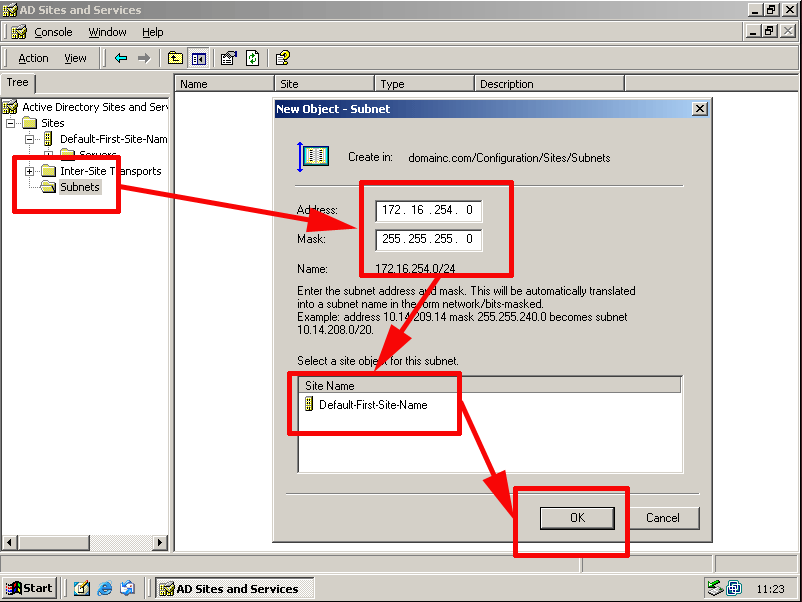
3. MS KB 262068 states that one subnet must exist, Click Start > Programs > Administrative Tools > Active Directory Sites and Services > Right click Subnet’s > New Subnet > Type in the subnet and subnet mask > Select the site to assign the subnet to (Note: By default it will be Default-First-site-Name) > OK.
Step 2 Extend the Schema
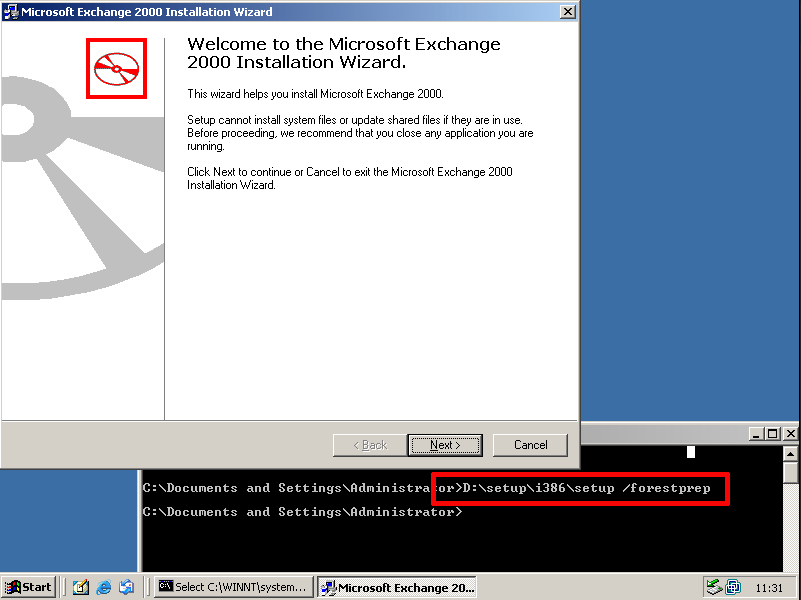
1. Insert the Exchange 2000 CD, Click Start > Run > cmd {Enter}
2. At command line D:setupi386setup /forestprep {Enter}
3 At the welcome Page Click Next > I Agree > Next.

4. Type in the 25 Character Unlock Code > Next > Next > Create New Exchange Organization > Next.
5. Either enter a name for the Exchange organization or accept the default of “First Organization” > Next.
6. Accept the default of the domain administrator (Unless you specifically want to use a different Schema admin account) > Next.
7. The AD Schema will be extended, this takes about 5 minutes > When dons Click Finish.
Step 3 Extend the Domain
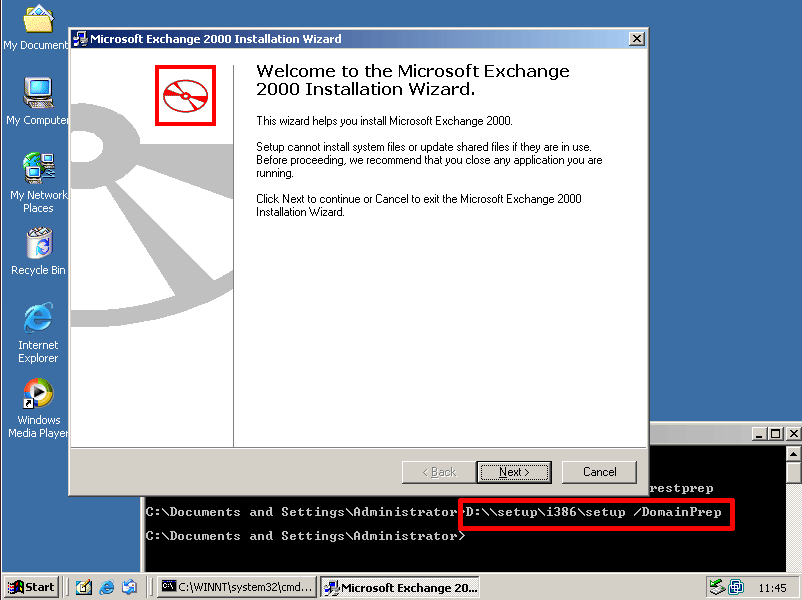
1. Back at command D:setupi386setup /DomainPrep {Enter}
2. At the welcome Page > Next > I Agree > Next.

3. Type in the 25 Character Unlock Code > Next > If you get a security warning click OK.
4. The domain will be prepared , this takes about 1 minute > When done > Finish.
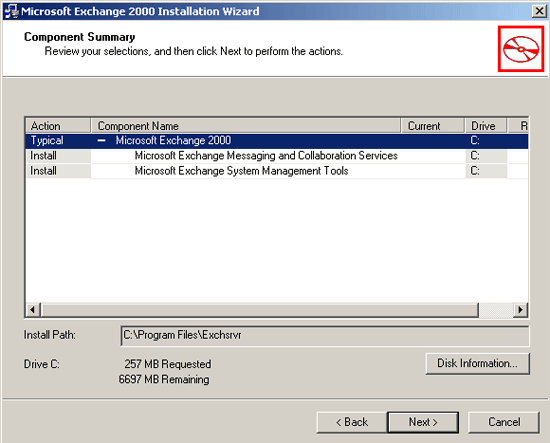
Step 4 Install Exchange 2000
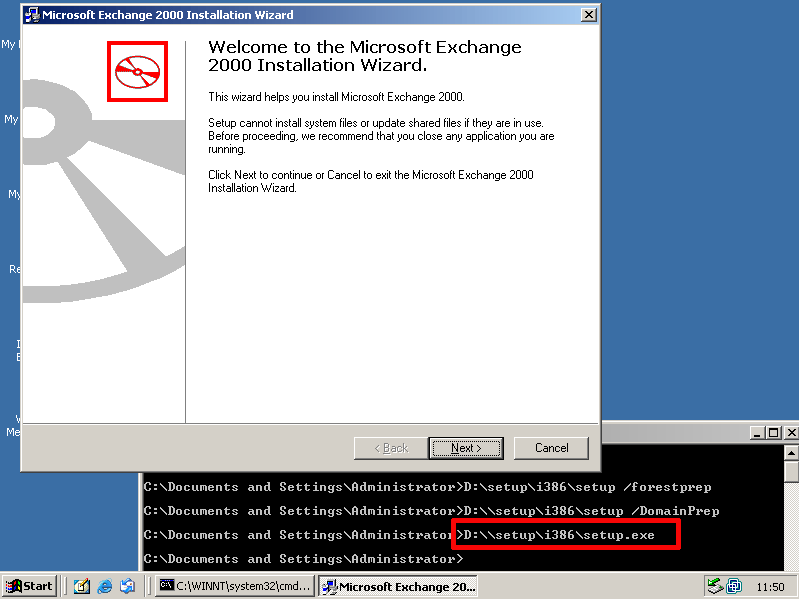
1. Back at command D:setupi386setup.exe {Enter}
2. At the welcome page > Next > I Agree > Next.
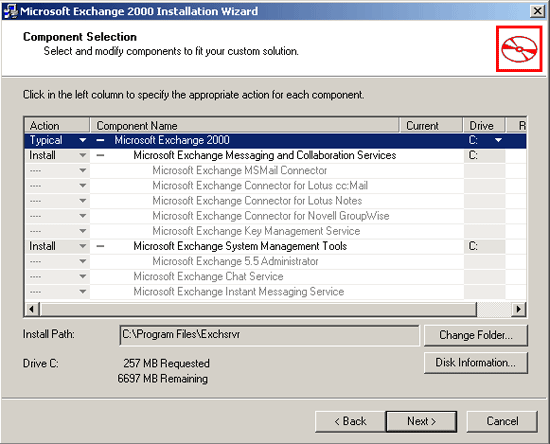
3. Type in the 25 Character Unlock Code > Next > Next > Select “I agree that I have read and agree to be bound by the license agreements for this product” > Next.
4. Click Next > Exchange will install > When done > Finish.
5. Reboot the server.
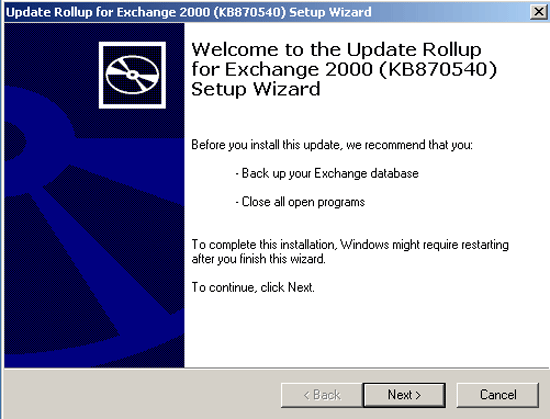
Step 6 – Update
1. Download and install service pack 3.
2. Download and install the “Update roll up for Exchange 2000”.
Step 7 Configure Exchange
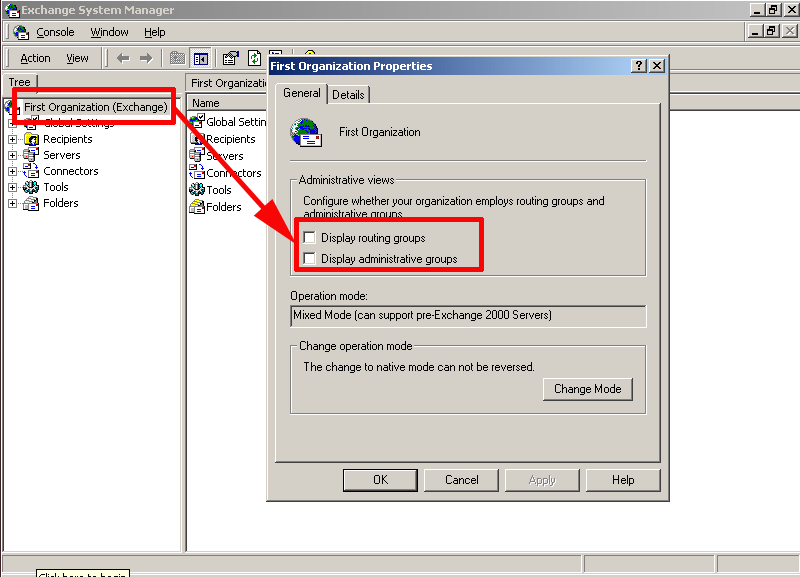
1. Launch the Exchange administration console, Start > Programs > Microsoft Exchange System Manager. I like to see the administrative groups and routing groups so right click the top level > Properties > Tick “Display Routing Groups” > Tick “Display administrative groups” > Apply > OK > OK.
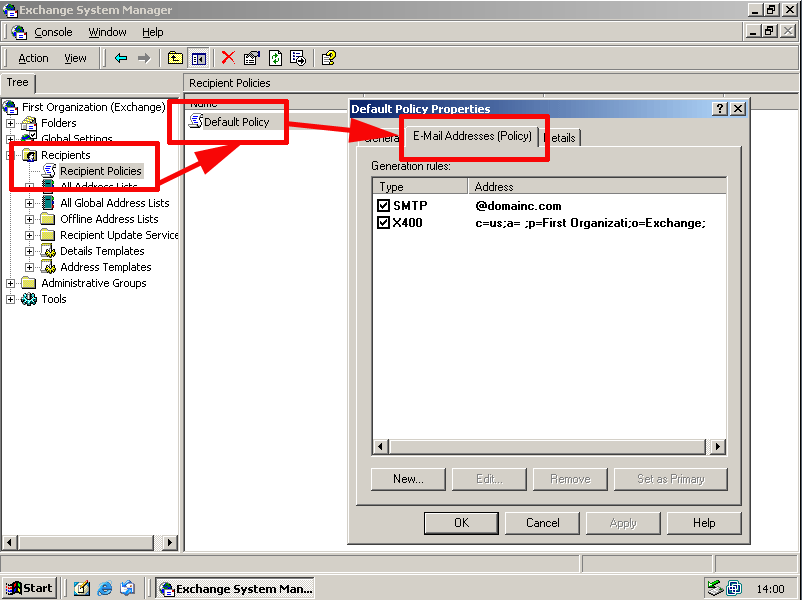
2. To ensure your email addresses will be correct > Expand recipients > Recipients policies > Default Policy > Properties > Email address policy. (Note you can add in new domain names to the global policy here as well).
3. Ensure that your public mail records (MX Records) are either pointing directly to the Exchange server, or your corporate router or firewall is passing SMTP (TCP Port 25) traffic to the server.
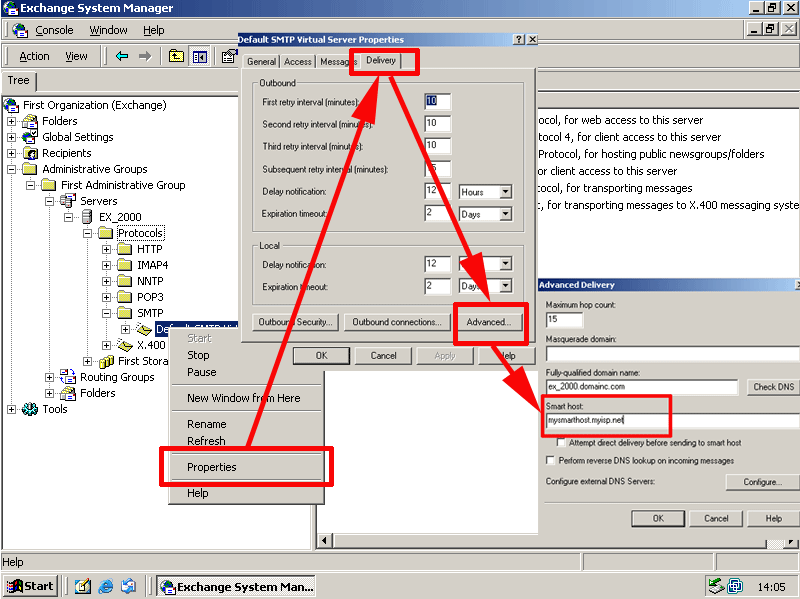
4. If you send your mail out via an SMTP smart host add it as follows, Expand “Administrative Groups” > “First Administrative group” (Note: yours may be named differently) > Servers > {server name} > Protocol > SMTP > Right click the “Default SMTP Virtual Server > Properties > Delivery Tab > Advanced > Enter your smart host (Note: If you don’t know whether you have a smart host you probably don’t have one).
Step 8 Mail Enable Your Users.
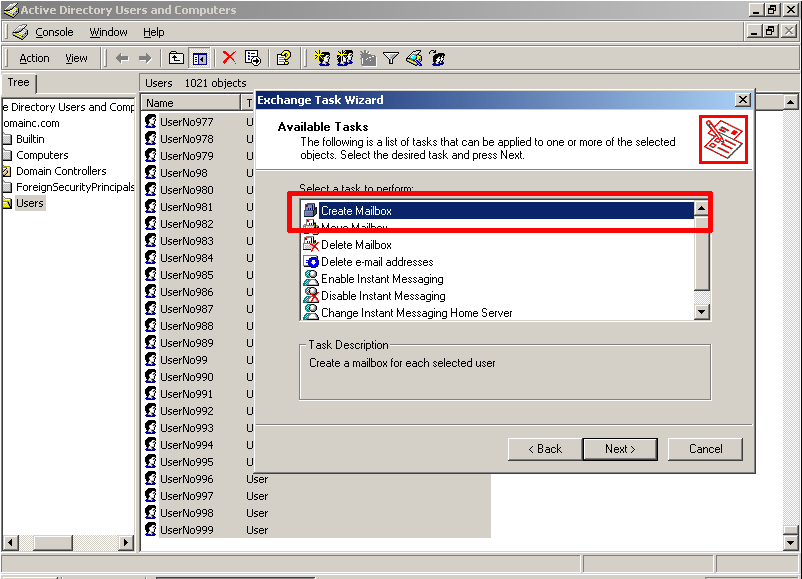
1. Start > Run > dsa.msc {enter}
2. Locate your user(s). Right click them > Exchange Tasks > Next > Create Mailbox > Next > Next > When done click finish.
Related Articles, References, Credits, or External Links
NA