
Bridged Mode – Thompson Speedtouch ST510
KB ID 0000210
Problem
You have a device either a PC, or In my case a Cisco firewall you want to have the public IP address assigned by your ISP, rather than the translated private IP address given out by the speedtouch router/modem.
Solution
1. Once you have your Speedtouch up and running, connect your devices to the back of it (it only has one internal Ethernet port so you may need to plug in a switch to get your laptop/PC, and the item in question on – though you can plug them in one at a time if your pushed). Select “Home Network” > “Devices” > all being well you should see the device you are after on the list > Select it.
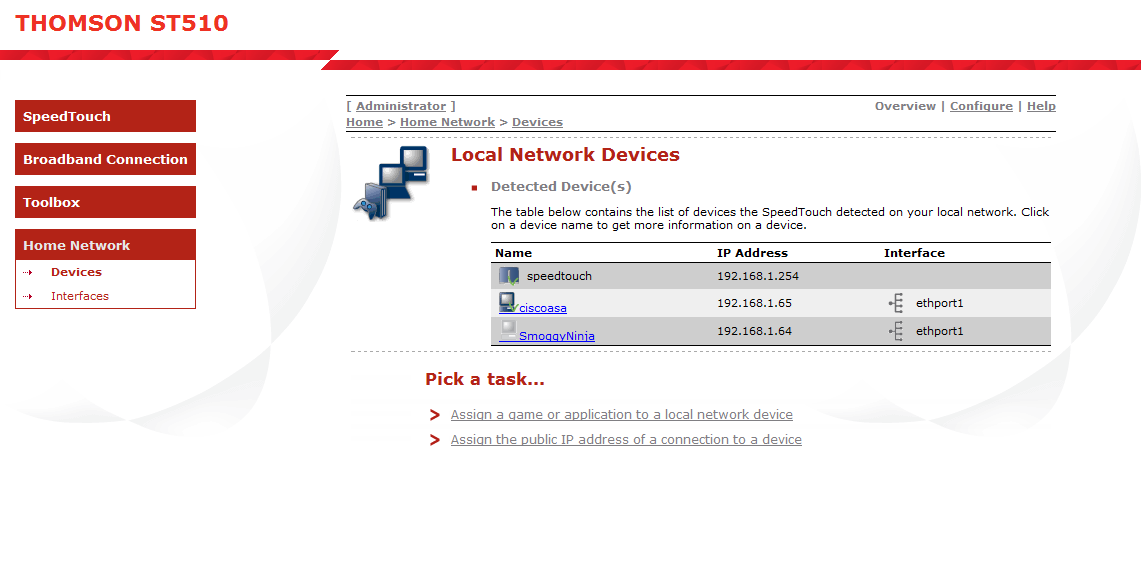
2. Here’s my firewall listed, currently with a private IP address via DHCP (192.168.1.65 in this case). At the bottom select “Assign the public IP address of a connection to a device.”

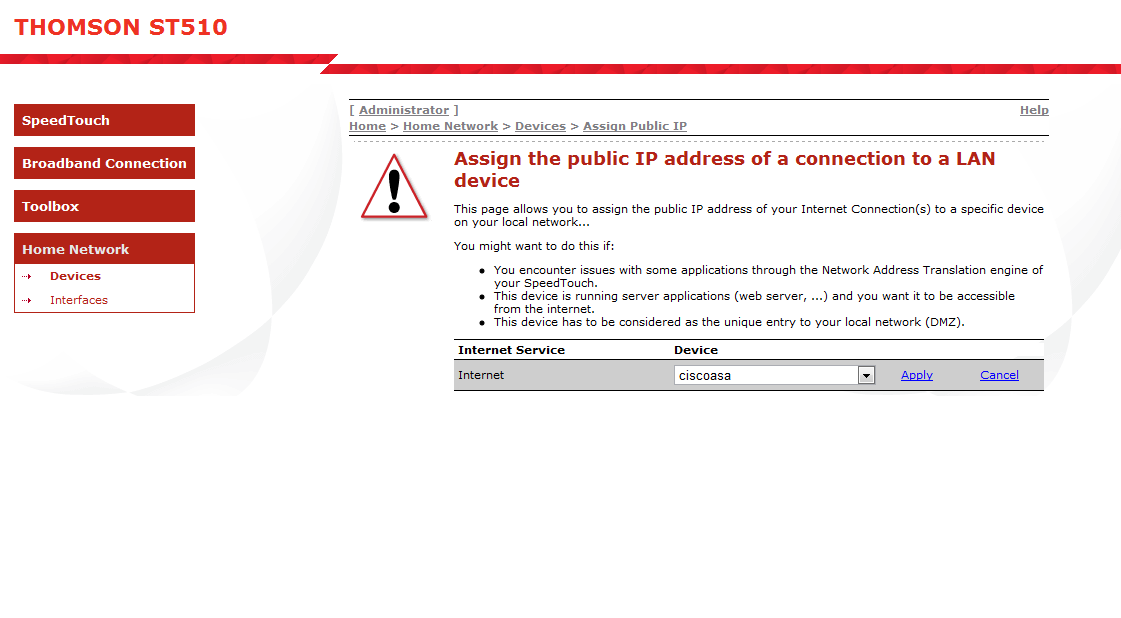
3. At present nothing is set you need to click “Edit”.

4. Change the drop down section so that your device is listed and > Apply.
5. Now you should see it listed, if you mistakenly assigned it to the wrong device you can click “Unassign”.

6. Note on the device you will need to reboot or refresh the IP address before it will get the public IP address.
Firewall Notice
If you are deploying a firewall behind this router – you might find that your VPN’s work but your port forwarding and remote management does not. You will need to disable the Speedtouch’s internal firewall. Select Firewall > Configure > Select “Disabled” > Apply.

Related Articles, References, Credits, or External Links
NA