
KB ID 0000164
Problem
When Microsoft released Windows Vista and Server 2008 they had the brilliant Idea of putting all the versions you would require in the same install media. With Windows 7 they have changed their approach, and the install media is specific to the version that is going to be installed. Well actually that’s not true the version is decided by a file in the installation media called ei.cfg and all versions are STILL in there.
What they still do, is have their x32 bit and their x64 bit Operating Systems on different media. If you do a lot of installs you might want them all on one DVD. Below are two walkthroughs, the first shows you how to make an x32 and x64 bit install DVD with all the versions* on it, the second shows you how to unlock your exiting install media so that all the versions on it are accessible.
Create an x32 and x64 bit Windows 7 Multi Install Media DVD
Create an x32 or x64 bit Windows 7 Multi Install DVD.
*When I say “all versions” I’m NOT including Windows 7 Enterprise, that comes on separate media, and is just for open value subscription customers, or customers with software assurance.
Solution
Create an x32 AND x64 bit Windows 7 Multi Install Media DVD
1. Download your Windows 7 ISO Images (x32 and x64), from VLSC, Technet, or MSDN etc.

2. Make two Directories on your Machine’s C: Drive called Master and Images.

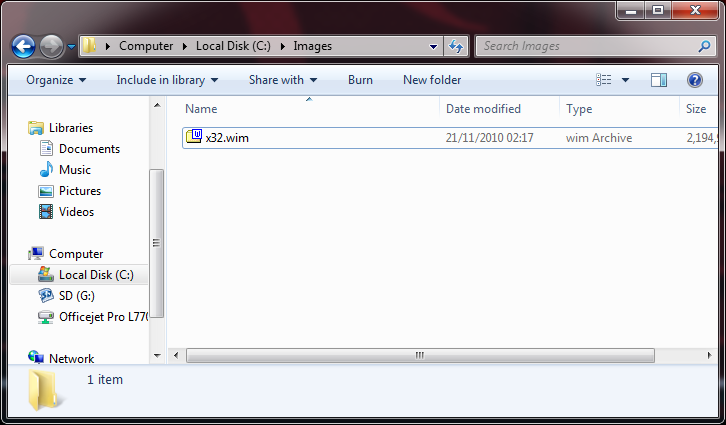
3. Using 7Zip open the x32 bit ISO file you have downloaded, and extract the sourcesinstall.wim file to the C:Images folder.
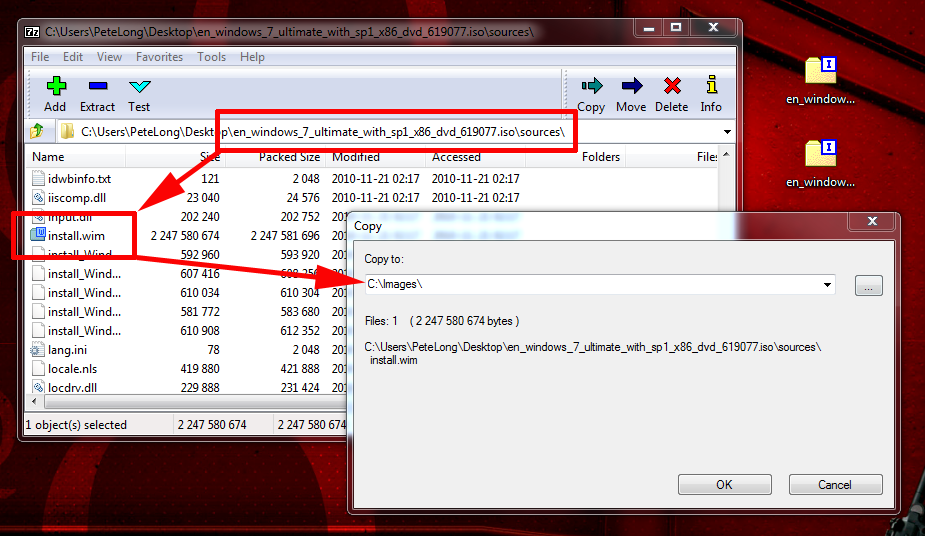
4. Then rename the file you just extracted to x32.wim.
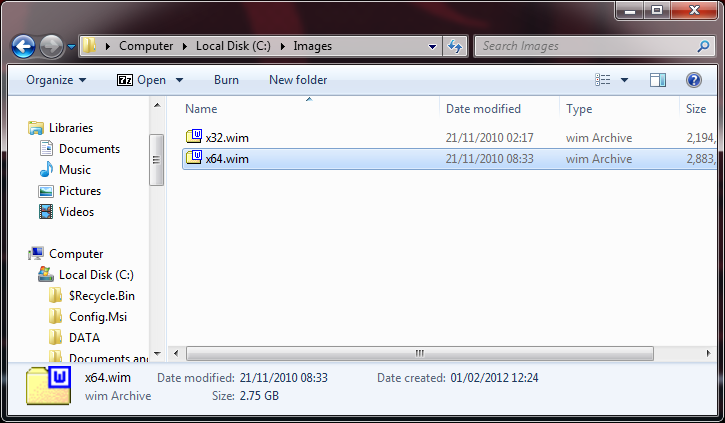
4. Using 7Zip open the x64 bit ISO file you have downloaded, and extract the sourcesinstall.wim file to the C:Images folder.

5. Then rename the file you just extracted to x64.wim.
5. Install the WAIK on your machine (instructions here).
6. Check the x32 image for the “Image Index” (these are the numbers of all the Windows versions in this image), Yours will probably be identical, but you may have different media so check! Launch the “Deployment Tools Command Prompt”

To check the image index, execute the following command;
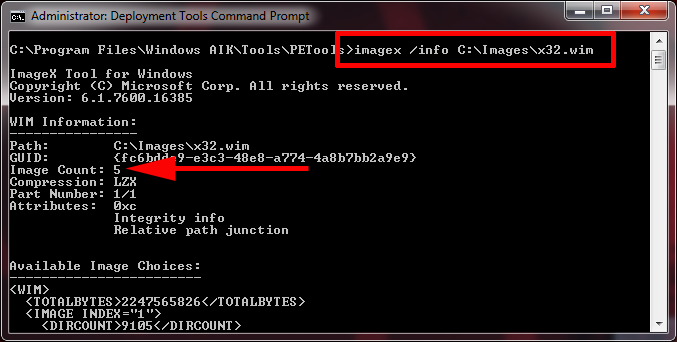
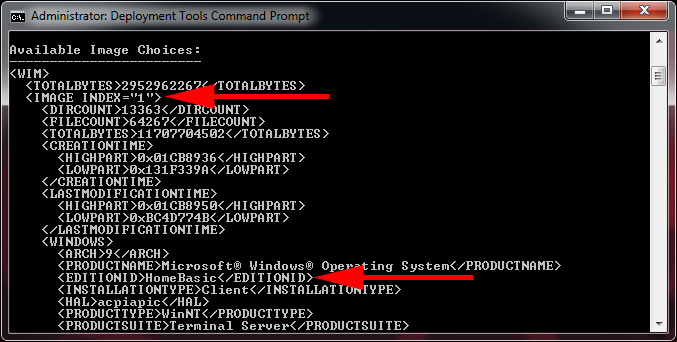
You can see (above) this image has five images within it, scroll down and you can see them.
Mine is structured as follows;
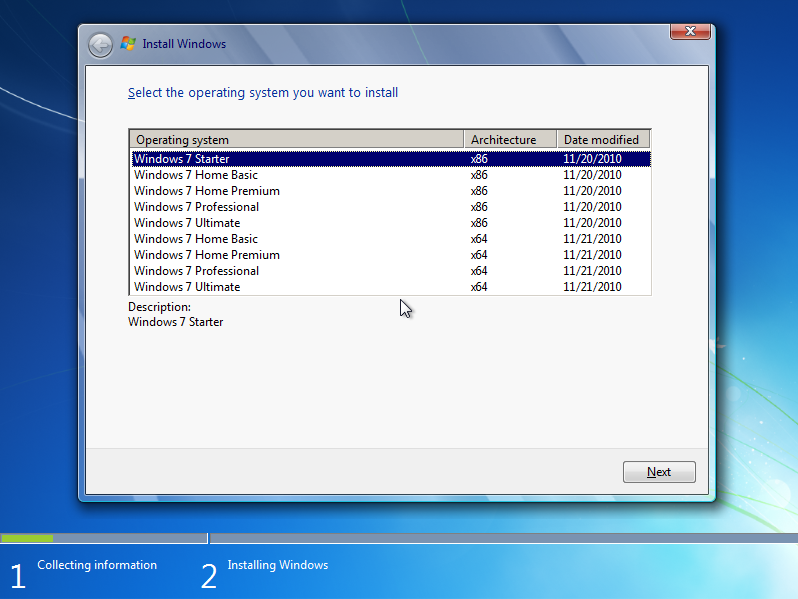
Image 1 – Starter Edition
Image 2 – Home Basic
Image 3 – Home Premium
Image 4 – Professional
Image 5 – Ultimate
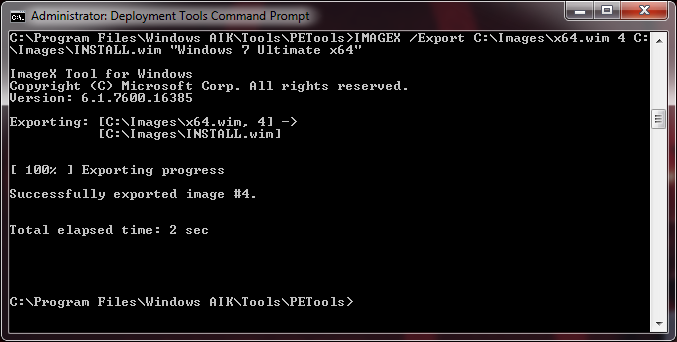
7. Create a new image from all these Windows 7 x32 images, by executing the following commands;
IMAGEX /Export C:Imagesx32.wim 1 C:ImagesInstall.wim “Windows 7 Starter x32” IMAGEX /Export C:Imagesx32.wim 2 C:ImagesInstall.wim “Windows 7 Home Basic x32”
IMAGEX /Export C:Imagesx32.wim 3 C:ImagesInstall.wim “Windows 7 Home Premium x32”
IMAGEX /Export C:Imagesx32.wim 4 C:ImagesInstall.wim “Windows 7 Professional x32”
IMAGEX /Export C:Imagesx32.wim 5 C:ImagesInstall.wim “Windows 7 Ultimate x32”
8. Now check the x64 image (Note: There is NO x64 bit Starter Edition).
To check the image index, execute the following command;
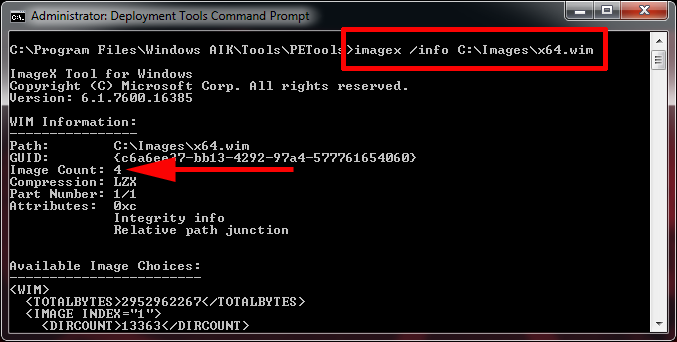
You can see (above) this image has four images within it, scroll down and you can see them.
Mine is structured as follows;
Image 1 – Home Basic
Image 2 – Home Premium
Image 3 – Professional
Image 4 – Ultimate
9. Create a new image from all these Windows 7 x64 images, by executing the following commands;
IMAGEX /Export C:Imagesx64.wim 2 C:ImagesInstall.wim “Windows 7 Home Premium x64”
IMAGEX /Export C:Imagesx64.wim 3 C:ImagesInstall.wim “Windows 7 Professional x64”
IMAGEX /Export C:Imagesx64.wim 4 C:ImagesInstall.wim “Windows 7 Ultimate x64”
10. Extract the contents of one (I used the x32 bit one) of your ISO files to the C:Master Directory.
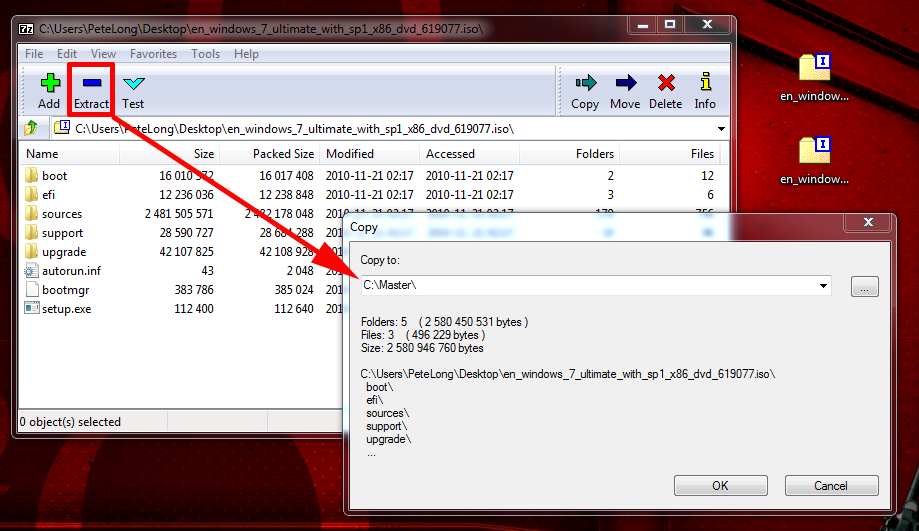
11. Delete the C:MasterSourcesei.cfg file.

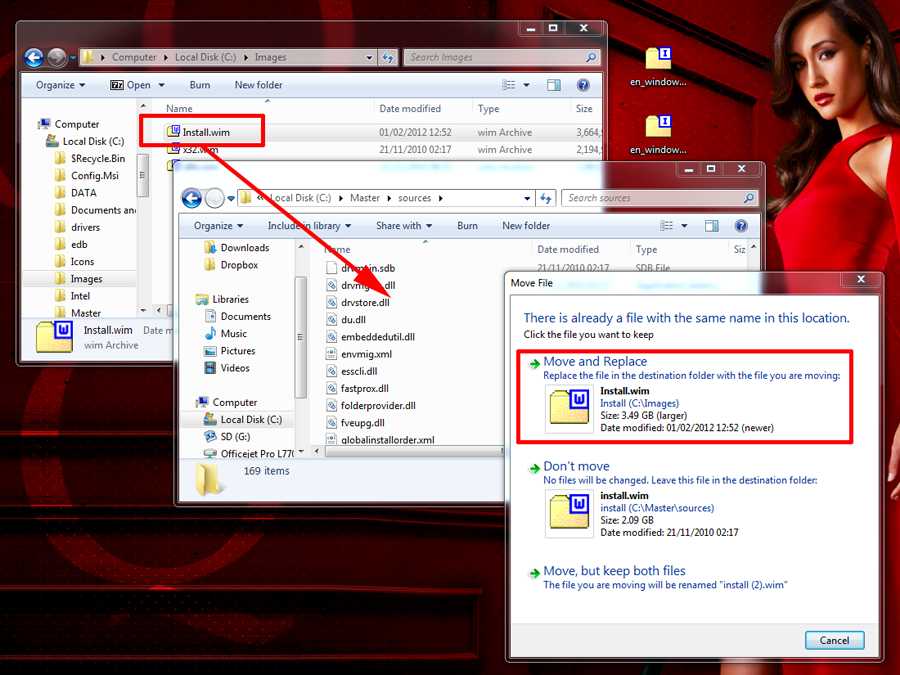
12. Copy the C:ImagesInstall.wim to c:MasterSources (Select Yes to Overwrite).
13. Create a new ISO file, by executing the following command;

14. Test your new install media (Note: if you want to Burn a DVD from this ISO use ImgBurn (it’s free).
Create an x32 OR x64 bit Windows 7 Multi Install DVD.
So if you have the installation media in .iso format you can change it so you can see the other install versions. On THIS site there are some utilities to help you – the “eicfg removal utility” removes the pointer to the file (which means you can install any version by picking it from the install menu (like you did with Windows Vista). Or you can swap your version with the second tool “Windows 7 iso image edition switcher”. I deploy a lot of machines so the former is a much better option for me.
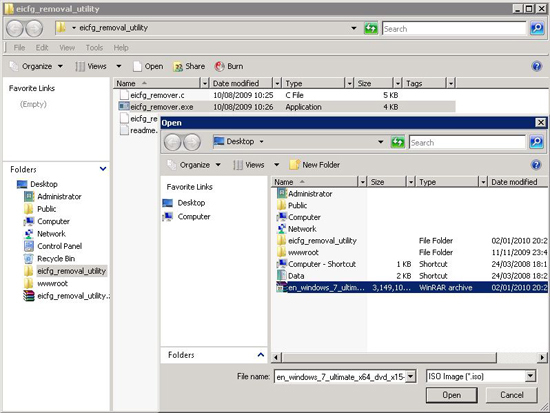
1. Drop the windows 7 .iso file somewhere you can get at it (i.e. on your desktop).
2. Download eicfg removal utility, Extract it and run the eicfg_remover.exe
3. Browse to your .iso file > Open.
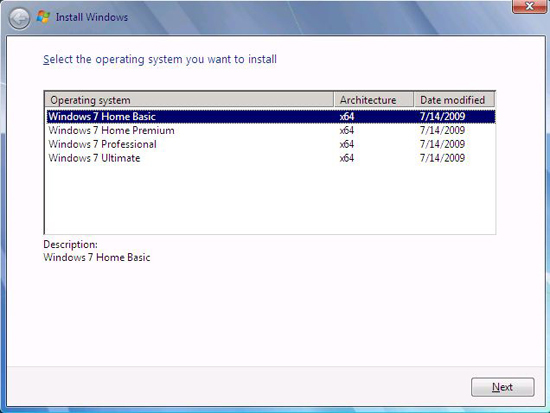
4. Now if you boot with this media you will get a choice of which version you want to install.
Related Articles, References, Credits, or External Links
Original article written 02/01/10