
Pete’s Adventures in Hyper-V Part 2
KB ID 0000093 Dtd 10/11/09
Problem
Back in Part 1 we looked at getting your Hyper-V Media up to date, the next logical step would be to install Hyper-V, but I’ve never been that logical, and I already had a Hyper-V server at home, So I thought before I went any further I would install the Hyper-V Management tools on My laptop, then I could continue this from the comfort of my sofa.
In an ideal world that would have taken about 5 minutes and then I could get back to doing things in a logical order, BUT it turned out to be such a trip round the houses I thought I’d better do this first.
Why simply installing a management console has to be so difficult I don’t know, I’ve read many posts on other sites and forums, where it “Just Worked” but mine didn’t so lets take the worse case scenario and deal with that.
Before you start you need…….
1. A machine running Vista WITH SP1 installed
2. The Hyper-V management update, there’s a sea of dead links in the internet for these x86 or x64
3. The RSAT Tools Installed CLICK HERE
Solution
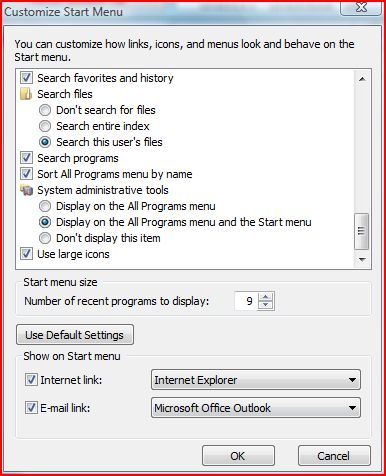
1. Assuming you have installed the RSAT already > Put the administrative tools on your start menu > Right click the taskbar > Properties > Start menu > Customize > System Administrative Tools > Display on the all programs and start menu.
Note: I add the run command here as well because I use it all the time (Yes I know in vista you can use the “Start Search” box but you will see in my articles I always use Start > Run
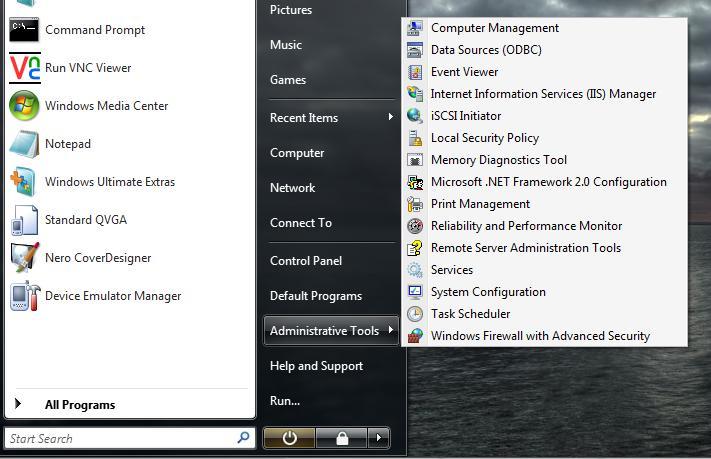
2. And there they are, but Hyper-V that’s nowhere to be found, I spent an age searching the internet for the update, and about two minutes after I asked the question in the Technet Forum I found them download the x86 or x64 version as appropriate and install the update.
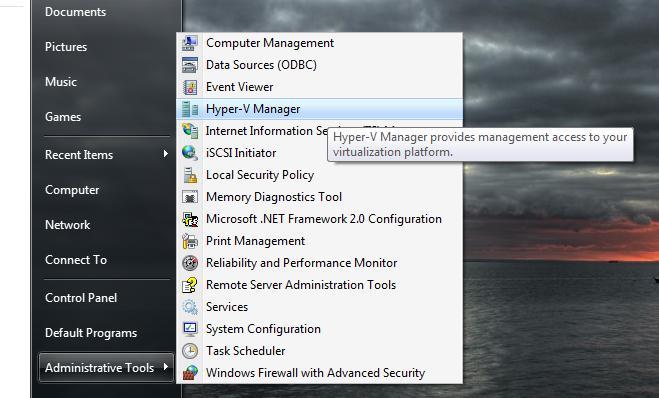
3. And there it is – Brilliant! Click it……….
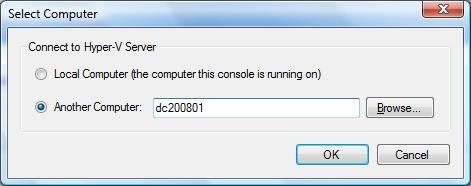
4.Select Connect to Server.

5. Give it the name or IP of the Hyper-V server > OK
6. And mine broke……………
![]()
Error: You do not have the required permission to complete this task. Contact the administrator of the authorization policy for the computer “Server name”.
OK – After some web searching, head scratching, and reading some excellent articles/blogs, the problem seems to be, I have a domain at home, and my laptop is not in that domain, its in my work domain. You will also get this error in a workgroup environment. You need to create a user on the Hyper-V server and assign some permissions.
Configuration – (On the Vista Client)
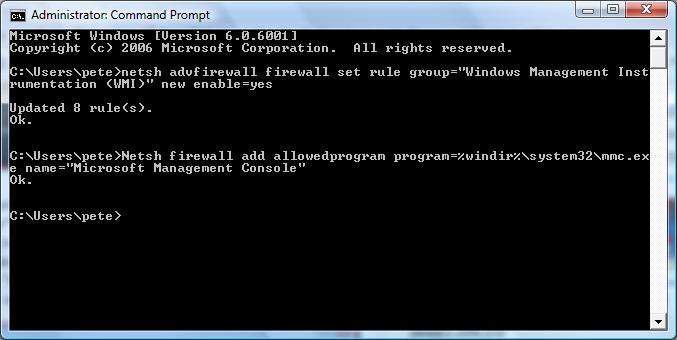
7. Start > Run > cmd {enter} > Issue the following two commands.
netsh advfirewall firewall set rule group=”Windows Management Instrumentation (WMI)” new enable=yes
netsh firewall add allowedprogram program=%windir%system32mmc.exe name=”Microsoft Management Console”
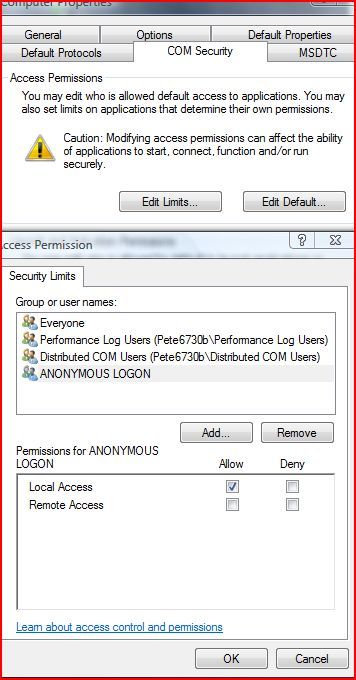
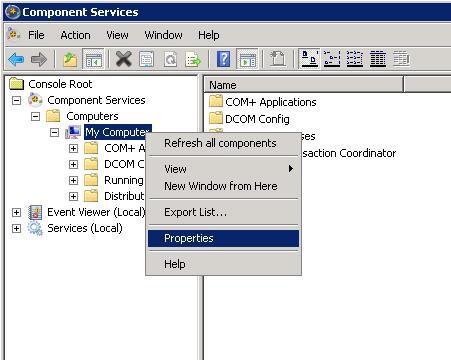
8. Start > Run > dcomcnfg {enter} > Component Services > Computers > My Computer > My Computer > Right Click > Properties.
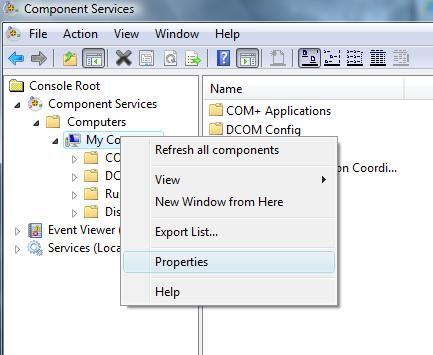
10. COM Security tab > Access Permissions area (top section) > Edit Limits > ANONYMOUS LOGON > Grant Local and remote access > Apply > OK.
Now take a note of the username you are using on your Vista machine (in my case pete).
Configuration – (On the Hyper-V Server)
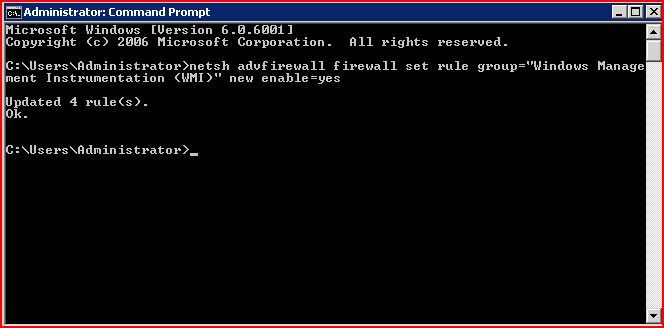
11. Create a user on the server (if its a domain controller it will need to be a domain user) with the same name and password as the one logged into your Vista client PC. Then Start > run > cmd {enter} > Enter the following command,
netsh advfirewall firewall set rule group=”Windows Management Instrumentation (WMI)” new enable=yes
11. Start > Run > dcomcnfg {enter}.

12. Component Services > Computers > My Computer > My Computer > Right Click > Properties.
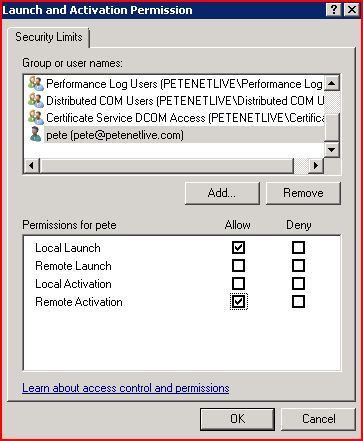
13. COM Security tab > Launch and Activation Permissions (bottom) > Edit Limits > Add.
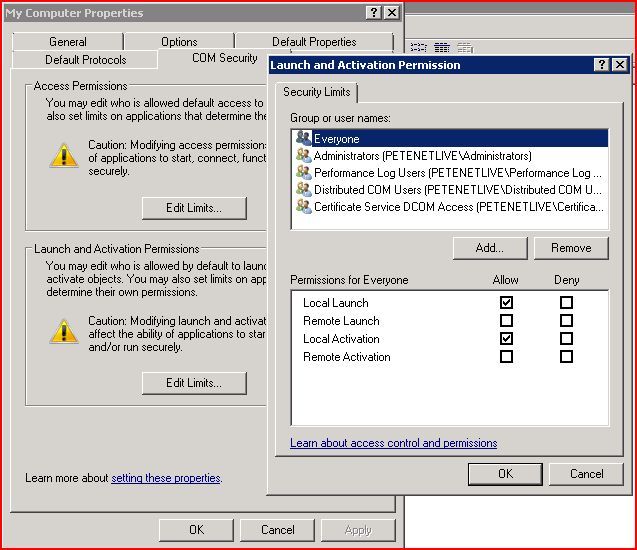
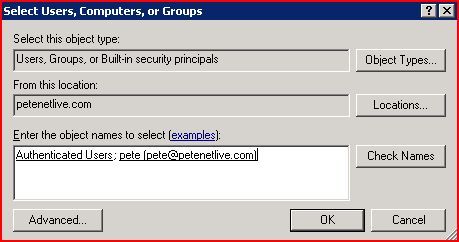
14. You need to add in your new user and the Authenticated Users group.
15. > Grant > Remote Launch and Remote Activation > (FOR AUTHENTICATED USERS) > OK.
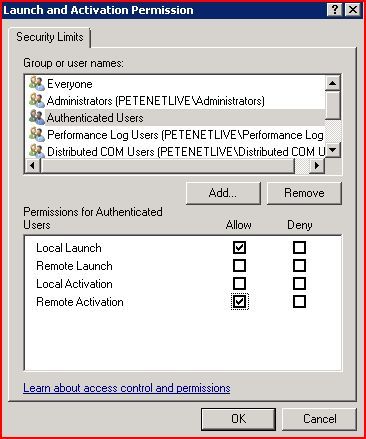
16. Grant > Remote Launch and Remote Activation > (FOR YOUR LOCAL USER) > OK.
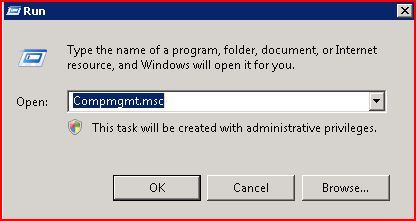
17. Start > Run > Compmgmt.msc {enter}.
18. WMI Control > Right click > Properties.
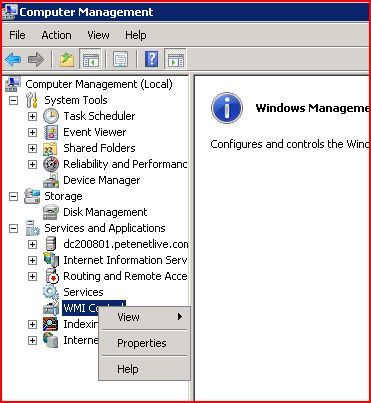
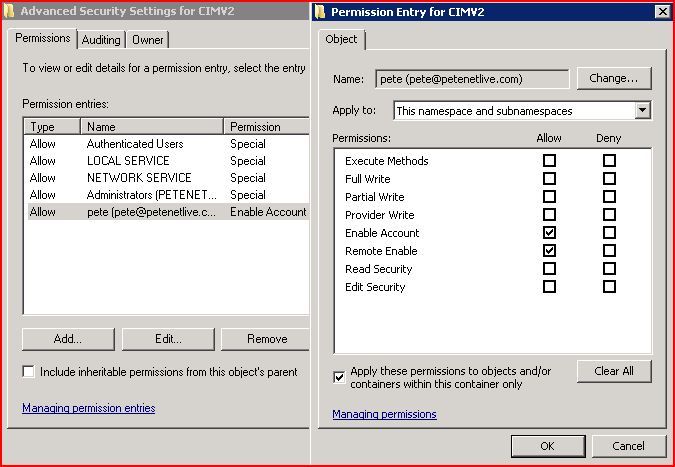
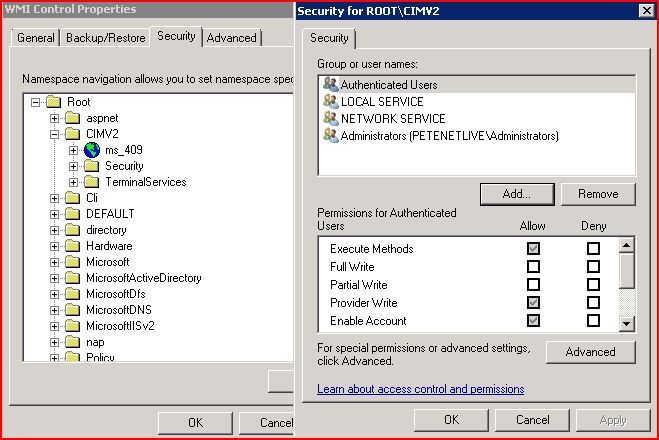
19. OK You need to make changes to permissions on TWO things for your USER and Authenticated Users > The first object you are going to change is CIMV2 select it then press Security.
Add > Authenticated users > Your Local User > Select EACH > Advanced > select the new user and group in then > Edit > “Apply to drop-down “This name space and subnamespaces” > Select Remote Enable > Tick “Apply these permissions to objects and/or containers within this container only”.
NOTE: So by the time you have finished this step you have assigned a group and a user rights to CIMV2
THEN REPEAT THE WHOLE PROCESS AND ASSIGN THE SAME PERMISSIONS TO THE ROOTVIRTUALIZATION NAMESPACE (it’s near the bottom of the list that CIMV2 is in).
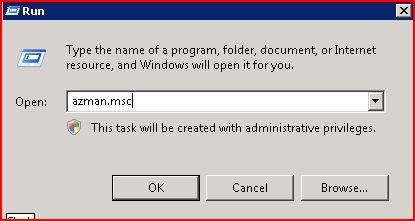
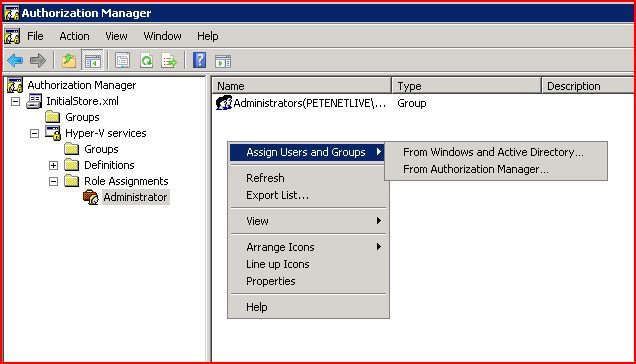
20. Start > Run > azman.msc {enter}.
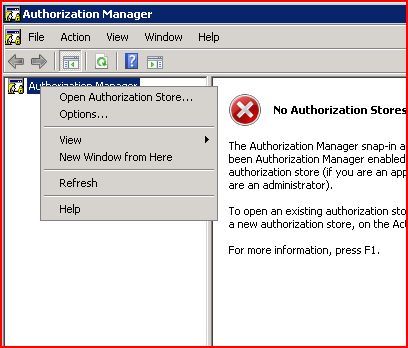
21.Authorization Manager > Right-click > Authorization Store.
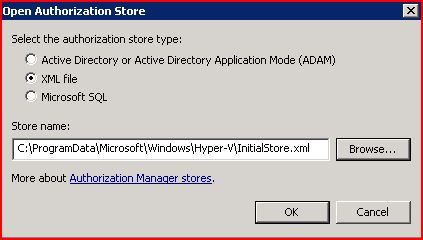
22. Browse > c:ProgramDataMicrosoftWindowsHyper-VInitialStore.xml > OK.
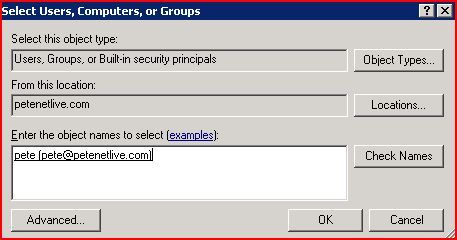
23. Expand Hyper-V services > Role Assignments > Administrator > Administrator > In the right hand window > Right click >Assign Users and Groups > From Windows and Active Directory > Add your user and authenticated users.
24. Users and group added > OK
Close all open windows and REBOOT THE SERVER!!
25. Now, when you connect it should work, go and have a brew you’ve earned it 🙂

Related Articles, References, Credits, or External Links
NA