KB ID 0000066
Problem
This is a simple job to do from command line, however the world is full of people who would rather spend an hour in the ASDM working out how to do it! So I’ve included both methods.
What is split tunneling?
This is the process of letting a remote VPN user browse the web, and access local resources etc, from their location whilst connected to your VPN in this case via SSLVPN, but also from WebVPN or IPSEC VPN.
Solution
Option 1 Enable Split Tunnel via Command Line.
1. Connect to the ASA > Go to enable mode > Then to global configuration mode > Create an ACL that permits traffic from the network behind the ASA to any. (Note: Add additional ACL’s for additional internal networks).
Type help or '?' for a list of available commands.
PetesASA> enable
Password: ******
PetesASA# configure terminal
PeteASA(config)# access-list Split-Tunnel standard permit 10.0.0.0 255.255.255.0
2. Add the split tunnel to the policy you are using for you remote VPN, (if you are unsure issue a show run group-policy).
PeteASA(config)# group-policy SSL_Policy attributes
PeteASA(config-group-policy)# split-tunnel-policy tunnelspecified
PeteASA(config-group-policy)# split-tunnel-network-list value Split-Tunnel
PeteASA(config-group-policy)# exit
PeteASA(config)#
3. Save the changes.
PeteASA(config)# write mem
Building configuration...
Cryptochecksum: cb28eeb2 3d203272 eda92e1c a3b70d09

3166 bytes copied in 0.890 secs
[OK]
PeteASA(config)#
Enable Split Tunnel on an older (PIX Firewall)
Type help or '?' for a list of available commands.
PetesPIX> enable
Password: ******
PetesPIX# configure terminal
PetesPIX(config)# access-list Split-Tunnel permit ip 10.0.0.0 255.255.255.0 any
PetesPIX(config)# vpngroup RemoteVPN split-tunnel Split-Tunnel
Option 2 Enable Split Tunnel via ASDM
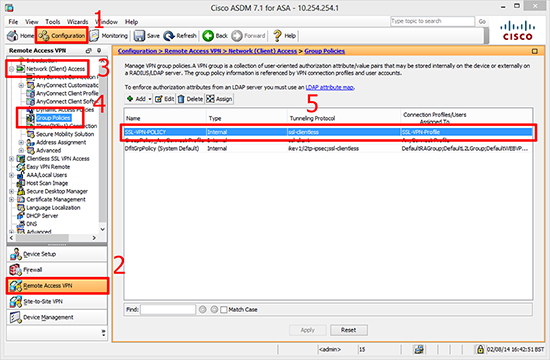
1. Launch the ASDM > Configuration > Remote Access VPN > Network (Client) Access > Group Policies > Select your policy.
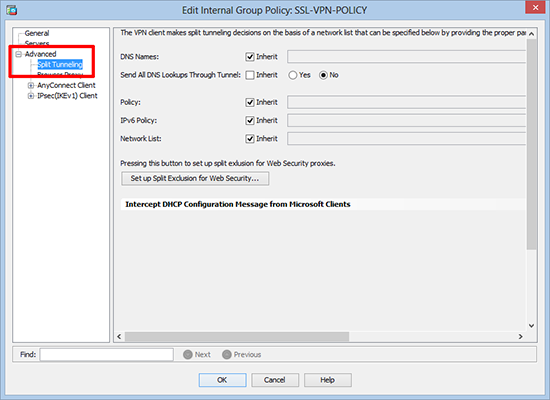
2. Edit > Select Advanced > Split Tunneling.
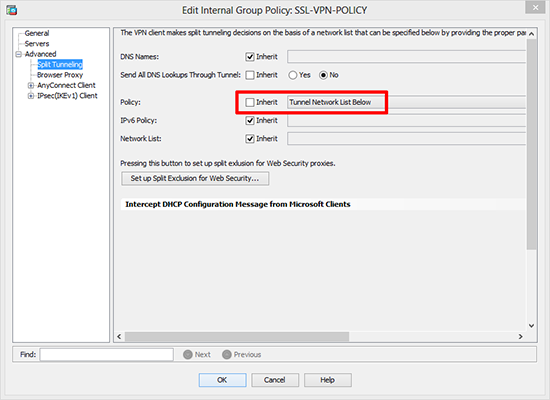
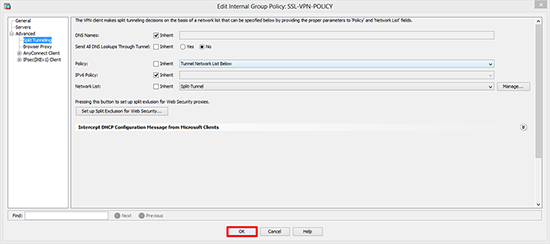
3. Next to Policy > Untick “Inherit” > Change to “Tunnel Network List Below”.
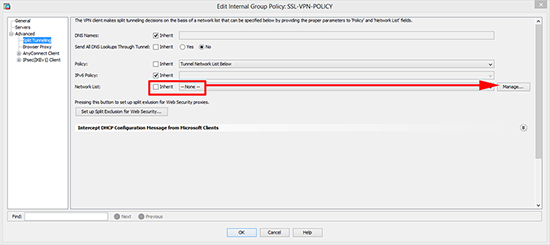
4. Next to “Network List” remove the tick from Inherit > Click Manage.
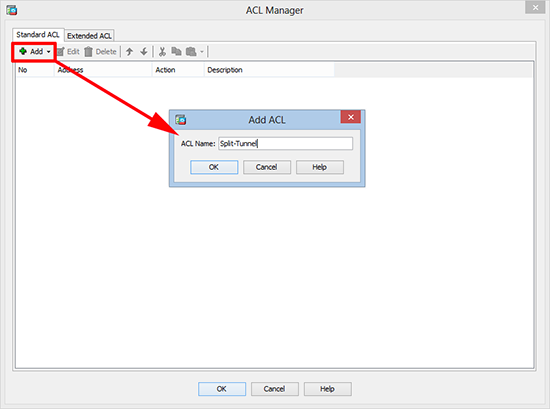
5. Add ACL > Call it something sensible like Split-Tunnel > OK.
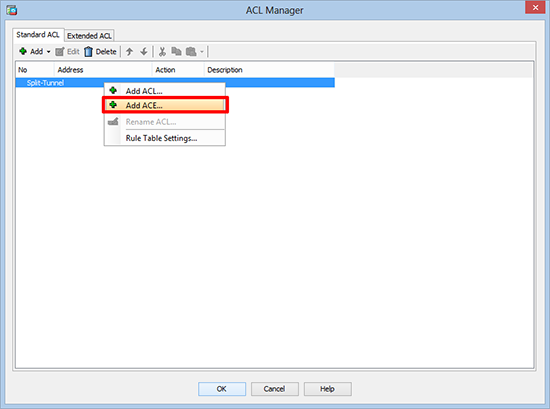
6. Then click Add ACE.
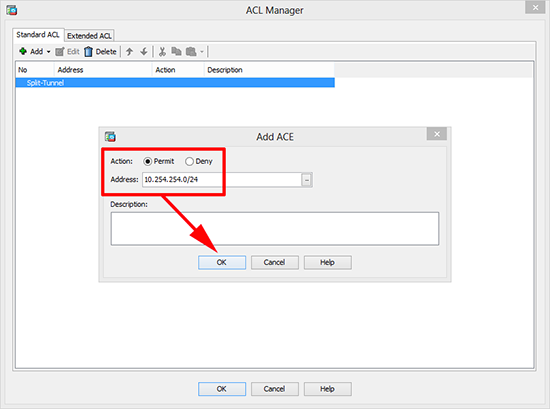
7. Select Permit and enter the network BEHIND THE ASA> OK.
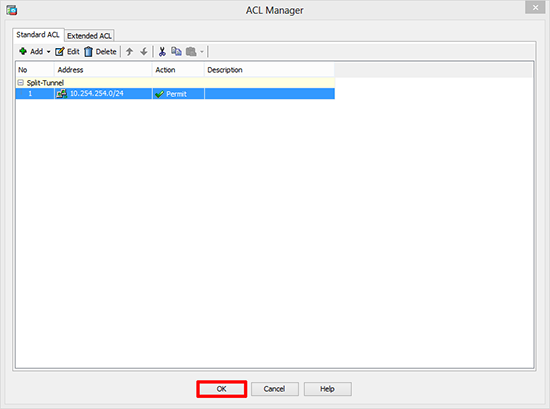
8. Should look a bit like this > OK.
9. OK.
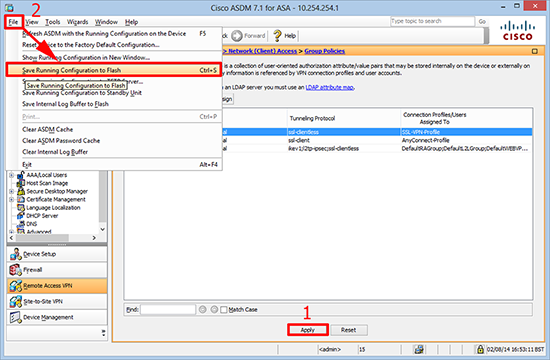
10. Apply > File > Save running configuration to flash.
Related Articles, References, Credits, or External Links
Original Article Written 14/06/12
Troubleshooting Cisco ASA Split Tunnel
Cisco ASA – Remote VPN Client Internet Access
PPTP VPN – Enable Split Tunneling

