
KB ID 0001068
Problem
Cisco ISE arms itself with a self generated certificate out of the box, (well the NFR appliance does anyway). To replace that cert with one signed by your own CA, this is the procedure. (Note: I’m using Microsoft Certificate Services on Server 2012 R2).
Solution
Step 1: Import the CA Certificate into ISE
Note: If you have a lot issuing servers it’s a good idea the repeat this procedure for EVERY issuing server you have in your PKI environment. Assuming you have an off-line root that would be every SubCA (to use Microsoft terminology). On my test network I only have one so that’s not a problem.
1. Connect to the web enrollment portal of your Certificate services folder > Download a CA Certificate, certificate chain, or CRL.

2. Select DER encoding > Download CA Certificate.
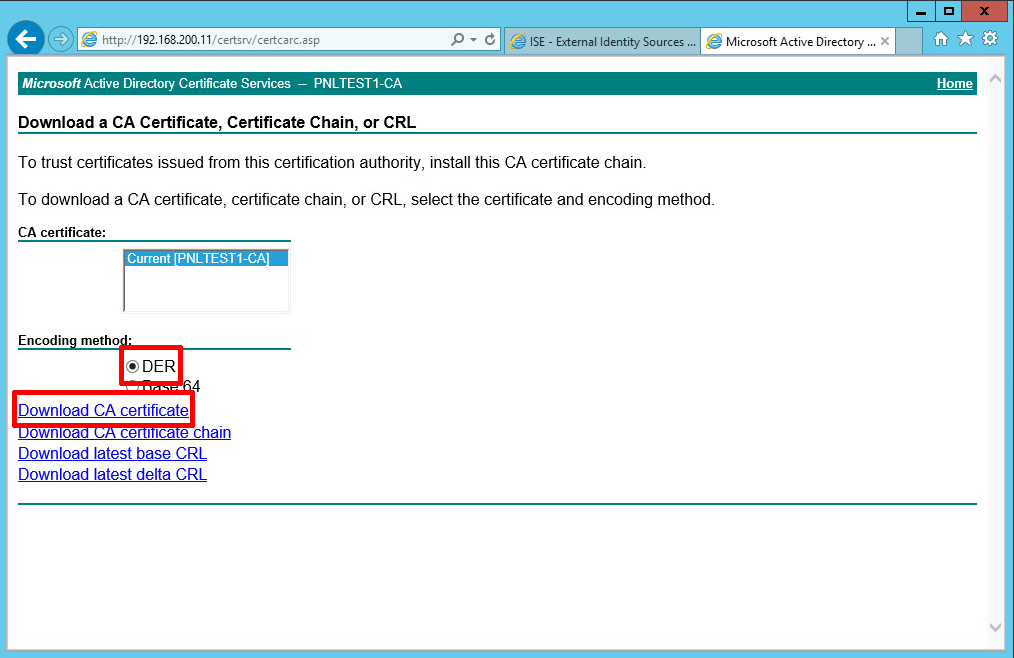
3. Save the certificate where you can find it, with a sensible name.

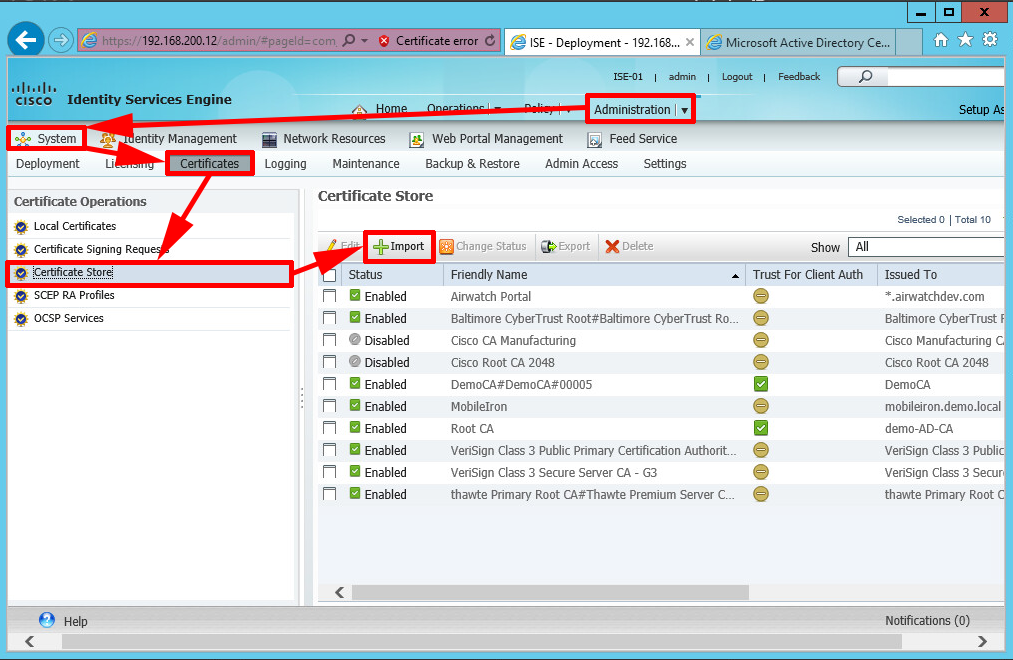
4. Log into ISE > Administration > System > Certificates > Certificate Store > Import.
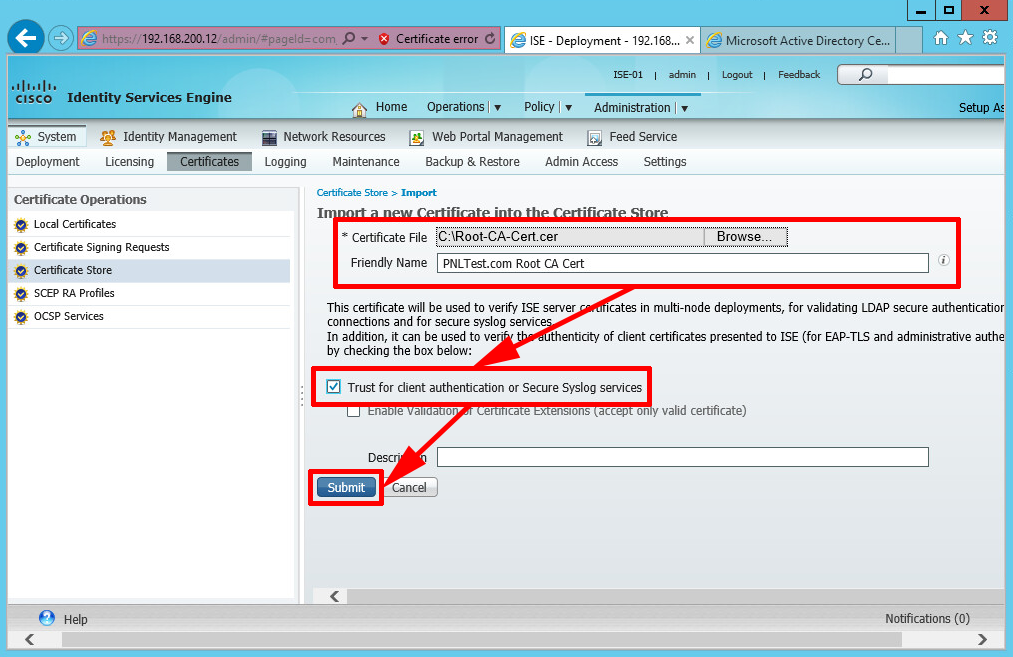
5. Import the certificate you just saved and tick the ‘Trust for client authentication or secure Syslog services’ option > Submit.
Step 2: Generate a New Certificate for Cisco ISE
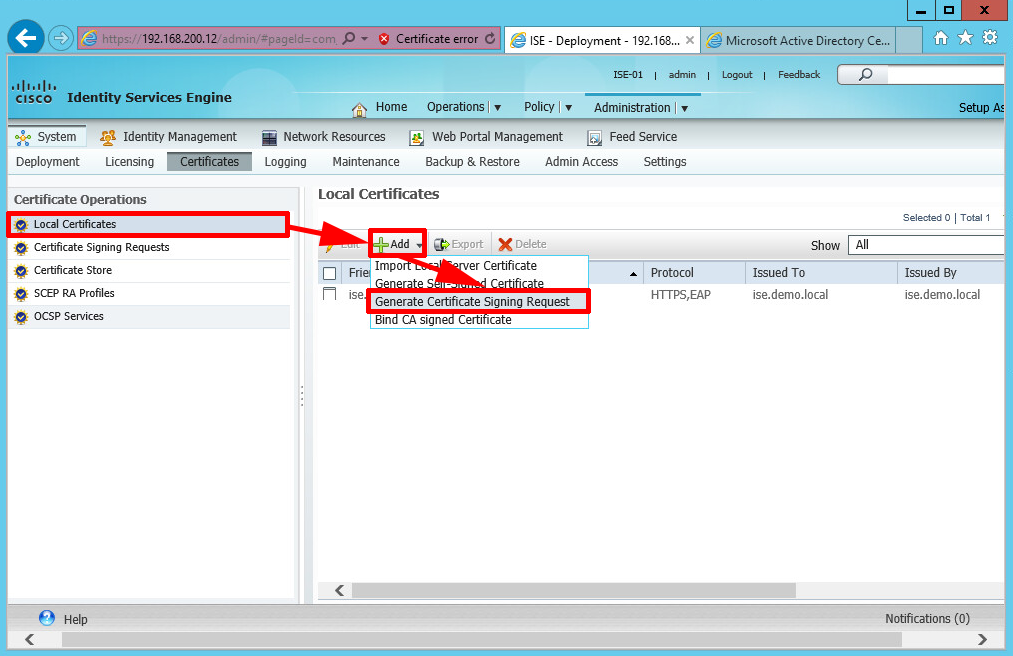
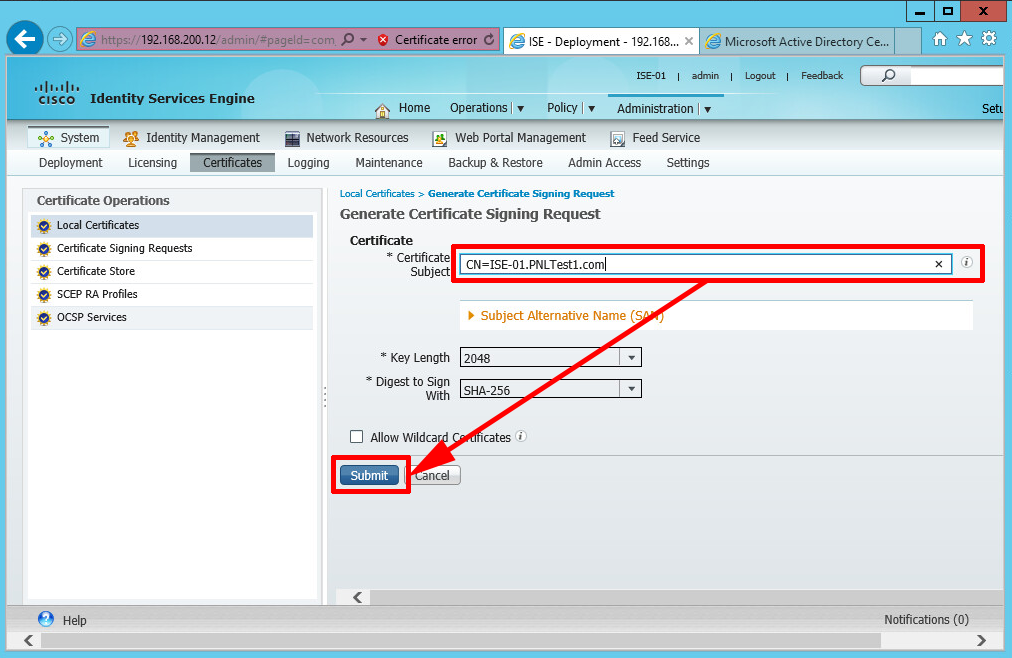
6. Whilst still in the certificate section > Local Certificates > Add > Generate Certificate Signing Request.
7. Enter the FQDN of the ISE appliance > Submit.
8. Certificates > Certificate Signing Requests > Export.
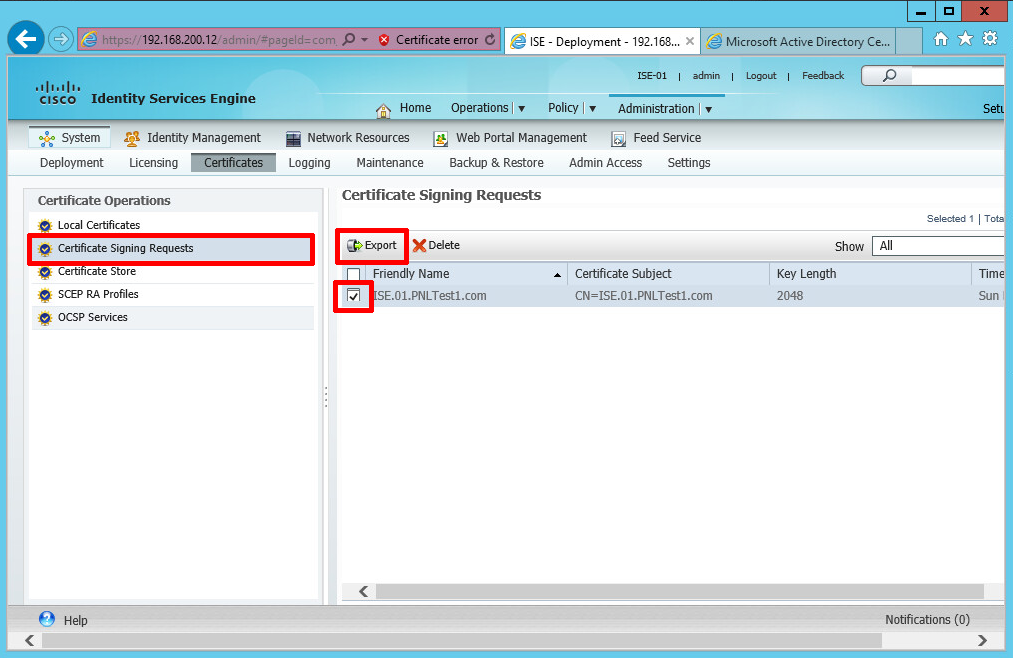
9. Again save it somewhere you can find it easily.

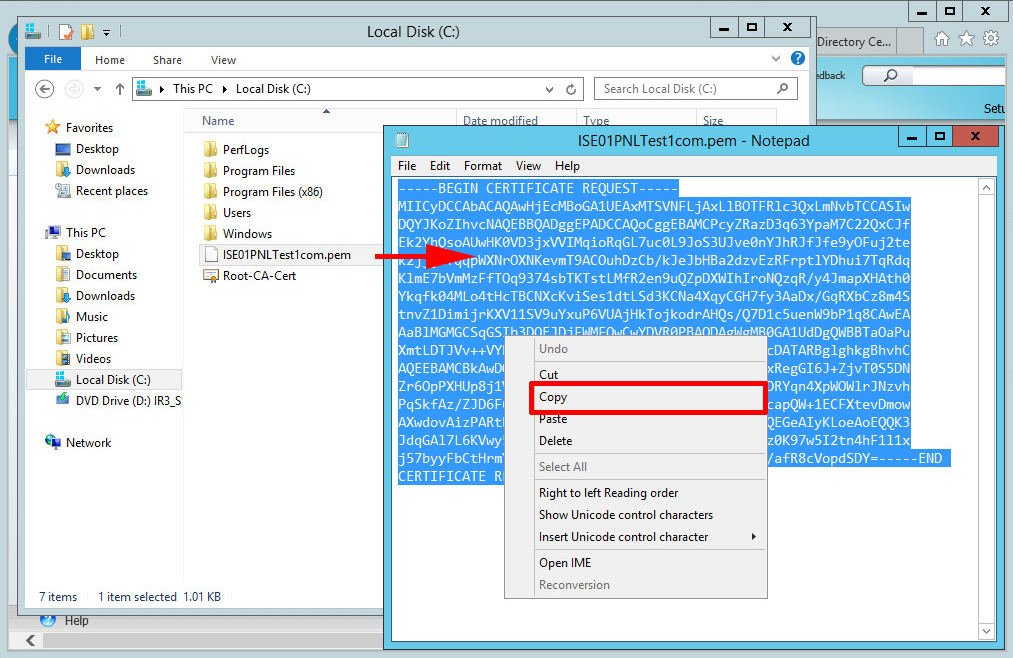
10. Open the PEM file you just created, and copy all the text to the clipboard.
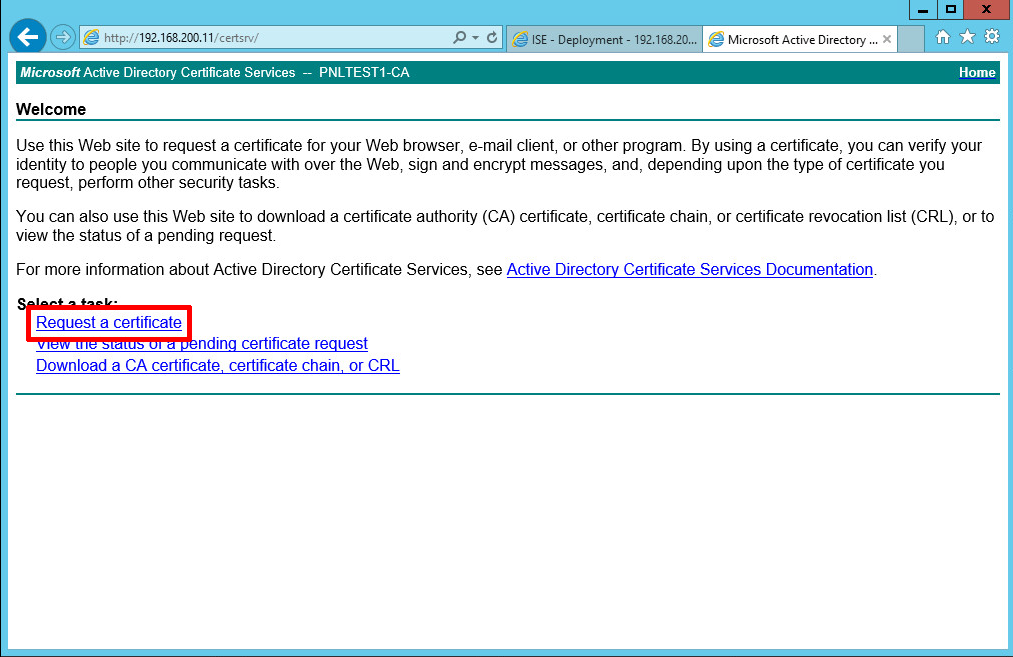
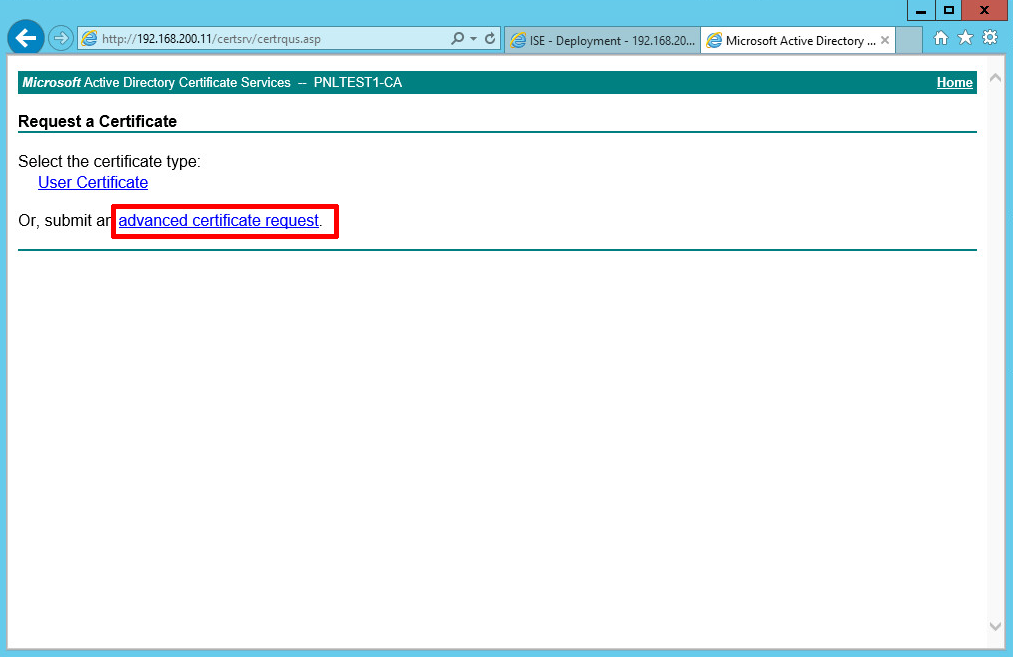
11. Back at you web enrollment portal > Request a certificate.
12. Advanced certificate request.
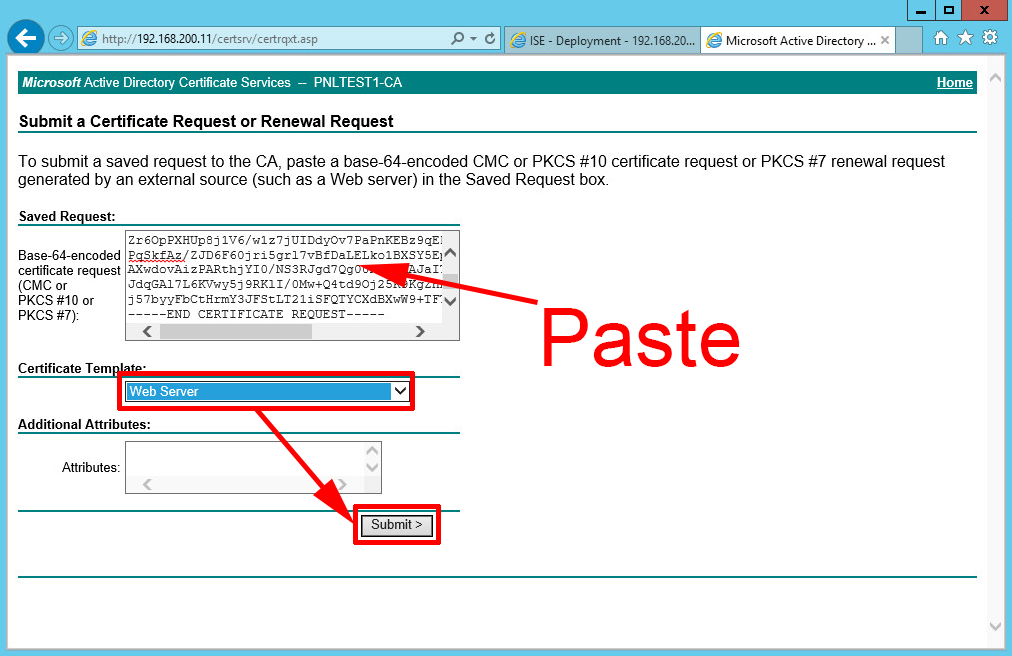
13. Submit a certificate request by using…

14. Paste in your copied text (make sure no spaces get added to the end, this usually happens, be careful) > Set the template to Web Server (of your own template, if you are not using the default one) > Submit.
15. Select DER encoded > Download certificate > Save it with a name that is recognizable as the ISE appliance.

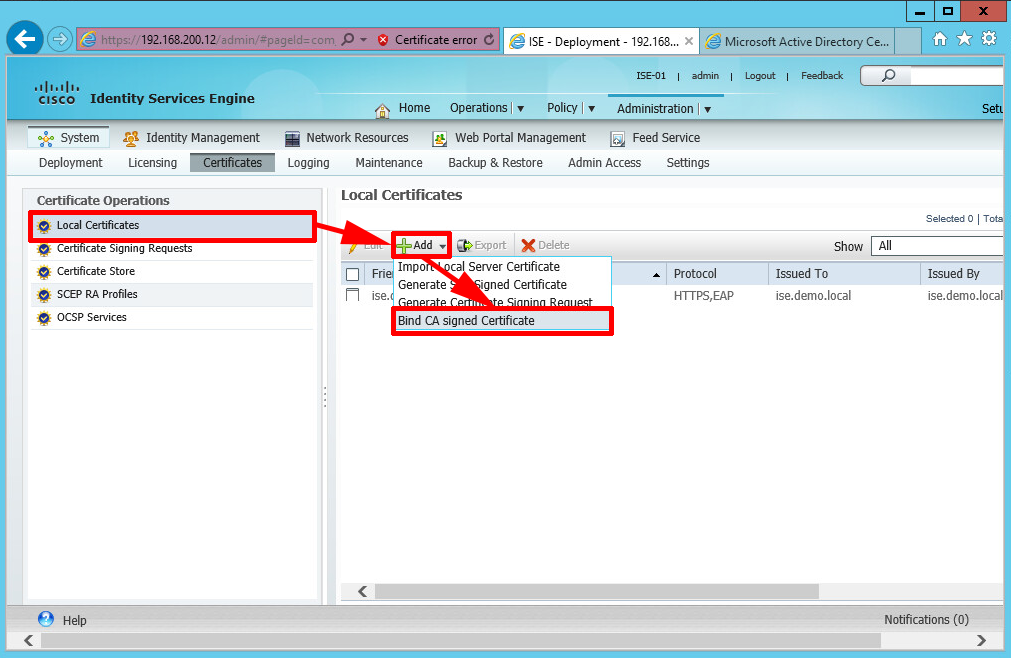
16. On the ISE web portal > Local Certificates > Add > Bind CA Signed Certificate.
17. Browse to the new cert > Select EAP and HTTPS > Submit.

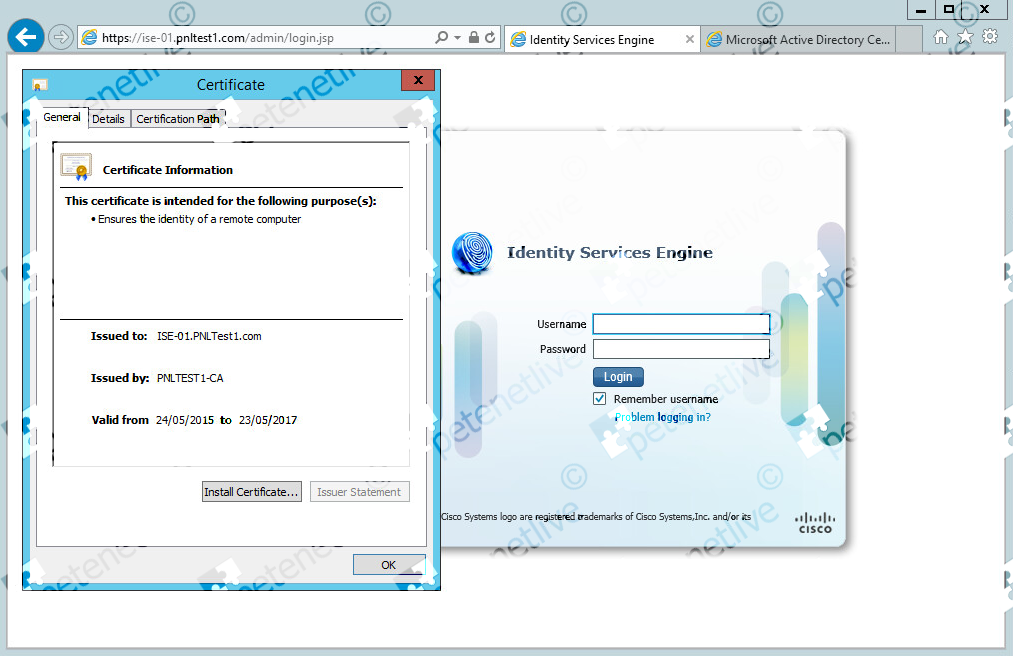
18. Now remember to connect to the ISE appliance using its FQDN (you did remember to create a record in DNS for it didn’t you?)
At this point if you get an error either the URL is wrong, or you didn’t create a DNS record, or the machine you are on does not trust your issuing servers root certificate.</p?
Related Articles, References, Credits, or External Links
NA