
KB ID 0001023
Problem
Cisco PRSM gives you the ability to import certificates into it, but like other Linux distros does not give you the tools to generate the actual certificate request. The documentation tells you to use OpenSSL to this. I was just about to fire up a CentOS box when I remembered I did something similar for VMware 5.5 not so long ago, would the same procedure work here? Yes it did, and it’s a lot easier than growing a ginger ponytail, donning sandals and firing up Linux.
Solution
The following procedure was carried out on Windows Server 2012 R2. I want my certificate to have a common name of prsm.petenetlive.com (change your configs and commands accordingly).
1. Download and install the following.
Microsoft Visual C++ 2008 Redistributable Package (x86) and Shining Light Productions installer for OpenSSL x86 version 0.98r (or later)
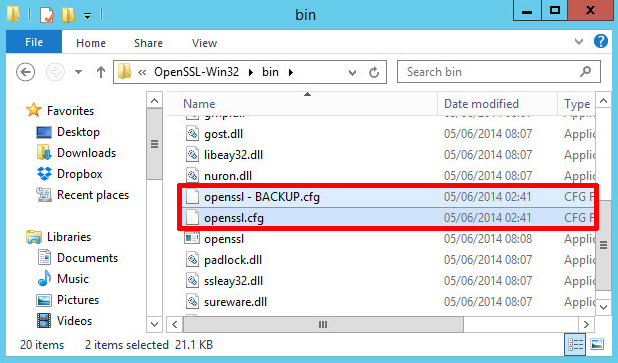
2. Accept all the defaults and it should install to C:OpenSSL-Win32 go there, and in the bin directory make a backup of the openssl.cfg file.
2. Open the original openssl.cfg file and delete everything out of it, then paste in the following text, replace the values in red with your own, and save the file.
[ req ]
default_bits = 2048
default_keyfile = prsm.petenetlive.com.key
distinguished_name = req_distinguished_name
encrypt_key = no
prompt = no
string_mask = nombstr
req_extensions = v3_req

[ v3_req ]
basicConstraints = CA:FALSE
keyUsage = digitalSignature, keyEncipherment, dataEncipherment
extendedKeyUsage = serverAuth, clientAuth
subjectAltName = DNS:PRSM, IP:123.123.123.110, DNS:prsm.petenetlive.com

[ req_distinguished_name ]
countryName = GB
stateOrProvinceName = Teesside
localityName = Middlesbrough
0.organizationName = PeteNetLive
organizationalUnitName = Technical Services
commonName = prsm.petenetlive.com
3. Open an administrative command window, issue the following three commands;
cd C:OpenSSL-Win32Bin

openssl req -new -nodes -out prsm.petenetlive.com.csr -keyout prsm.petenetlive.com-orig.key -config openssl.cfg

openssl rsa -in prsm.petenetlive.com-orig.key -out prsm.petenetlive.com.key
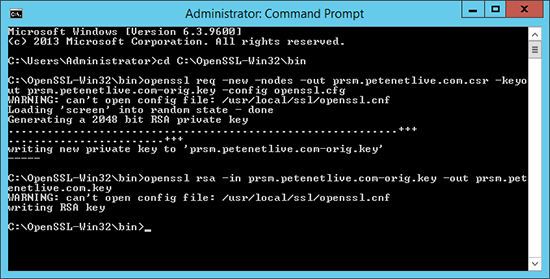
Don’t worry if it says it cant read the openssl.cnf file
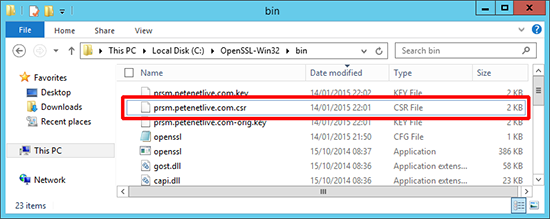
4. If you look in C:OpenSSL-Win32bin directory you will see the CSR (certificate request) has been generated.
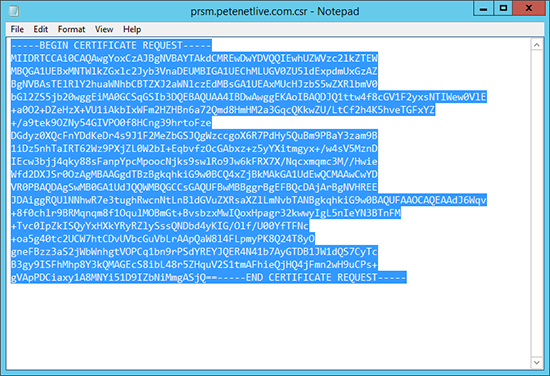
5. Open the .csr file with notepad and copy all the text, (this is a request in PEM format). This is what you will give to your CA to request the certificate, copy that to the clipboard.
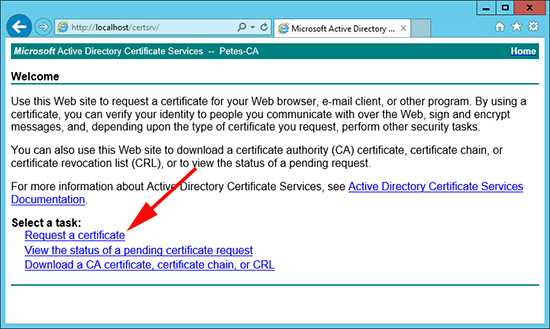
6. Connect to your Certificate Authority web enrollment portal > Request a certificate.
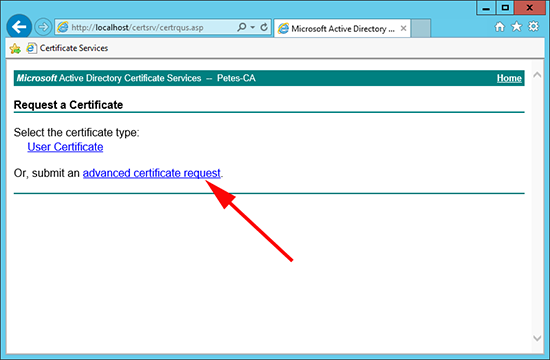
7. Advanced certificate request.
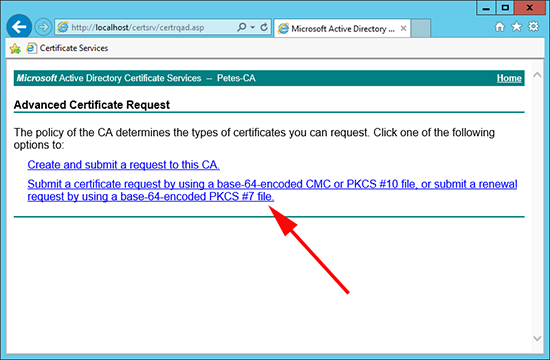
8. Submit a certificate request by using a base-64-encoded CMC or PKCS #10 file, or submit a renewal request by using a base-64-encoded PKCS #7 file.
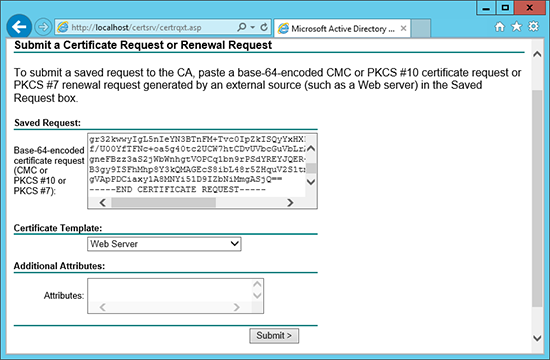
9. Paste in the PEM text you copied to the clipboard > Set the certificate template to ‘Web Server’ > Submit.
Note: Your CA may have a different template for web server certificates, if so use that one. If you don’t see web server either it’s not been published, or your user does not have rights to the certificate template.
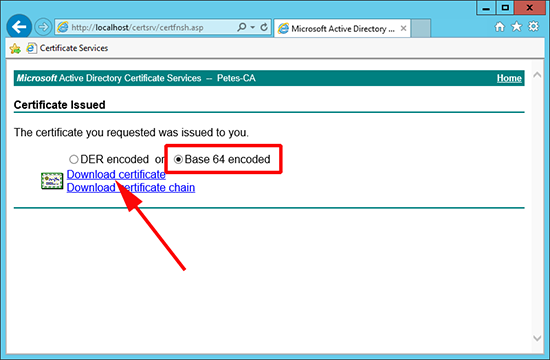
10. Choose ‘Base 64 encoded’ > Download > Save the cert in the directory you were using earlier (you will see why in a minute) > I give it the same name as the common name on the certificate so I saved it as prsm.petenetlive.com.cer
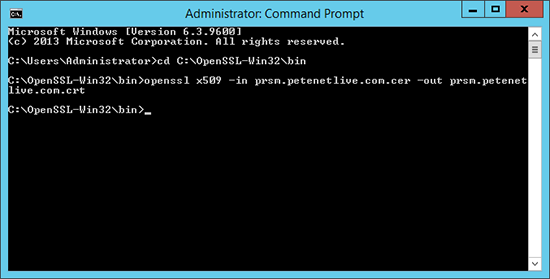
11. Here it is, but there is still a problem with it, PRSM needs the certificate in x509 format, (it isn’t). But OpenSSL-Win32 can convert it for us.

How to Convert a Windows .cer file to an x509 .crt file
12. Open and administrative command window and issue the following two commands;
cd C:OpenSSL-Win32bin
openssl x509 -in prsm.petenetlive.com.cer -out prsm.petenetlive.com.crt
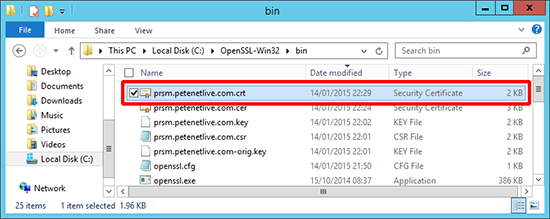
13. Now it looks better, for PRSM we need this file AND we need the .key file, (not the one that ends in xxx-orig.key!) In the example below I’ve kept everything neat so the other file i need is prsm.petenetlive.com.key, (third one down).
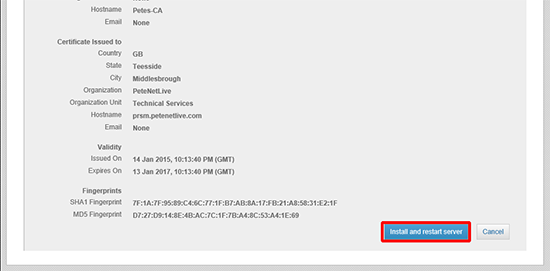
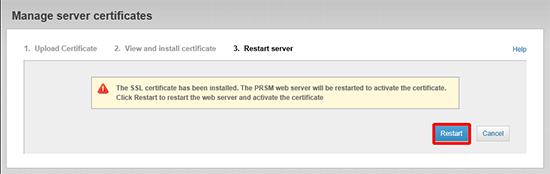
14. Connect to PRSM > Administration > Server Certificates > Browse and select both files.

15. Install and Restart Server.
16. Restart.
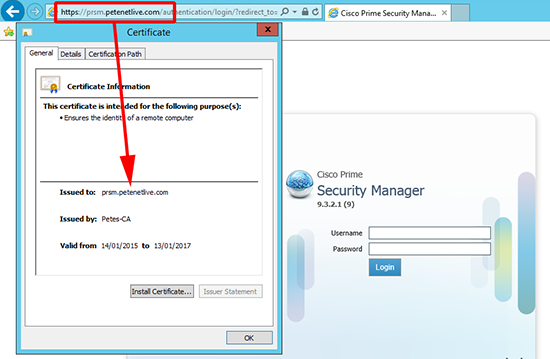
17. Refresh your web session and you should now be using the correct certificate.
Related Articles, References, Credits, or External Links
NA