
Setup a CRL KB ID 0000957
Problem
One of the often-overlooked tasks in a Public Key Infrastructure (PKI) deployment is configuring your Certificate Services Certificate Revocation List (CRL). For smaller deployments with only one server, you don’t need to worry about complex design considerations (though a CRL doesn’t have to be hosted on a Certificate Services server). In my test environment, I have only one PKI server, so everything will be configured on that single machine. In more complex environments, you may have multiple root and subordinate PKI servers writing to your CRL (you may even have multiple CRLs).
Solution : Setup a CRL
I consider this a post-Certificate Services installation task, so I’m assuming you already have it installed and configured.
Launch the Certification Authority management console. Right-click the server name, select Properties, and navigate to the Extensions tab

With CRL Distribution Point (CDP) selected, click Add. Enter the location: http://crl.{your-domain-name}.{your-domain-extension}/crld
Note: You cannot use https:// as it’s not supported for Certificate Services CRLs (which is somewhat ironic, I suppose).
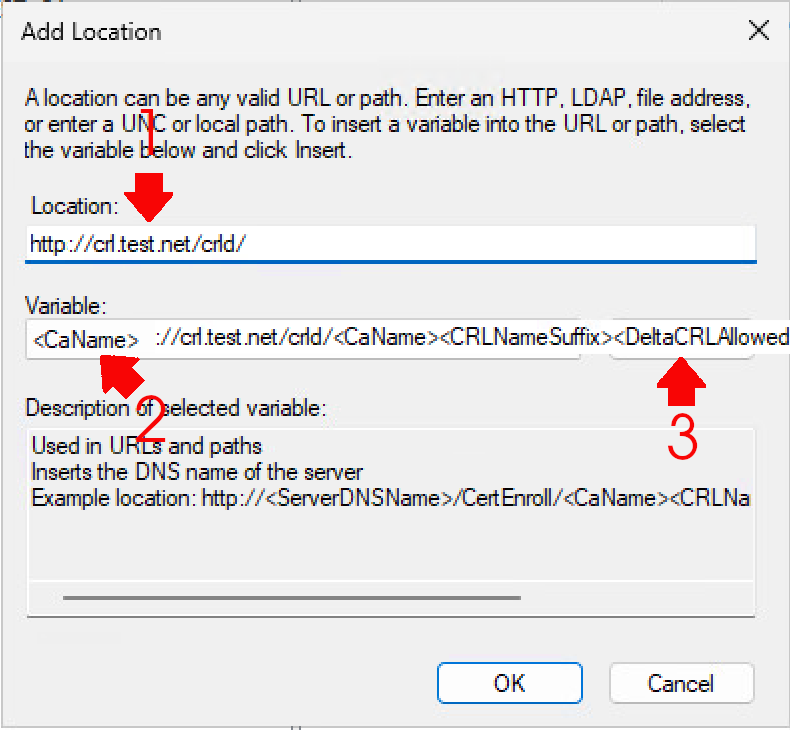
In the variable section, select and insert the following at the end of the URL:
-
<CaName> -
<CRLNameSuffix> -
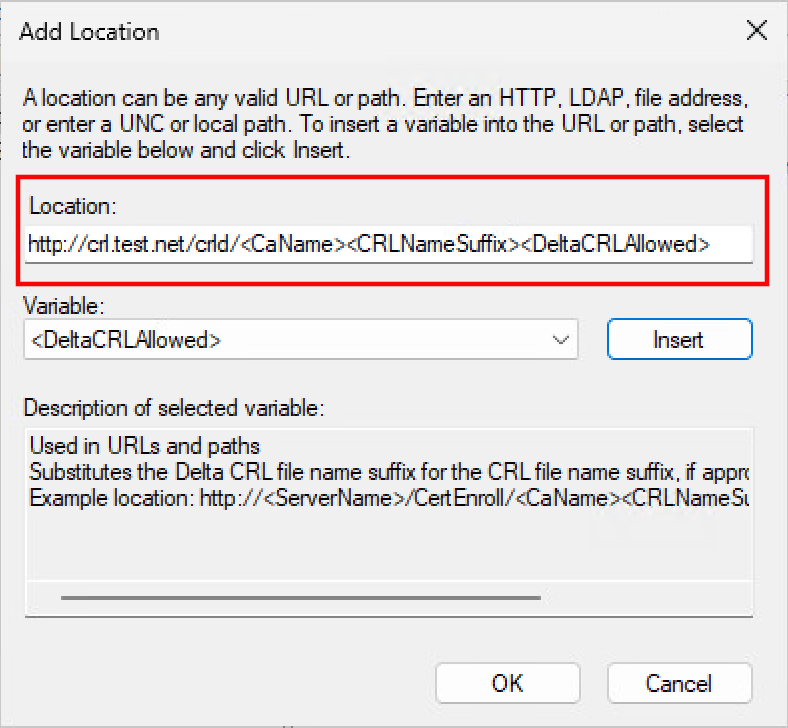
<DeltaCRLAllowed>
Finally, end the URL with .crl and click OK.
Note: It should look like: http://{FQDN-of-server}/crld/<CaName><CRLNameSuffix><DeltaCRLAllowed>.crl
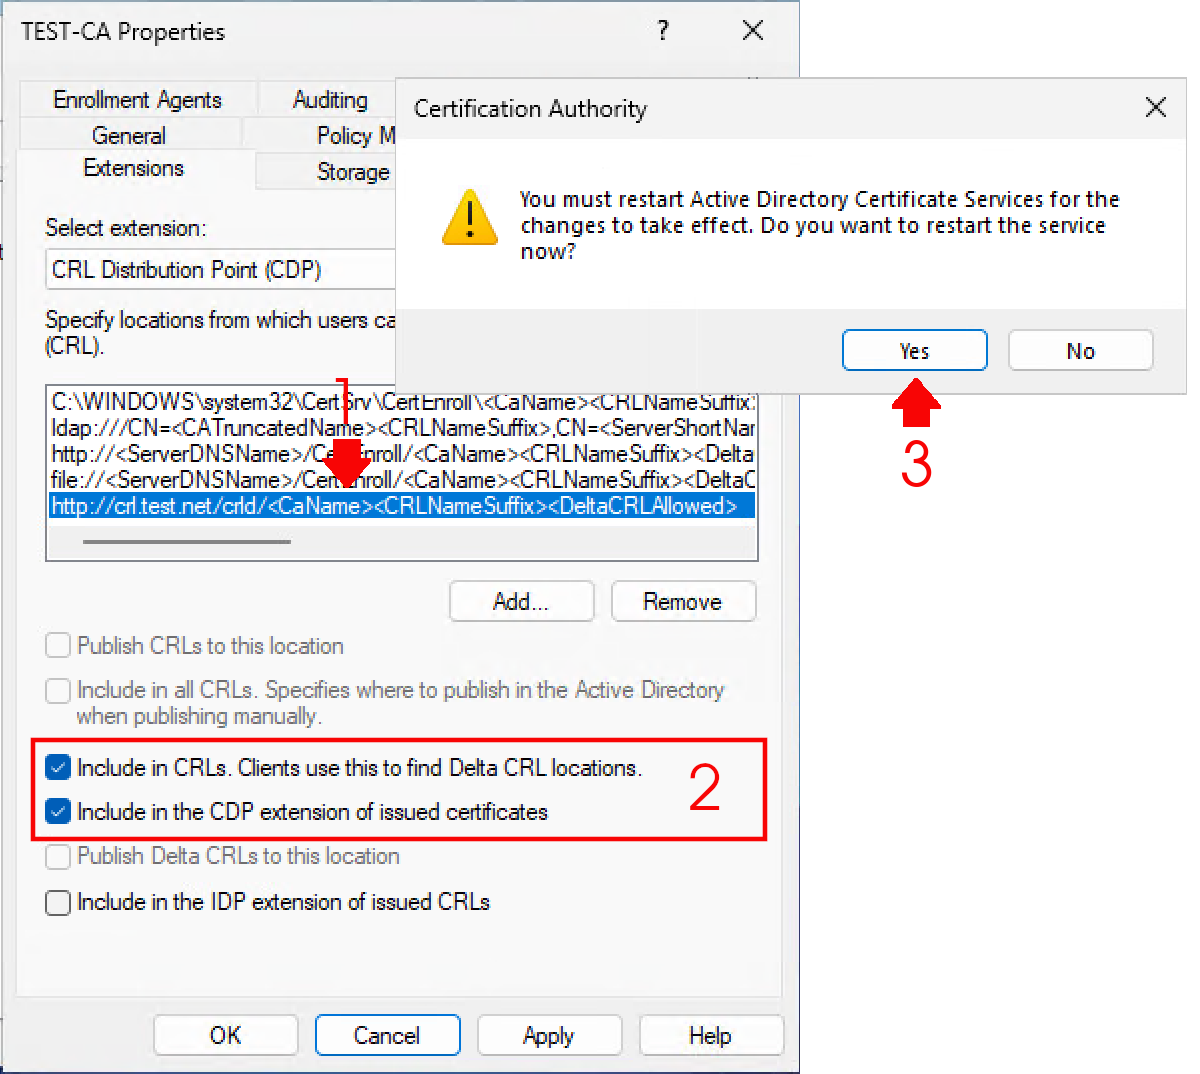
With the CRL entry you just created selected, enable the following two options:
-
Include in CRLs. Clients use this to find Delta CRL locations.
-
Include in the CDP extension of issued certificates.
Click Apply, then OK, and confirm with Yes.
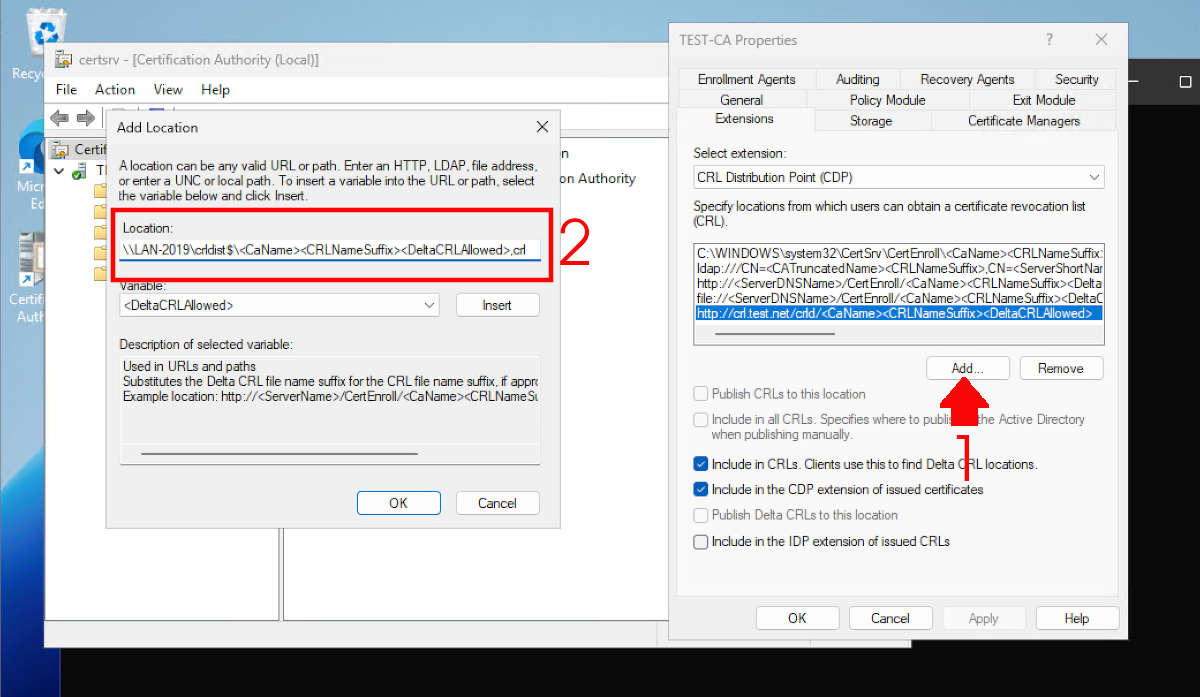
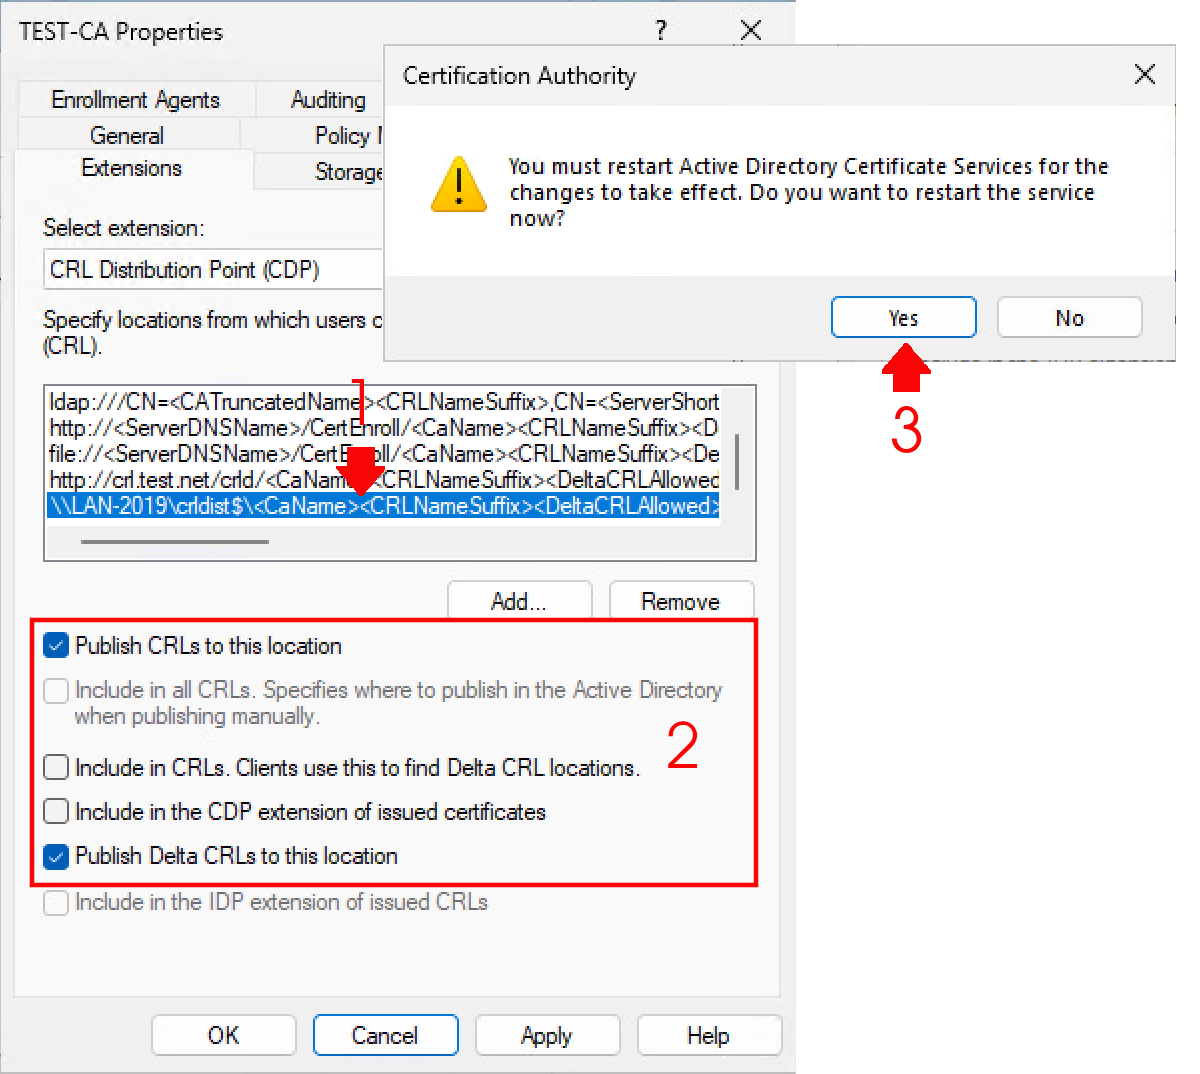
Change the ‘Select extension’ drop-down to CRL Distribution Point (CDP). Click Add and enter a UNC path as follows: \\{Server-name}\crldist$
Then select and insert the following variables at the end of the path:
-
<CaName> -
<CRLNameSuffix> -
<DeltaCRLAllowed>
Add .crl at the end of the path and click OK.
With the CDP selected, enable the following options:
-
Publish CRLs to this location
-
Publish Delta CRLs to this locationPete’s Blog+2pete.akeo.ie+2Pete’s Blog+2
Click Apply, then OK, and confirm with Yes.
Setup a CRL : Windows DNS Requirements for CRL
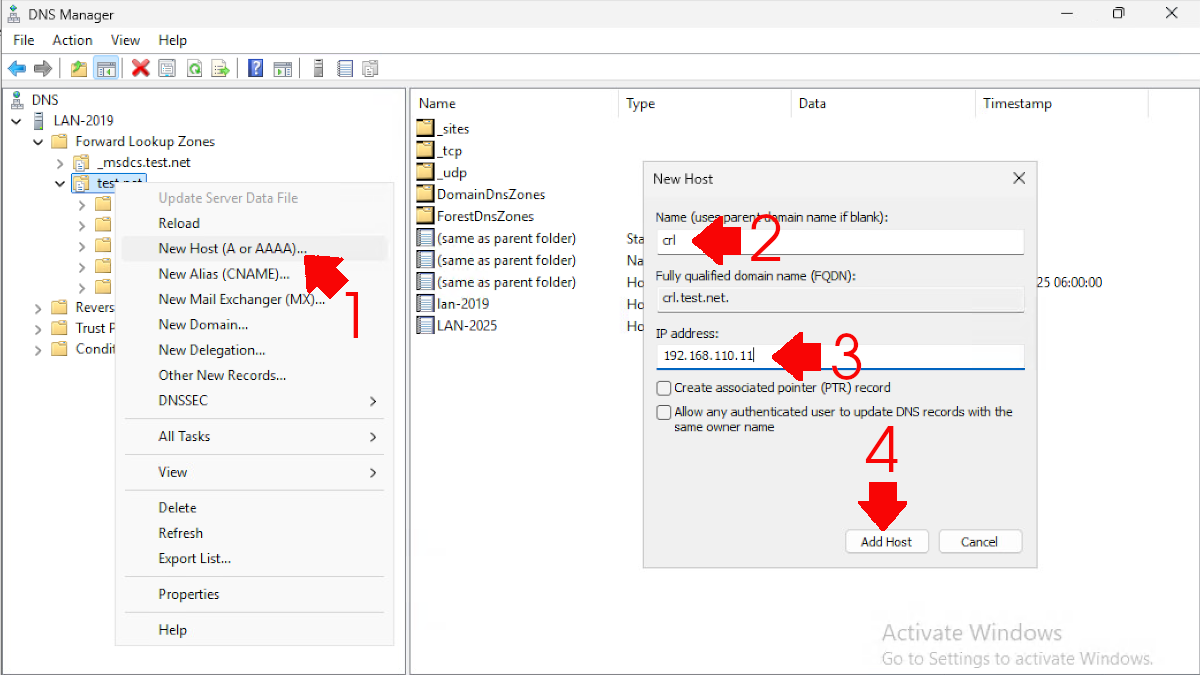
To ensure your clients can resolve the name of the CRL you just created, they need to be able to resolve the name. On your DNS server, open the DNS management console. Expand the server name, then Forward Lookup Zones, and select your domain. Right-click and choose New Host (A or AAAA). Name it crl, set the IP address to that of the IIS server hosting the CRL, click Add Host, and then close the DNS Manager.
Windows IIS Requirements Setup a CRL
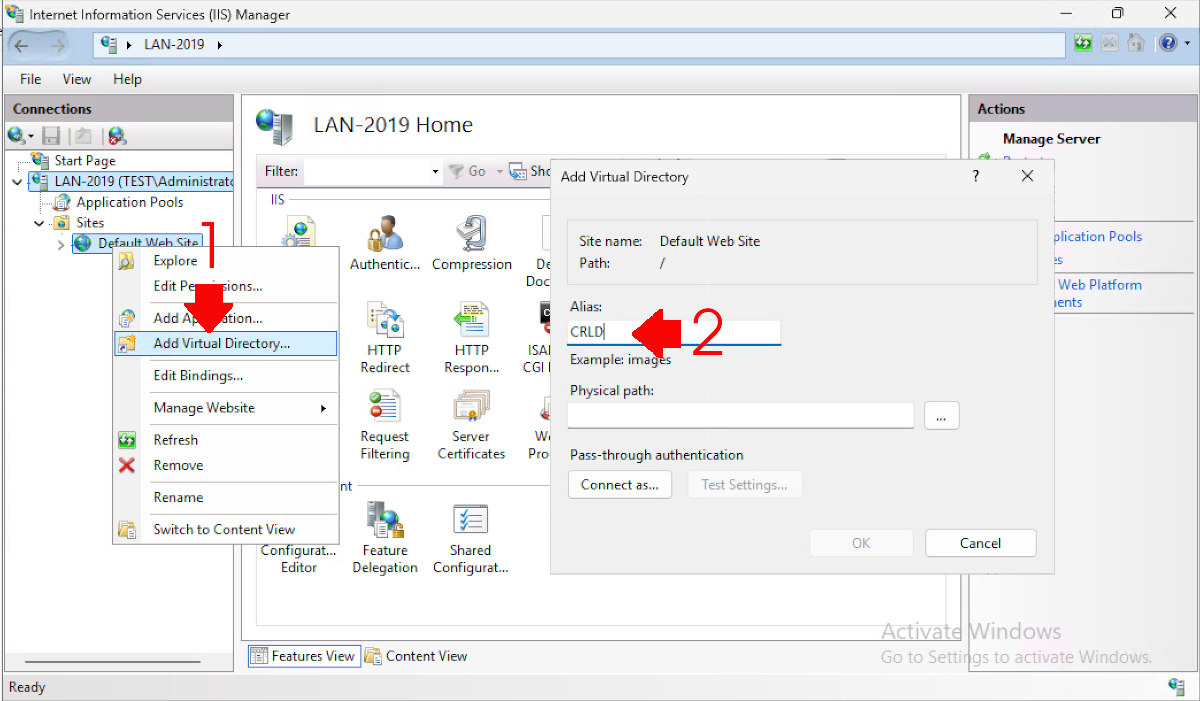
On the web server, open the Internet Information Services (IIS) Manager console. Expand and select your server name, right-click, and choose Add Virtual Directory. Set the alias to CRLD.
Note: In IIS, URLs are not case-sensitive.
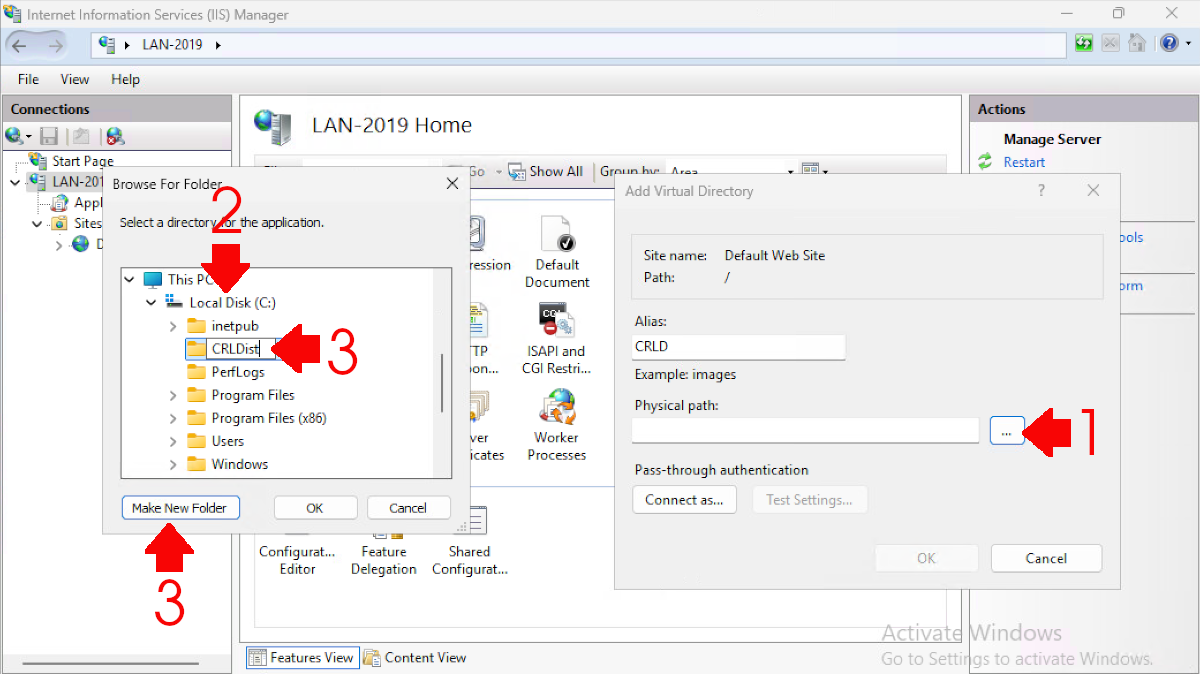
Under ‘Physical path’, click Browse, select the C: drive (or another drive if preferred), create a new folder named CRLDist, and click OK twice.
Select the server name and choose Directory Browsing.
Note: If you’re serving other services from this web server, you might wish to enable directory browsing only on the CRLD virtual directory.
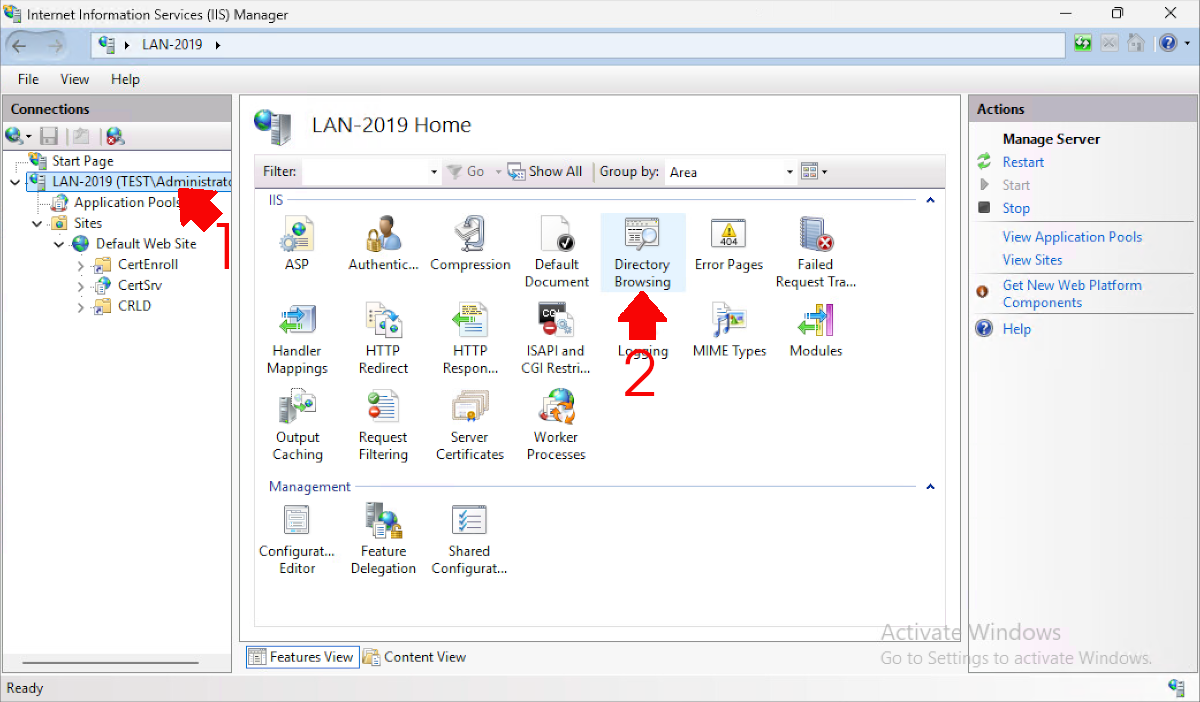
Click Enable, then Apply.

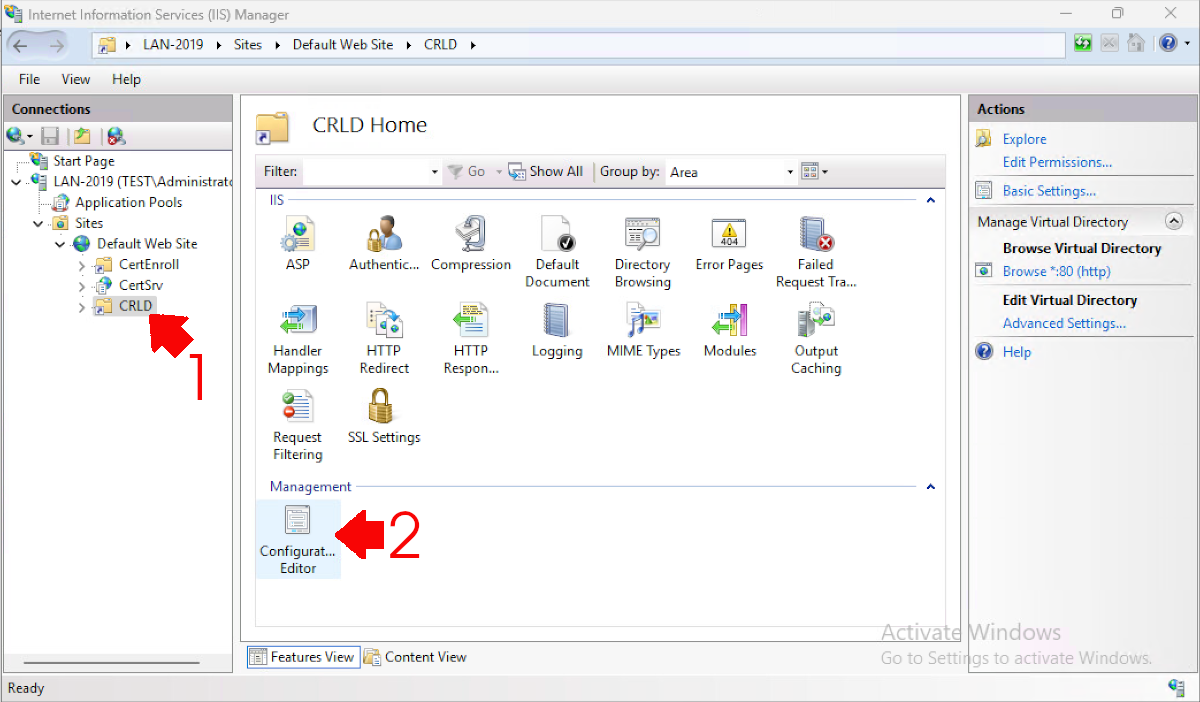
Select the CRLD directory (click Refresh if you can’t see it) and open Configuration Editor.
Navigate to system.webServer/security/requestFiltering.
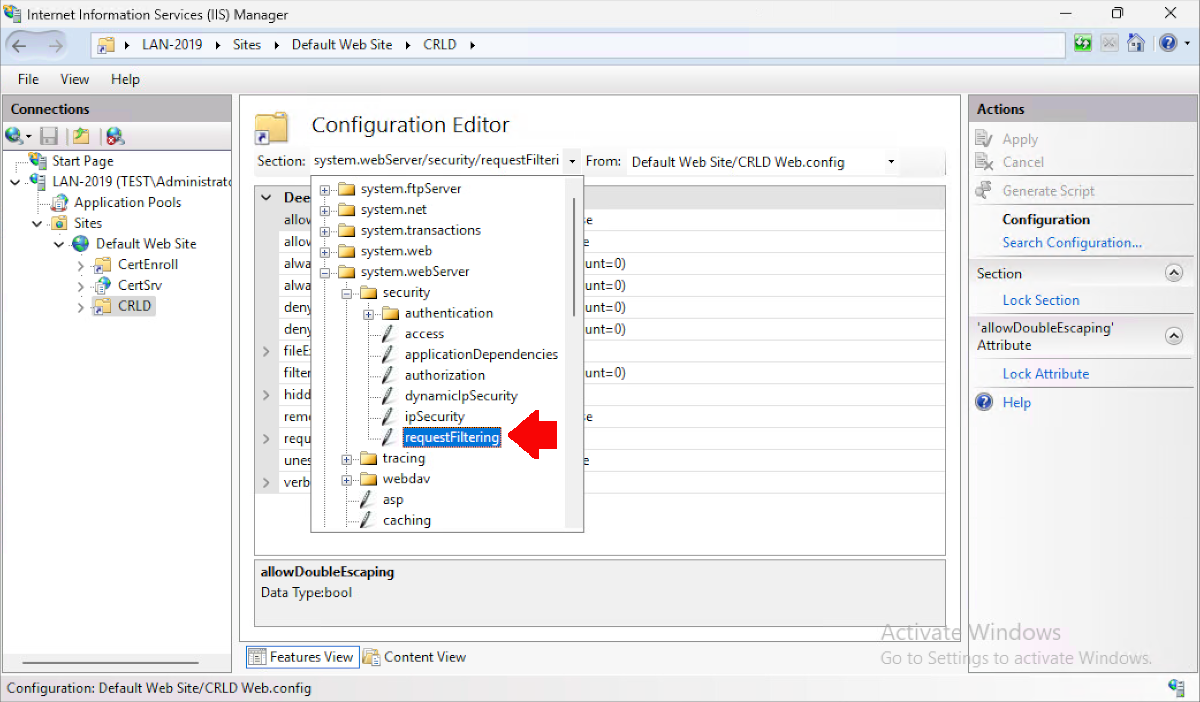
Note: On older versions of IIS, it’s under system.webServer/security/authentication/requestFiltering.
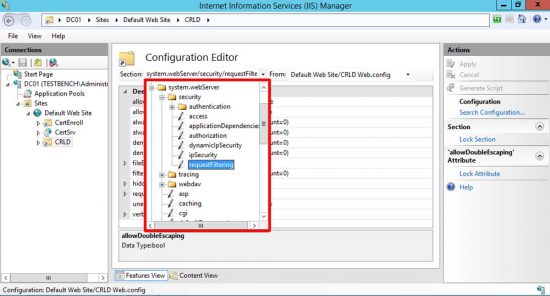
Change allowDoubleEscaping to True and click Apply.

Windows Folder Permission Requirements for
Setup a CRL
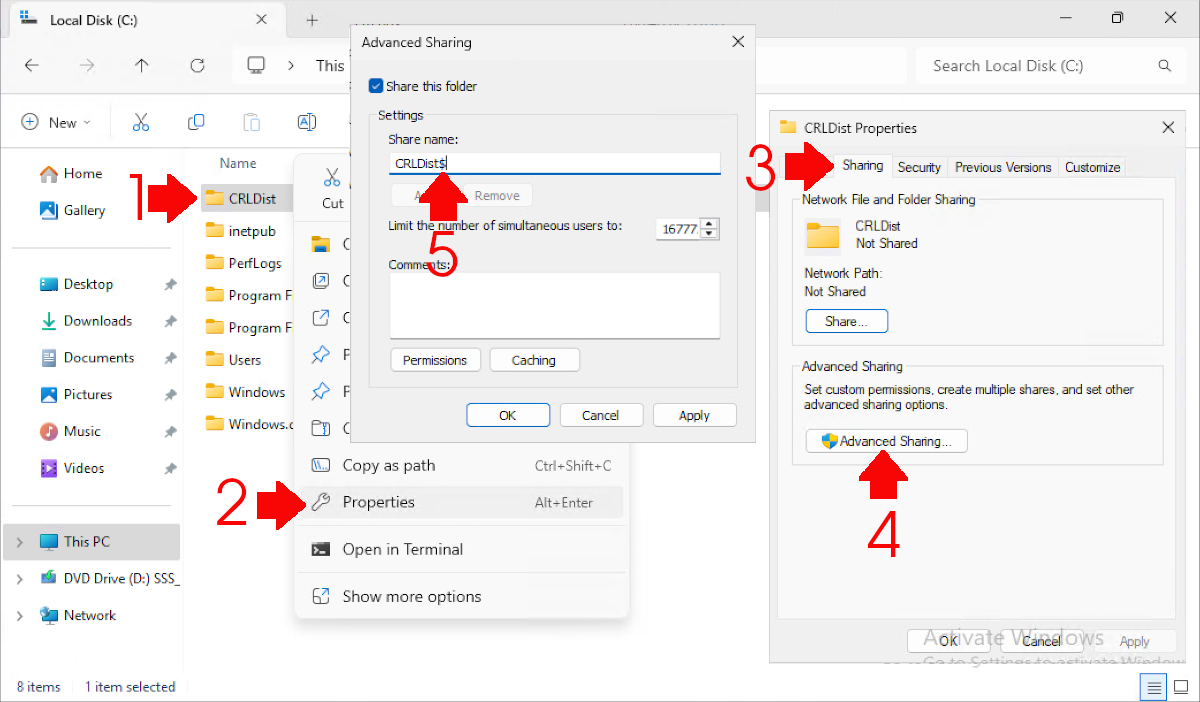
Navigate to the folder you just created (e.g., C:\CRLDist), right-click, and select Properties. Go to the Sharing tab, click Advanced Sharing, check Share this folder, and add a dollar symbol to the end of its name (i.e., CRLDist$).
Note: This creates a ‘hidden’ share.
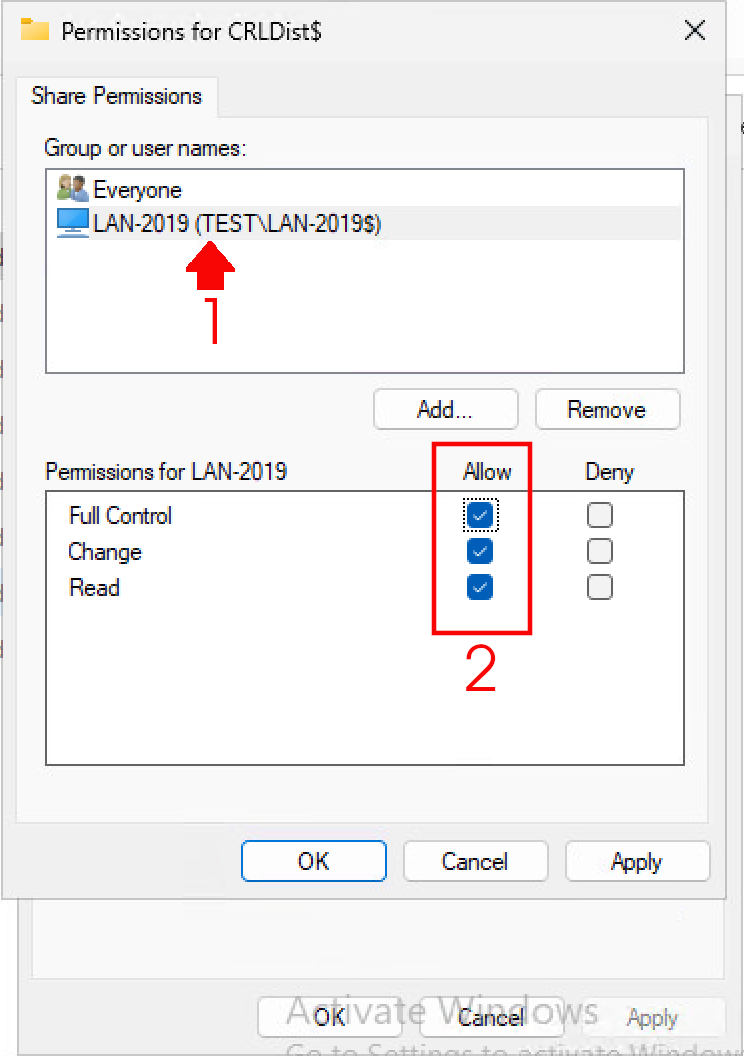
Note: In Addition, Set the Windows NTFS Permissions for the Server(s) to Full Control also.
Go to Permissions > Object Types, add Computers, then click OK. Enter the name(s) of the server(s) that need to write to the CRL, then click OK again.

Grant Full Control permissions to the server(s) you just added, then click Apply and OK.
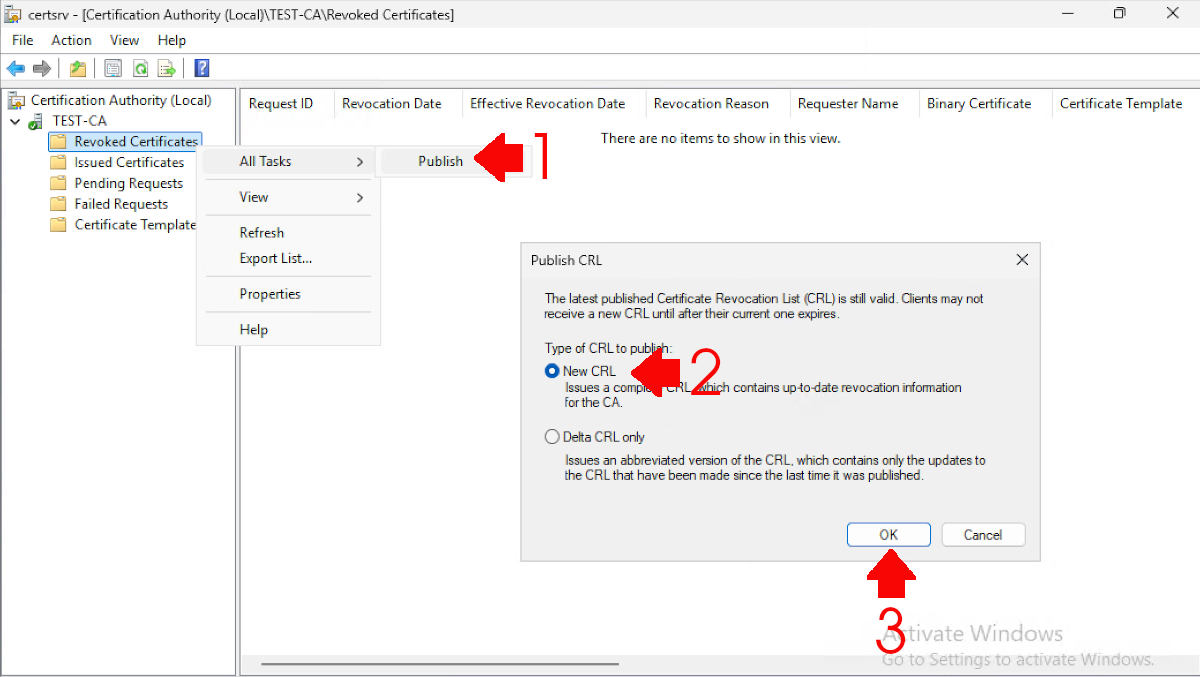
Back on the Certificate Services server, launch the Certification Authority management console. Navigate to Revoked Certificates, right-click, select All Tasks > Publish, choose New CRL, then click OK.
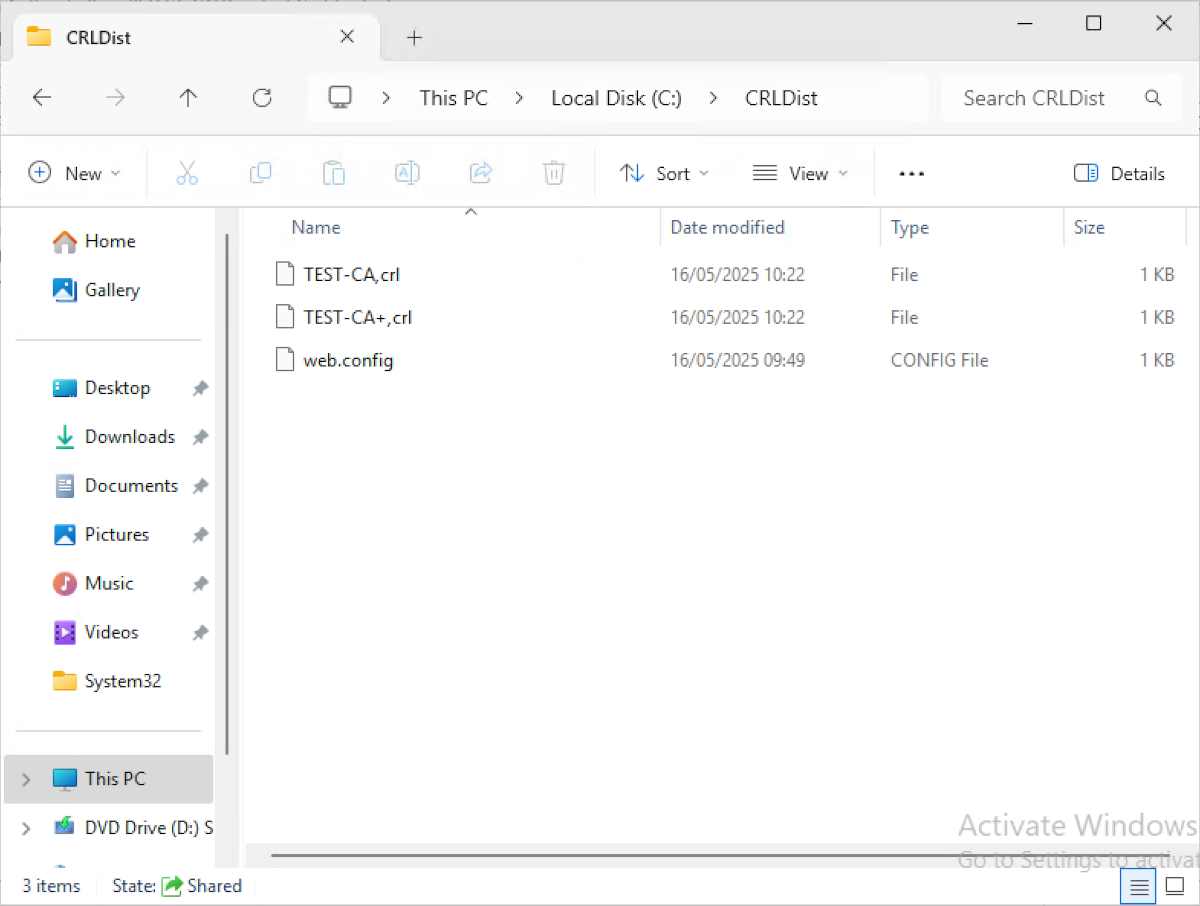
If you check the folder you created earlier, it should now contain the CRL files.
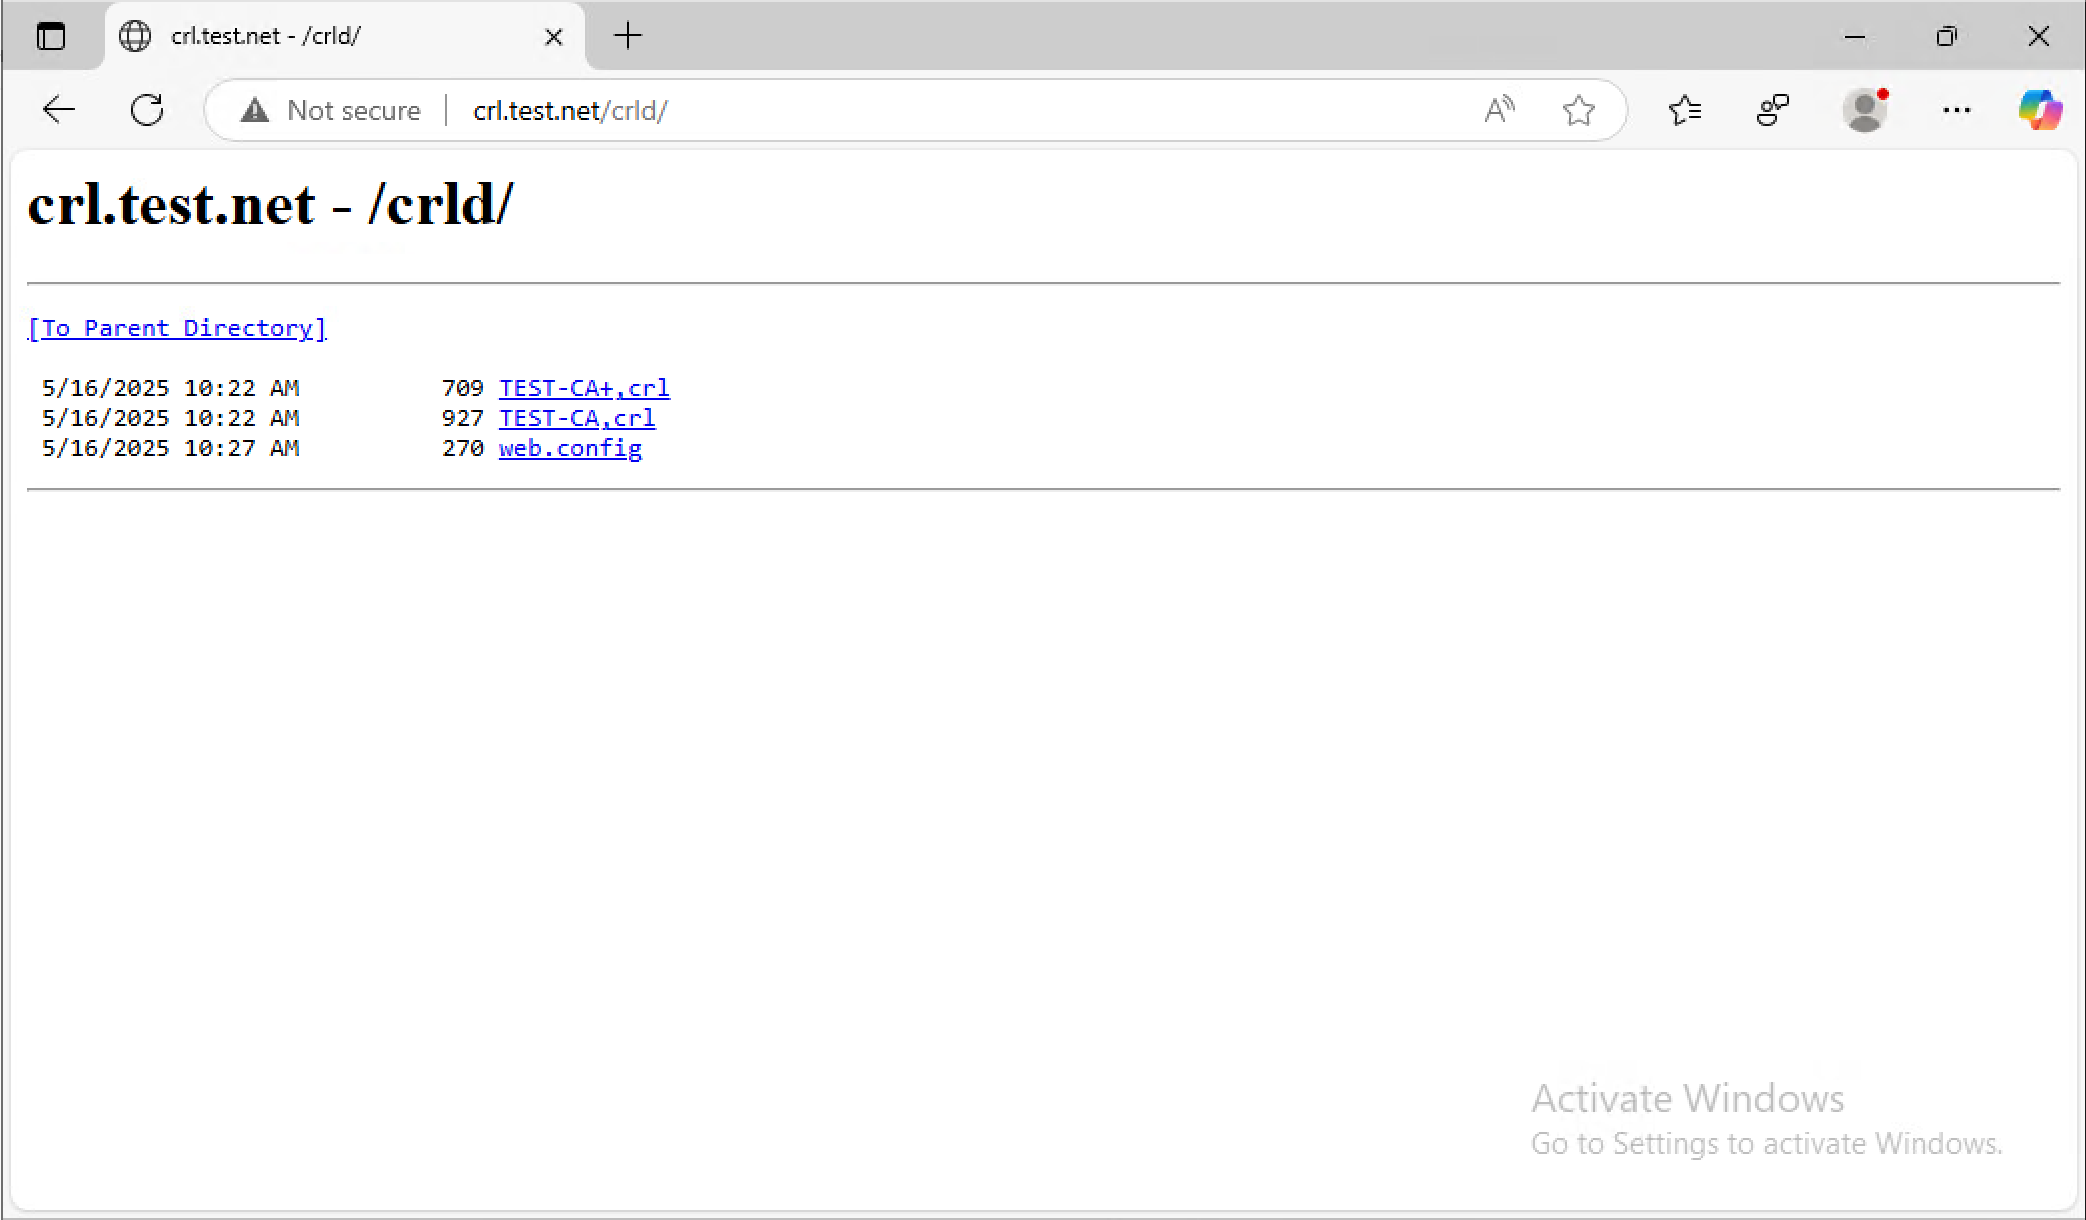
You can test the CRL by browsing to its webpage:
http://crl.[your-domain-name]/crld
It should look something like the following:
Related Articles, References, Credits, or External Links
Microsoft Certificate Services Configuring OCSP
Publish CRL Error – Access Denied 0x80070005
Configure WEB1 to Distribute Certificate Revocation Lists (CRLs)