
KB ID 0000927
NOTE: THIS ARTICLE IS FOR THE OLD VERSION OF GNS3
GO HERE FOR THE NEW ONE
Problem
I dip into GNS3 every so often, (depending on what I’m working on). And each time I install it, I spend just as long remembering how to set it up, as I do using it! So, if for no other reason than I can use this page as a reference in future, here’s how to get it up and running.
Solution
Note: At time of writing he latest version is 8.6
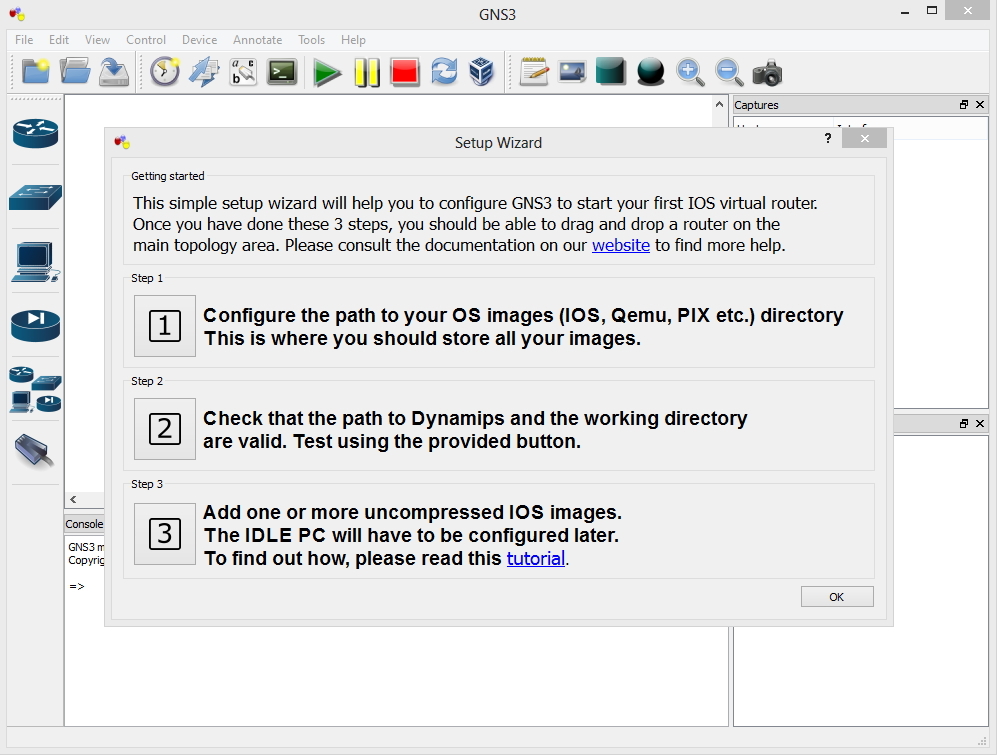
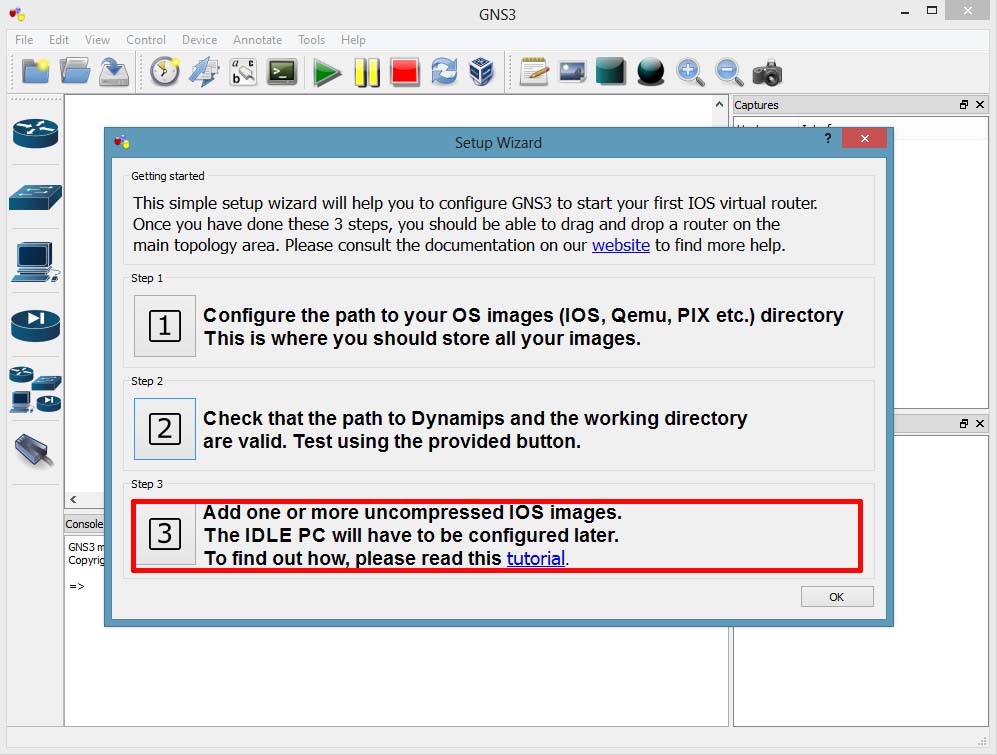
1. Download GNS3, I accept all the defaults (I actually tick to install SuperPuTTy, as tabbed console windows can be handy when using GNS3). Launch the program, you will be greeted with the following setup wizard. Select Option 1.
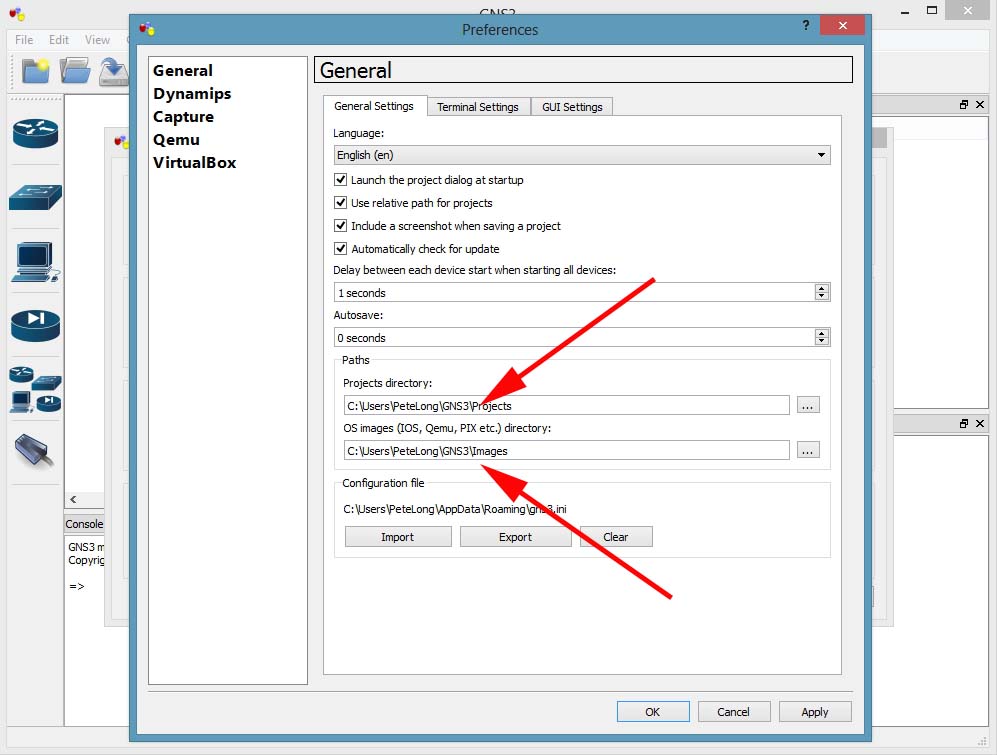
Note: You can do the same in future, by going to Edit > Preferences
2. Check that the path to the ‘projects’ and your ‘images’ folder are where you want them to be. The defaults are fine but if you run GNS3 on several machines you might want to choose something like Dropbox > Apply > OK.
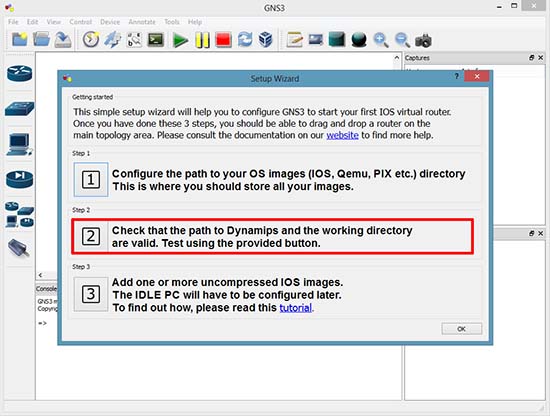
3. Option 2.
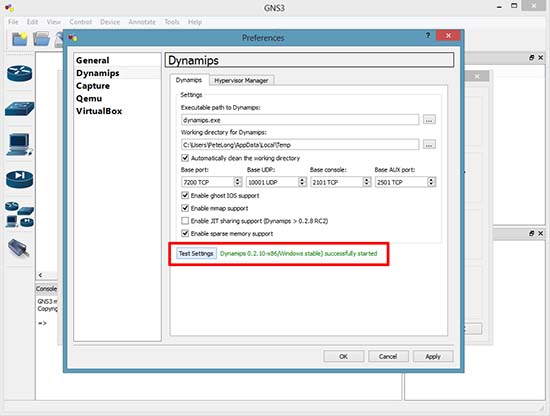
4. Click Test Settings > Have patience, it can take a couple of minutes > Apply > OK.
Adding Router Images to GNS 3
5. Option 3
Note: You can visit the same section in future by clicking Edit > IOS Images and Hypervisors.
6. Image file > Browse to the image you want to import. Here on GNS3 8.6 you can select the filename.bin file, with older versions you need to extract that file to a filename.image file.
Note: You need to legally download these images from Cisco. This means you need a Cisco CCO account, and a valid support agreement. DO NOT email me and ask for Cisco IOS images, (I will just ignore you!).
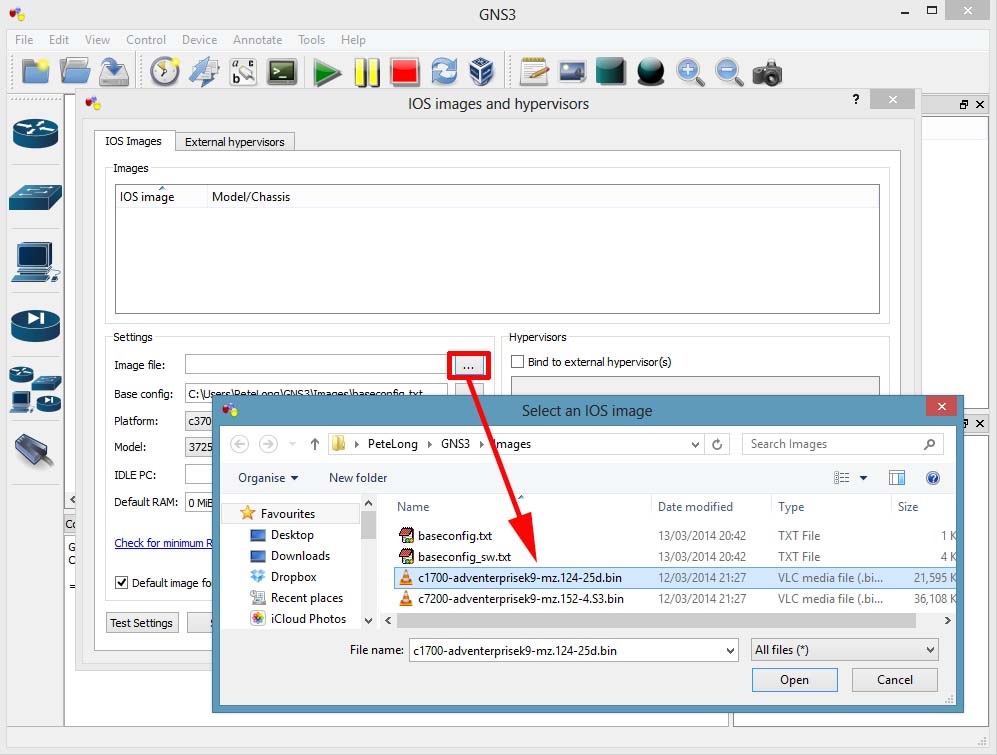
7. As mentioned above, it will convert my filename.bin image to an extracted filename.image file > Yes.

8. Set the Router platform and model > In the IDLE PC section click Auto calculation > This can take a while.
Note: You can do this later from the main workspace, and test a range of settings. I you don’t do this your virtual network devices will eat all your CPU power!
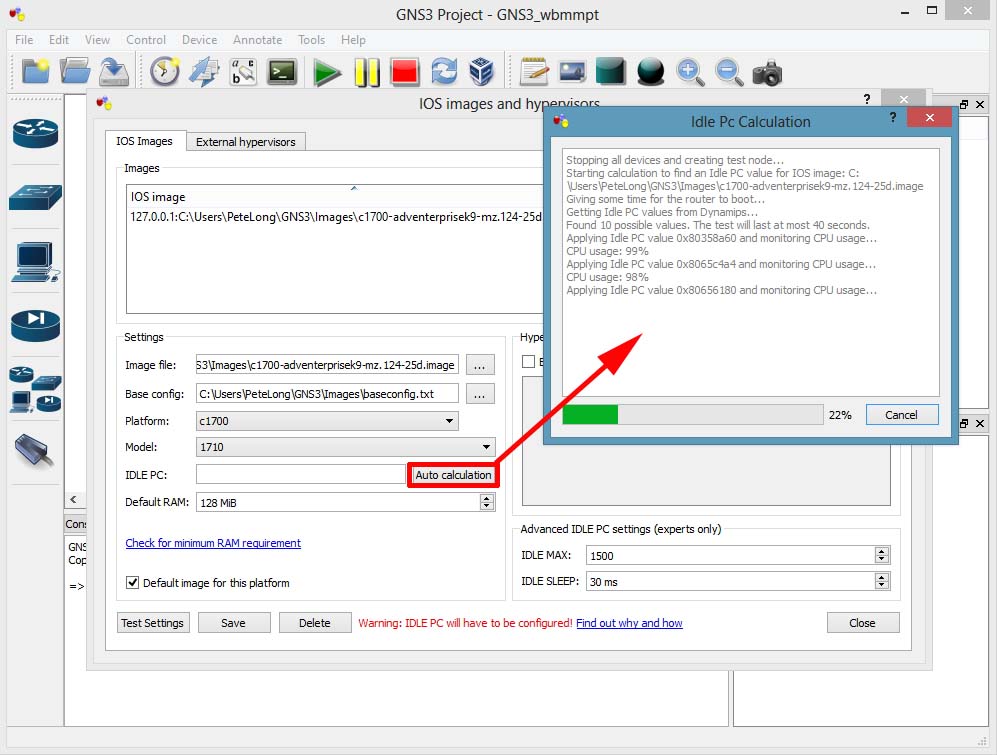
9. When complete click Close > Save > Close.

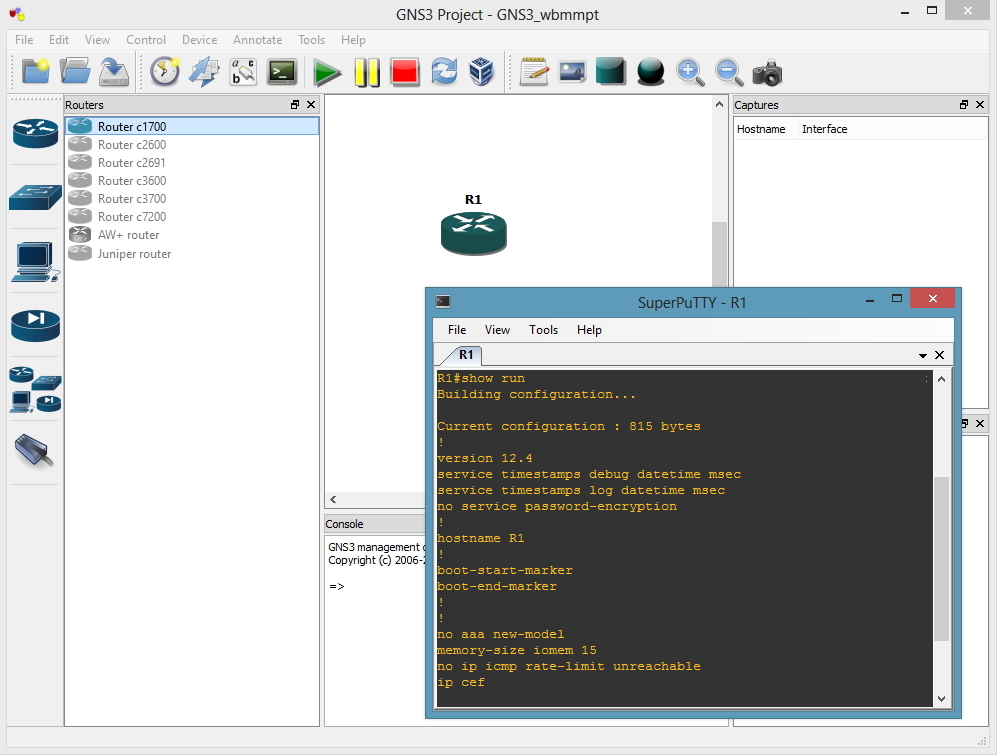
10. You can now start that model router to the workspace and use it. Repeat for each model of router you want to add.
Adding a Host to GNS3
Having a host machine for you labs is handy, usually you just need to be able to ping, or perform tracerts. So you can download a small Linux image from GNS3. There are a few options but I prefer linux-microcode.
11. Edit > Preferences.

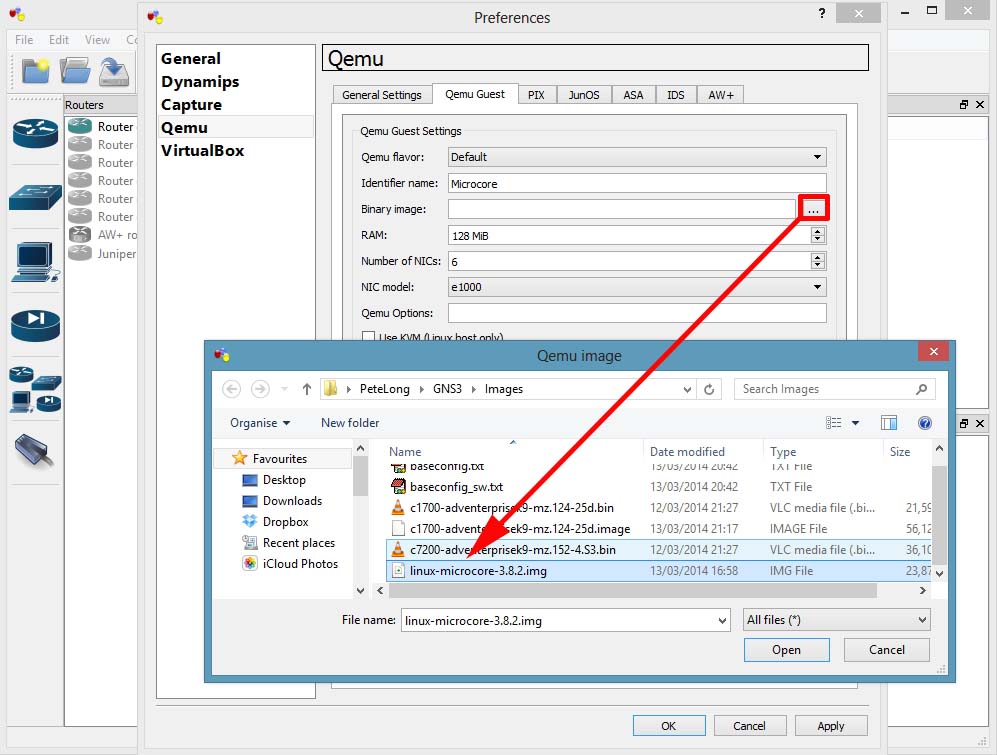
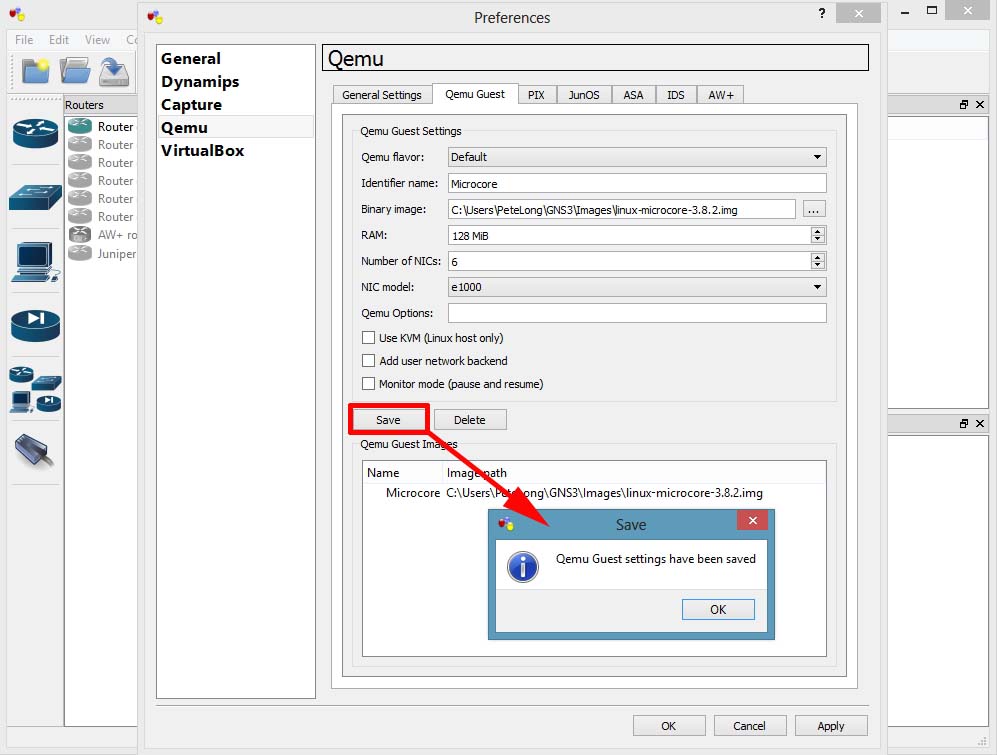
12. Quemu > Quemu Guest > Give it an identifier name (can be anything) > Browse to, and select the image you downloaded.
13. Save > OK > Apply.
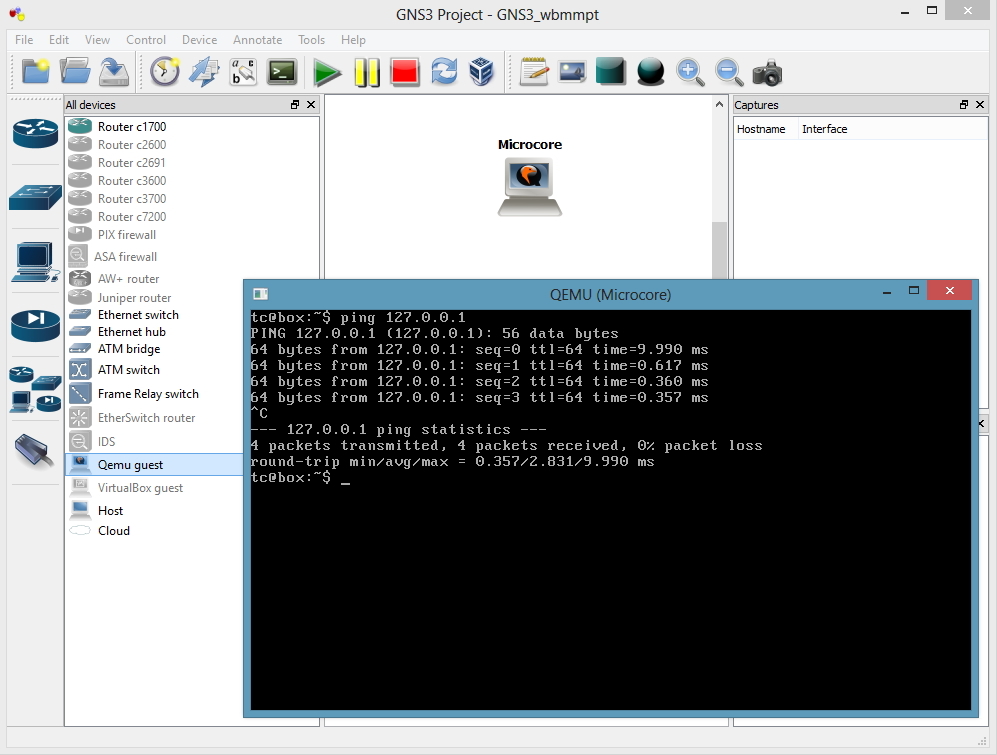
14. You can now drag a Quemu Guest machine onto the work space, and console into it.
Adding a Cisco ASA to GNS3
Yes you can add Cisco PIX as well, but there’s not many of them left in the wild.
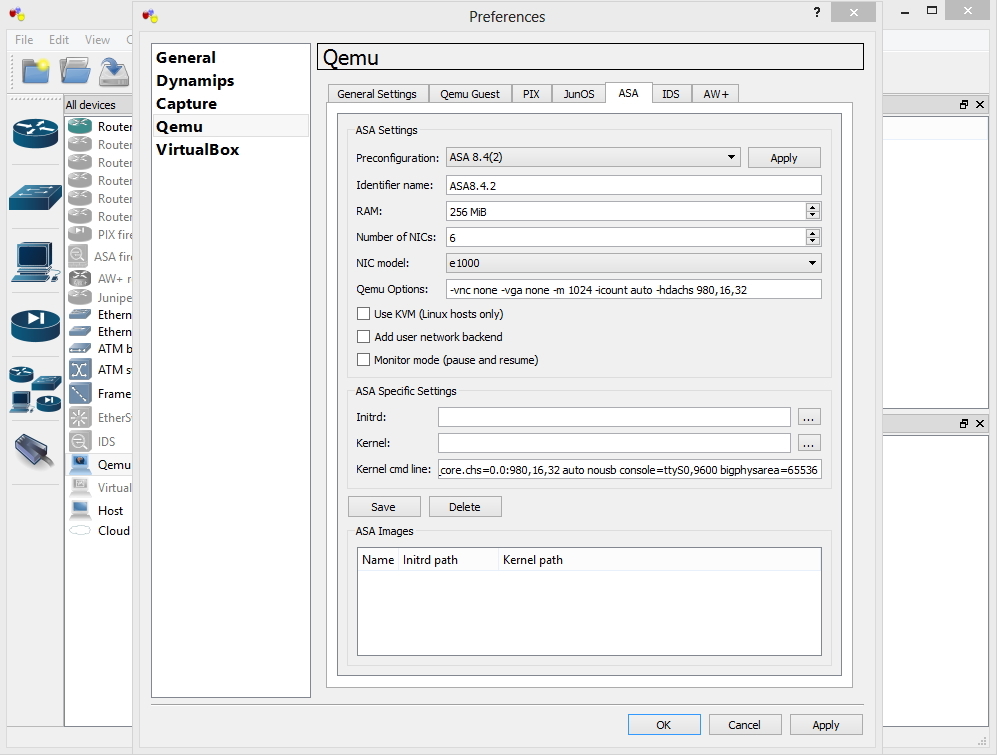
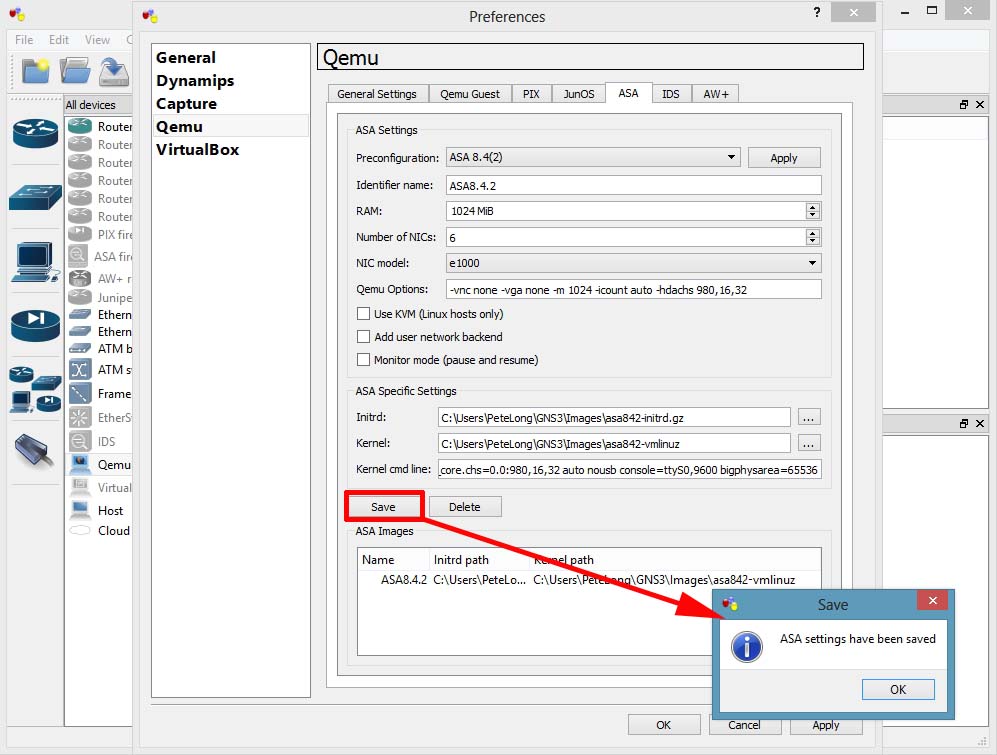
15. Edit > Preferences > Quemu > ASA > Give it an identifier name (can be anything) > Set the RAM to 1024 > Set the Qemu options to;
-vnc none -vga none -m 1024 -icount auto -hdachs 980,16,32
Set the Kernel cmd line option to;
-append ide_generic.probe_mask=0x01 ide_core.chs=0.0:980,16,32 auto nousb console=ttyS0,9600 bigphysarea=65536
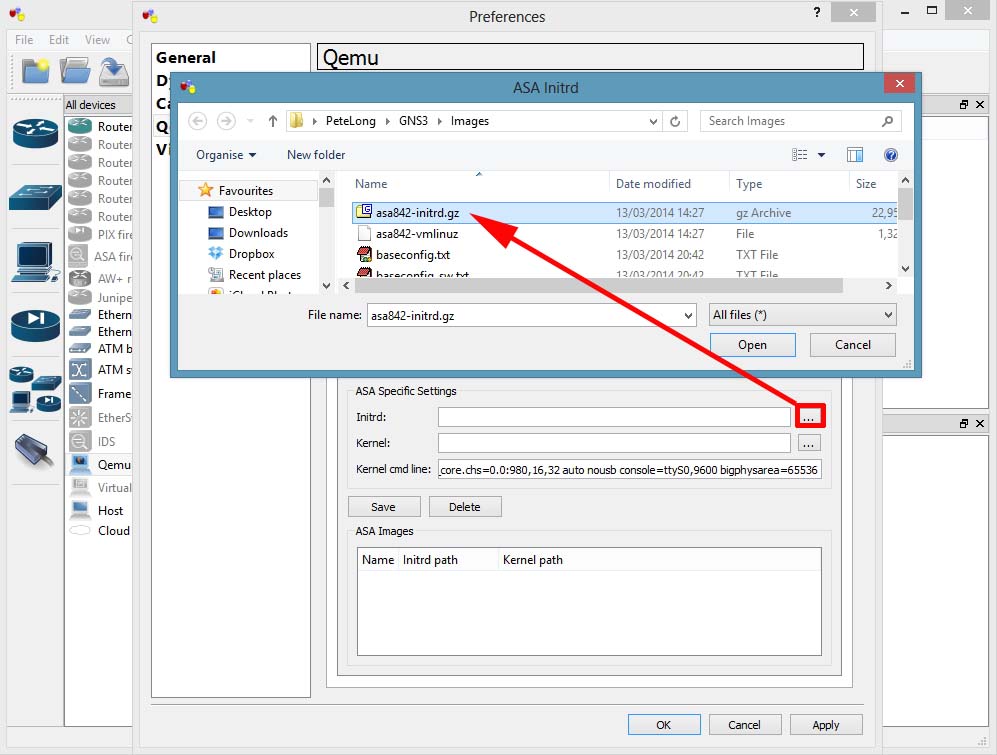
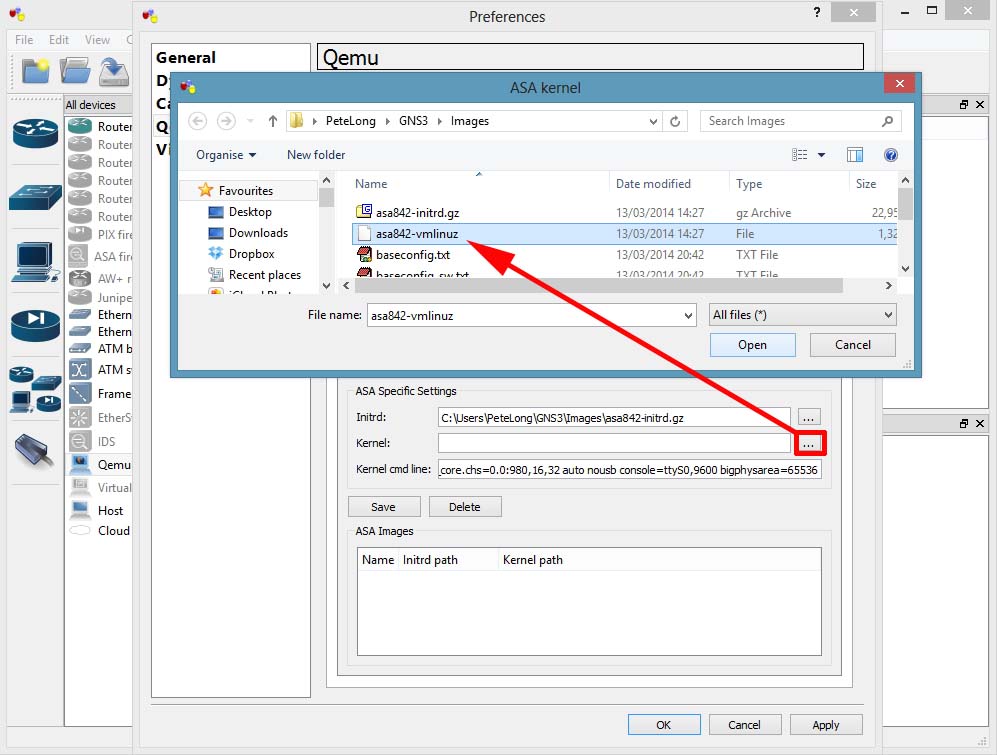
16. You need two files to run the ASA, an initrd file and a kernel file. You need to create these from a legally obtained copy of the asa843-k8.bin file.</p?
Should you wish to locate these files form a less reputable source you are looking for
asa842-initrd.gz and asa842-vmlinuz, again don’t email me for them! If you are too stupid to use a search engine, then technical ninjary is not the correct career choice for you.
17. Finally select the vmlunuz file > Open.
18. Save > OK > Apply.
19. You can now drag an ASA onto the workspace and console into it (it takes a while, be patient). When the ASA starts it has all the licenses disabled, to add them you need to change the ASA’s activation key. An ASA Activation key is usually linked to the serial number of the ASA, in this case we don’t have a serial number, (that’s not strictly true, if you check, it’s something like 12345678). So I will publish a working activation key*
*Disclaimer, this will only work on this virtual ASA, and it’s published elsewhere on the Internet, if I receive a request to remove it I will do so.
Another ‘quirk’ is every time you add a new ASA to the workspace, you need to go through this process, if you enter the commands below you can issue a reload and also save the ASA, without the need to re-enter the activation key.
activation-key 0xb23bcf4a 0x1c713b4f 0x7d53bcbc 0xc4f8d09c 0x0e24c6b6
{This can take 5-10 minutes}
copy running-config startup-config
{Enter}
copy startup-config disk0
{Enter}
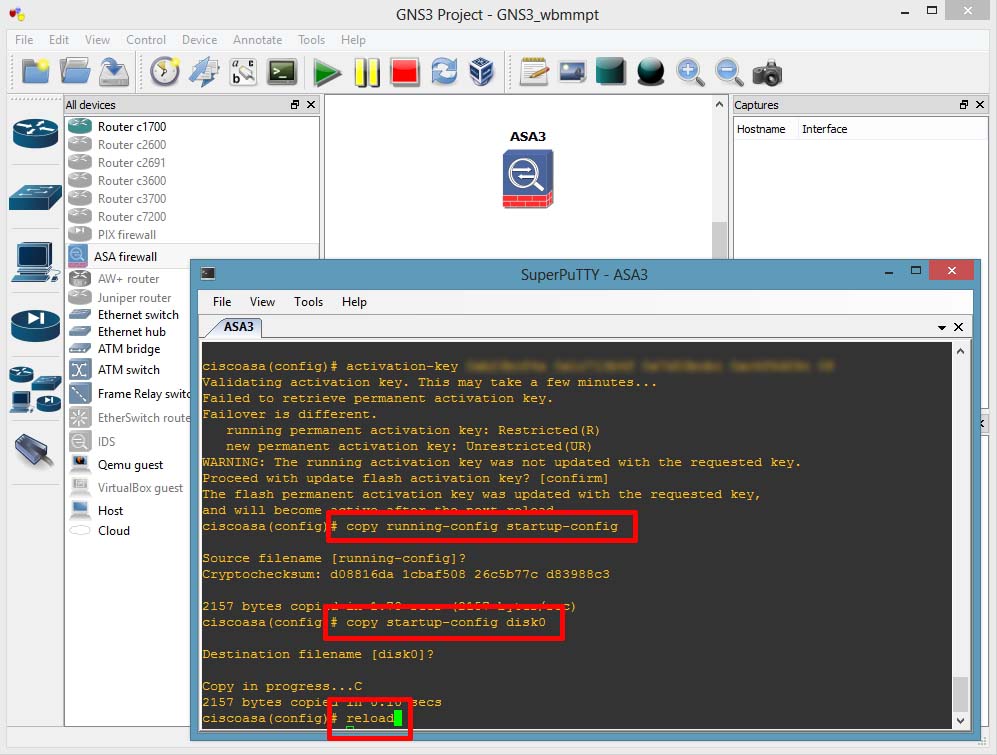
20. When it comes back up, (again it will take a few minutes). Your can check your ASA’s licensed features.

Related Articles, References, Credits, or External Links
Connecting GNS3 to VMware Workstation