
KB ID 0000783
Problem
This problem was originally identified by Microsoft here. But none of the fixes recommended by them were really practical in my clients situation.
I did read one promising post that said, if you disable offline file caching by GPO this problem would cease. However this particular client HAD TO have that feature enabled (for Ranger Offline).
Someone else had written a PowerShell script that ran through and changed the permissions on the offending file (see below), but what about new users?
Solution
I’ve got three options either, setup an FSRM screen and set it to remove the offending file, use a group policy preference, or add the following to the users login script (or run as a script with GPO);
Option 1 – Remove Desktop.ini with Group Policy Preference
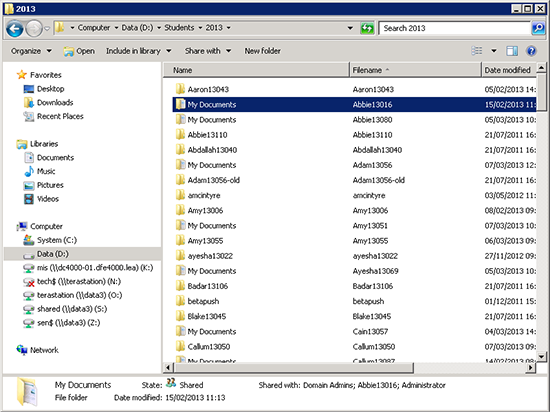
1. This is the file in question ‘desktop.ini’, it changes the icon and display-name of the folder (on Windows Vista and newer). You will notice the actual name of the folder does not change (see the example I posted above), which you can see by turning on the filename column in Windows Explorer.
Note: desktop.ini is a system and a hidden file.
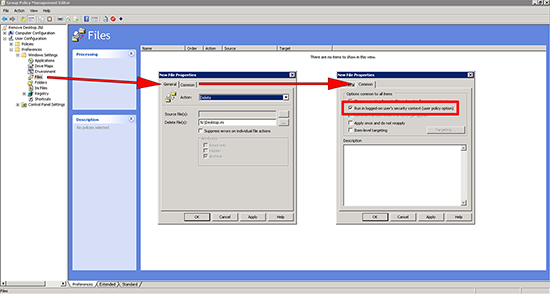
2. I’m creating a GPP to remove the desktop.ini file. On a domain controller Start > Administrative Tools > Group Policy Management Console > Navigate to where you want to create your policy, or edit an existing one > Navigate to;
Select New > File > Action = Delete > Source Files N:desktop.ini > Tick ‘Suppress errors on individual file actions’ > Common Tab > Tick ‘Run in logged-on-users’s security context (user policy option)’ > Apply > OK.
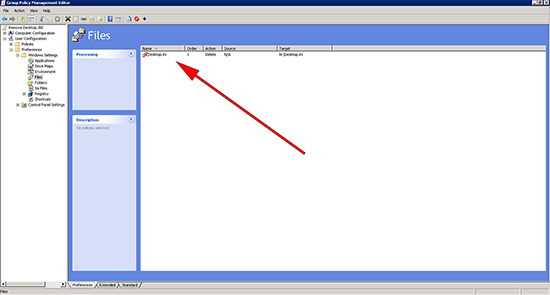
3. It should now look like this.
Option 2 – Use a File Screen
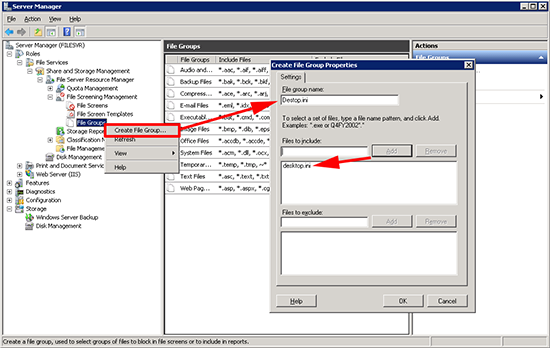
1. You need to have the ‘file services’ role installed, open the ‘Server and Storage Management’ Snap-in > File Group > Create File Group > Give it a name > Add in desktop.ini > OK.
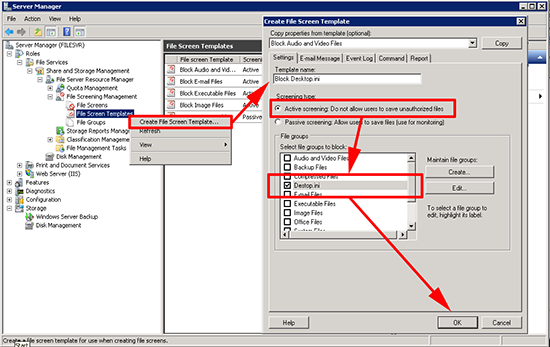
2. Right click ‘File System Templates’ > Create File Screen Template > Give it a name > Select Active Scanning > Tick desktop.ini > OK.
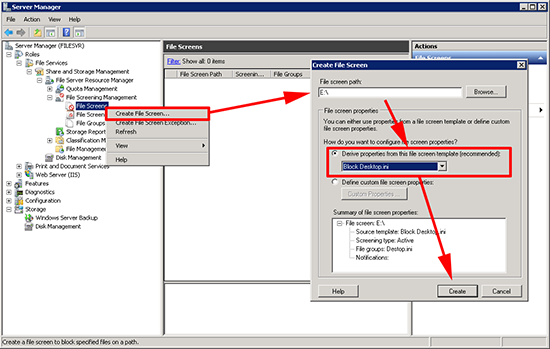
3. Right click ‘File Screen’ > Create File Screen > Browse to the volume or Folder > Select your file screen template > Create.
Locate and Remove ALL instances of Desktop.ini
Download and run this PowerShell Script to remove all instances of Desktop.ini from a folder and subfolders.
Related Articles, References, Credits, or External Links
Original Article Written 11/03/13