
KB ID 0000623
Problem
When VMware released ESX 4.1, they took away the “Host update utility”, (which was a mistake!). For people without VMware Update Manager, you now have to either put in the CD/DVD and do an ‘in place upgrade’, or grow a ginger pony tail and put some socks/sandals on and do some Linux.
Below I’ve got a build of ESX with no updates on it, I’m going to apply the ‘Update 1″ then the most recent patch to bring the host up to date (at time of writing).
Solution
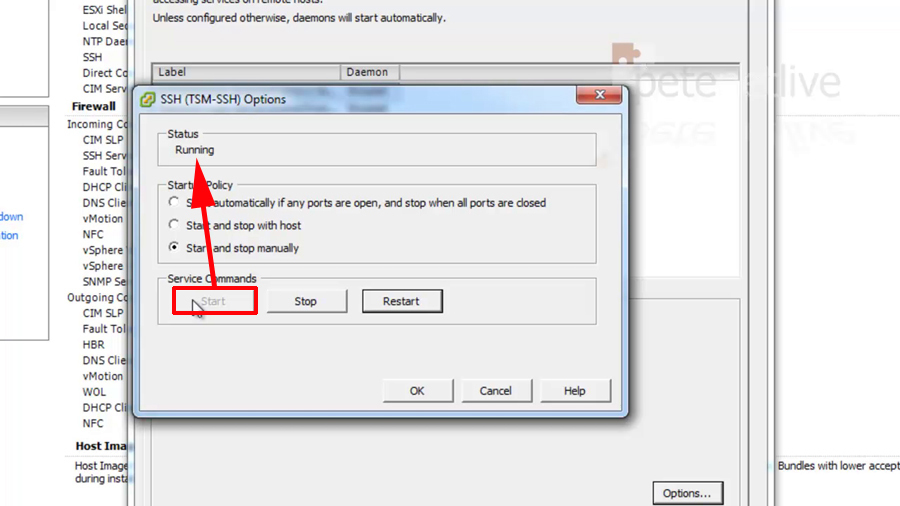
1. Whilst connected to your host with the VI client > Select the host > Configuration > Security Profile > Services Section > Properties > SSH > Options >Start > OK > OK > Exit the VI client.
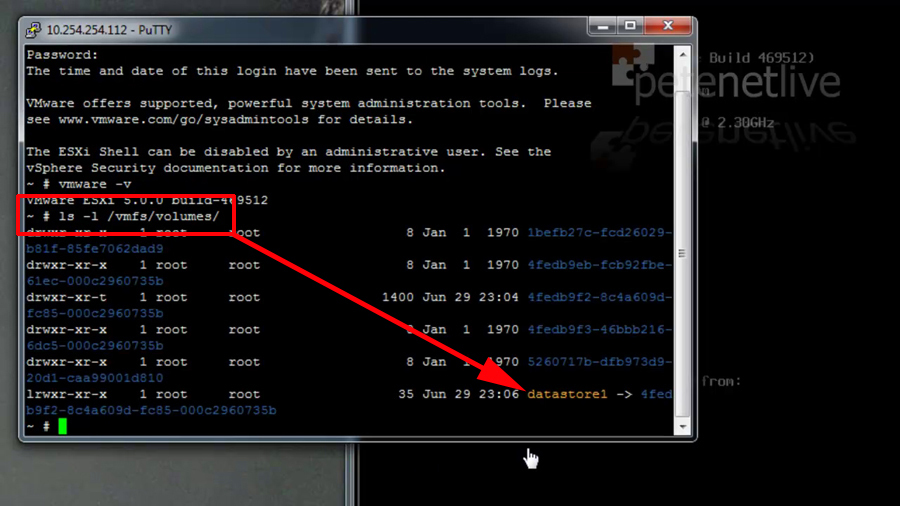
2. Connect to the host via an SSH command window (PuTTy shown). Log on as the root user, to check your current ‘build’ version issue the following command;

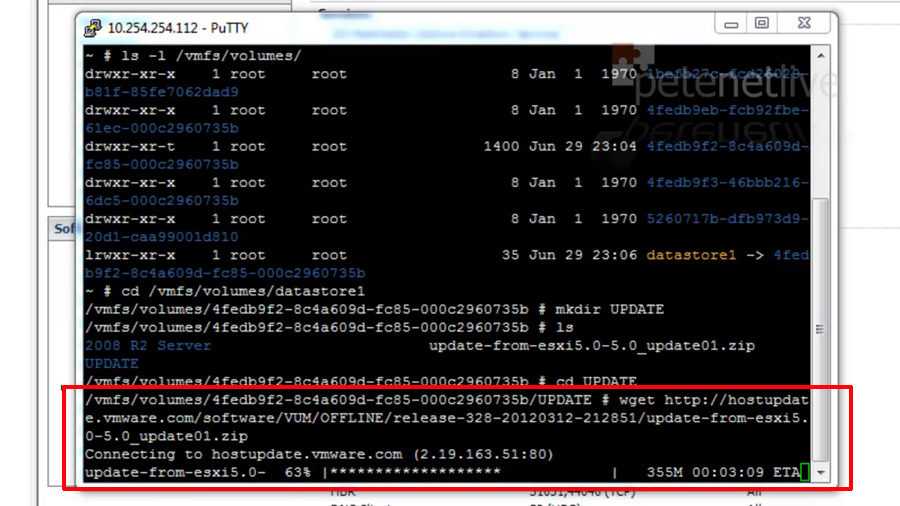
3. You should have a fair idea what piece of storage has the most free space already, this host only has one datastore (datastore1). That’s the one I’m going to download the updates into. To view the Datastores issue the following command;
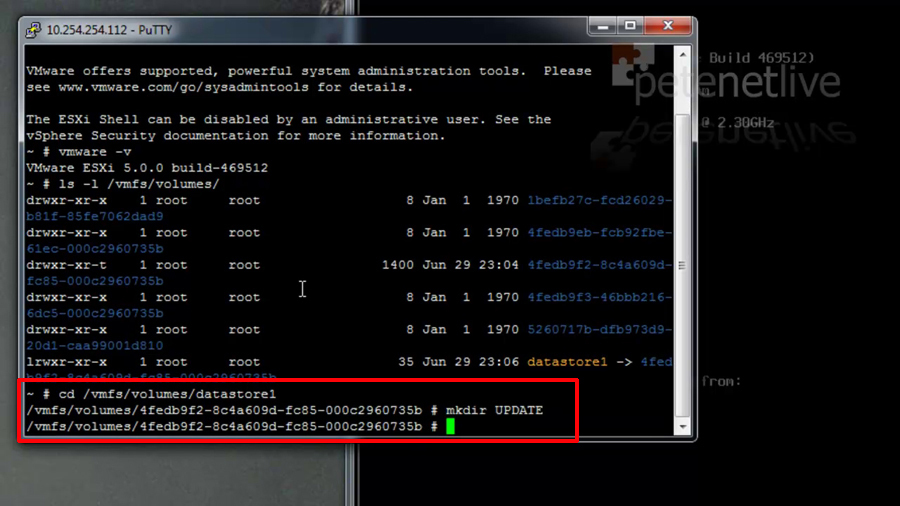
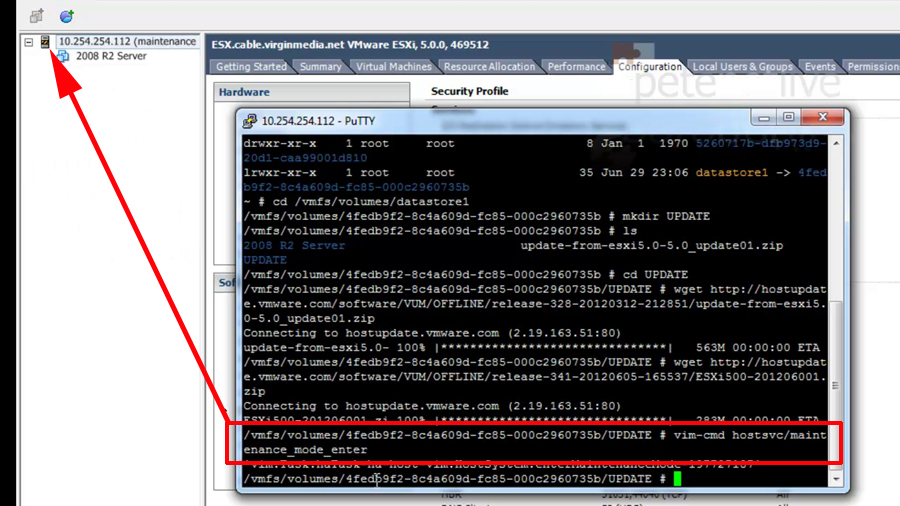
4. Change directory, so that you are ‘in’ that datastore and create a directory called ‘UPDATE’.
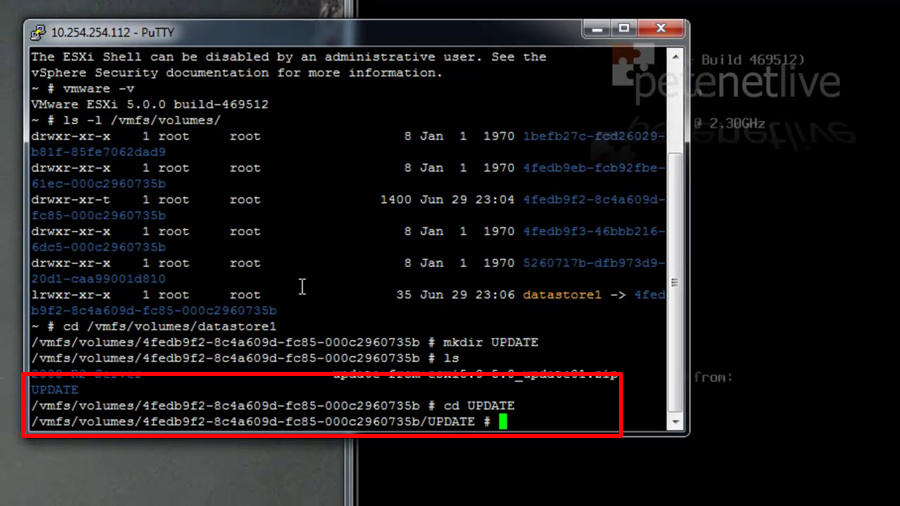
5. Then change into that directory;
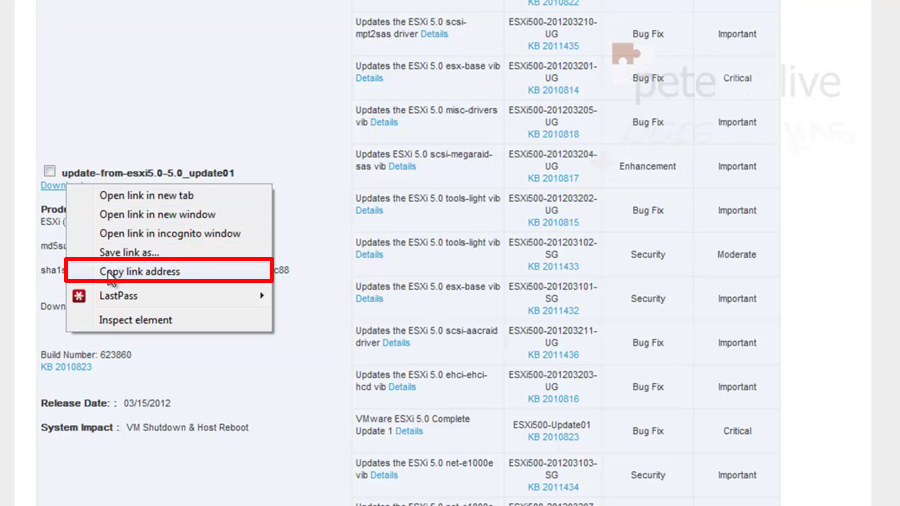
6. From a browser visit the VMware patch portal, locate the update you want to download and install, (here it’s VMware 5.0.0 Update1). Right click the download link and copy the URL.
Note: Patches after major updates are cumulative, I also downloaded the ‘latest’ patch.
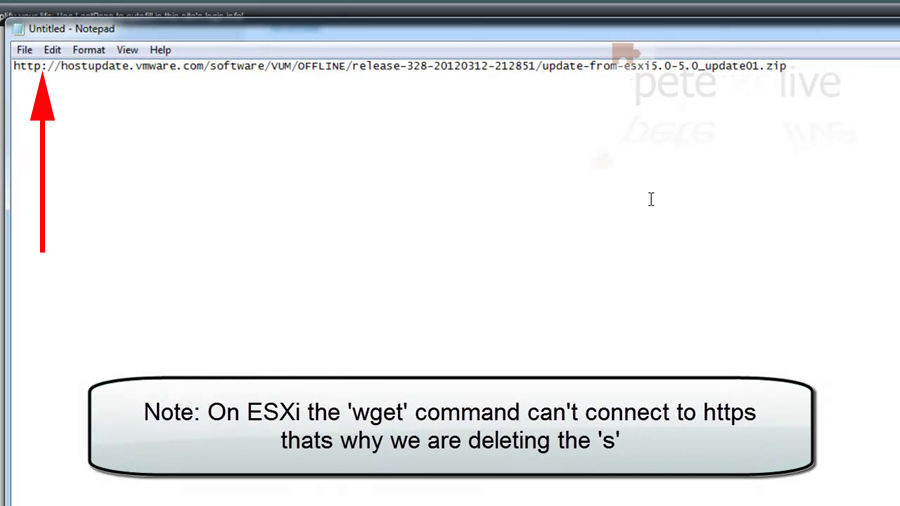
7. You need to remove the ‘s’ from the URL, I just paste the link into notepad, edit it then copy it again.
8. Back at your command window download the update with the following command;
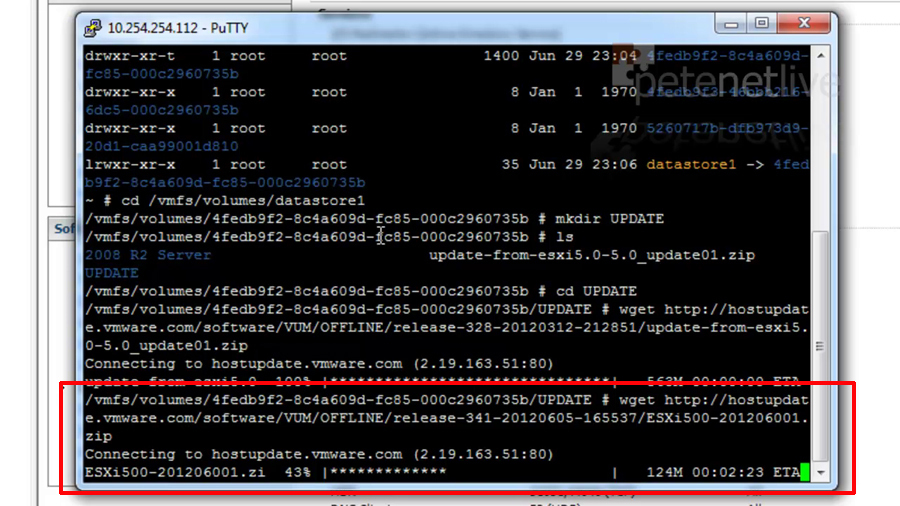
9. When completed, download any other required patches;
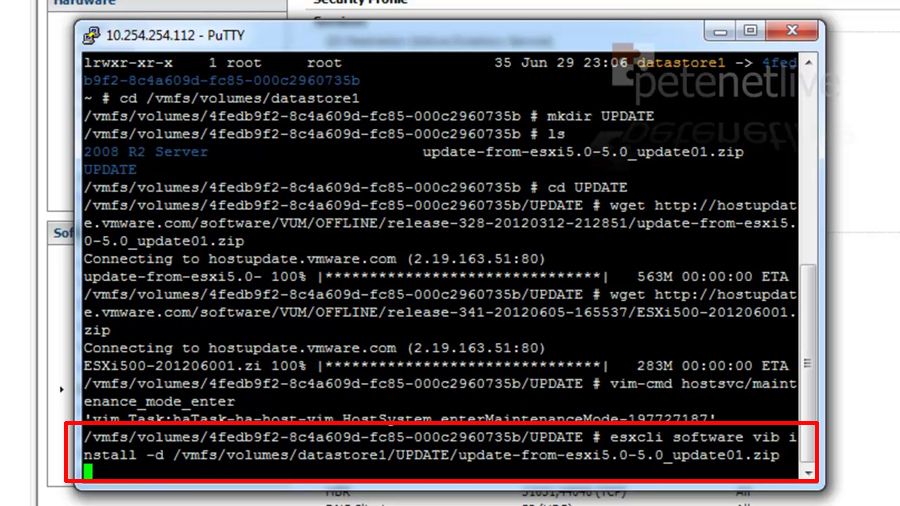
10. Before applying the update/patches, the host needs to be in maintenance mode;
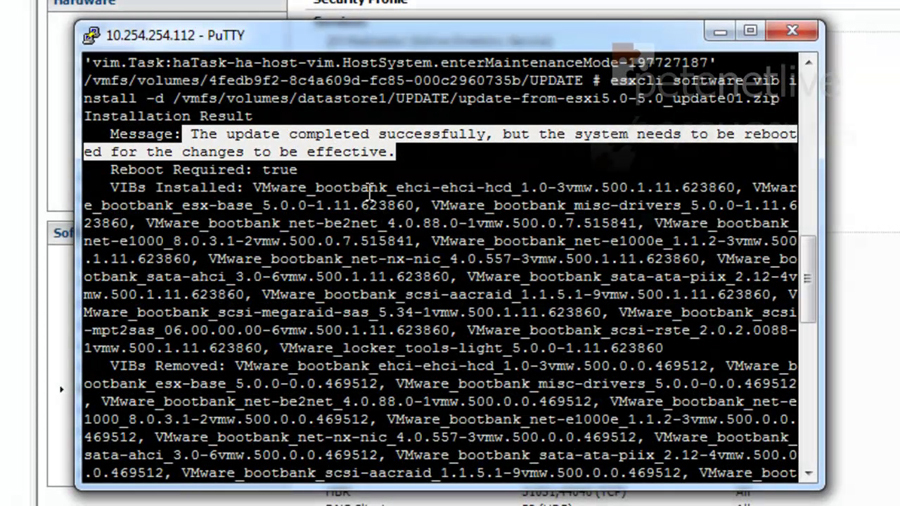
11. Then apply the update with the ‘esxcli’ command as follows;
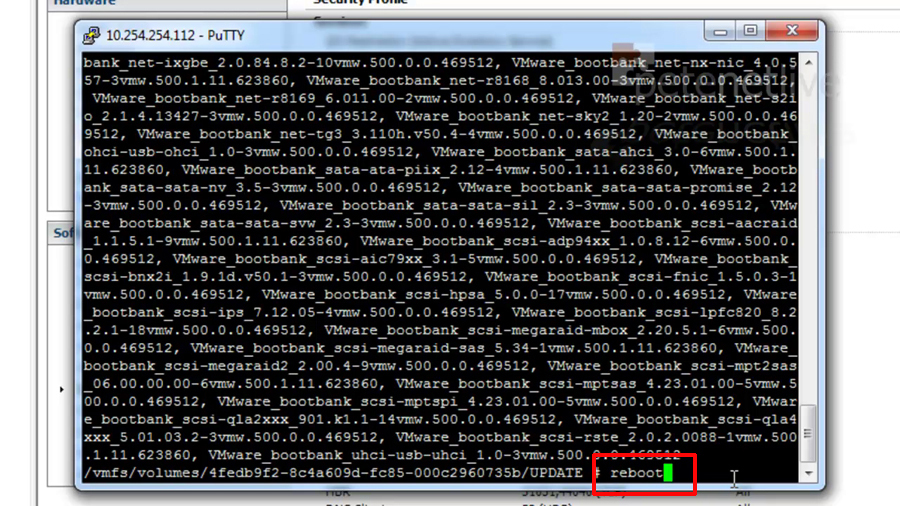
12. When complete, you will need to ‘scroll up’ and make sure it says, “Message: The update completed successfully, but the system needs to be rebooted for the changes to be effective.”
13. After the update, I am applying the latest patch with the same esxcli syntax, like so;
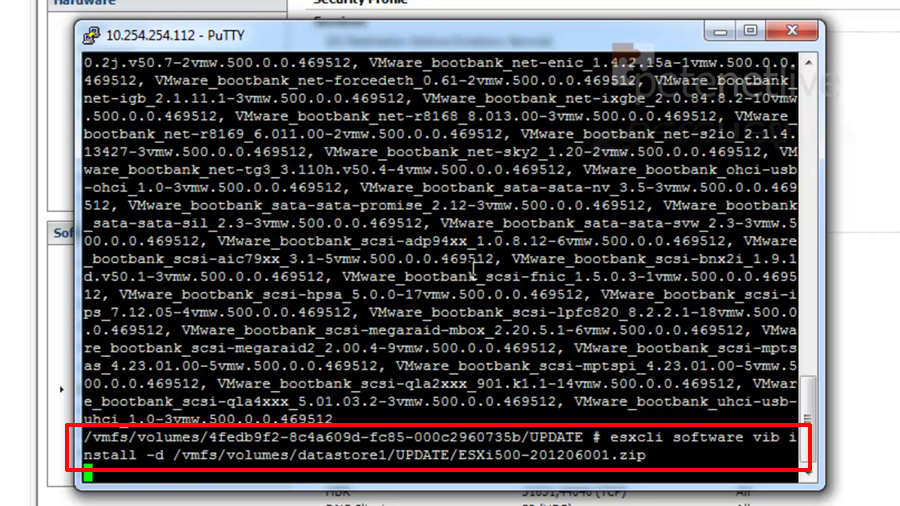
14. Once again you will need to ‘scroll up’ and locate, “Message: The update completed successfully, but the system needs to be rebooted for the changes to be effective.”

15. Now reboot the host;
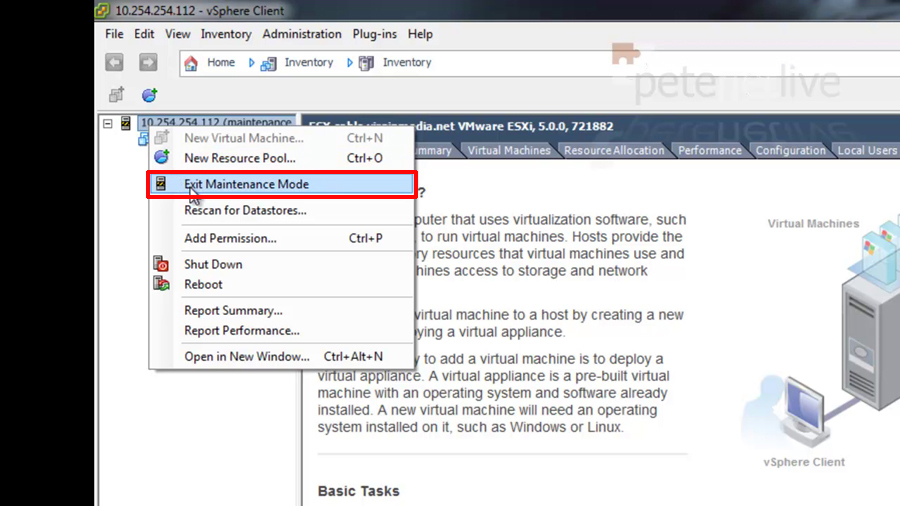
16. Once the host is back online, connect and take it out of maintenance mode.
17. Then locate the folder containing the update software and patches.
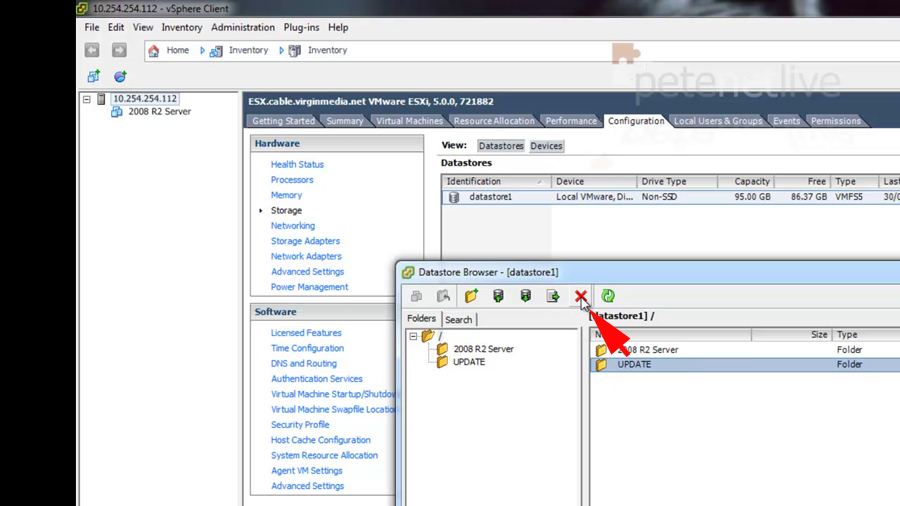
18. And delete it.

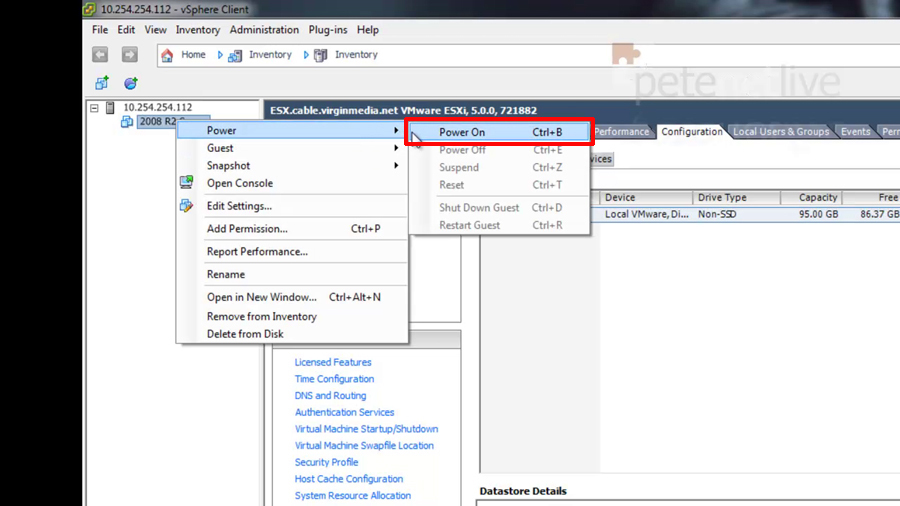
19. Finally power your guest machines back on again.
Related Articles, References, Credits, or External Links
Enable SSH Access to vSphere ESXi
Upgrade vSphere 4 Environment to vSphere 5
Update VMware ESXi from 4.0 to 4.1
Upgrade ESX 3 to version 4.1.0