
KB ID 0000490
Problem
Over the last couple of years I’ve done a lot of imaging of School PC’s I don’t know why but they come with a myriad of different drive and partition configurations. Even big vendors like HP and Dell ship their machines with recovery partitions these days.
If you are imaging with WDS this can cause a problem so what I usually want to do is remove all the partitions, create one big one that takes up all the drive, and format it as NTFS.
Solution
Before you begin make sure you are clued up on working with WDS unattended files, run through my instructions here.
The following procedure needs to be added to the WDS Unattended file NOT the unattended file for the image, (again run through KB0000180 if you are unsure.)
1. While editing your Unattended answerfile you need to locate, “Microsoft-Windows-Setup_neutral” and add “DiskConfiguration” to the “1 windowsPE” component.
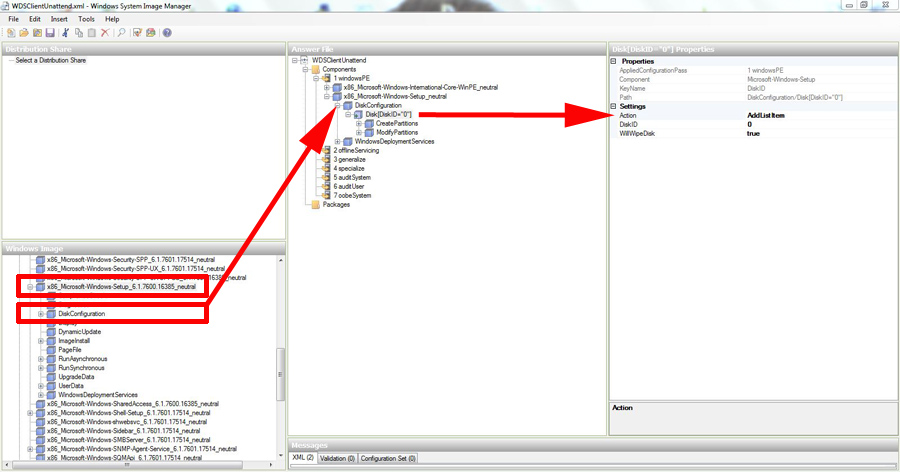
2. Right click it and add a disk > Set Disk ID = 0 > Set WillWipeDisk = true.
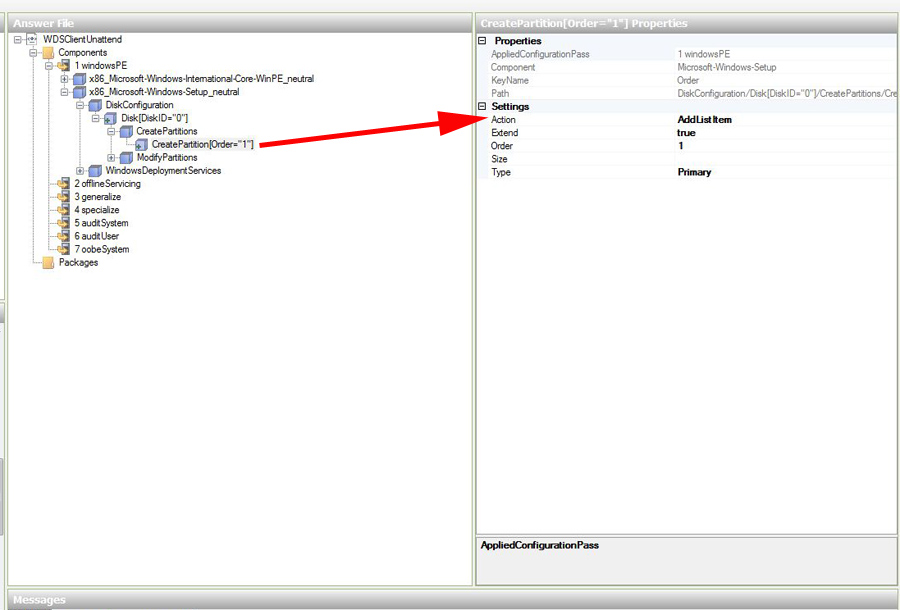
3. Right Click > Create Partition > Set Extend = true > Set Order = 1 > Set Type = Primary.
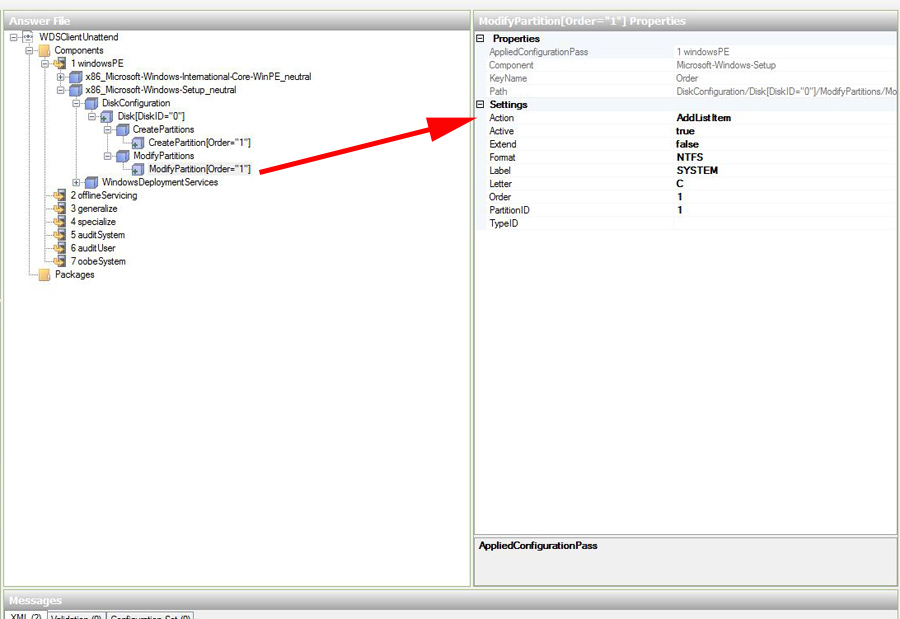
4. Select Modify Partitions > Set Active = true > Set Extend = false > Set Format = NTFS > Set Label = SYSTEM > Set Letter = C > Set Order = 1 > Set Partition ID = 1.
5. This procedure will add the following to your unattended file.

Related Articles, References, Credits, or External Links
NA