
KB ID 0000335
Problem
It’s been a while since I wrote a walk though on the Cisco AnyConnect/SSL VPN solution, and usually I secure these with Active Directory or simply using the local user database on the firewall. But what if you wanted to use certificates instead? Perhaps your users are too “technically challenged” to remember their passwords. Or you want to enable two factor authentication with usernames/passwords AND certificates (something you know and something you have).
Solution
Step 1: Setup the ASA as a Certificate Authority
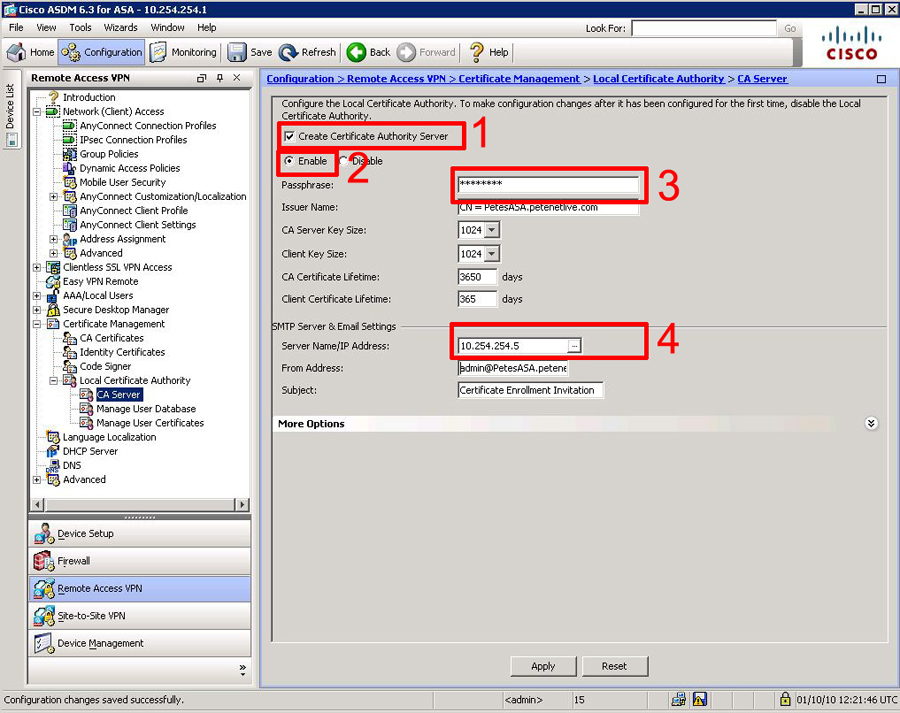
After version 8 Cisco included a complete CA solution in the firewall with a web front end. to use it we need to a) turn it on, b) give it an email address, c) provide a subject name, and finally d) create a unique pass phrase to generate the root certificate from.
Connect to the firewall and carry out the following,
PetesASA>
PetesASA> en
Password: ********
PetesASA# conf t
PetesASA(config)# crypto ca server
PetesASA(config-ca-server)# smtp from-address pnlCA@petenetlive.com
PetesASA(config-ca-server)# subject-name-default cn=pnlCA, o=petenetlive, c=GB
PetesASA(config-ca-server)# no shutdown

% Some server settings cannot be changed after CA certificate generation.
% Please enter a passphrase to protect the private key
% or press return to exit
Passphrase: ********

Re-enter passphrase: ********

Keypair generation process begin. Please wait...

Completed generation of the certificate and keypair...

Archiving certificate and keypair to storage... Complete
INFO:
Certificate Server enabled.
PetesASA(config-ca-server
To do the same via ASDM connect to the ASDM > Navigate to Configuration > Remote Access VPN > Certificate Management > Local Certificate Authority > CA Server > Fill in the details > Apply.
To check that the CA Server is up and running issue a “show crypto ca server” command.
PetesASA# show crypto ca server

Certificate Server LOCAL-CA-SERVER:
Status: enabled <--Good!
State: enabled <--Good!
Server's configuration is locked (enter "shutdown" to unlock it)
Issuer name: CN=PetesASA.petenetlive.com
CA certificate fingerprint/thumbprint: (MD5)
774e1fe0 27495b35 019a9874 7507d8a9
CA certificate fingerprint/thumbprint: (SHA1)
93414d52 5f23e510 0f7f8fc2 857e3c86 d5687286
Last certificate issued serial number: 0x1
CA certificate expiration timer: 12:33:29 UTC Sep 30 2013
CRL NextUpdate timer: 18:33:29 UTC Oct 1 2010
Current primary storage dir: flash:/LOCAL-CA-SERVER/

Auto-Rollover configured, overlap period 30 days
Autorollover timer: 12:33:29 UTC Aug 31 2013
PetesASA#
Step 2: Obtain a Client Certificate
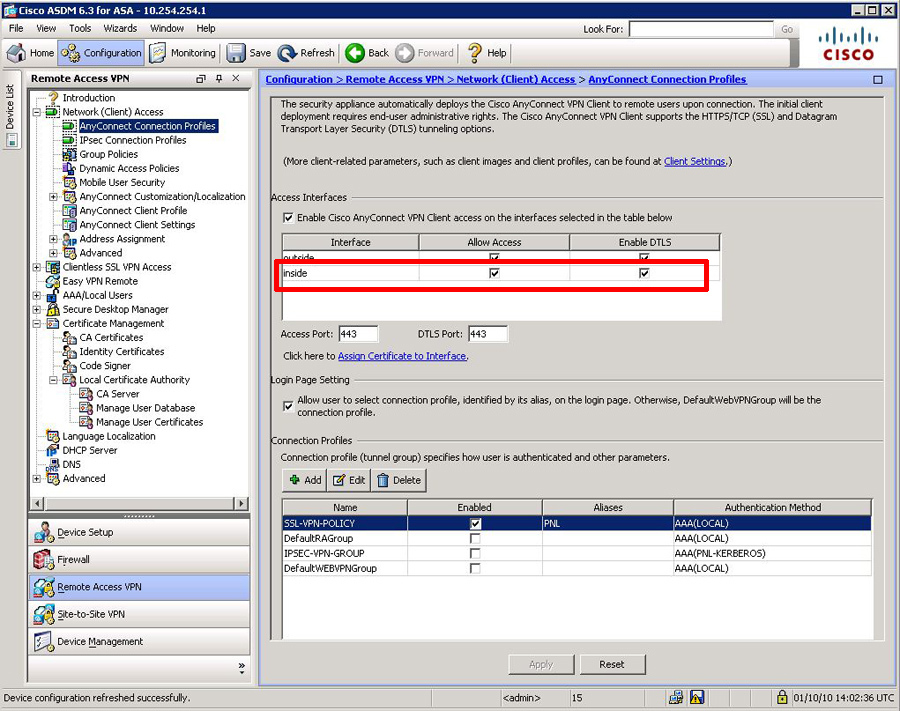
If you have a LOT of these you can set them up and send them by email directly, I’m just going to do this one manually, By default your webvpn probably isn’t enabled on the “inside” so lets turn that on.
PetesASA#
PetesASA# conf t
PetesASA(config)# webvpn
PetesASA(config-webvpn)# enable inside
INFO: WebVPN and DTLS are enabled on 'inside'.
PetesASA(config-webvpn)# exit
PetesASA(config)#
To do the same via ASDM connect to the ASDM > Navigate to Configuration > Remote Access VPN > Network (Client) Access > AnyConnect Connection Profiles > Tick both the inside options > Apply.
Now I’m going to create a user, and a “One Time Password”.
PetesASA(config)#
PetesASA(config)# crypto ca server user-db add petelong
INFO: User added as 'petelong'
PetesASA(config)# crypto ca server user-db allow petelong display-otp
Username: petelong
OTP: 010B3B9F500F7142 <--your user will need this!
Enrollment Allowed Until: 12:43:23 UTC Mon Oct 4 2010

PetesASA(config)#
Via ADSM it’s a little more convoluted, you need to add the user then view/re-generate the OTP.

Open a web browser and got to https://{ip or name of firewall}/+CSCOCA+/enroll log in with the details you created above.

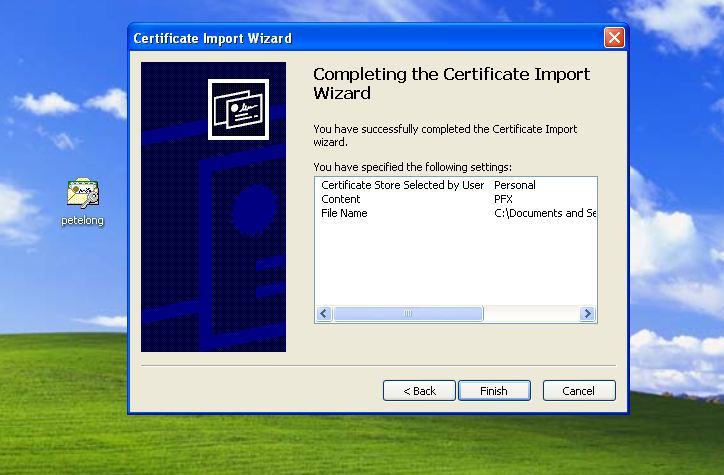
When prompted download the certificate and put it on the machine that requires secure access. Simply double click it and import it (it should import into the “Personal Certificates” folder.) – if you are prompted for a password you enter the OTP from above.
Step 3: Change the VPN authentication to Certificate.
First lets check that enrolment was successfully with a “show ca server user-db” command.
PetesASA(config)# show crypto ca server user-db
username: petelong
email: <None>
dn: <None>
allowed: 12:43:23 UTC Mon Oct 4 2010
notified: 1 times
enrollment status: Enrolled, Certificate valid until 12:47:25 UTC Sat Oct 1 2011,<--Good!
Renewal: Allowed

PetesASA(config)#
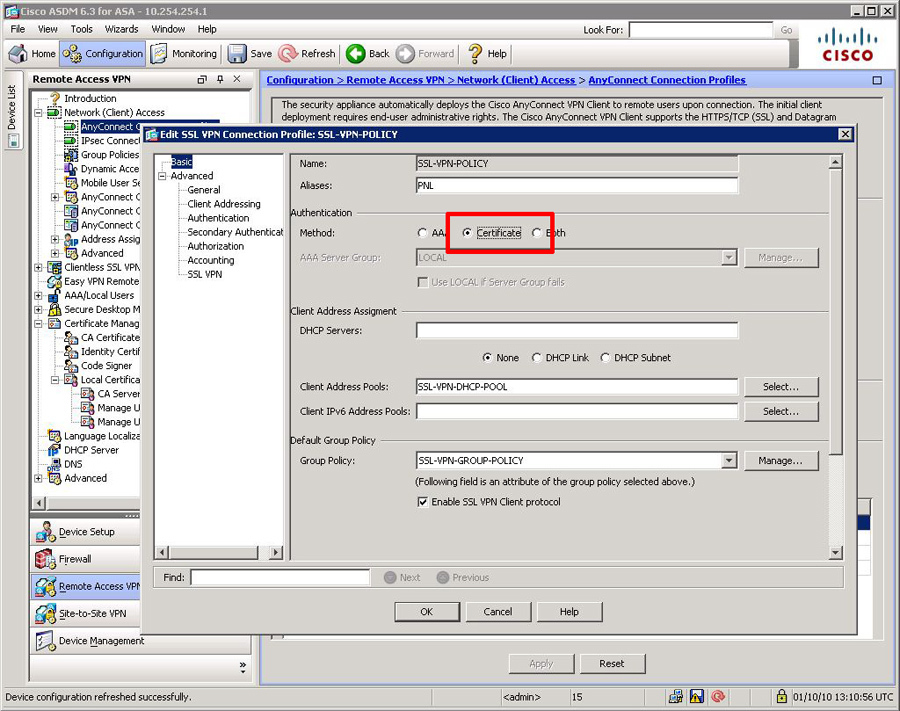
Change the webvpn authenticate to certificate. Note your SSL tunnel group WILL have different name.
PetesASA# conf t
PetesASA(config)# tunnel-group SSL-VPN-POLICY webvpn-attributes
PetesASA(config-tunnel-webvpn)# authentication certificate
PetesASA(config-tunnel-webvpn)# exit
PetesASA(config)#
To use usernames AND certificates use “both” instead of “cert”, to Revert back to usernames enter “aaa”
Via ASDM
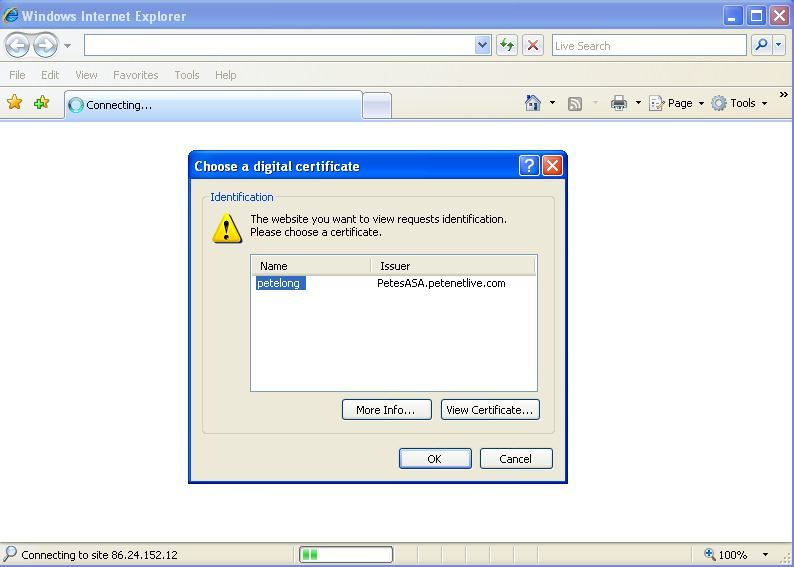
Step 4: Test
Connect to the VPN portal and you should now be prompted for certificate authentication.
Related Articles, References, Credits, or External Links
Cisco ASA 5500 – Using a Third Party Digital Certificate (For Identification, AnyConnect, and SSL VPN)