
KB ID 0000242
Problem
You want to pick up your Exchange 2010 email on a Windows Mobile or an iPhone
Solution
The key to making this system work is “certificates”, you can either buy one or create your own. There are pros and cons to doing either.
Self Signed Certificates
Pros: Free – You already have the software to make them – When they expire you can replace them instantly.
Cons: All mobile devices WONT trust them, so you need to install a certificate on each device – the cost in “man hours” importing certificates sometimes outweighs the cost saving.
Purchased Certificates
Pros: They “Just Work” – Your mobile device will trust them, (check the vendors cert is trusted before you buy!).
Cons: The cost, they’re much cheaper than they used to be but its still an expense, and they take a while to get to you (the vendor has to check you out before it will issue one).
For this run through I’ll cover using BOTH.
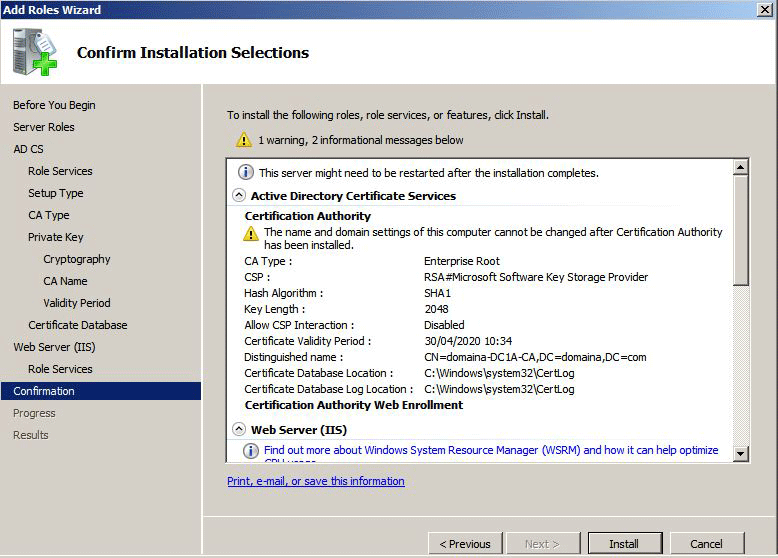
Step 1 (Install a Certification Authority)
Skip to step 2 if you are purchasing a certificate.
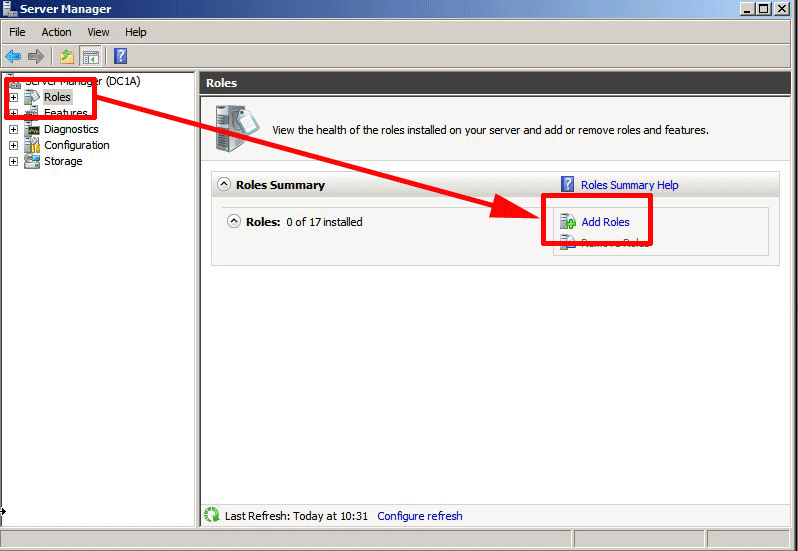
1. Start > Server Manager > Roles >Add Roles.
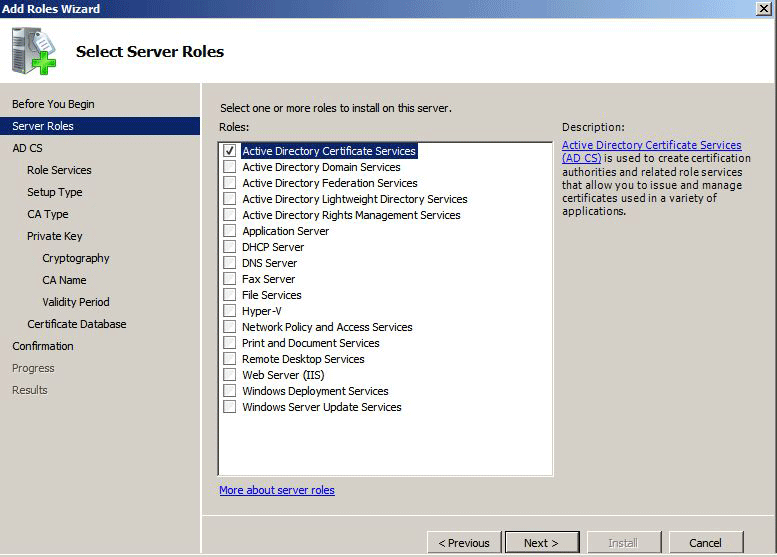
2. Skip the Intro > Next > Tick “Active Directory Certificate Services” > Next > Next.
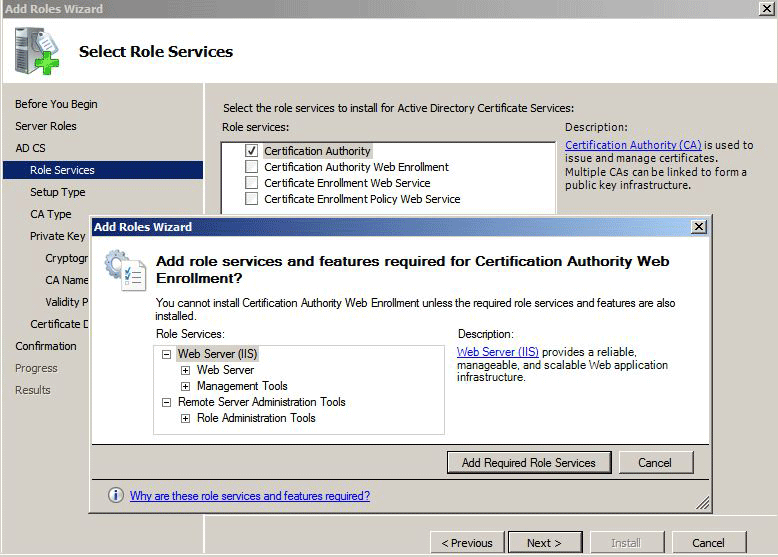
3. Tick “Certificate authority Web Enrolment.” > Add Required Role Services > Next.
4. Select Enterprise > Next.

5. Root CA > Next.

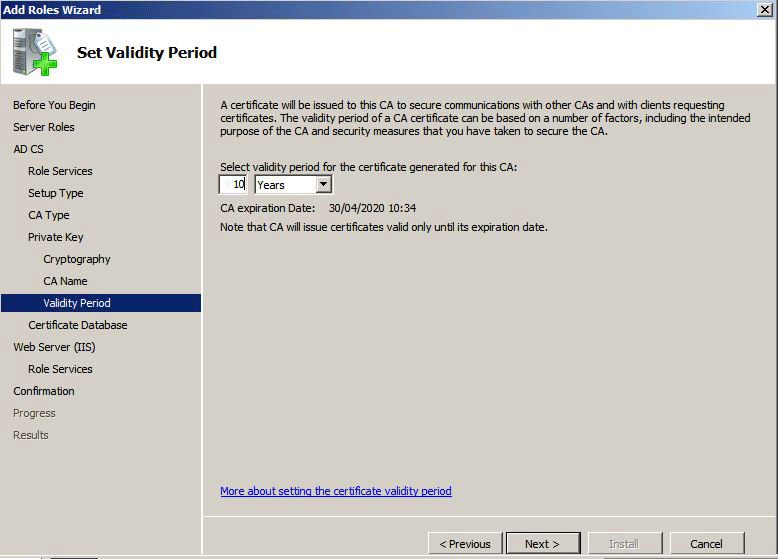
6. Create a new private key > Next > Next > Next > Change Validity to 10 Years > Next.
7. Next > Next > Next > Install > When finished click close.
Step 2 Generate a Certificate Request.
1. There are other tools for doing this but I prefer the easy option go to Digicert, fill in the details and generate the code needed to create a certificate request.

2. On the Exchange Server, launch the Exchange Management Shell, and paste in the command you generated above.
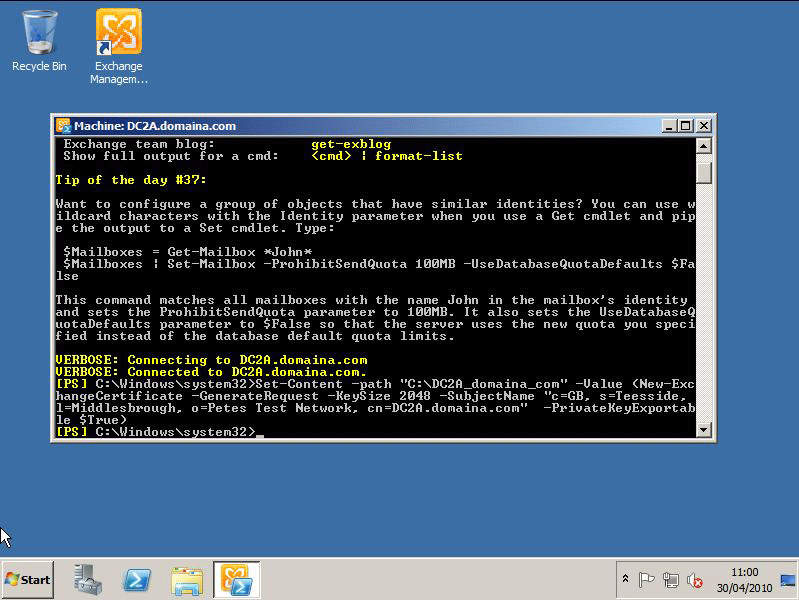
3. Open the certificate request you have just created (It’s on the root of the C: drive in this example).

4. What you do next depends on whether you are going to create your own certificate, or buy one. You have a certificate request, this can be sent to a certificate vendor if you are going to buy a certificate, or used with your own certificate server if you are going to create your own.
Step 3 Create your own Self Signed Certificate. Skip this step if you are purchasing a certificate.
1. Open the certificate request you have created with notepad, and copy all the text to the clipboard.
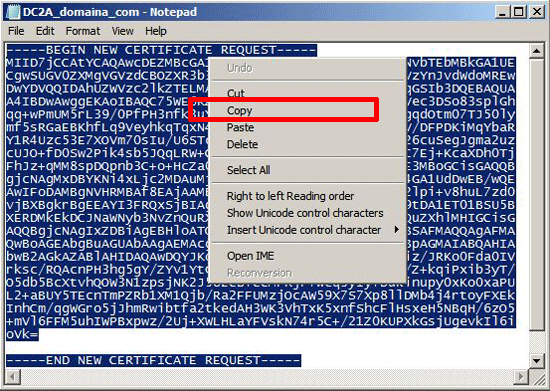
2. Open a web page and go to http://ip of your ca/certserv (or http://localhost/certsrv/Default.asp) > Request a certificate > Advanced Certificate Request > Submit a certificate request by using a base 64….. > Paste in the text from your request > Set the Certificate Template to Web Server > Submit.
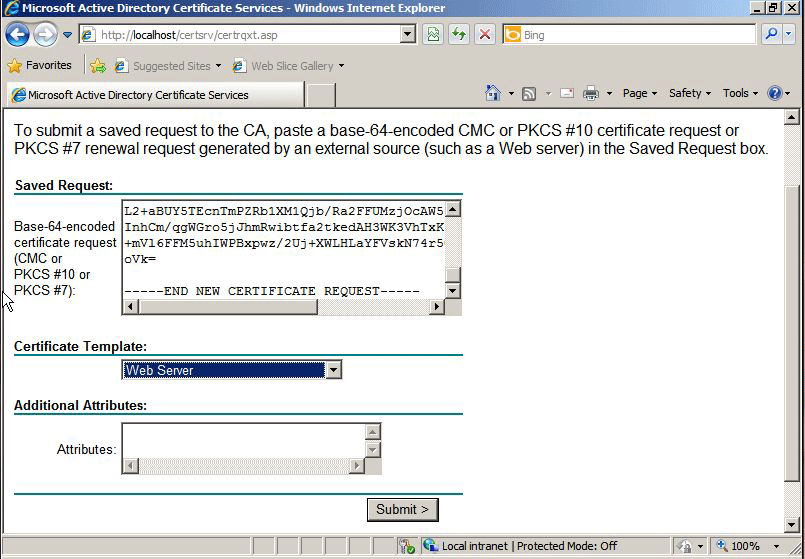
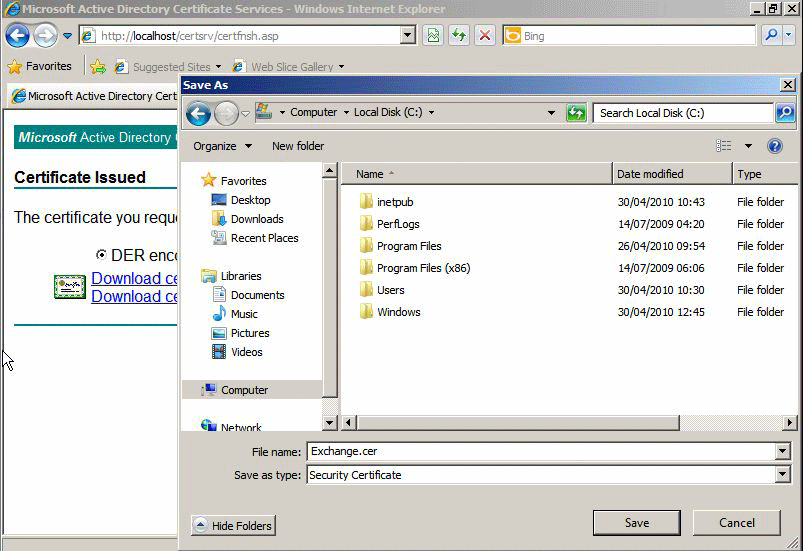
7. Download certificate > Save > Name it something simple like Exchange.cer > Copy that file to the Exchange 2010 Server.
Step 4 Import your Certificate If you have bought your certificate use that instead of Exchange.cer used in this example.
8. On Exchange > Start > All Programs > Microsoft Exchange Server 2010 > Exchange Management Console > Expand “Server Configuration” > Select “Import Exchange Certificate” > Browse > Navigate to the Exchange.cer file (Note: Change file types to “All Files (*.*)”) > Open > Type anything in the password field > Next > Next > Import > Finish.
Note: If you try and leave the password area blank you will see this error.
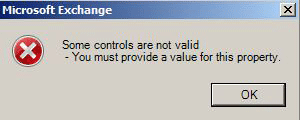
Error Some controls are not valid – You must provide a value for this property.
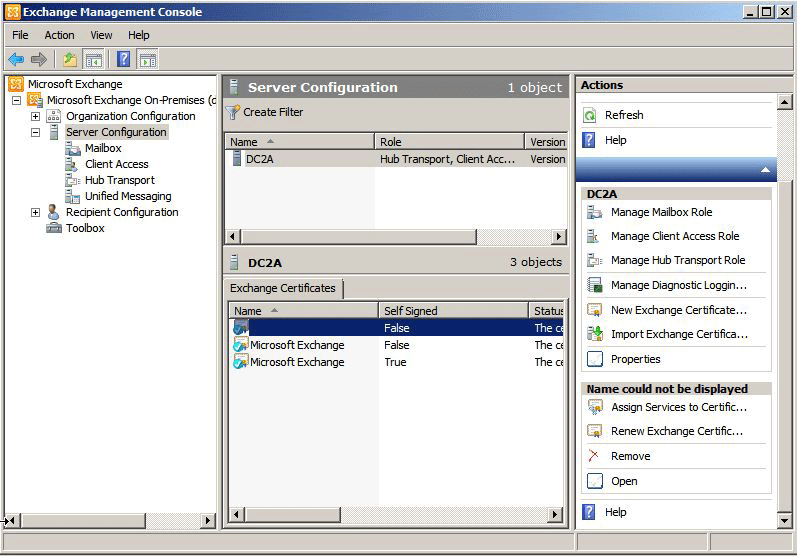
9. Select the New Certificate (look at the expiry date if your unsure which one) > Select “Assign Services to Certificate” > Next.
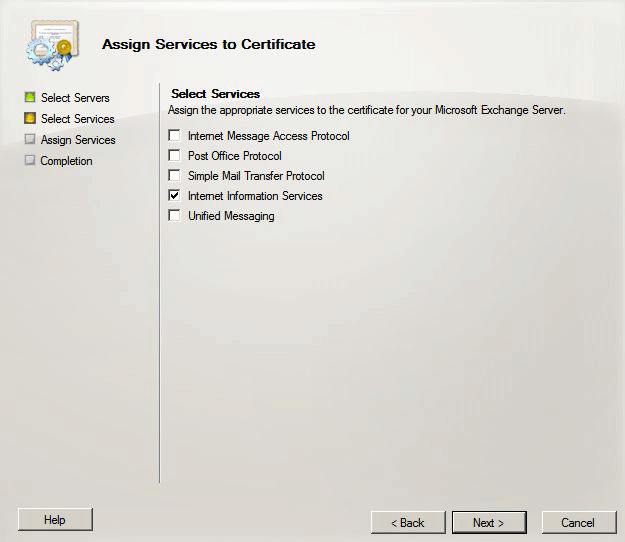
10. Select “Internet Information Services” > Next > Assign > Finish.
Step 5 Get Your Root Certificate & Install on the Mobile Device Skip this step if you have bought your certificate.
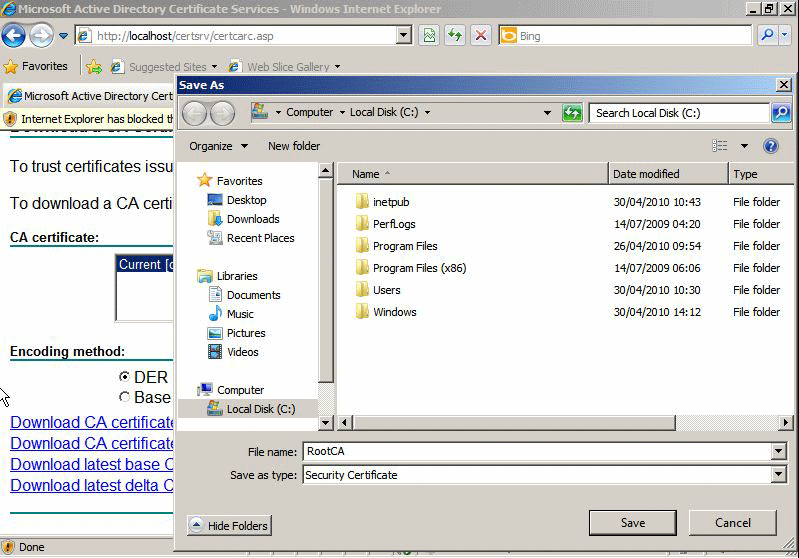
1. Connect to the CA that is http://IP_of_CA_Server/certsrv (or http://localhost/certsrv/Default.asp) > Select “Download a CA certificate, certificate chain, or CRL” > Select “Download CA Certificate” > Save the file somewhere (RootCA is a good name).
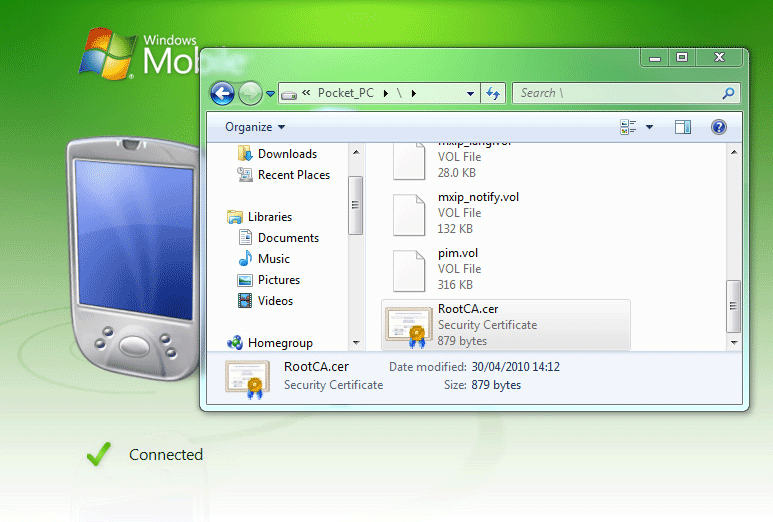
2. Copy the RootCA Certificate to the device whether using Windows Mobile Device Center or on an SD/MiniSD/MicroSD card.
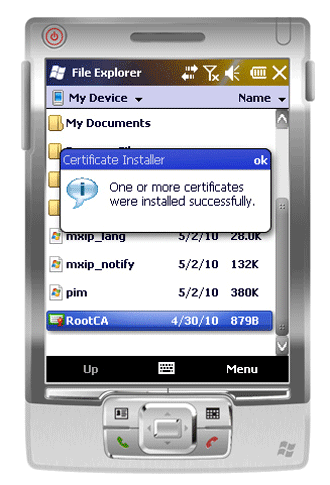
3. On the DEVICE, Start > File Explorer > Navigate to the place you put your RootCA certificate >Double Click it > After a few seconds it should say that the Certificate was installed correctly > OK.
Step 6 Configure your Mobile Device (with Windows Mobile 6.5).
Note: For testing purposes you can use the Windows Mobile Emulator.
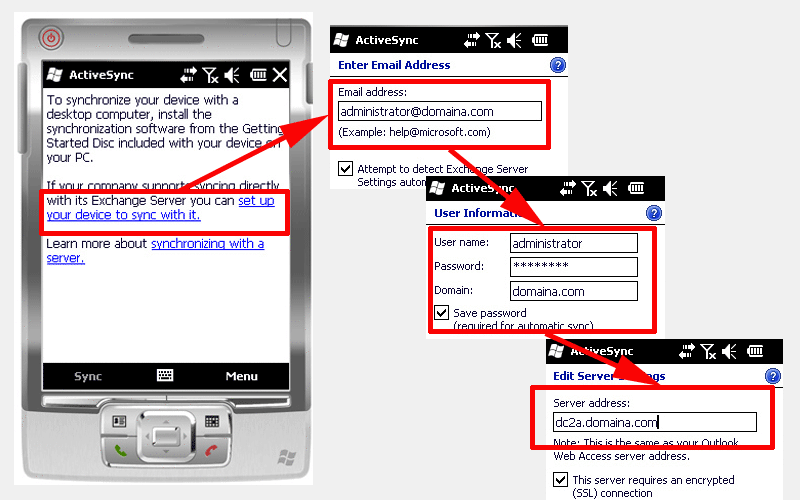
1. On the DEVICE, click Start > ActiveSync > Under the Exchange Sections click “set up your device to sync with it” > Enter your email address > Next > Enter your username > Password > Domain name > Next > It will attempt to connect > and usually fails > It will then ask for the server name > Enter it > Next.
5. Select what you want to sync > Finish > The first time it will take longer to sync > It may tell you that it needs to enforce policies on the device.

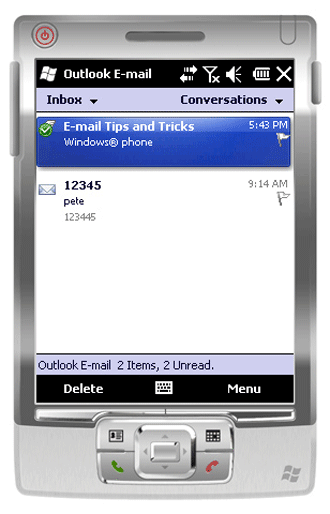
6. All being well the items you asked to sync should sync. If it fails it will give you an error code, tap that code into Google and it will tell you what went wrong.
Related Articles, References, Credits, or External Links
NA