
KB ID 0000106
Problem
For everyone that’s ever sat in a server room/cupboard and had to wait for a server to replicate active directory from a remote site, you will appreciate just how helpful the /ADV switch is when creating a domain controller.
What does it do? Well Basically it lets you build a domain controller from a backed up copy of active directory, so after a reboot the new domain controller only has to replicate the changes from a distant server (which is good if you only have a 512Kb connection and a dozen people are also using it)
Solution
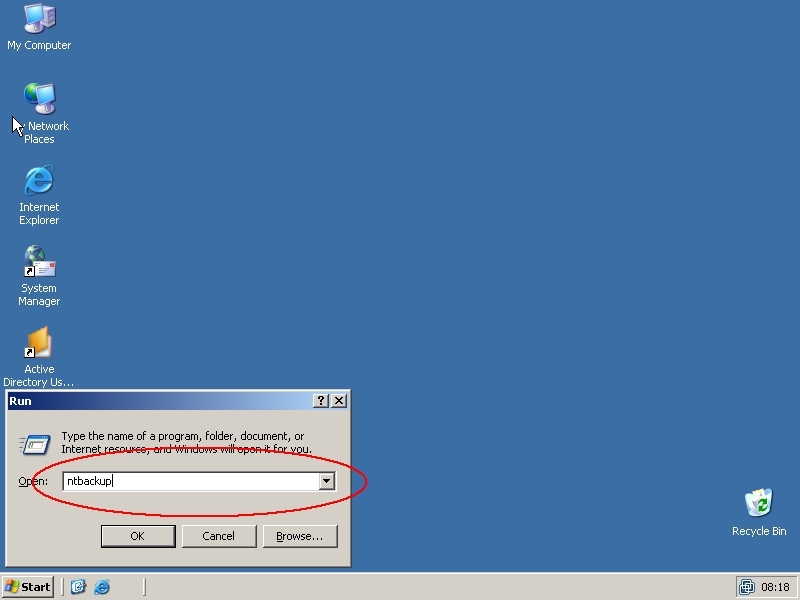
1. First you need to get a backup of active directory, Go to an existing domain controller, and click Start > Run > ntbackup {enter}.
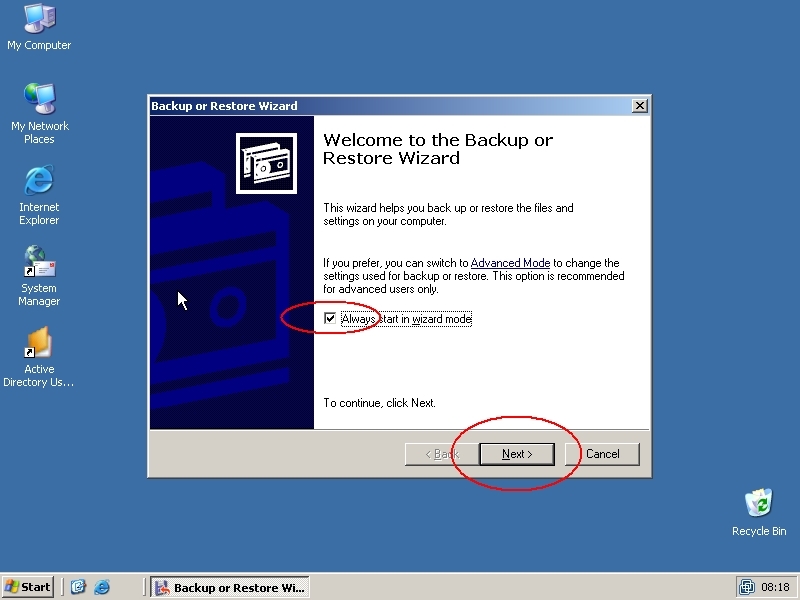
2. Untick “Always start in wizard mode” and click Next.
3. Select “Backup files and settings” click Next.

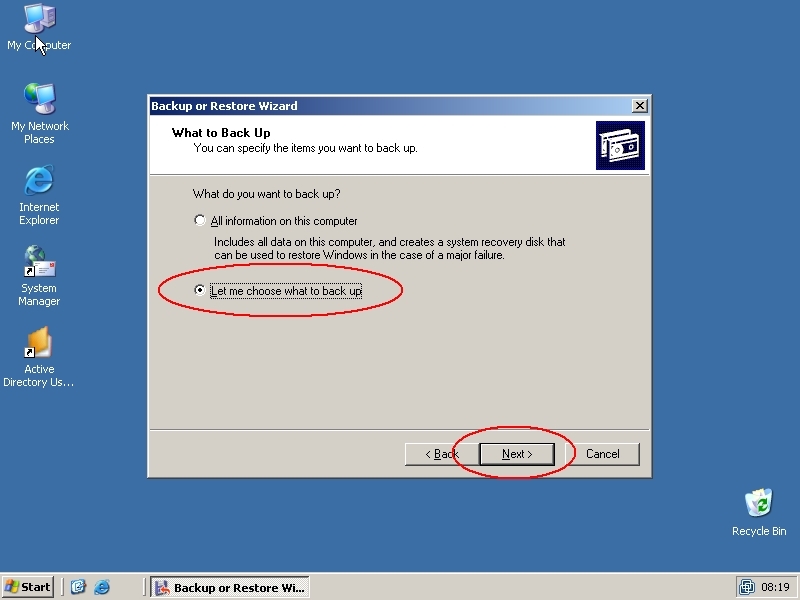
4. Select “Let me choose what to backup” Click Next.
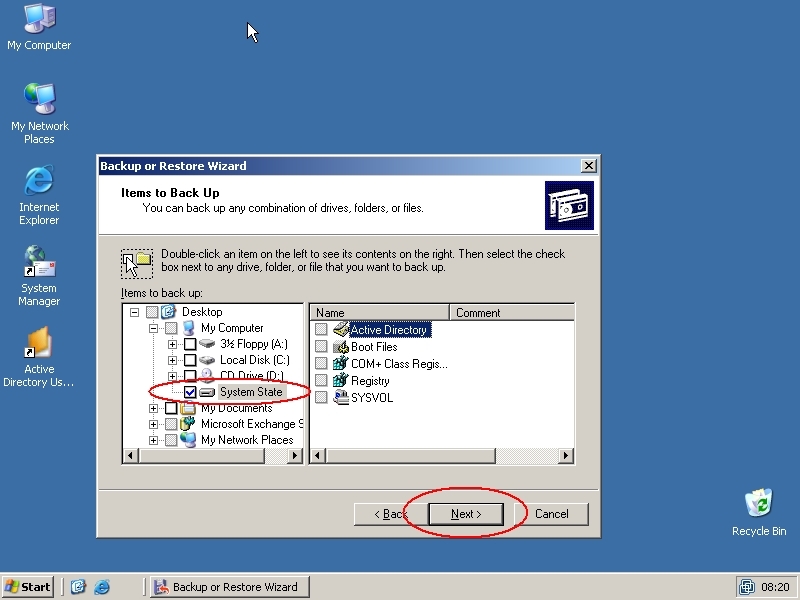
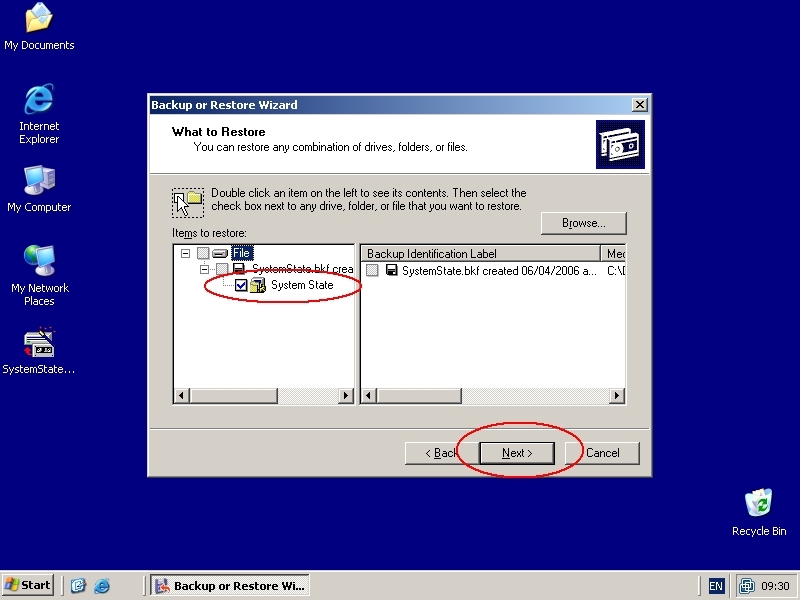
5. Expand the server and select “System State”, Click Next.
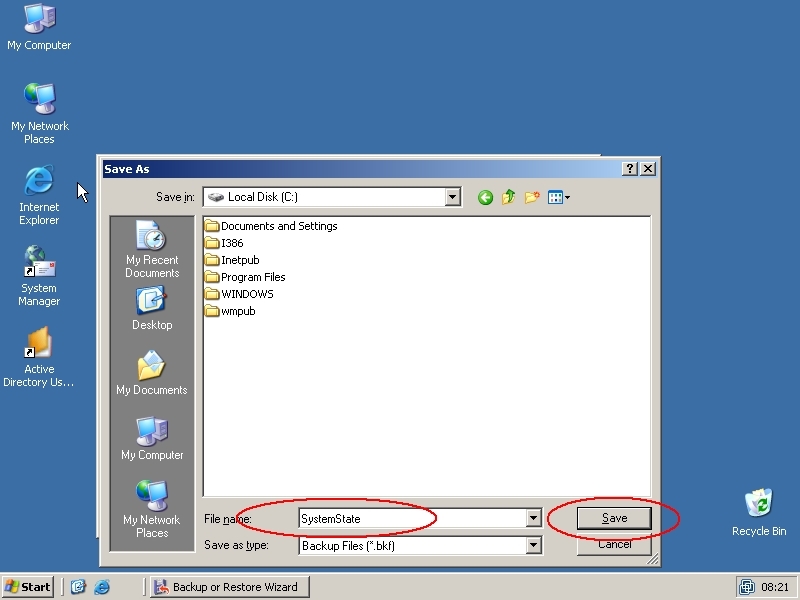
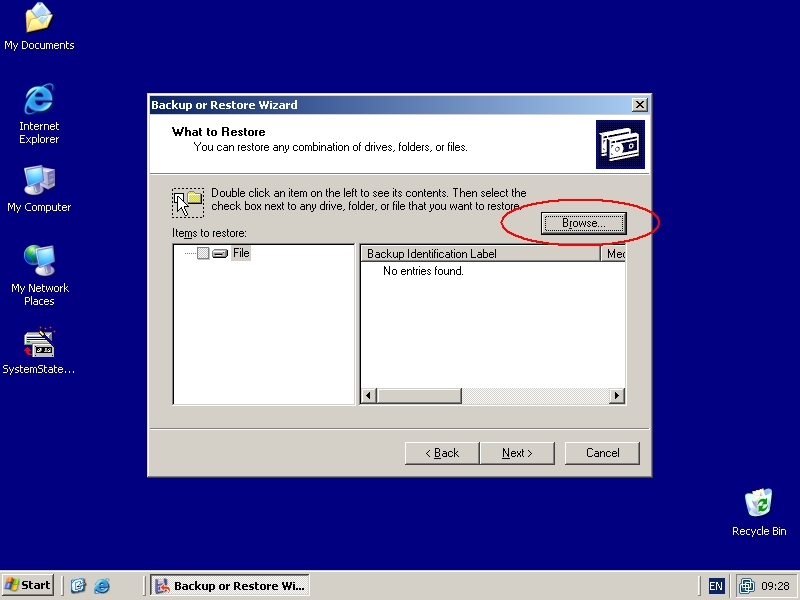
6. Click the Browse button.

7. Call the backup SystemState and drop it on the root of the C: drive.
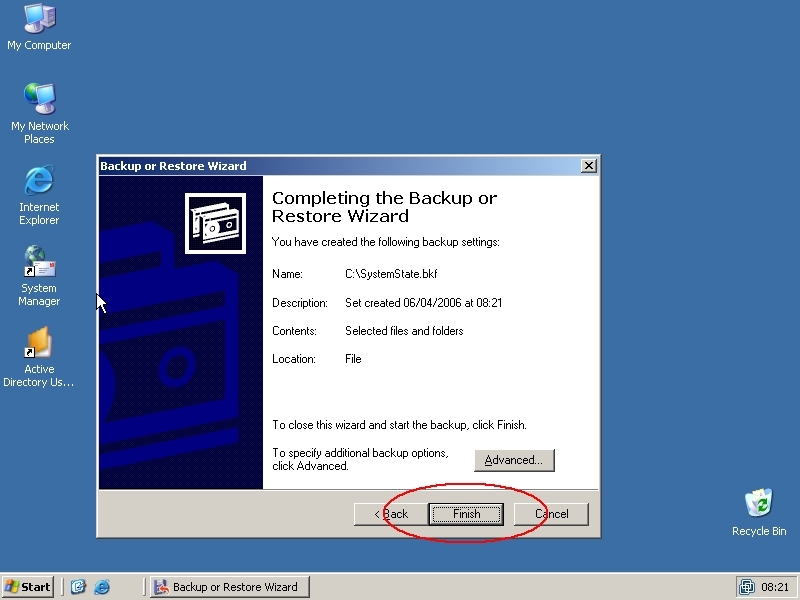
8. Click Next.

9. Click Finish.
10. The Backup Process will start.
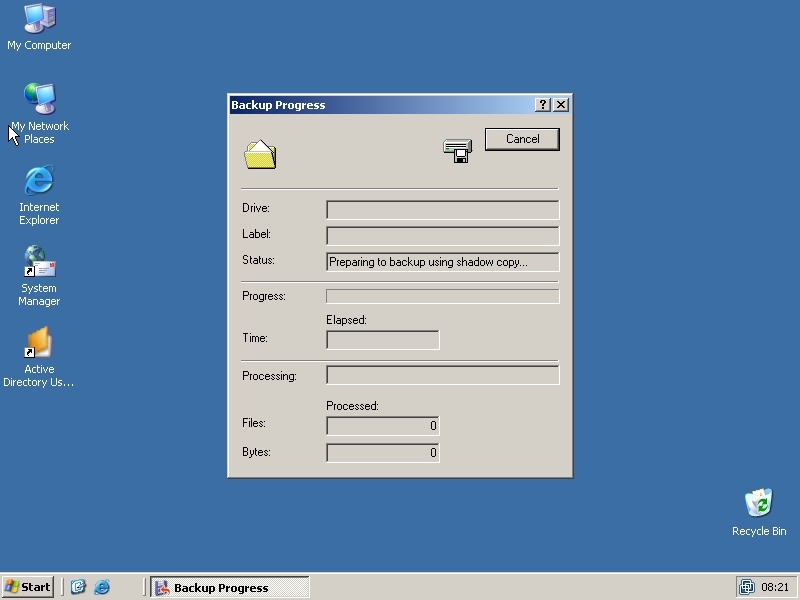
11. It may run for a while – best go get a coffee 🙂

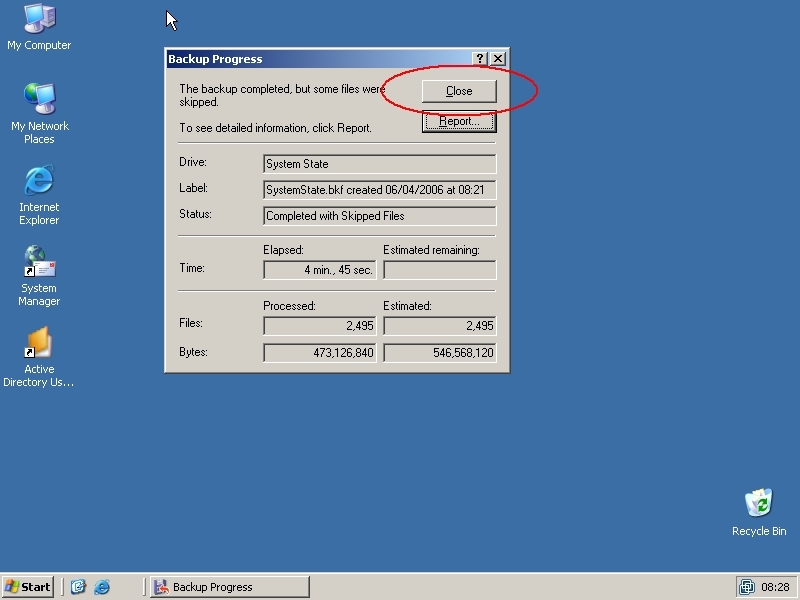
12. When it has finished click “Close” Note make sure no errors reported apply to active directory.
13. Go to the New server armed with a copy of the SystemState.bkf file and drop it onto the new server.

14. Now you need to restore the files to a folder so the DCPROMO session can read the Active directory files. Click Start > run > ntbackup.

15. Untick “Always start in wizard mode” and click Next.

16. Select “Restore Files and Settings” Click Next.

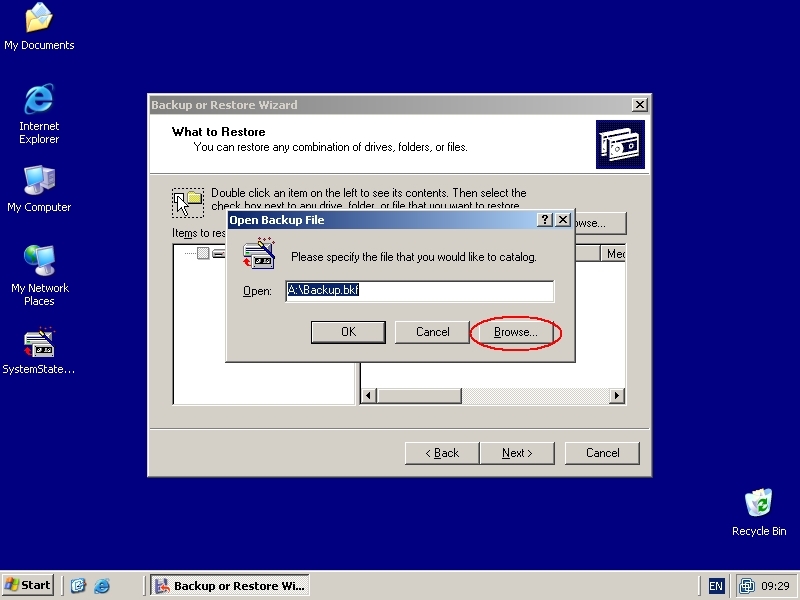
17.Click Browse.
18. Click Browse.
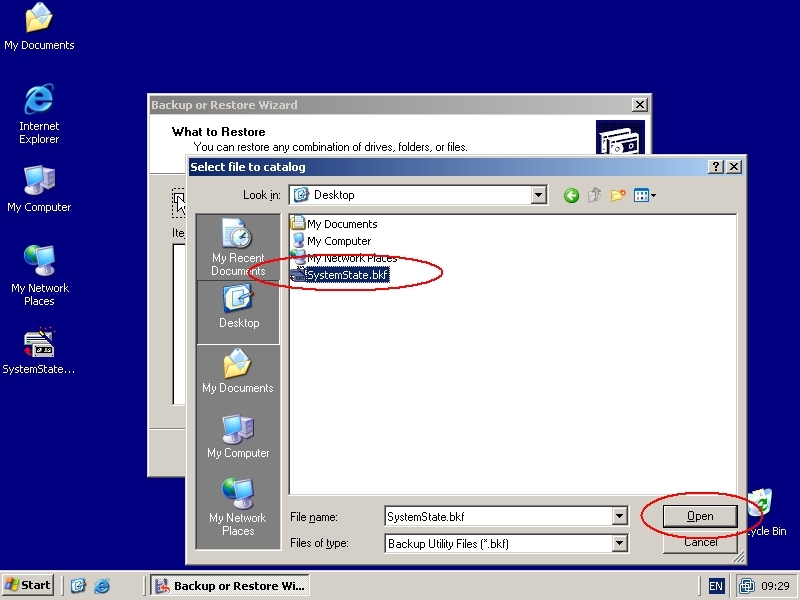
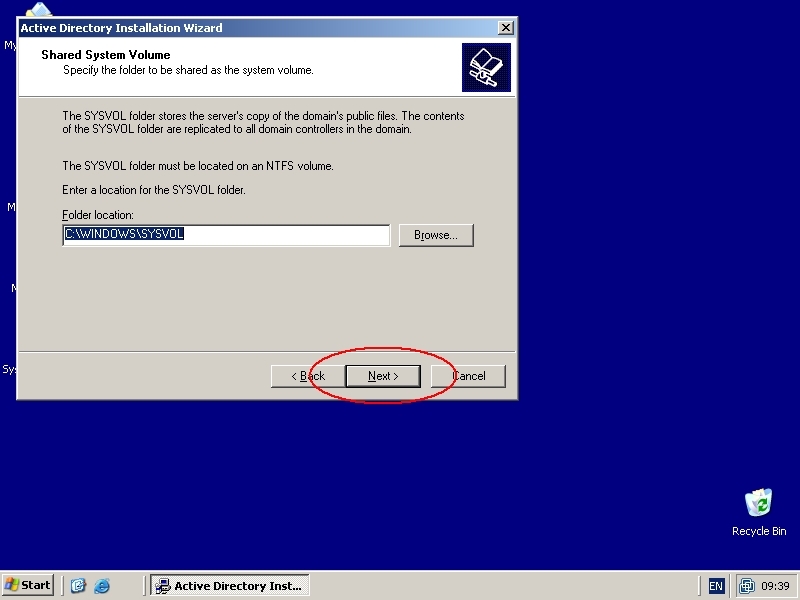
19.Navigate to the SystemState.bkf file and click OPEN.
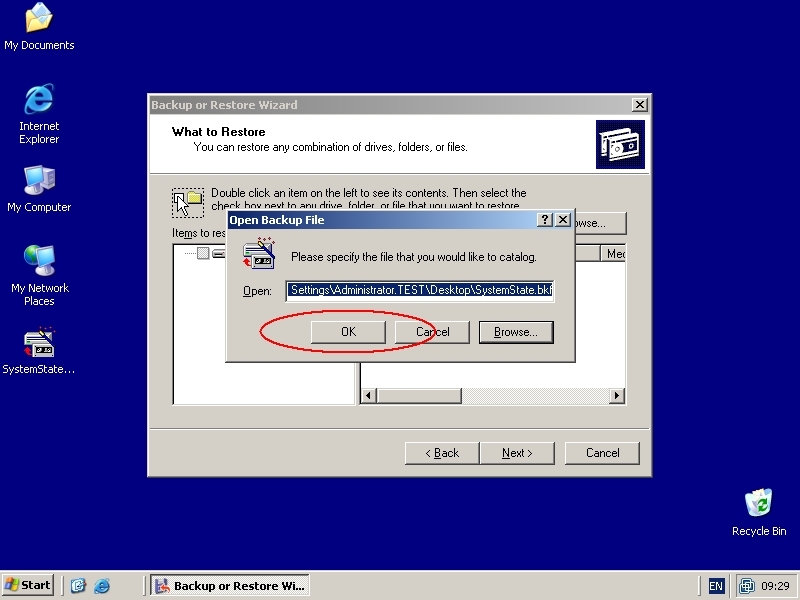
20. Click OK.
21. Select System State > Click Next.
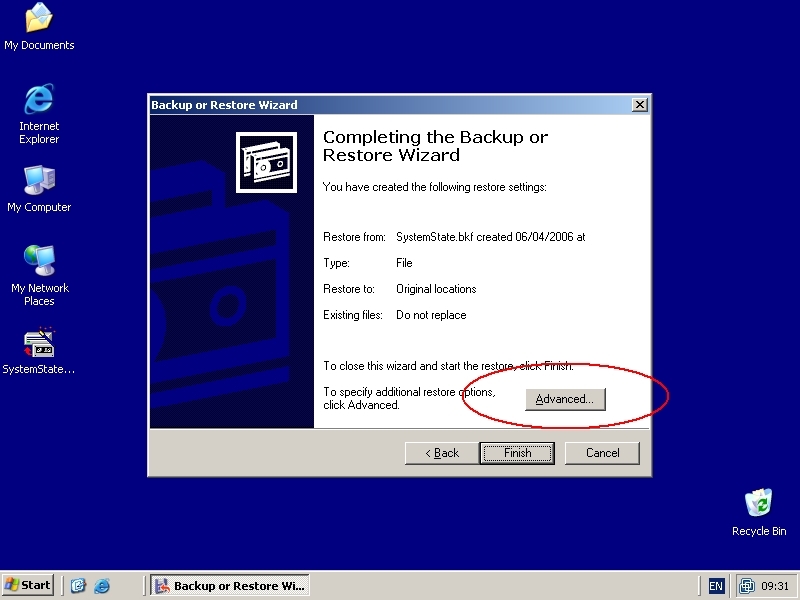
22. Click Advanced.
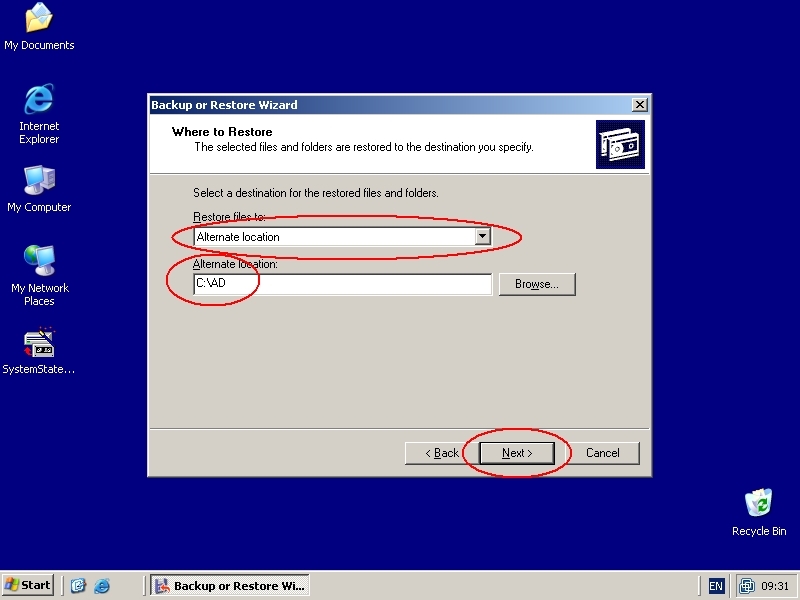
23. Change the restore files to “Alternative location” and type in a folder to hold the restored files (C:AD) > Click Next.
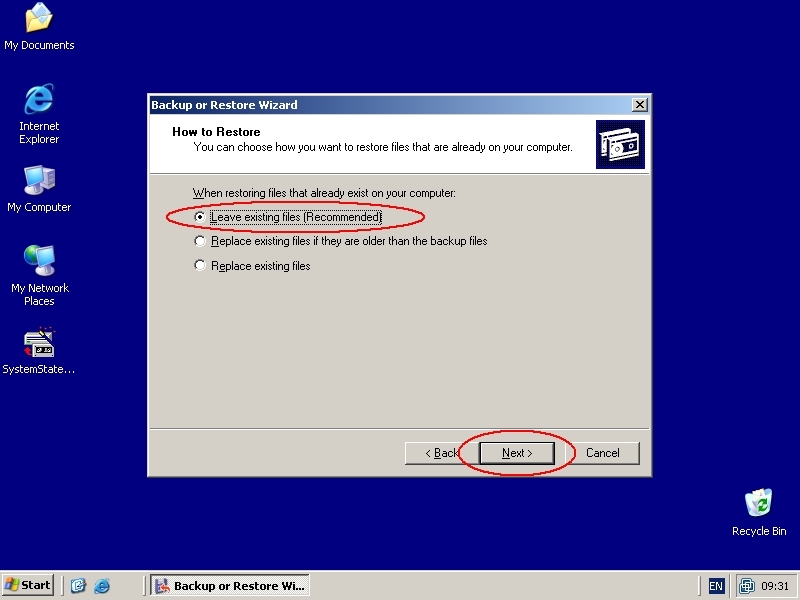
24. Accept the default of “Leave existing files (recommended)” > Click Next.
25. Accept the defaults > Click Next.
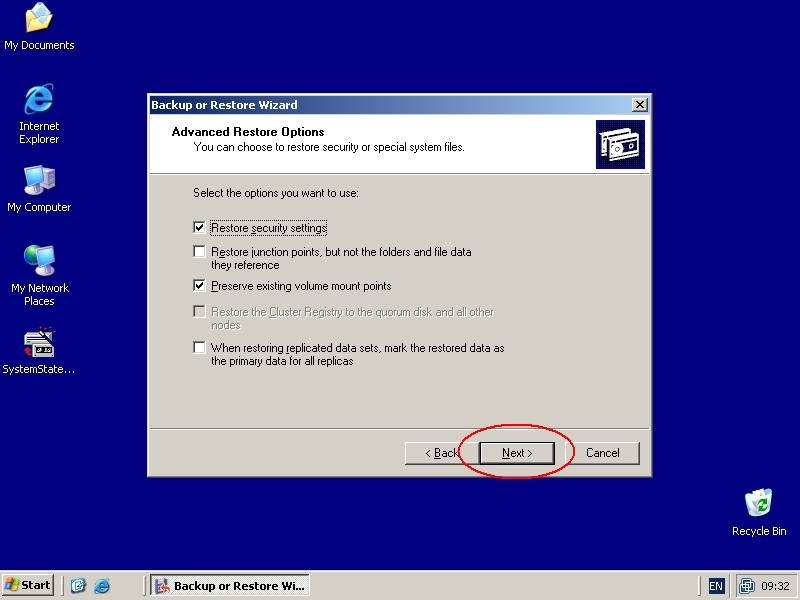
26. Click Finish.
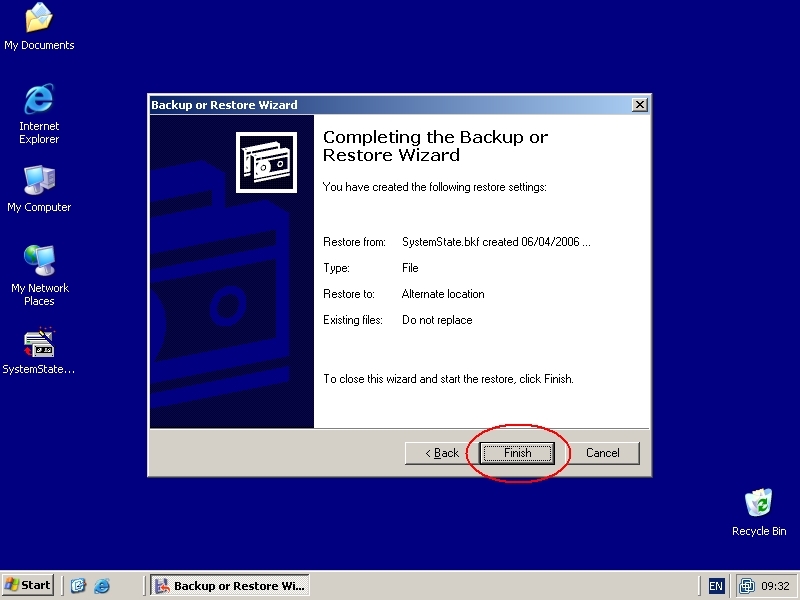
27. The files will now restore.
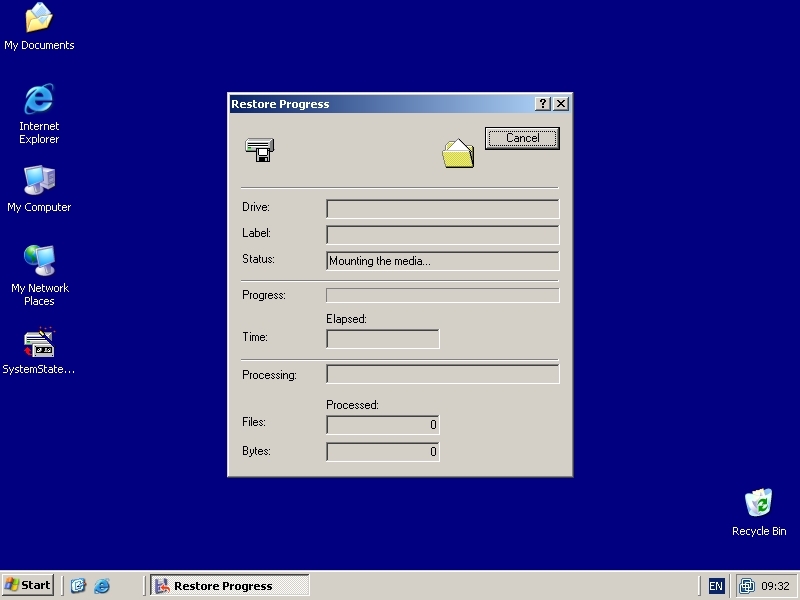
28. Time for another brew.

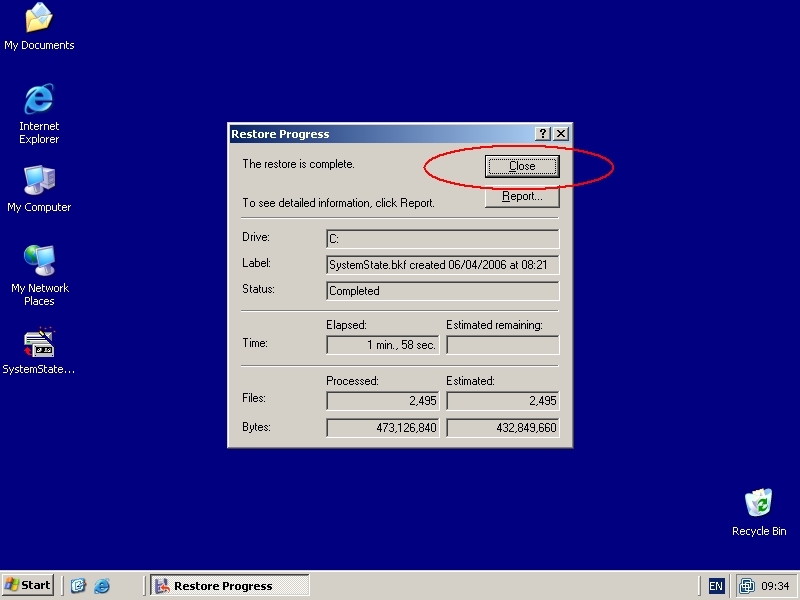
29. When its finished click Close.
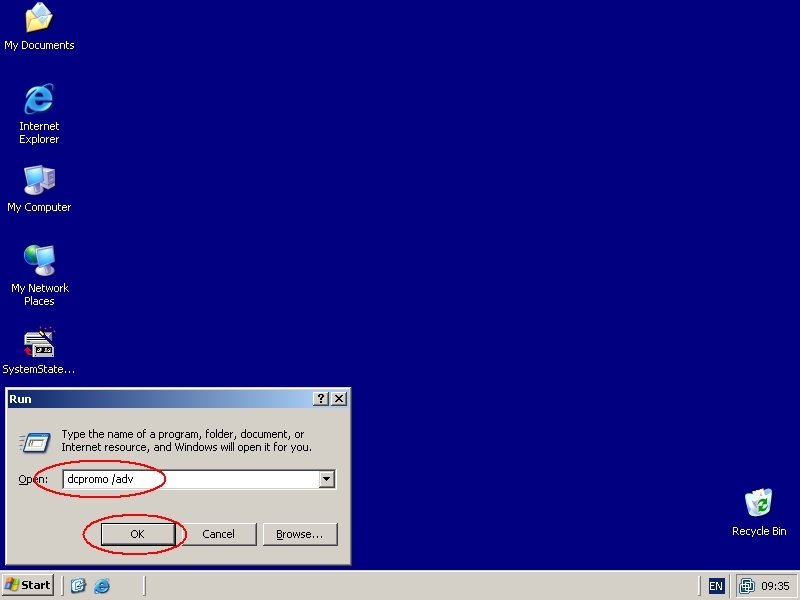
30. Now you need to Promote the server to a domain controller. Click Start > run > dcpromo /adv {enter}.
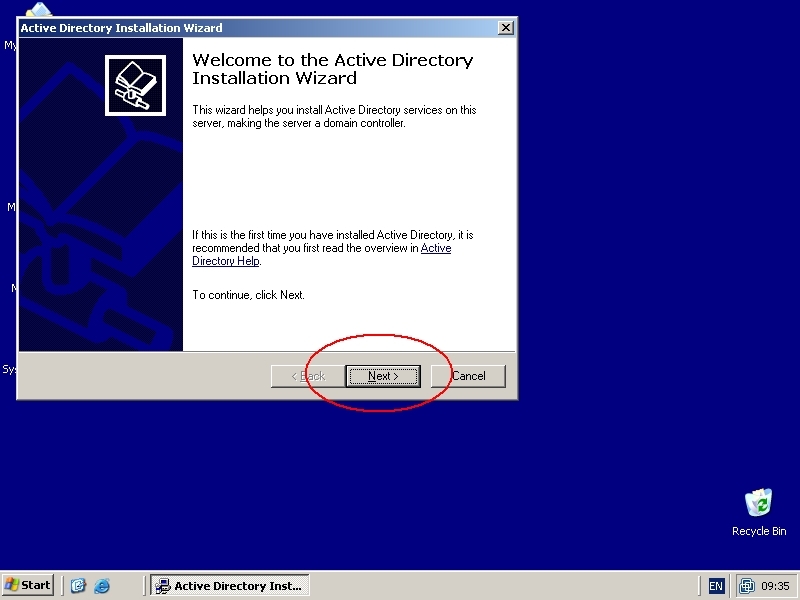
31. Click Next.
32. Click Next.

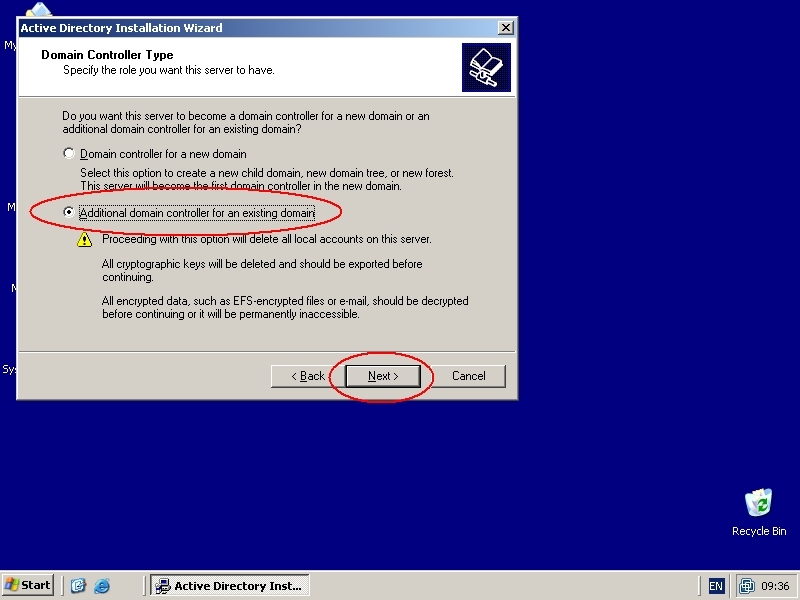
33. Select “Additional Domain controller for an existing domain” Click Next. (Note: if DNS is not set correctly it will fall over at this point.)
34. Select “From these restored backup files” > Browse > Navigate to the folder you restored files to earlier.

35. Click Next.

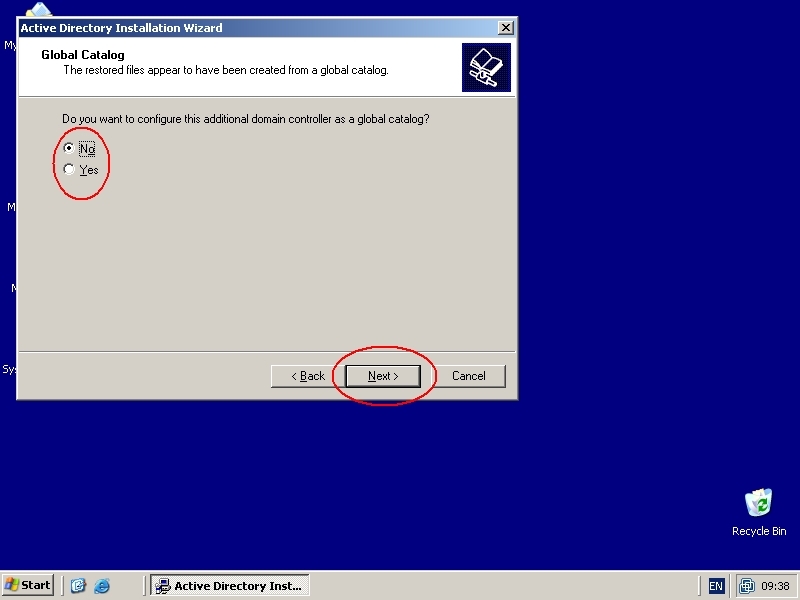
36. If you want this server to be a Global Catalogue server then select Yes otherwise leave the default of No selected and click Next.
37. Supply an account with sufficient privileges to promote the server to a domain controller.

38. Accept Defaults > Click Next.

39. Accept Defaults > Click Next.
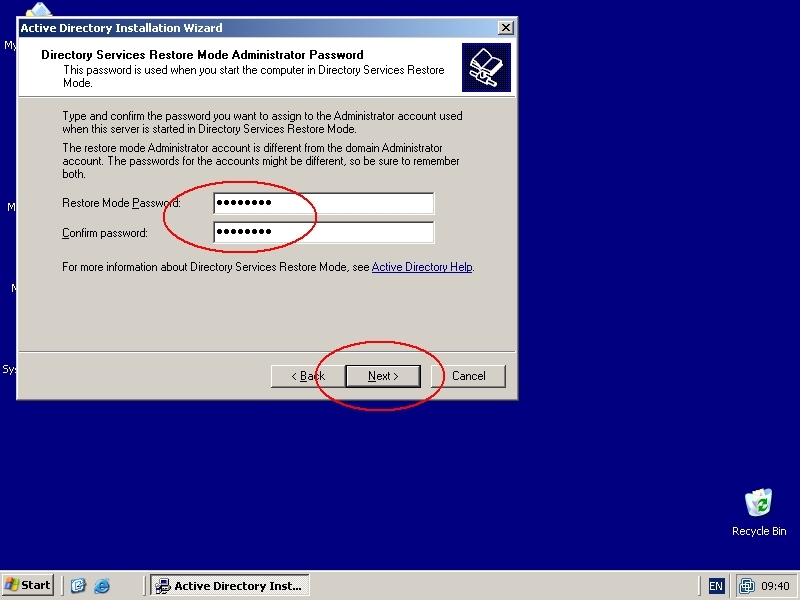
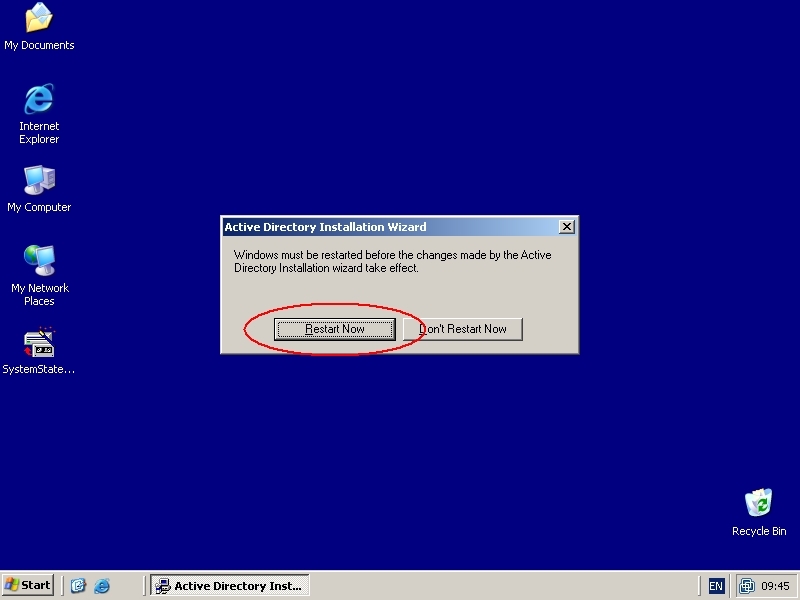
40. Enter and confirm a directory restore mode password (Make sure you will remember what this is in case you ever need to repair AD on this server) then Click Next.
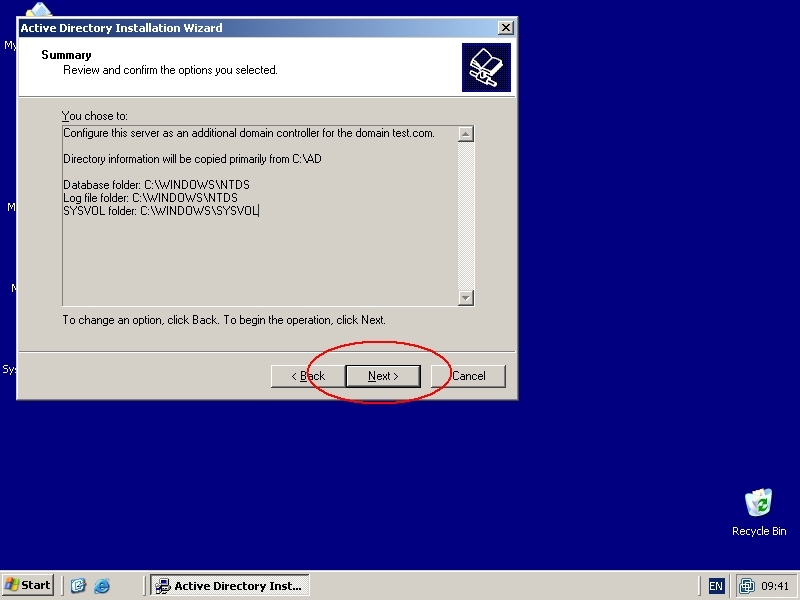
41. Review the settings > Click Next.
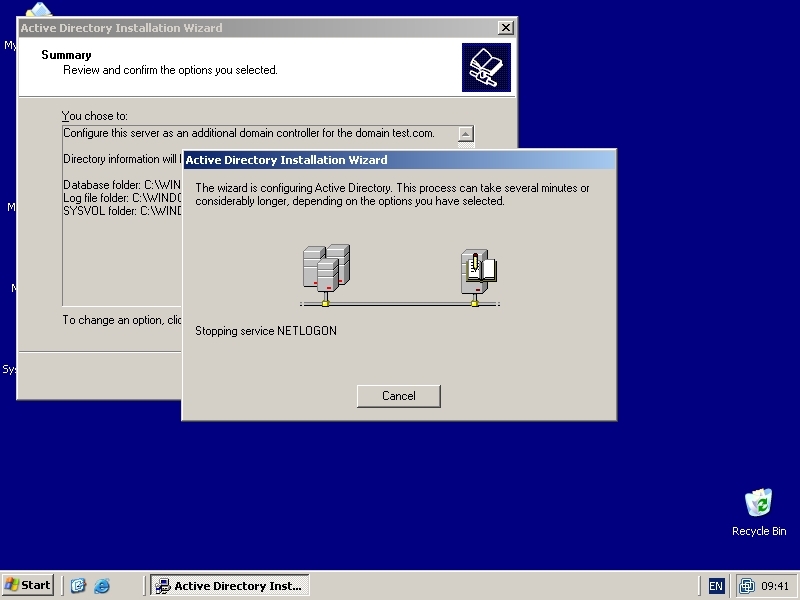
42. Now the server will install and configure active directory.
43. When it’s done Click Finish.

44. Click “Restart Now.”
Job done! The longer its been since you did the original backup the longer it will take to replicate the changes to Active Directory so don’t be to surprised it it takes a little longer to boot up.
Related Articles, References, Credits, or External Links
NA