
KB ID 0000076
Problem
There are many different versions of PIX and ASA Firewalls. So, if you want to get a backup of the configuration and save it elsewhere, (so in the event of a failure, (or more likely someone tinkering and breaking the firewall)). you will be able to recall and restore that configuration. By far the easiest method is to use a TFTP server – and it works on ALL versions, so learn it once and use it many times.
Note: Some people flatly refuse to use command line, if that’s you, you can also backup and restore from the ASDM click here.
OK for starters you need to get a TFTP server – while this sounds very grand, its a little piece of software that will run on just about any windows PC, I use an application called 3CDeamon and I’ve put information on how to get it and how to set it up (about 5 min’s work) HERE. Or if you have a Mac it’s built in.
I’ll assume at this point you have the TFTP server installed and running, and you know the IP address of machine that’s running it.
NOTE: TFTP uses UDP Port 69, if you have firewalls in between the one you are working on, and the TFTP server then this port needs to be open.
Solution
1. Connect to the firewall via Telnet, Console Cable or SSH, then go to enable mode, type in the enable password.
Petes-ASA> enable
Password:*********
Petes-ASA#
2. To back up the firewall you need to specify the IP address of where you want to send it(i.e. the TFTP server), what you want to call the backup, and you tie them together with a “Write Net” command. The syntax is,
write net {ip address}:{filename}
Petes-ASA# write net 172.254.1.2:firewall_backup
Building configuration...
INFO: Default tftp-server not set, using highest security interface
Cryptochecksum: 85c211cb 3099b392 9e7206e6 e1548bcd
!
[OK]
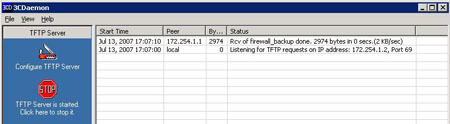
Petes-ASA#3. On your TFTP server you will see that a file has been received.
4. If you look in the TFTP server root directory you will find the file, though it has no file extension you can open it and view it using a text editor like notepad or wordpad, just remember NOT to save it with a txt or rtf extension when you close it again. Keep it safe you will need it if you ever want to restore.
Restore
1. To restore you must have already backed up the firewall earlier and have that backup in the TFTP servers root directory.
2. Connect to the firewall via Telnet, Console Cable or SSH, then go to enable mode, type in the enable password.
Petes-ASA> enable
Password:*********
Petes-ASA#
3. Enter configuration mode using the “conf t” command.
Petes-ASA# configure terminal
Petes-ASA(config)#
4. Unlike when you backed up the firewall to restore the configuration you use the copy tftp start command.
Petes-ASA(config)# copy tftp start5. Supply it with the IP address of your TFTP Server.
Address or name of remote host []? 172.254.1.26. Supply it with the name of the file you backed up earlier.
Source filename []? firewall_backup7. The file will get copied over.
Accessing tftp://172.254.1.2/firewall_backup...!
Writing system file...
!
2974 bytes copied in 0.90 secs
Petes-ASA(config)#
8. On your TFTP server you will see the file being “copied out”
9. Not finished yet, the file now lives in the “Startup” configuration so its not been loaded from memory yet, the best way to do this is to reboot the firewall. To do this issue the reload command, and confirm by pressing enter.
Petes-ASA(config)# reload
Proceed with reload? [confirm] {Enter}
Petes-ASA(config)#
*** *** — START GRACEFUL SHUTDOWN — Shutting down isakmp Shutting down webvpn Shutting down File system
** *** — SHUTDOWN NOW —
10. After the reboot, you will be running on the restored configuration.
Note: With a Version 6 Firewall – restoring a config from TFTP simply “Merges” the new one with the config on the firewall, in most cases this is NOT what you want, to get round this place the following command at the top of the config you are restoring
clear config all
Backup a Cisco 5500 firewall from the ASDM
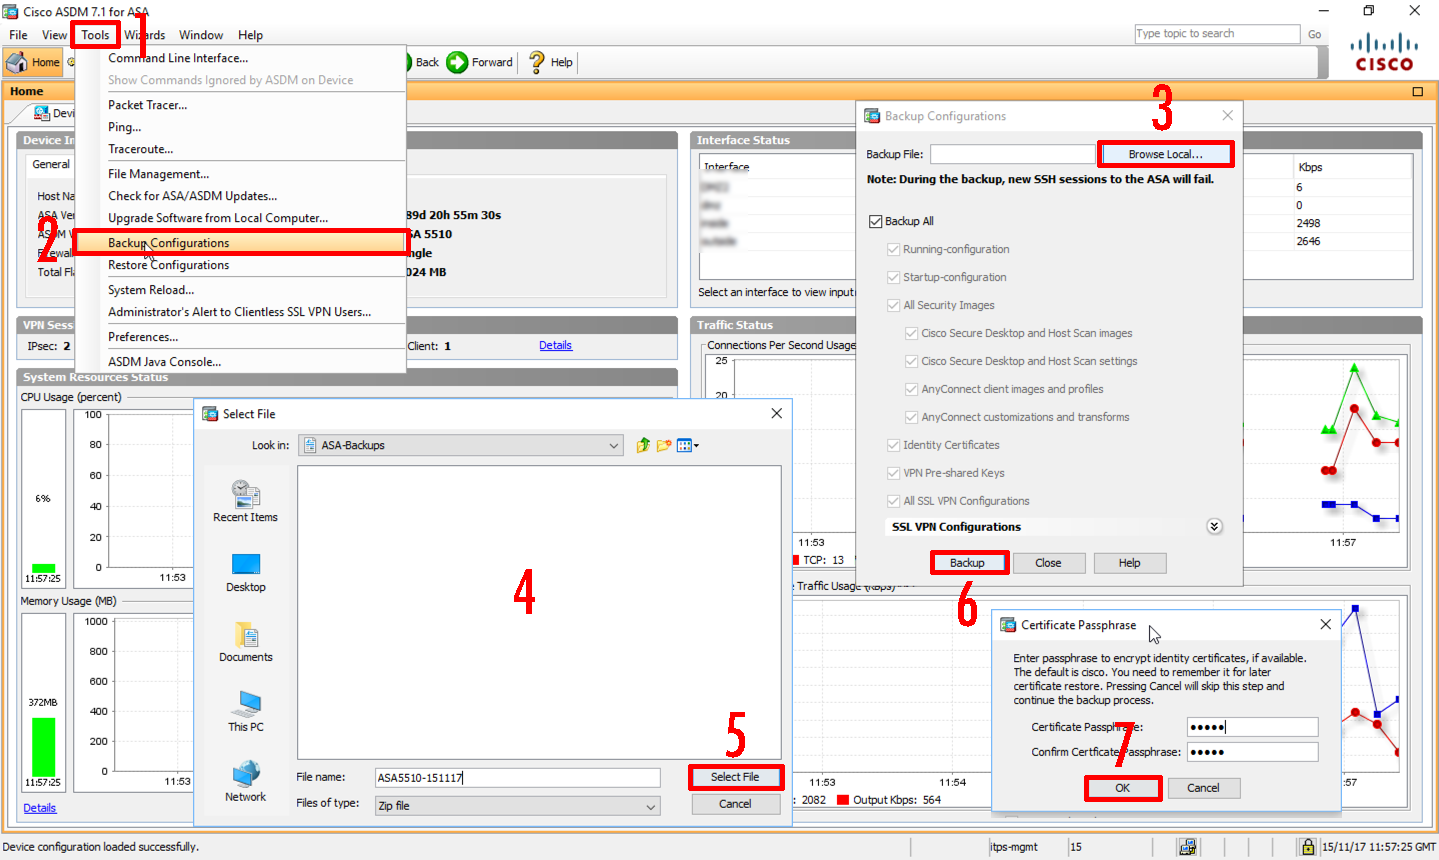
1. Connect to the firewall via ASDM, then Tools > Backup Configuration > Browse to a Location to Save the File > If you have certificates to backup, then choose and confirm a password > OK.
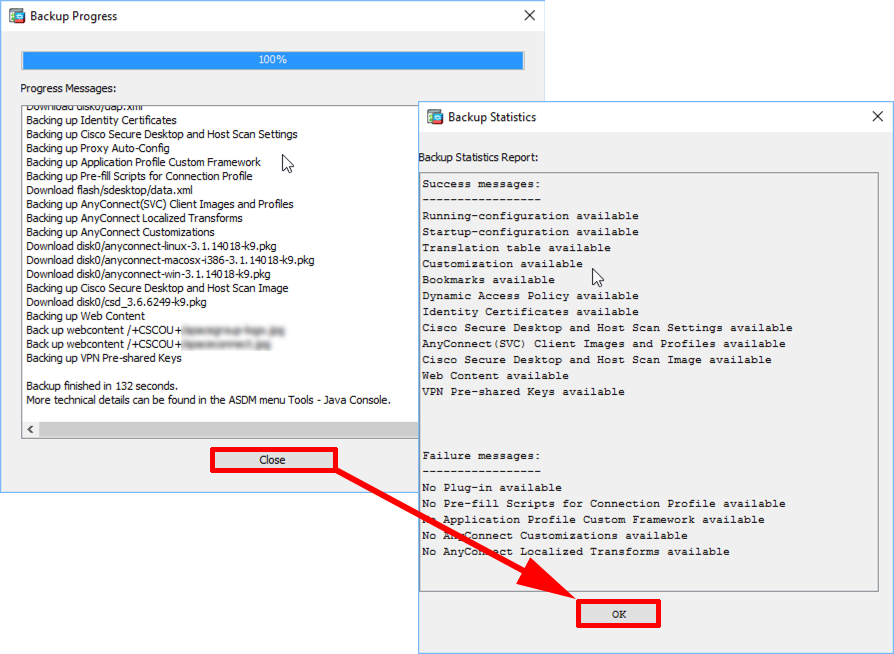
2. Watch the progress > Close > OK.
Restore a Cisco 5500 firewall from the ASDM
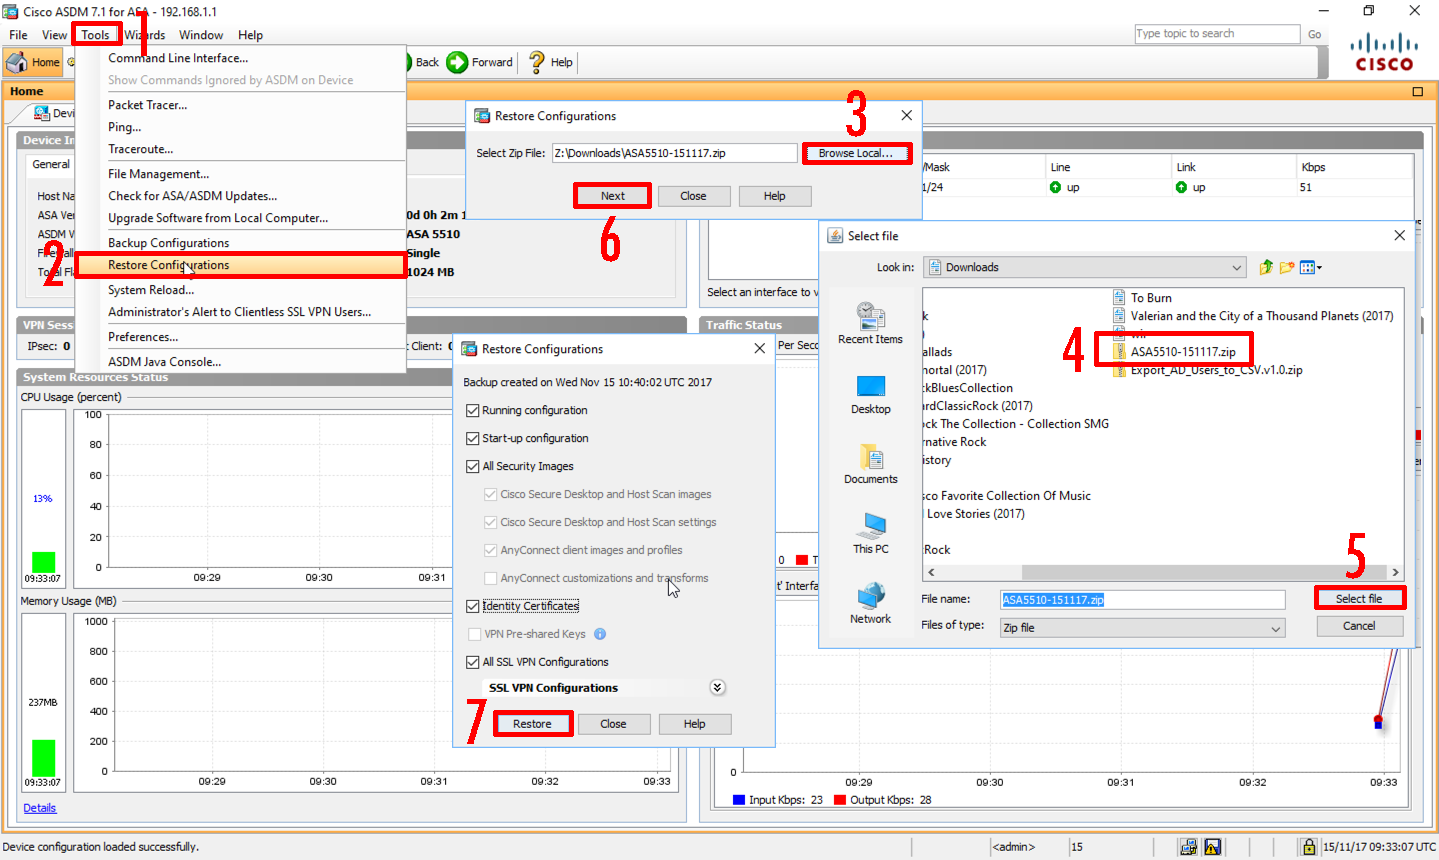
1. Connect to the firewall via ASDM, then Tools > Restore Configuration >Browse to the .zip file you saved earlier > Select File > Next > Restore.
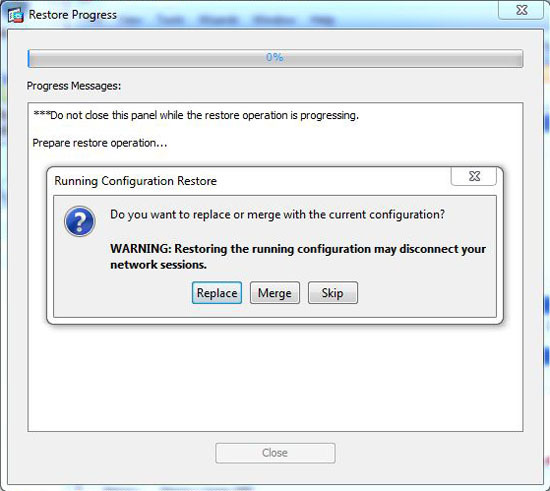
2. If you are restoring certificates enter the password you used above > OK > Then choose whether to ‘replace‘ the config on the firewall, or ‘merge‘ the restored config with the one on the firewall.
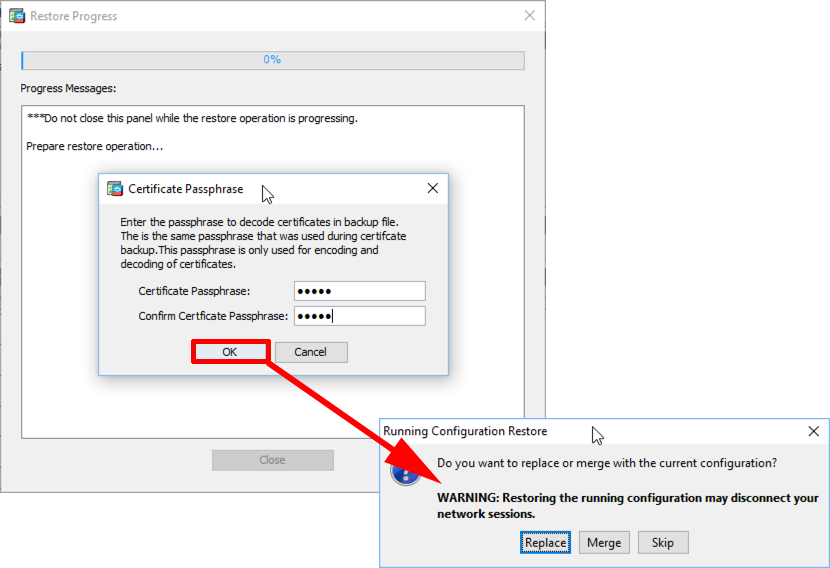
3. The ASDM will detect theres been a change, just drag that window to one side, Wait for the restore to finish > Close. You will probably need to reconnect to the firewall now.

Related Articles, References, Credits, or External Links
Backup and Restore a Cisco Router with TFTP