
KB ID 0000072
Problem
Note: This is for Cisco ASA 5500, 5500-x, and Cisco Firepower devices running ASA Code.
Below is a walk-through for setting up one end of a site to site VPN Tunnel using a Cisco ASA appliance – Via the ASDM console. Though if (like me) you prefer using the Command Line Interface I’ve put the commands at the end.
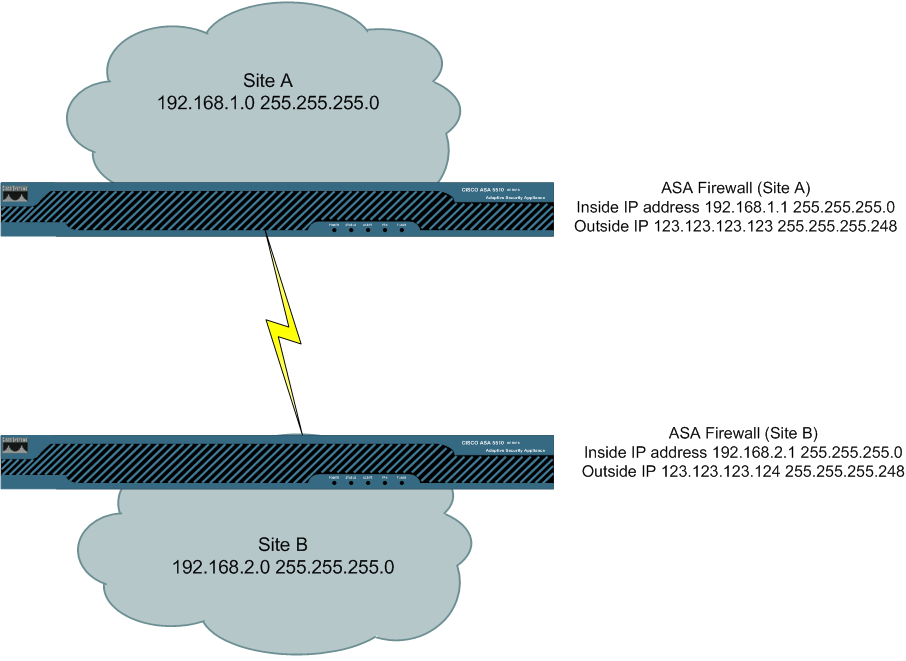
click image for full subnet information
Solution
VPN Setup Procedure carried out on ASDM 6.4
Note: The video above uses IKE v1 and IKE v2, in reality you would choose one or the other, and for IKE v2 both ASA 5500 firewalls need to be running OS 8.4(1) or above.
VPN Setup Procedure carried out on ASDM 5.2
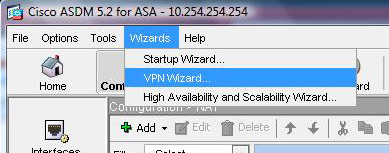
1. Open up the ADSM console. > Click Wizards > VPN Wizard.
2. Select “Site-to-Site VPN” > Next.

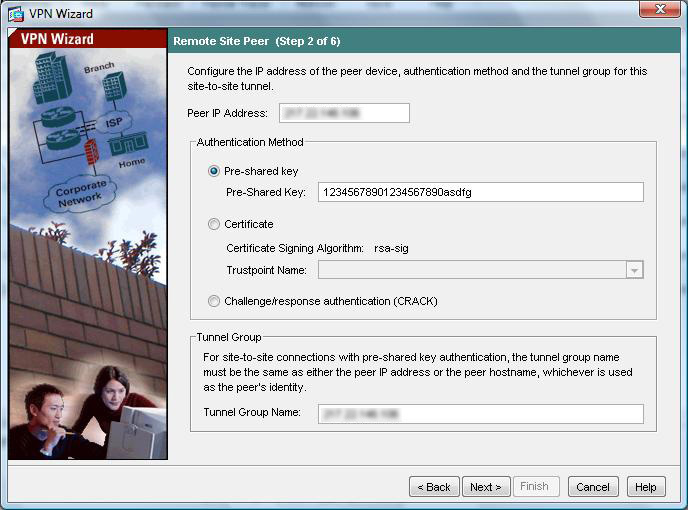
3. Enter the Peer IP address (IP of the other end of the VPN tunnel – I’ve blurred it out to protect the innocent) > Select “Pre Shared Key” and enter the key (this needs to be identical to the key at the other end. > Give the tunnel group a name or accept the default entry of its IP address. > Next.
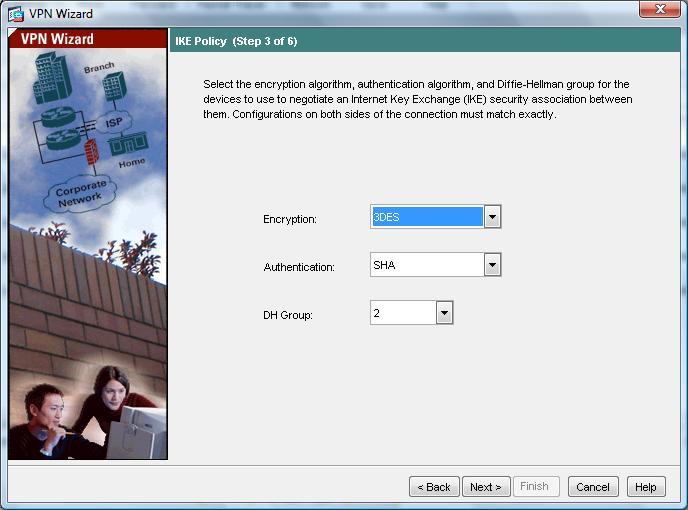
4. Choose the encryption protocol (DES, 3DES, AES-128, AES-192, or AES256), choose the Authentication Method (SHA or MD5), and choose the Diffie Hellman Group (1, 2, 5 or 7). Note the other end must match, this establishes phase 1 of the tunnel. > Next.
5. Now select the Encryption Protocols (DES, 3DES, AES-128, AES-192, or AES256), choose the Authentication method (SHA, MD5 or None). Note this is for phase 2 and will protect the encrypted traffic “In Flight”. > Next.

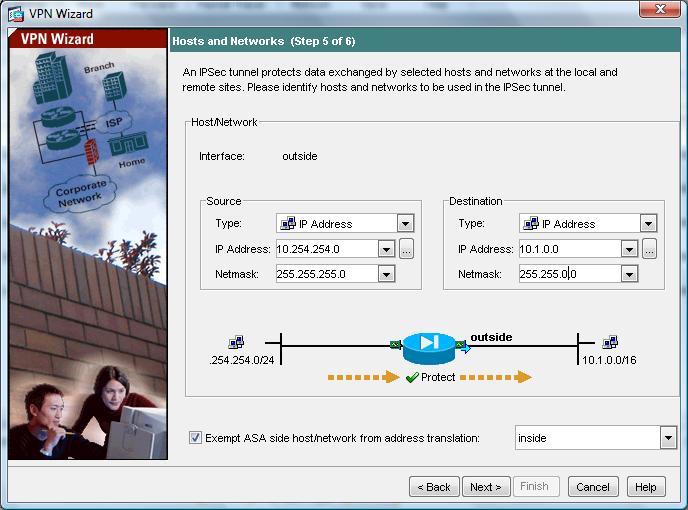
6. Now you need to specify what traffic to encrypt, on the left hand side enter the network or host details (of what’s behind the ASA you are working on), and on the right hand side the IP address of the network or host that’s behind the other VPN endpoint. Note the other end should be a mirror image. > Next.
7. Review the Settings (Note I’ve blurred the IP address out again) > Next.

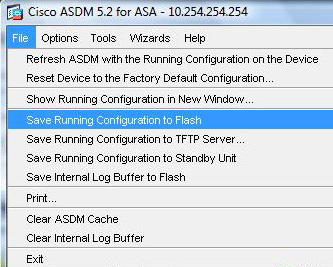
8. Back at the ASDM console commit the settings to the ASA memory, Click File > “Save Running Configuration to Flash.”
ASA 5500 VPN Setup from command line
object network Site-A-SN
subnet 192.168.1.0 255.255.255.0
object network Site-B-SN
subnet 192.168.2.0 255.255.255.0
nat (inside,outside) source static Site-A-SN Site-A-SN destination static Site-B-SN Site-B-SN
access-list outside_1_cryptomap extended permit ip object Site-A-SN object Site-B-SN
crypto ipsec ikev1 transform-set ESP-3DES-SHA esp-3des esp-sha-hmac
crypto map outside_map 1 match address outside_1_cryptomap
crypto map outside_map 1 set pfs
crypto map outside_map 1 set peer {Other Ends IP Address}
crypto map outside_map 1 set ikev1 transform-set ESP-3DES-SHA
crypto ikev1 enable outside
crypto ikev1 policy 10
authentication pre-share
encryption 3des
hash sha
group 2
lifetime 86400
tunnel-group {Other Ends IP Address} type ipsec-l2l
tunnel-group {Other Ends IP Address} ipsec-attributes
ikev1 pre-shared-key 12345678901234567890asdfg
ASA 5500 VPN for Version 8.2 and older firewalls
access-list outside_20_cryptomap extended permit ip 10.254.254.0 255.255.255.0 10.1.0.0 255.255.0.0
access-list inside_nat0_outbound extended permit ip 10.254.254.0 255.255.255.0 10.1.0.0 255.255.0.0
nat (inside) 0 access-list inside_nat0_outbound
crypto ipsec transform-set ESP-3DES-SHA esp-3des esp-sha-hmac
crypto map outside_map 20 match address outside_20_cryptomap
crypto map outside_map 20 set pfs
crypto map outside_map 20 set peer {Other Ends IP Address}
crypto map outside_map 20 set transform-set ESP-3DES-SHA
crypto map outside_map interface outside
crypto isakmp enable outside
crypto isakmp policy 10
authentication pre-share
encryption 3des
hash sha
group 2
lifetime 86400
tunnel-group {Other Ends IP Address} type ipsec-l2l
tunnel-group {Other Ends IP Address} ipsec-attributes
pre-shared-key 12345678901234567890asdfg
Related Articles, References, Credits, or External Links
Original article written 09/11/09
Troubleshooting Phase 1 Cisco Site to Site (L2L) VPN Tunnels
Troubleshooting Phase 2 Cisco Site to Site (L2L) VPN Tunnels