
KB ID 0000009
Problem
You cannot open a Microsoft client VPN tunnel with a cisco PIX or ASA in front of you on the network.
Solution
You need the following open (outbound)
Allow PPTP Client through the ASA via Command Line
1. Connect to the ASA then add PPTP inspection to the default inspection map.
PetesASA>
PetesASA> en
Password: ********
PetesASA# conf t
PetesASA(config)# policy-map global_policy
PetesASA(config)# (config-pmap)# class inspection_default
PetesASA(config)# inspect pptp
PetesASA(config)#
2. Then allow the GRE protocol and TCP Port 1723 outbound.
PetesASA(config)# access-list outbound extended permit gre any any
PetesASA(config)# access-list outbound extended permit tcp any any eq pptp
PetesASA(config)# access-group outbound in interface inside
3. Save the changes.
PetesASA(config)# write mem
Building configuration...
Cryptochecksum: 5c8dfc45 ee6496db 8731d2d5 fa945425
8695 bytes copied in 3.670 secs (2898 bytes/sec) [OK] PetesASA(config)#
Allow PPTP Client through the ASA via ASDM (GUI)
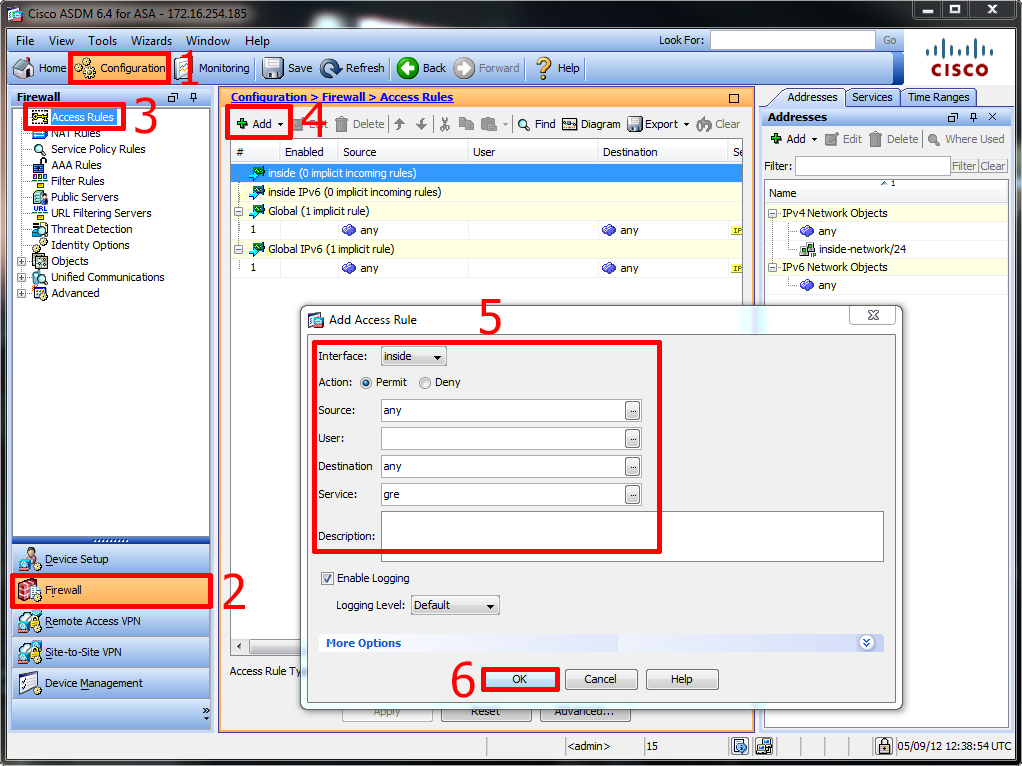
1. Connect to the ASDM GUI interface. Configuration > Firewall > Access Rules > Add > Inside Interface > Allow > Source = Any > Detination = Any > Service = GRE > OK > Apply.
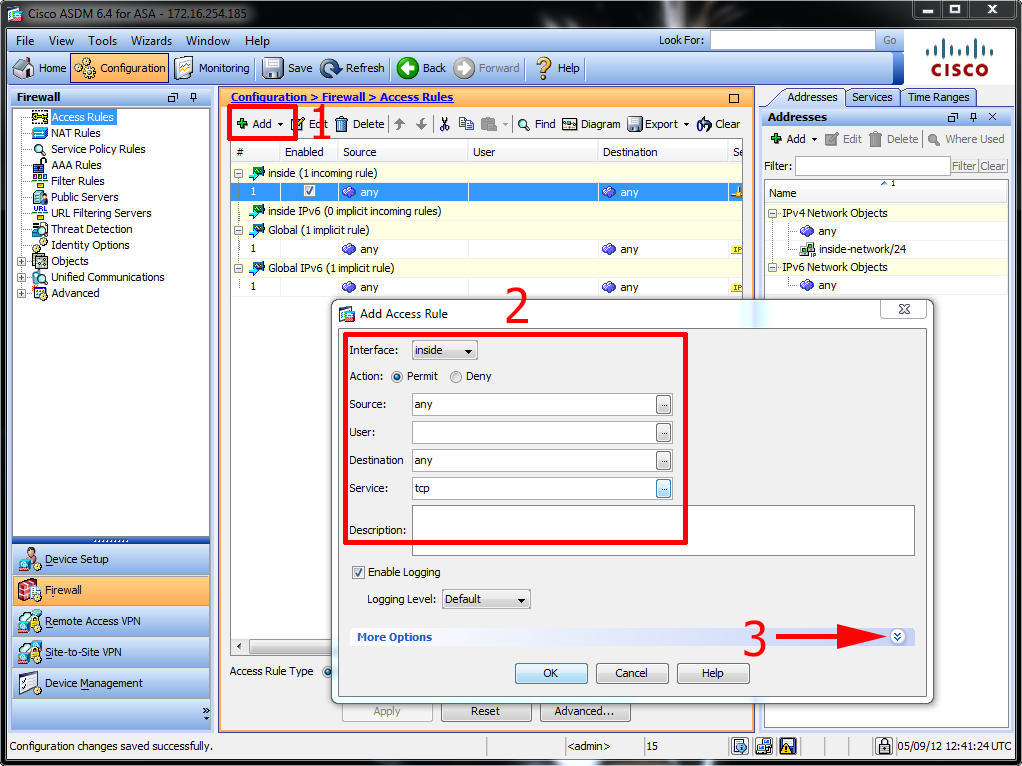
2. In the same window > Add another rule > This time seelct TCP > Then select ‘More Options’.
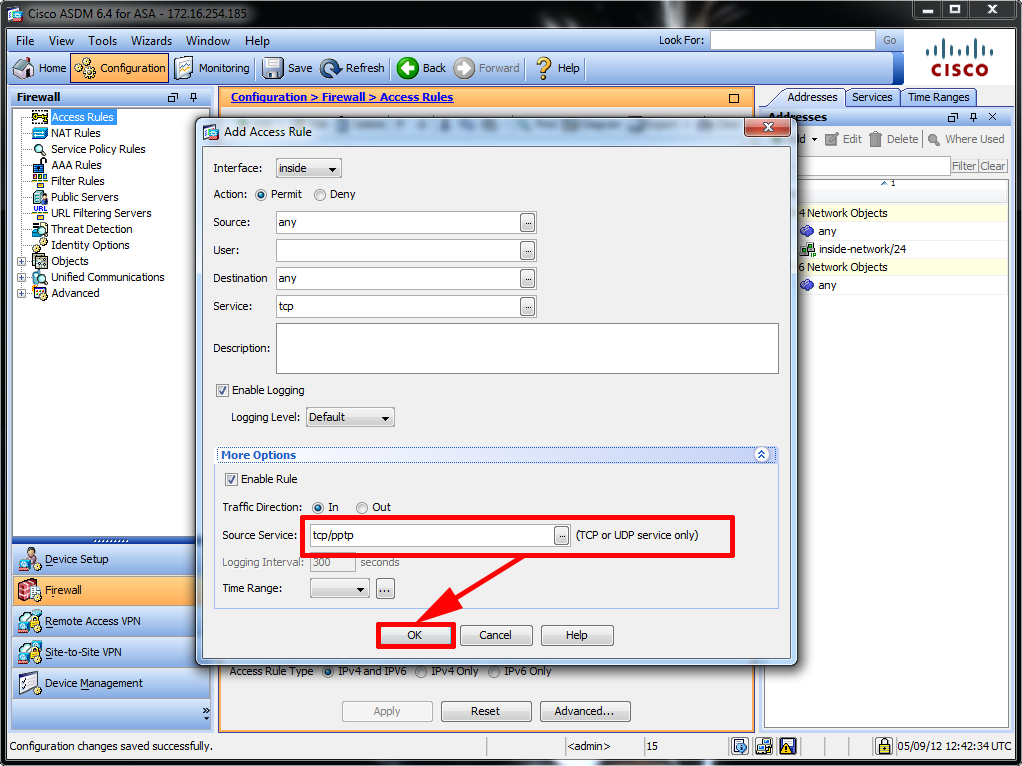
3. Change the Source/Service to tcp/pptp > OK > Apply.
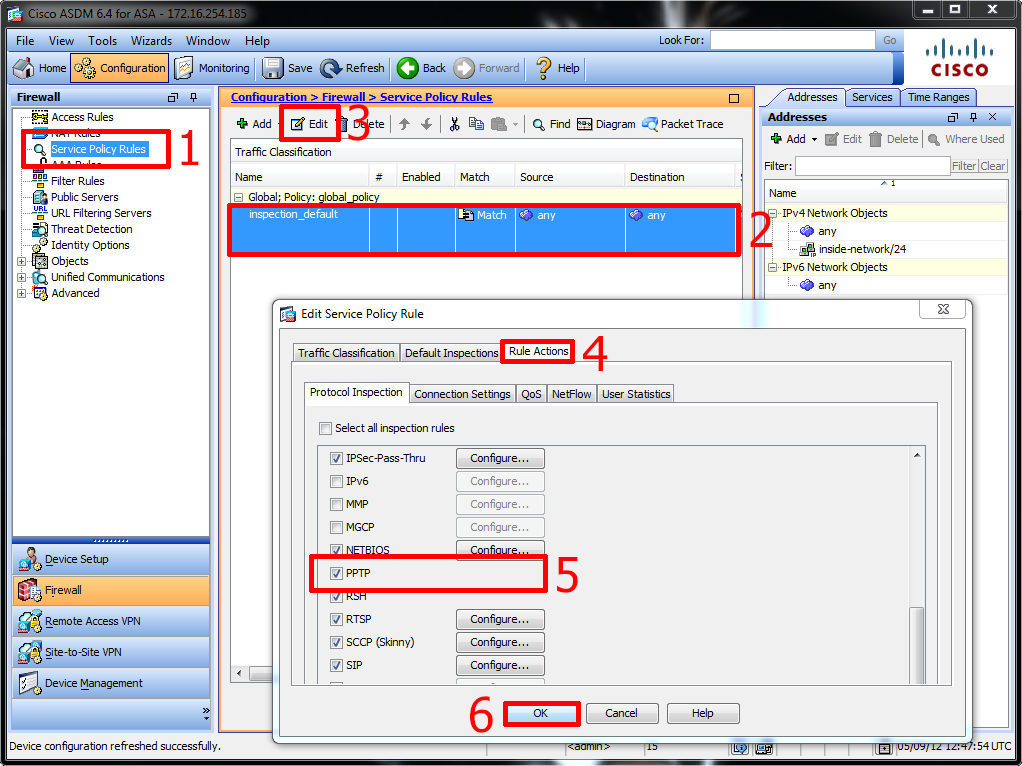
4. To add PPTP inspection >Service Policy Rules > Seelct > Inspection_Default > Edit > Rule Actions > Tick PPTP > OK.
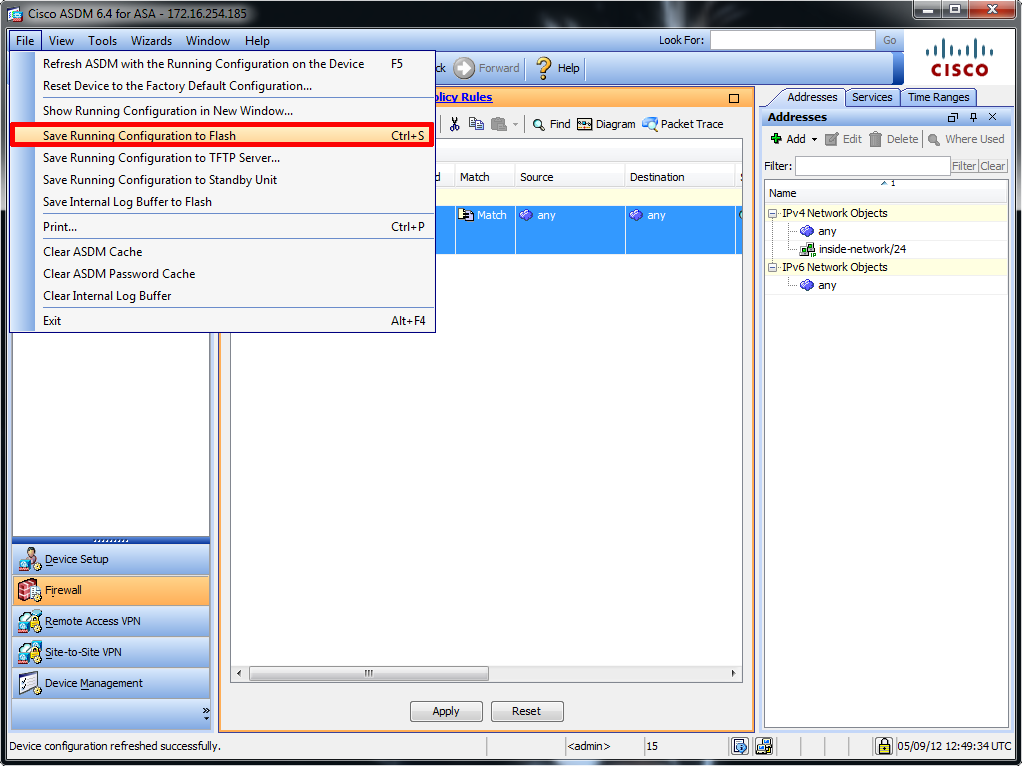
5. Finally to save your work > File > Save running configuration to flash
Related Articles, References, Credits, or External Links
Original Article Written 18/09/08