
Part 2 (How to Configure AnyConnect)
KB ID 0001031
Problem
Back in Part 1 We configured the Microsoft Certificate Services to meet our certificate needs. Now we configure the firewall for AnyConnect.
Solution
1. Log onto the ASA > Go to global configuration Mode.
login as: petelong
petelong@192.168.100.1's password:**********
Type help or '?' for a list of available commands.
Petes-ASA> enable
Password: *******
Petes-ASA# configure terminal
Petes-ASA(config)#
2. Enable domain DNS Lookup inside, (for CRL lookups).
Petes-ASA(config)# dns domain-lookup inside
Petes-ASA(config)# dns server-group DefaultDNS
Petes-ASA(config-dns-server-group)# name-server 192.168.1.10
Petes-ASA(config-dns-server-group)# exit
Petes-ASA(config)#
3. Enable NTP Time sync (here I’m using an external IP in the UK).
Petes-ASA(config)# ntp server 130.88.212.143 source outside4. Copy over AnyConnect Image, from a TFTP server.
Petes-ASA(config)# copy tftp flash

Address or name of remote host [] 192.168.100.10

Source filename [] anyconnect-win-3.1.06079-k9.pkg

Destination filename [anyconnect-win-3.1.06079-k9.pkg]{Enter}

Accessing tftp://192.168.100.10/anyconnect-win-3.1.06079-k9.pkg...!!!!
!!!!!!!!!!!!!!!!!!!!!!!!!!!!!!!!!!!!!!!!!!!!!!!!!!!!!!!!!!!!!!!!!!!!!!
Writing file disk0:/anyconnect-win-3.1.06079-k9.pkg...
!!!!!!!!!!!!!!!!!!!!!!!!!!!!!!!!!!!!!!!!!!!!!!!!!!!!!!!!!!!!!!!!!!!!!!
!!!!!!!!!!!!!!!!!!!!!!!!!!!!!!!!!!!!!!!!!!!!!!!!!!!!!!!!!!!!!!!!!!!!!!

37984585 bytes copied in 69.650 secs (550501 bytes/sec)
5. Setup AnyConnect, Ive covered this before here if you want to know what all these commands are for.
Petes-ASA(config)# ip local pool AnyConnect-Pool 172.16.1.1-172.16.1.254 mask 255.255.255.0
Petes-ASA(config)# object network Obj-AnyConnect-Subnet
Petes-ASA(config-network-object)# subnet 172.16.1.0 255.255.255.0
Petes-ASA(config-network-object)# exit
Petes-ASA(config)# webvpn
Petes-ASA(config-webvpn)# enable outside
INFO: WebVPN and DTLS are enabled on 'outside'.
Petes-ASA(config-webvpn)# tunnel-group-list enable
Petes-ASA(config-webvpn)# anyconnect image disk0:/anyconnect-win-3.1.06079-k9.pkg
Petes-ASA(config-webvpn)# anyconnect enable
Petes-ASA(config-webvpn)# exit
Petes-ASA(config)# username testuser password Password1
Petes-ASA(config)# access-list Split-Tunnel permit 192.168.100.0 255.255.255.0
Petes-ASA(config)# group-policy AnyConnectProfile internal
Petes-ASA(config)# group-policy AnyConnectProfile attributes
Petes-ASA(config-group-policy)# vpn-tunnel-protocol ssl-client
Petes-ASA(config-group-policy)# dns-server value 192.168.100.10
Petes-ASA(config-group-policy)# wins-server none
Petes-ASA(config-group-policy)# split-tunnel-policy tunnelspecified
Petes-ASA(config-group-policy)# split-tunnel-network-list value Split-Tunnel
Petes-ASA(config-group-policy)# default-domain value petenetlive.com
Petes-ASA(config-group-policy)# exit
Petes-ASA(config)# tunnel-group AnyConnectProfile type remote-access
Petes-ASA(config)# tunnel-group AnyConnectProfile general-attributes
Petes-ASA(config-tunnel-general)# default-group-policy AnyConnectProfile
Petes-ASA(config-tunnel-general)# address-pool AnyConnect-Pool
Petes-ASA(config-tunnel-general)# tunnel-group AnyConnectProfile webvpn-attributes
Petes-ASA(config-tunnel-webvpn)# group-alias AnyConnectProfile enable
Petes-ASA(config-tunnel-webvpn)# exit
Petes-ASA(config)# nat (inside,outside) 2 source static any any destination static Subnet Obj-AnyConnect-Subnet no-proxy-arp route-lookup
6. Set the ASA to get a cert from NDES, start by generating an RSA key pair.
Petes-ASA(config)# crypto key generate rsa label PNL-Key modulus 2048 noconfirm7. Setup a certificate Trustpoint (Note: mine checks CRL’s, if you do the same make sure your PKI deployment has CRL locations setup and configured properly).
Petes-ASA(config)# crypto ca trustpoint PNL-Trustpoint
Petes-ASA(config-ca-trustpoint)# enrollment url http://192.168.100.11/certsrv/mscep/mscep.dll
Petes-ASA(config-ca-trustpoint)# revocation-check crl
Petes-ASA(config-ca-trustpoint)# keypair PNL-Key
Petes-ASA(config-ca-trustpoint)# id-usage ssl-ipsec
Petes-ASA(config-ca-trustpoint)# enrollment retry count 3
Petes-ASA(config-ca-trustpoint)# enrollment retry period 5
Petes-ASA(config-ca-trustpoint)# fqdn vpn.petenetlive.com
Petes-ASA(config-ca-trustpoint)# CN=vpn.petenetlive.com,OU=IS,O=PeteNetLive,
C=GB,St=Teesside,L=Middlesbrough,EA=pl@petenetlive.com
8. Get your CA Certificate from NDES (Note: If you have multiple issuing servers then you may need to manually import the CA certs for them later, or some clients will work, and others wont depending on which issuing CA servers issued the computer or user certificates! Good luck troubleshooting that if you forget!)
Petes-ASA(config-ca-trustpoint)# crypto ca authenticate PNL-Trustpoint


INFO: Certificate has the following attributes:
Fingerprint: cc528d62 112a5704 bd444535 53353d0e
Do you accept this certificate? [yes/no]: yes

Trustpoint CA certificate accepted.
Petes-ASA(config)#
9. Get the Identity Certificate for the ASA (this will be created from either the ‘IPSEC (Offline request)’ template), or your custom one if you changed it.
Petes-ASA(config)# crypto ca enroll PNL-Trustpoint

Would you like to continue with this enrollment? [yes/no]: yes
% Start certificate enrollment ..
% Create a challenge password. You will need to verbally provide this
password to the CA Administrator in order to revoke your certificate.
For security reasons your password will not be saved in the configuration.
Please make a note of it.
Password: ********
Re-enter password: ********

% The subject name in the certificate will be: CN=vpn.petenetlive.com,OU=IS,O=Pe teNetLive,C=GB,St=Teesside,L=Middlesbrough,EA=pl@petenetlive.com

% The fully-qualified domain name in the certificate will be: vpn.petenetlive.com

% Include the device serial number in the subject name? [yes/no]: no

Request certificate from CA? [yes/no]: yes
% Certificate request sent to Certificate Authority
Petes-ASA(config)#
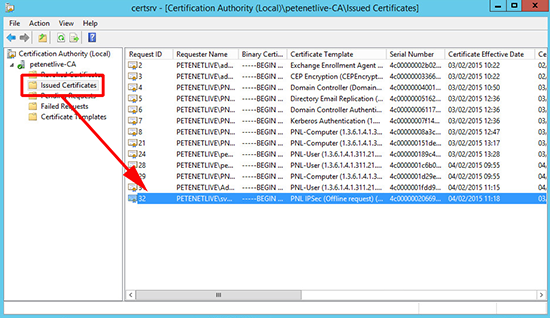
10. You can take a look on your running config and you should not see two certificates (big blocks of hex code). Or simply go to the Certificate Services server and see if the cert was issued.
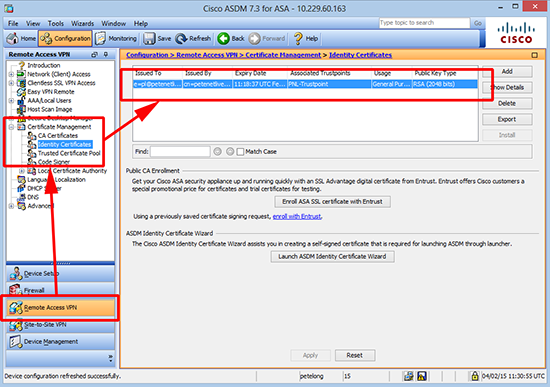
Or you can look in the ASDM.
11. Enable the cert on the outside interface.
12. Finally change the AnyConnect profile to now use certificate authentication.
Petes-ASA(config)# tunnel-group AnyConnectProfile webvpn-attributes
Petes-ASA(config-tunnel-webvpn)# authentication certificate
Petes-ASA(config-tunnel-webvpn)# exit
13. Don’t forget to save the changes.
Petes-ASA(config)# write mem
Building configuration...
Cryptochecksum: 063a55a7 0ddf34dd a80373cd 0bc5e269
11299 bytes copied in 1.330 secs (11299 bytes/sec)
[OK]
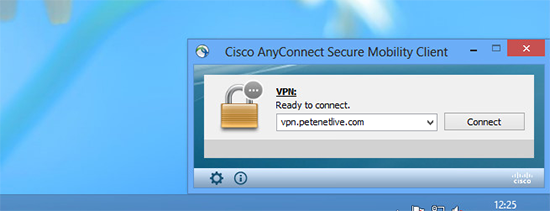
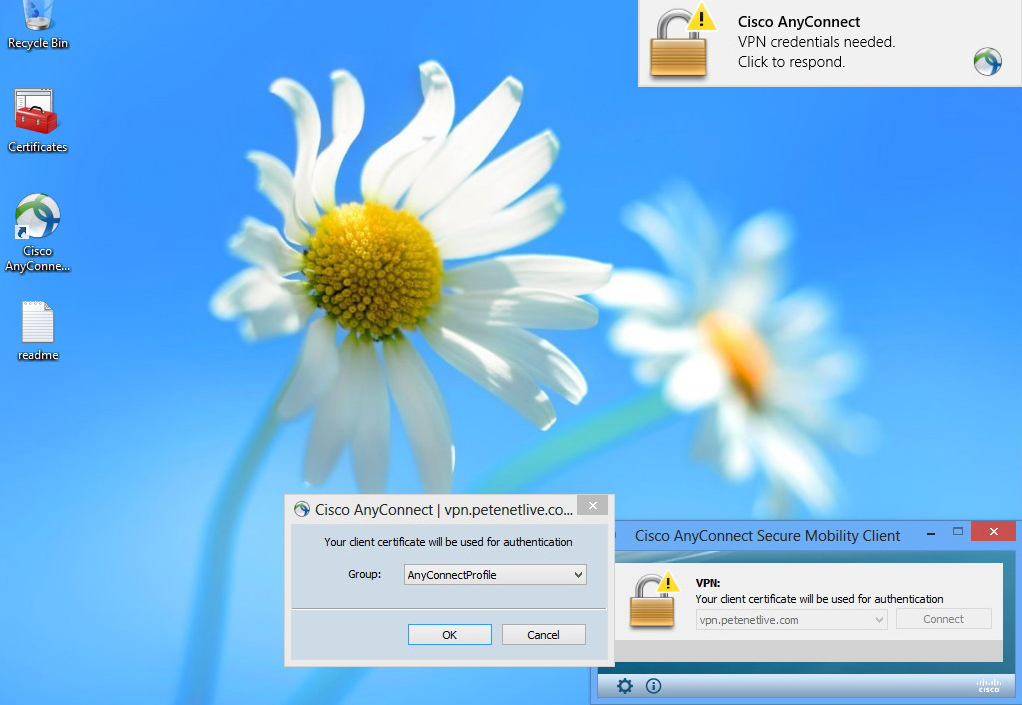
Petes-ASA(config)#14. Take a client with the correct certificates on to an external Internet connection and test.
15. To make the connection seamless (without any user intervention), add a group-url, and disable ‘tunnel-group-list’.
Petes-ASA(config)# tunnel-group AnyConnectProfile webvpn-attributes
Petes-ASA(config-tunnel-webvpn)# group-url https://vpn.petenetlive.com enable
Petes-ASA(config)# webvpn
Petes-ASA(config-webvpn)# no tunnel-group-list enable
AnyConnect Client Profiles
Now if you have been following along from the beginning, you will remember my client wants an ‘always on’ connection, and they want to allow ‘local LAN‘ access to the remote client. This is done by configuring an ‘AnyConnect Client Profile’. This has to be done from the ASDM.
Open the ASDM and navigate to Configuration > Remote Access VPN > Network (Client) Access > AnyConnect Client Profile > Add > Name the profile and assign it to your AnyConnect Group Policy.
Note: Here is where you specify ‘always on’.
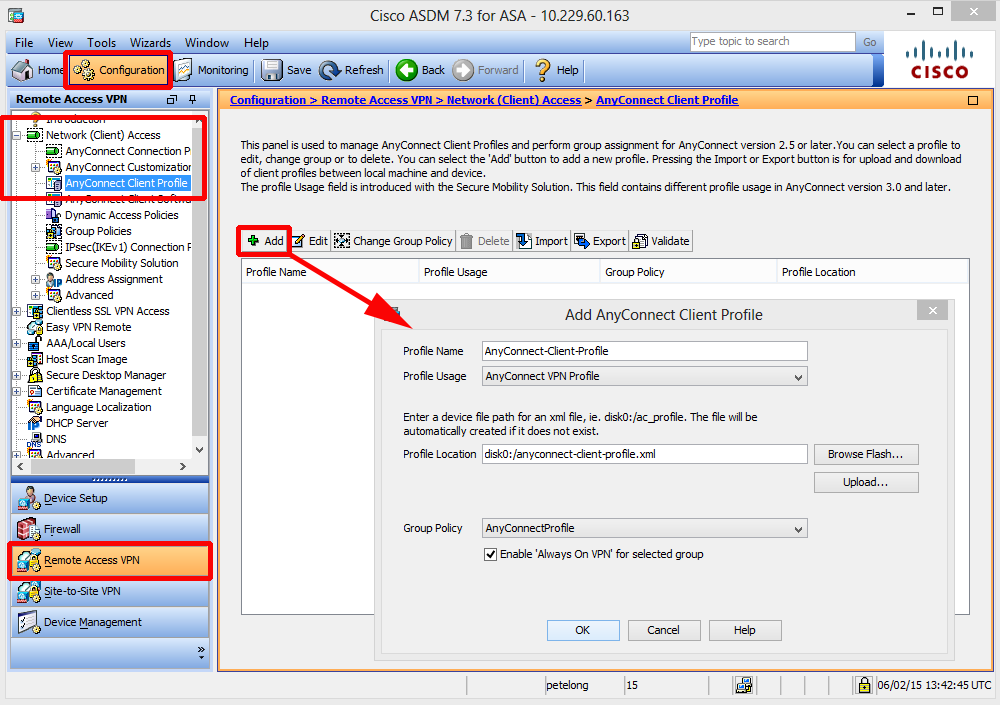
Note: If you cannot see this option make sure you have an AnyConnect software package loaded into the firewall.
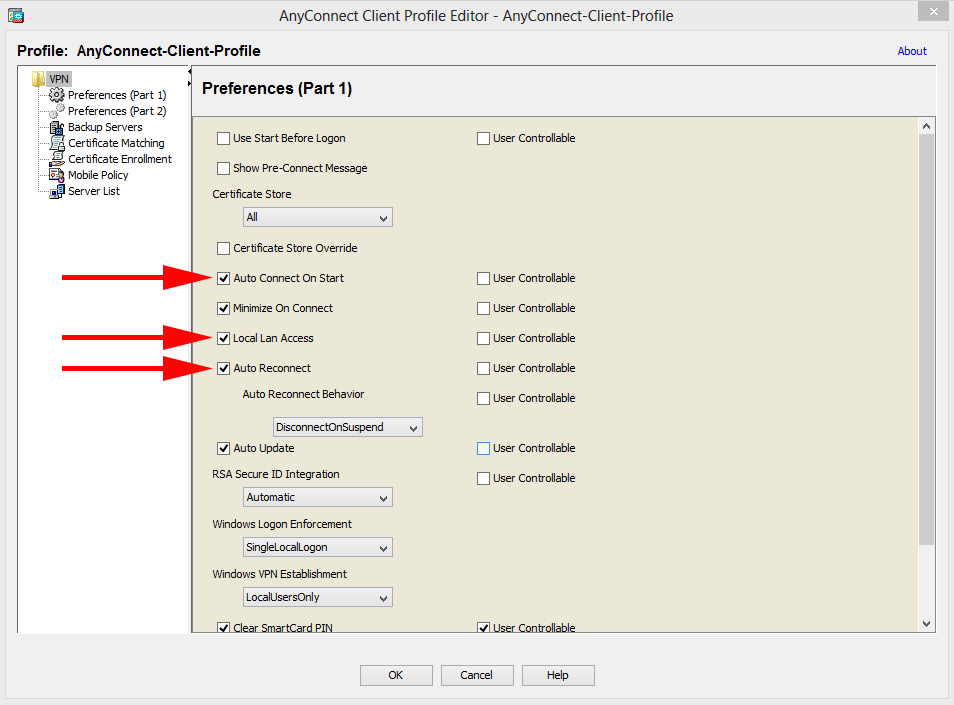
You can now select and open this profile, and a separate profile editor window will open, where you can allow LAN access, specify reconnect, and get the connection to auto-connect.
Related Articles, References, Credits, or External Links
NA