
KB ID 0000731
Problem
The Cisco CSC module provides ‘in line’ scanning of POP3, SMTP, HTTP and FTP traffic, to protect against viruses but also for anti spam and anti phish (with the correct licensing).
If you are familiar with Trend products, you will like it, (because that’s what it runs), and the interface is much the same as Trend IWSS.
It is a hardware device that plugs into the back of the ASA, and comes in two flavours.
1. CSC-SSM-10 (50 to 500 users, depending on licenses) for ASA 5510 and 5520.
2. CSC-SSM-20 (500 to 100 users, depending on licenses) for ASA 5510, 5520, and 5540.
In addition to licensing the amount of users, you can also buy a Plus License, this enables anti-spam, anti-phish, URL filtering, and blocking control. Note: This license expires and must be renewed annually).
Solution
Some licenses on the CSC are time specific, I would consider setting the ASA’s internal clock before you start.
Set the ASA to get time from an External NTP Server
Step 1: License the Cisco CSC Module
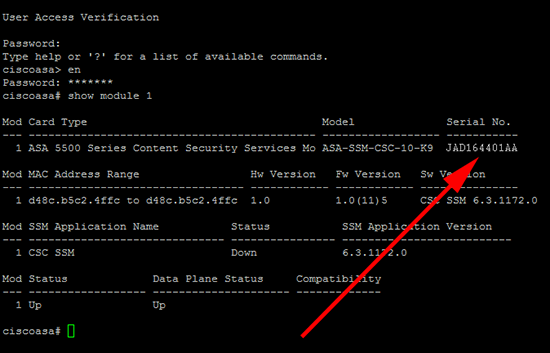
1. Connect to the ASA via command line, go to enable mode and issue the following command;
From the output you should be able to get the serial number of the CSC module (write it down).
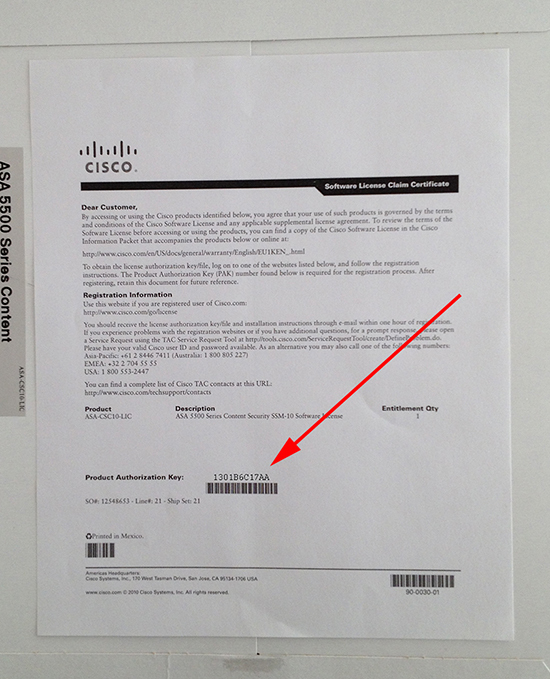
2. In the box with the CSC/ASA should be an envelope containing the PAK for the CSC module, write that number down as well.
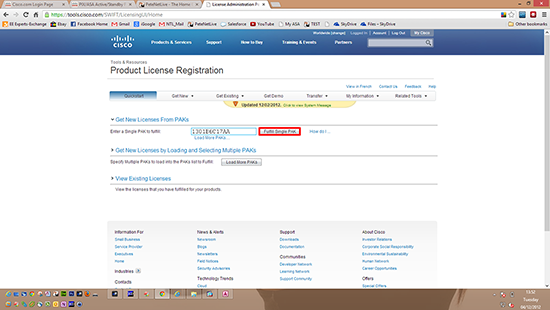
3. Go to the Cisco license portal here, Note: If you do not have a Cisco CCO account you may need to create one. Enter your PAK code > Fulfill Single PAK.
Note: If you have multiple PAK codes, you can do them at once with the ‘Load more PAK’s’ button, this may be the case if you also have a ‘plus’ license to add.
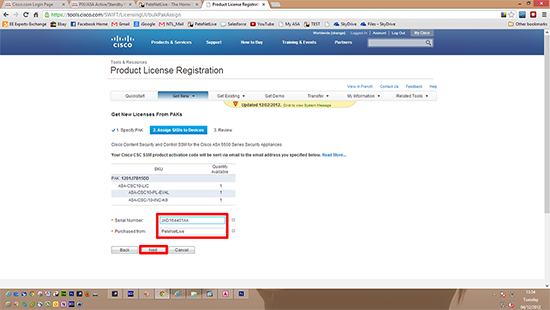
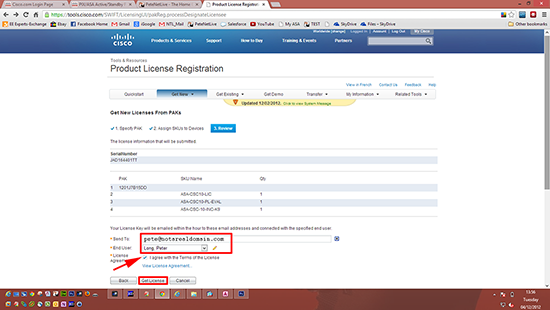
4. Enter the serial number of your CSC module and the person/company from whom you bought it > Next.
5. It should display your valid email address (from your CCO account). Tick the box to accept the terms and conditions > Get License.
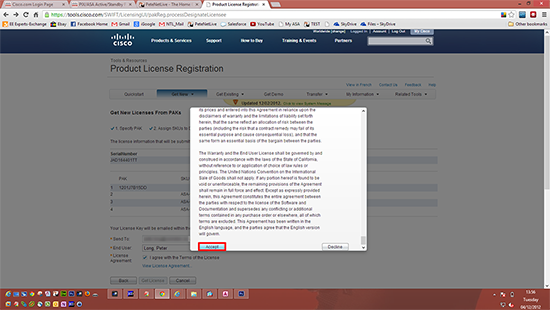
6. Scroll down and accept, then select DOWNLOAD, (that way you wont have to wait for it to be emailed to you).
7. Open the license file (will have a .lic extension) with notepad and you should see two keys.

Step 2: Setup the CSC Module
Note: Here I’m going to simply set up inspection of everything on all interfaces, this might not be what you want, i.e. if theres no mail server in the DMZ why would you want to inspect all DMZ traffic for SMTP.
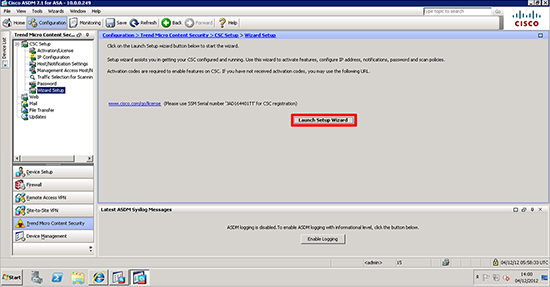
1. Connect to the firewall’s ASDM console > Trend Micro Content Security > It should point you straight to the setup wizard.
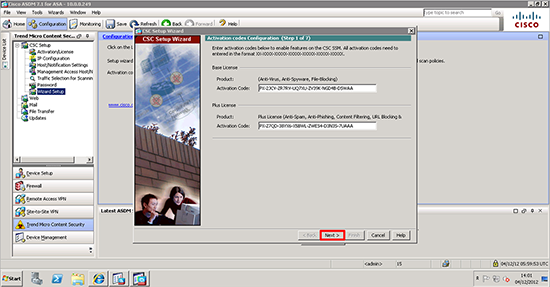
9. Enter the base and plus license codes. Note: The plus license code that comes with the CSC is just an evaluation one, if you have purchased a plus license separately, then paste THAT code in instead.
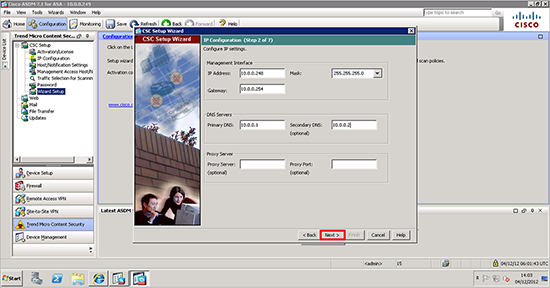
10. Enter the network settings you require for the CSC (it requires its own network connection). it has a single RJ45 network socket on the CSC modules back plane, connect that to your LAN > Next.
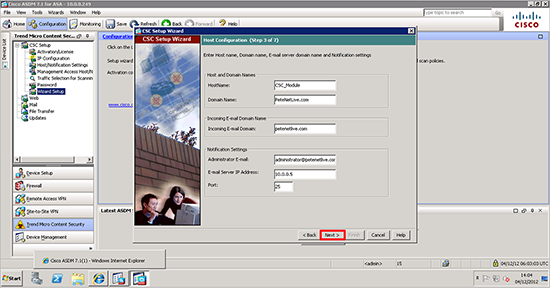
11. Supply a name for the CSC module and details of your email server (if you require email notification) > Next > enter the IP addresses that will be allowed access to the CSC web console > Next > Change the password Note: The original password will be cisco > Next.
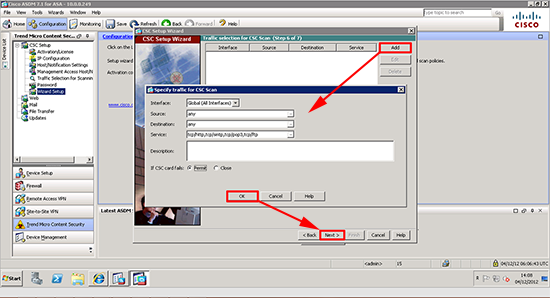
12. Select what traffic you want to inspect, here I’ve selected all traffic all interfaces > Ive set the CSC to fail open (if theres a problem it simply passes traffic, if you have it on fail close and the CSC encounters a problem all http, smtp, ftp, and pop traffic will be blocked until the problem is resolved) > OK > Next.
13. Review the settings > Finish.
Note: You may get a warning if you set ‘fail open’ above that’s OK.

Connecting to and Managing the Cisco CSC Module
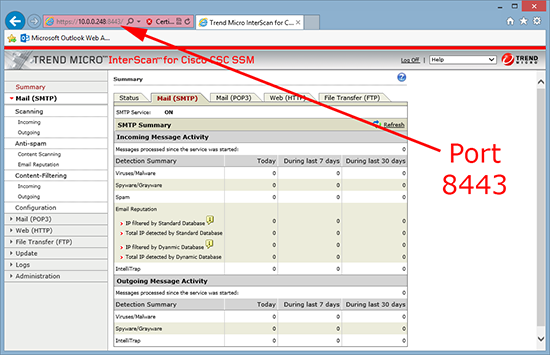
Although you can access the CSC settings via the ASDM, the easiest way is via its web interface, you set the IP address in step 2 number 10 above, navigate to
https://{ip-address}:8443
Note: You should now set the CSC module so that is DOES NOT scan its own update traffic, see the following article.
Cisco CSC Module – Stop it scanning its own update traffic
Adding a ‘PLUS’ License to a Cisco CSC
If you add the plus license later, you will obtain the code in the same manner as you did above (put the PAK and the CSC Serial number into the licensing portal and have it sent to you.
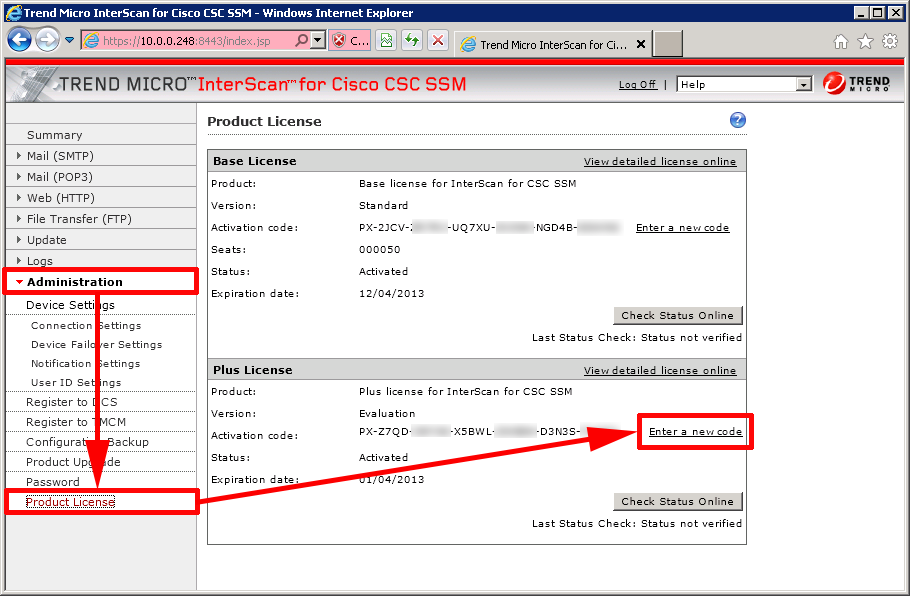
1. Once you have the code, open a web session to the CSC management interface https://{ip-address}:8443 > Administration > Licensing > Enter a new code.
2. Paste in the new code > Activate.
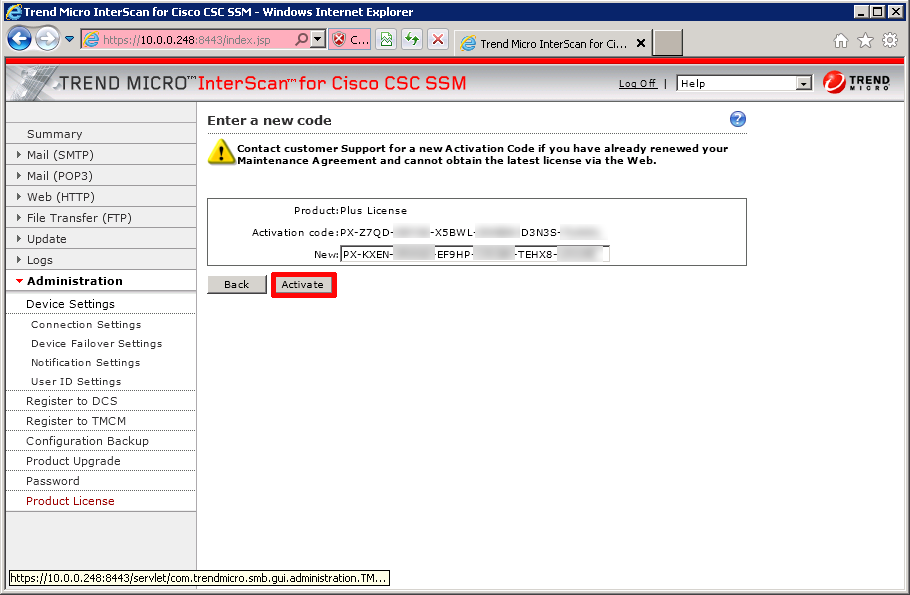
3. It may look like it has hung, wait a minuter or so, and check the licensing tab again.
Related Articles, References, Credits, or External Links
Cisco CSC Module Error – Activation Warning
Apple Devices will not Update Though Cisco ASA and CSC Module
Outlook Error 0x800CCC0F – Using POP3 To Exchange – Behind a Cisco CSC (Trend InterScan) Module