KB ID 0000422
Problem
AnyConnect runs over TCP port 443 (That’s HTTPS/SSL), but if you only have one public IP and need to forward that port to a web server or internal host then you are a bit snookered. You can of course change the port that AnyConnect runs over, so that it’s no longer on TCP port 443.
Why you would NOT want to do this.
Bear in mind that https is a well known port, and its open in most places for secure web traffic. You use it when you purchase things over the internet, or do your banking. For that reason it’s allowed from most networks, and through most firewalls. Which is what makes AnyConnect so handy, if you change the port then you may have some connection problems.
Solution
Assuming you accept the potential problems and want to swap the port over then do the following.
Via Command Line
1. Connect to the ASA via Telnet, SSH or Console Cable.
2. Log in and go to “configure terminal” mode.
PetesASA> enable
Password: ***********
PetesASA# configure terminal
PetesASA(config)#
3. You can’t change the port while AnyConnect is enabled, so you need to disable it, change the port then re-enable it again (in this example I’ve changed it to port 444).
PetesASA(config)# webvpn
PetesASA(config-webvpn)# no enable outside
WARNING: Disabling webvpn removes proxy-bypass settings.
Do not overwrite the configuration file if you want to keep existing proxy-bypass commands.
INFO: WebVPN and DTLS are disabled on 'outside'.
PetesASA(config-webvpn)# port 444
PetesASA(config-webvpn)# enable outside
INFO: WebVPN and DTLS are enabled on 'outside'.
PetesASA(config-webvpn)#
4. Save the changes with a write mem command.
PetesASA(config)# write mem
Building configuration...
Cryptochecksum: f3645705 ae6bafda c5606697 ecd61948

9830 bytes copied in 1.550 secs (9830 bytes/sec)
[OK]
PetesASA(config)#
Via ASDM
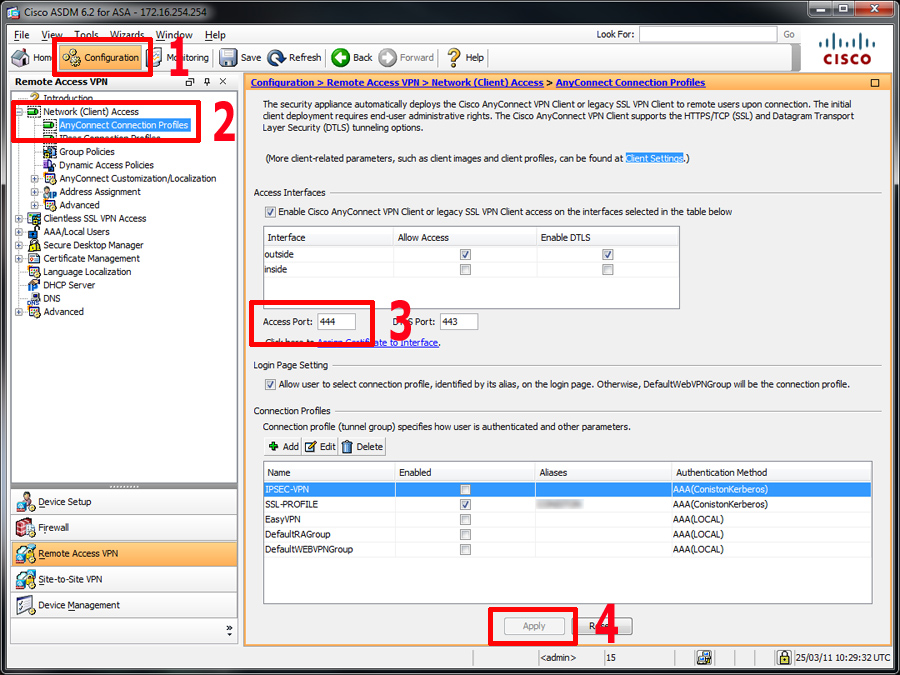
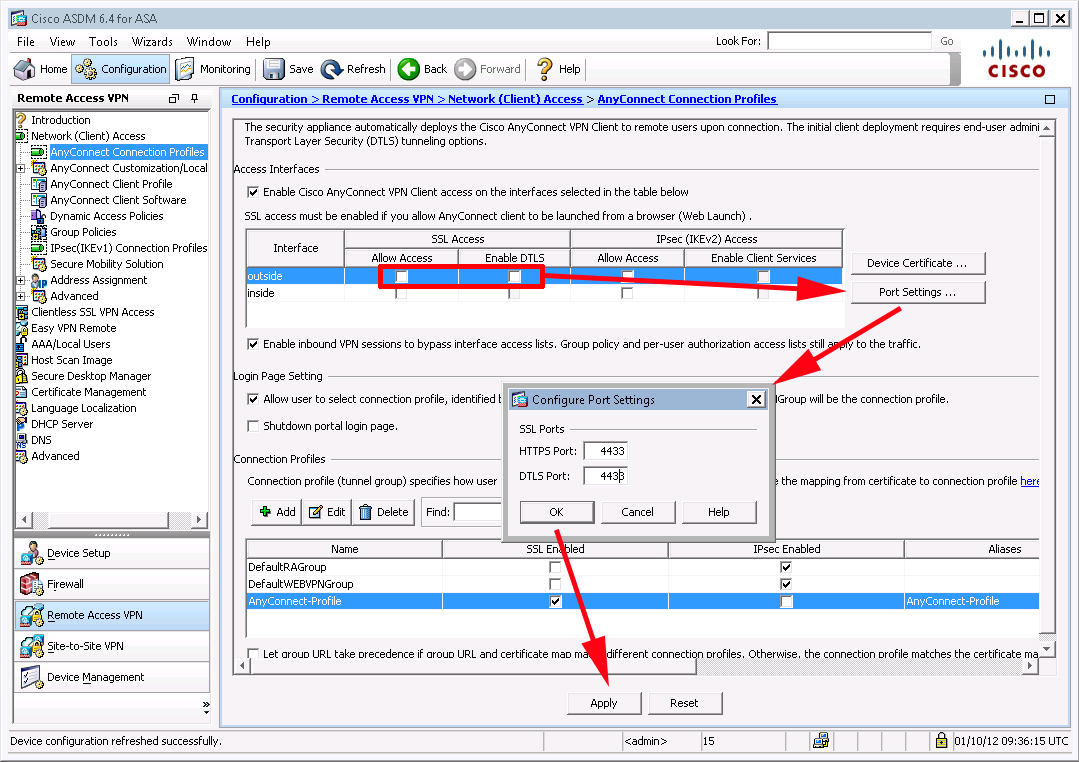
2. Navigate to Configuration > Remote Access VPN > Network (Client) Access > AnyConnect Connection profiles.
3. You will need to un-tick the allow access on the outside option, then change the port, then re-tick to allow access, then click Apply.
Update 01/10/12
4. When done, click File > Save Running configuration to flash, to save the changes.
BE AWARE
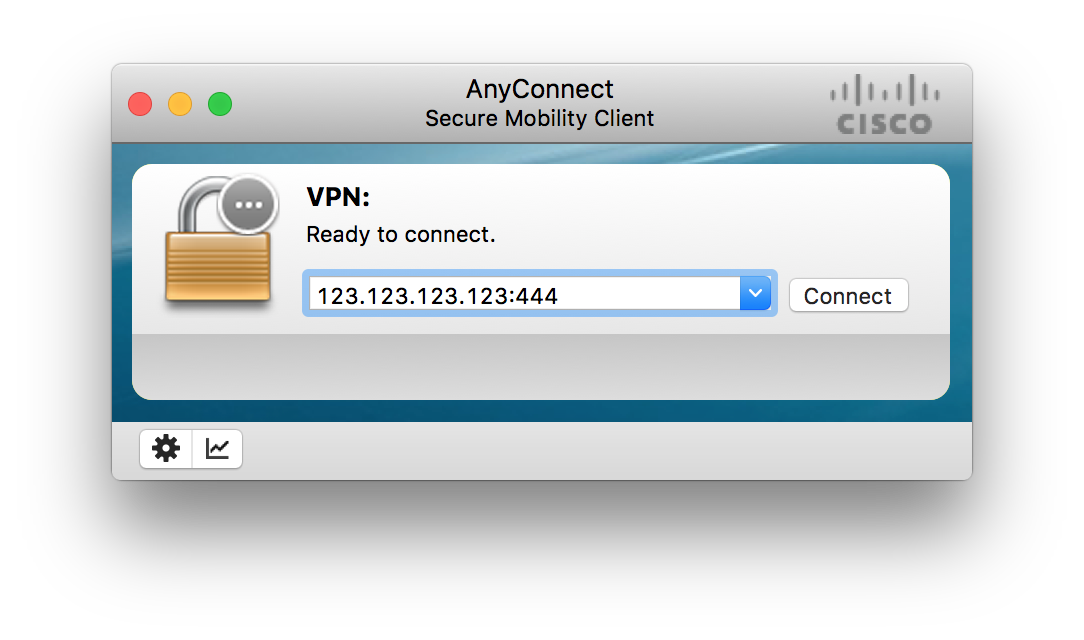
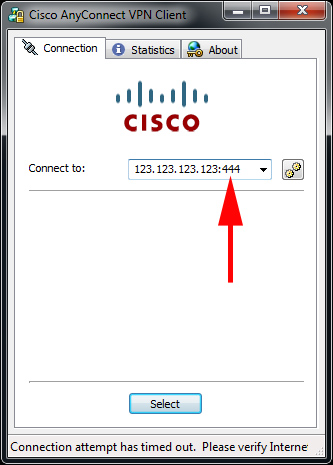
Your clients would now need to connect to the portal on,
https://{name or IP address}:444
Or if using the client software, they will need to tag the port number on the end like so,