
Working with GNS3 and PEMU – (Part 2)
KB ID 0000662
Problem
In Part 1 we installed and Licensed our Virtual PIX, now we will give it an IP address and get the firewalls web management console running.
To complete this procedure you will need to,
1. Have a TFTP server up and running (CLICK HERE).
2. Know how to connect to a Cisco Firewall (CLICK HERE).
Solution
Step 1 (Add an interface to your host machine)
1. On your host PC/VM Click Start > Run > hdwwiz.cpl {enter} > At the “Add Hardware Wizard” click Next > Let it search > Tick “Yes I’ve allready connected the hardware > Next > Scroll to the bottom > Select “Add a new hardware Device > Next.
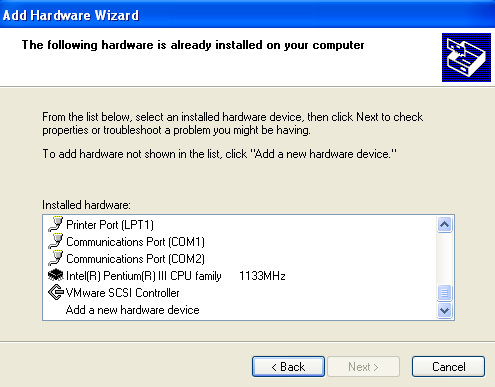
2. Select “Install the hardware that I manually select” > Next > Next > Select Network Adaptor > Next > Next > Finish.
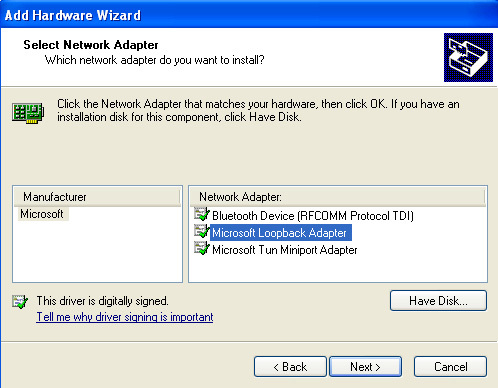
3. Click Start > Run > ncpa.cpl > Right Click the new NIC and rename it to loopback adaptor > Then give it a valid IP on your test network. (Right click > properties > TCP/IP).

Step 2 (Configure the connection)
4. Connect to the PIX as shown in Part 1 > Give the PIX an IP address with the following commands;
enable
{Password} - Set blank by default
configure terminal
int e1
no shutdown
nameif inside
ip address {ip on test network}{subnet of test network}
write men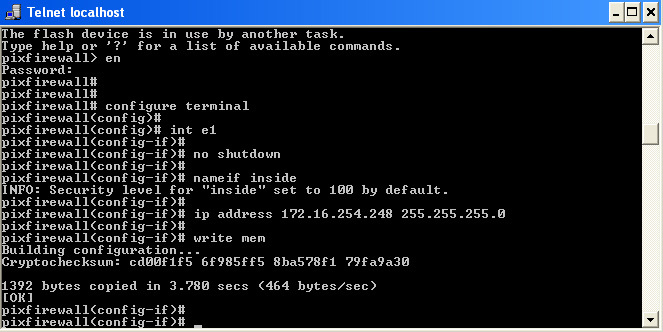
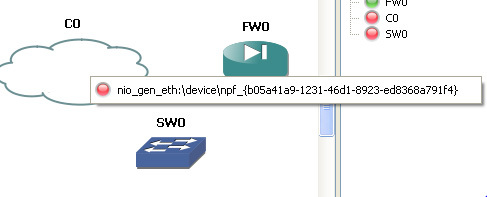
5. To connect tie PIX to the Loopback adaptor you need to add some networking in the GNS3 console > Drag the cloud object into the work area > Right click > Configure.
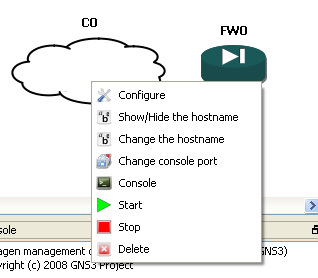
6. Select C0.

7.Select the loopback adaptor > Add > Apply OK
![]()
Note: If you are presenting a real adaptor you will only see some uncomprehensable numbers – locate the “Network Device List” Batch file in the GNS3 directory and run it whis will de-cypher those numbers for you.
8. Drag a switch onto the workspace.

9. Click the connection tool and select “Fast Ethernet”.

10 Select the cloud (Loopback Adaptor) and drag a connection to the switch.
11. Select the PIX (Inteface e1) and drag a connection to the switch.
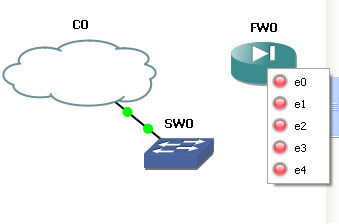
12. All green lights is good 🙂

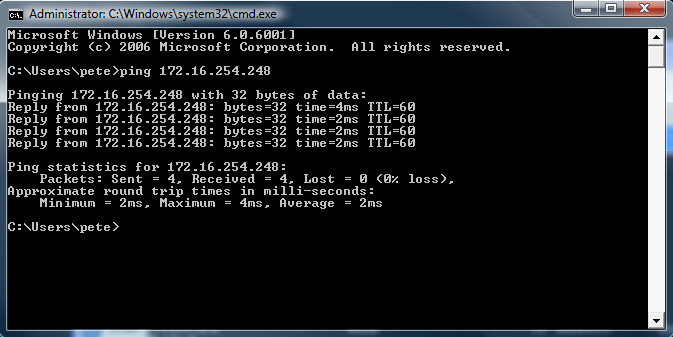
13 From another machine on the network make sure you can ping the PIX to test connectivity.
Note: If you are using Microsoft Hyper-V server, you may find that the whole thing fails at this point, If thats the case, then close down the Guest machine and add and configure a “Legacy Network Card”. Bring the system back up and configure the new network card accordingly.
Also if you are in a virtual environment you can simply add another network card and get the cloud to use that instead of using a loopback adapter.
Step 3 Install and configure the ASDM (Web Inteface)
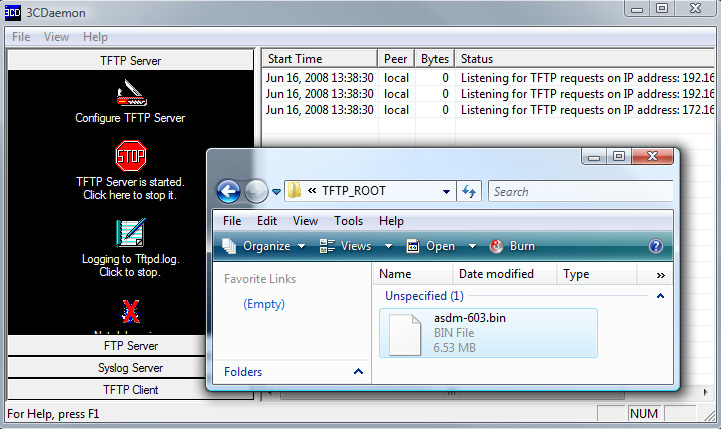
1. Set up your TFTP server and have the asdm image file ready in the TFTP servers root directory.
2. We are now going to allow connection to the PIX via Telnet – becaue the console can be a bit twichy in the GNS3 environment.
enable
{Password} <-blank be default
configure terminal
telnet 0.0.0.0 0.0.0.0 inside
passwd cisco <- sets telnet password to cisco
write men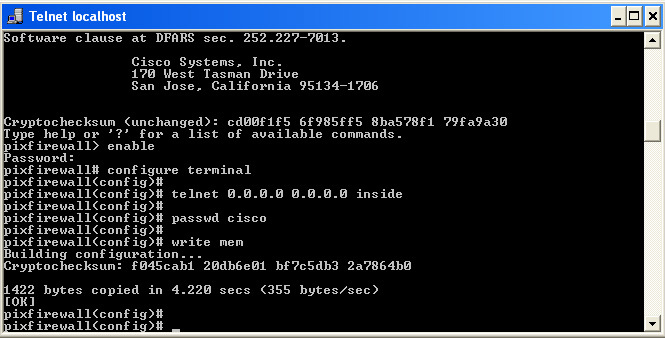
3. Now you can telnet to the PIX from another machine and copy the ASDM image from your TFTP server to the PIX.
enable
{Password} <-blank by default
copy tftp flash
{ip of the hosst running TFTP}
{filename of the asdm inage}
{Enter} to accept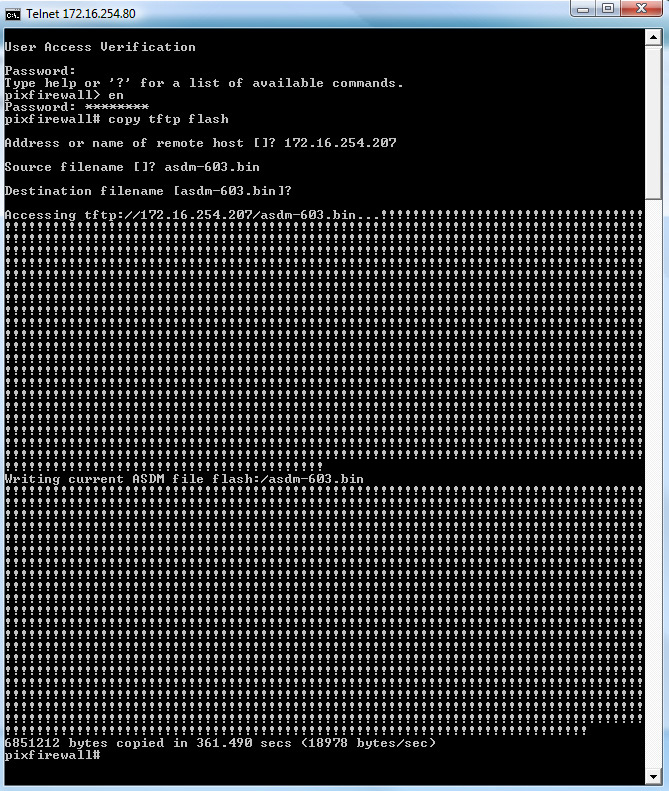
4. Once the file is copied over you need to let the Firewall know that its the one to use, turn on the internal http server and allow access.
enable
{Password} <-blank by default
conf t
asdm image flash:asdm-603.bin
http server enable
http 0.0.0.0 0.0.0.0 inside
write men
The file will be copied over into the firewalls flash memory (Time for a coffee).
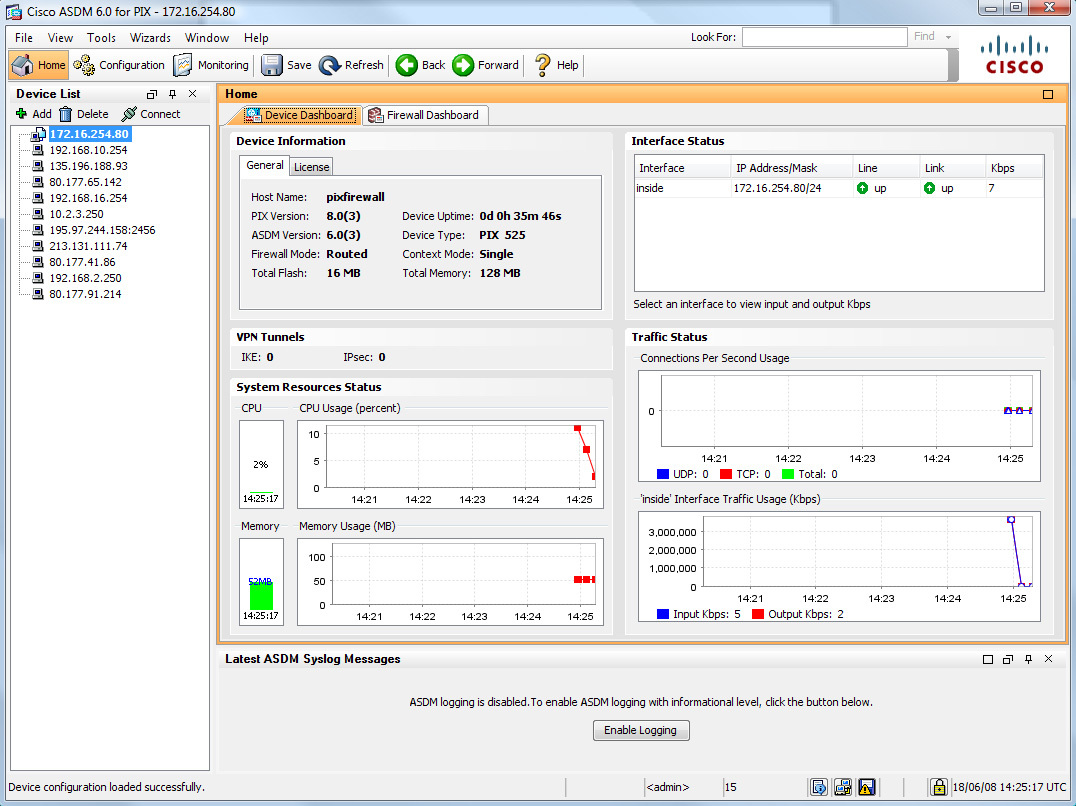
5. Now simply connect via the ADSM inteface – if your unsure how to do that see my article here
Using the information above you can present multiple network cards and clouds to the Virtual firewalls various interfaces (There are 5 interfaces on this firewall – its a PIX 525) – enjoy
NB Please dont email and ask me for PIX images and/or activation keys as refusal often offends – PL
Related Articles, References, Credits, or External Links
NA